• Skip to primary navigation
  • Skip to main content
  • Skip to primary sidebar
  • Home
  • About
  • Contact
  • Privacy + Terms
  • Affiliates

The Chaos and the Clutter

  • Facebook
  • Twitter
  • Pinterest
  • Google Plus
  • RSS
  • Email
  • School at Home
  • Sensory
    • Sensory Processing Disorder
    • Awesome Sensory Play Activities
      • Sensory Bins
      • Sensory Bottles
      • Sensory Bags
  • Family Games
    • Minute to Win It Games
  • Special Needs Parenting
    • Childhood Anxiety
    • Reactive Attachment Disorder
    • Sensory Processing Disorder
  • Store
  • Course Login

Archives for 2019

Bright Butterfly Sensory Bin

By Sharla Kostelyk

The inspiration behind this butterfly sensory bin was actually a package of pasta! I was at the store and spotted brightly coloured bow tie pasta. As soon as I saw it, I thought “those look like butterflies”. So of course I bought it so that I could make a butterfly sensory bin.

Brightly coloured bow tie shaped dry pasta is in a blue plastic bin. Resting on the pasta are blue and green plastic butterflies, a large yellow butterfly shaped foam piece, a pink butterfly wand, and a purple butterfly shaped cookie cutter. The words "Butterfly Sensory Bin" are on the bottom of the image.
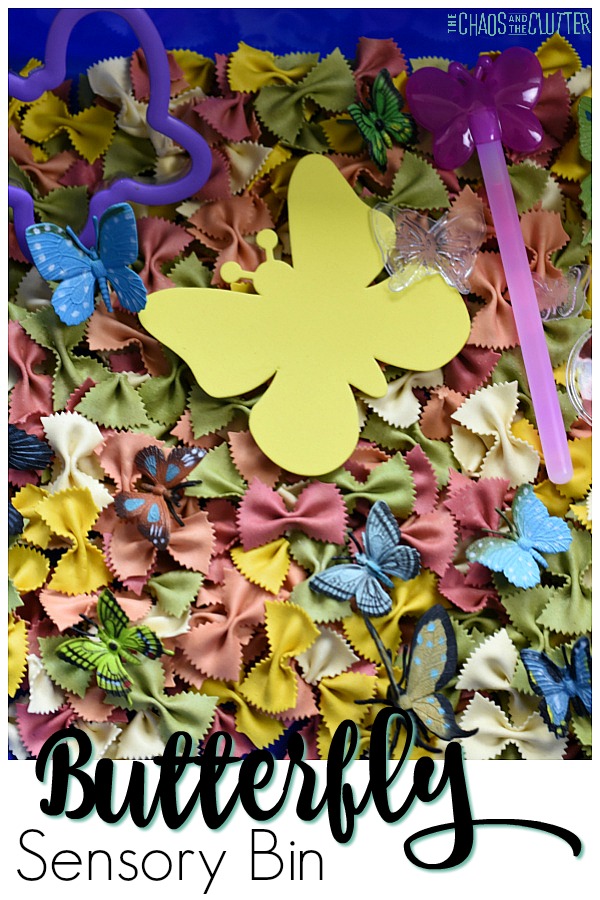
The pasta looks so much like little butterflies that the other butterflies in this sensory bin blend in with it. The kids enjoyed exploring with this activity.

Butterfly Sensory Bin:
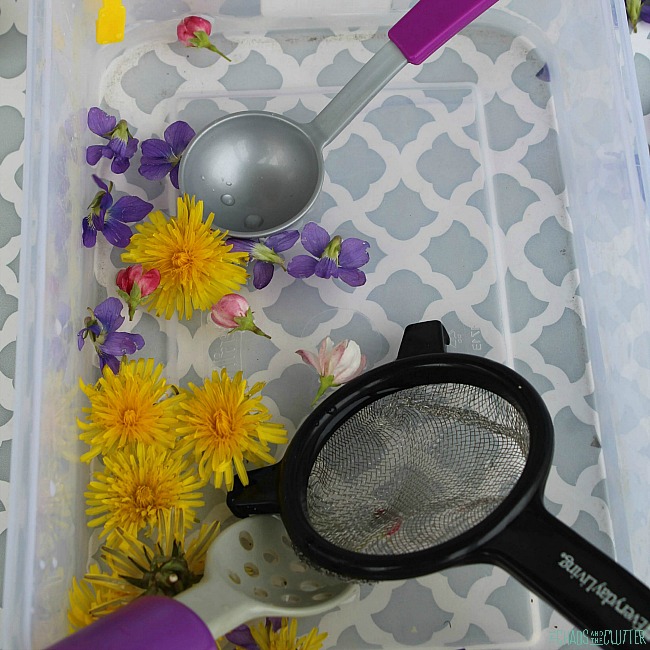
Materials needed:

  • brightly coloured bow tie pasta in a variety of colours*
  • clear silicone butterfly stamps
  • butterfly shaped cookie cutter
  • butterfly shaped foam piece
  • small magnifying glass
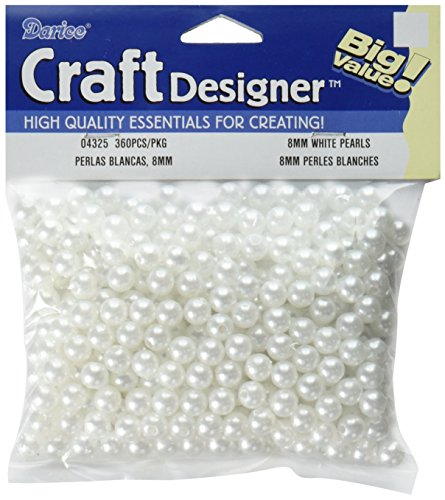
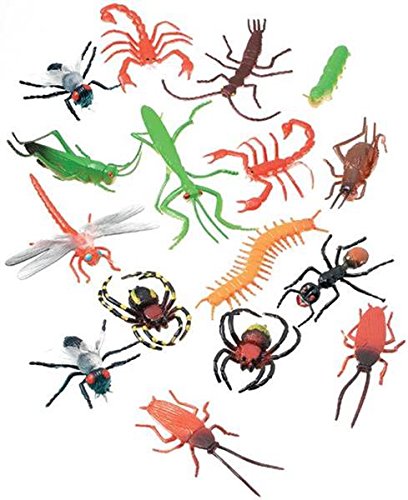
  • plastic butterflies from the butterfly Toob
  • glow in the dark butterfly wand (I find a 3 pack of these at the dollar store)

*If you can’t find bow tie pasta that’s already coloured, you can buy regular bow tie pasta and colour it yourself. You can find a tutorial on dying pasta for sensory play here.
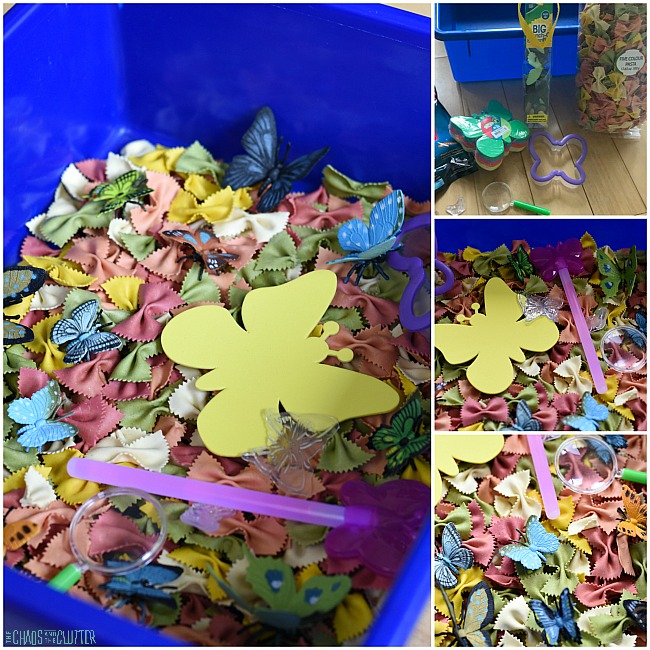
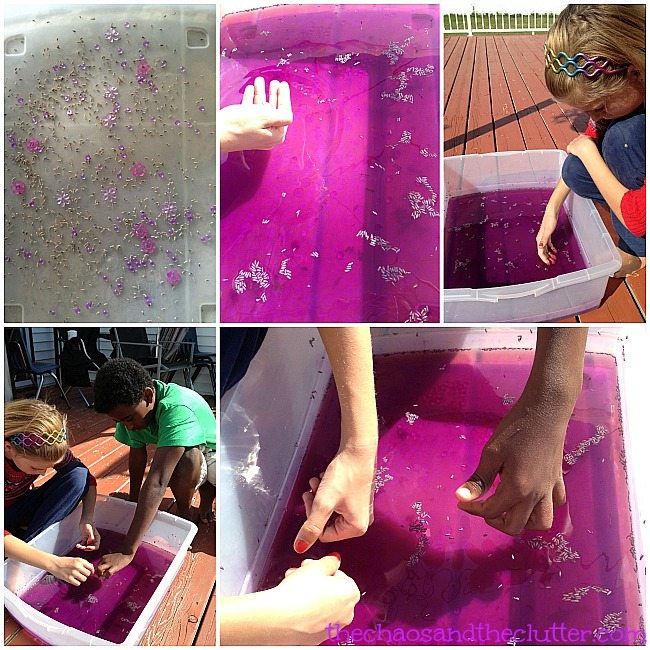
Directions:

  1. Pour the dry pasta into a plastic bin.
  2. Add the other items.
  3. You can also add small cups or bowls as scoops.
  4. Invite your child to play!

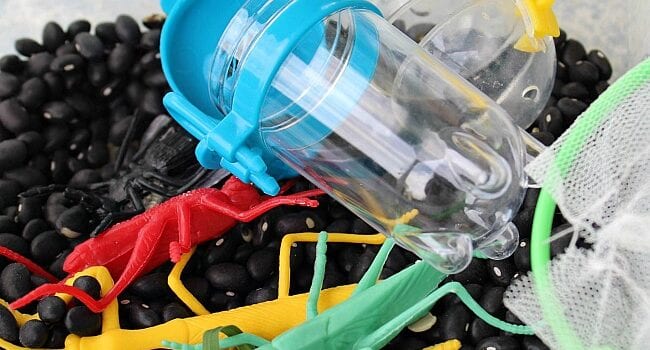
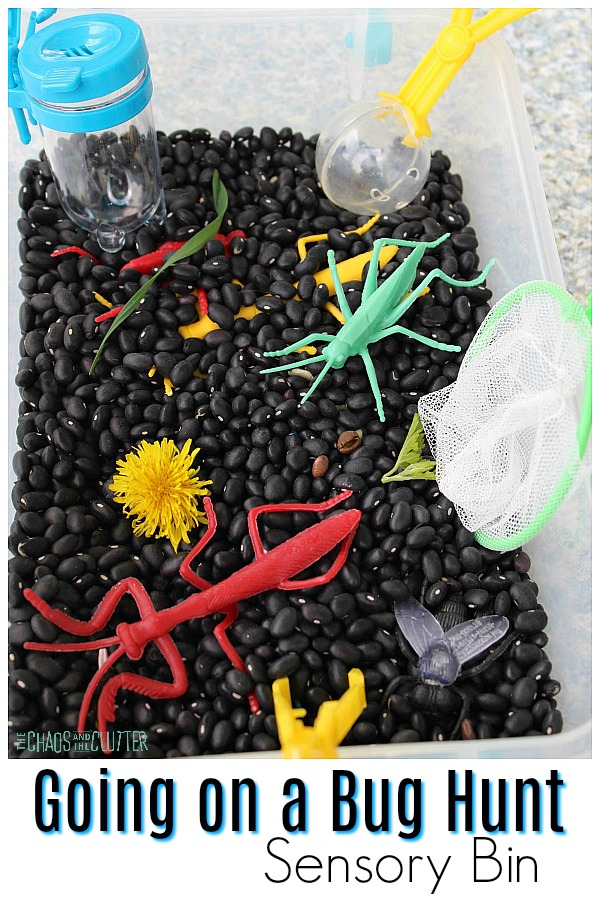
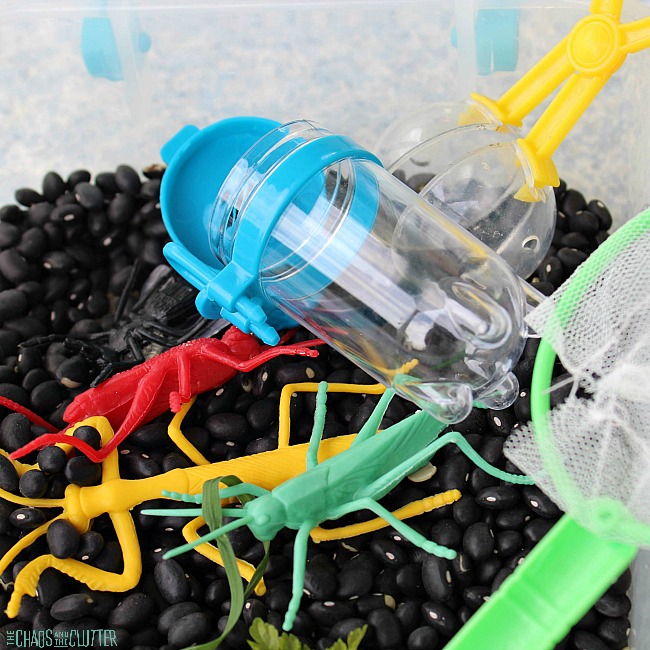
This sensory bin provides visual, auditory, and tactile sensory input.

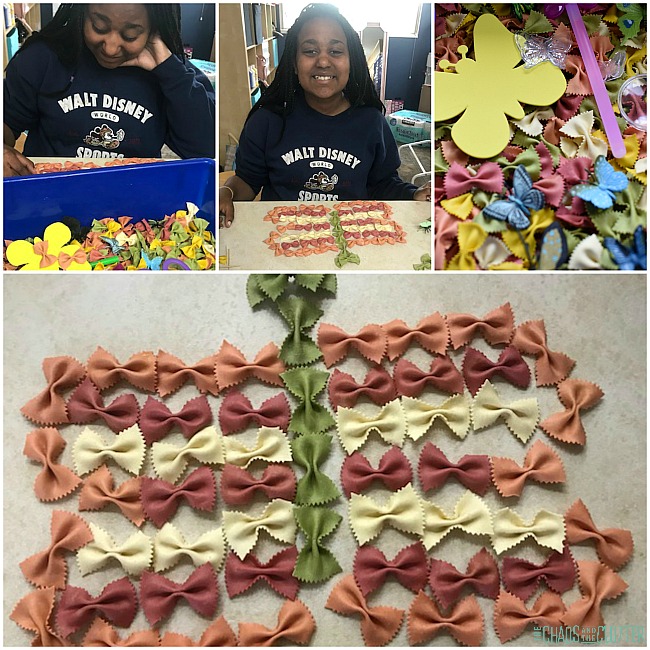
I always find it interesting the way that each of my kids approaches a sensory bin differently. This one was no different. One of our sons just scooped around in the bin, hiding butterflies and finding them and even mindlessly running his fingers through it to hear the sound of the dry pasta moving. 
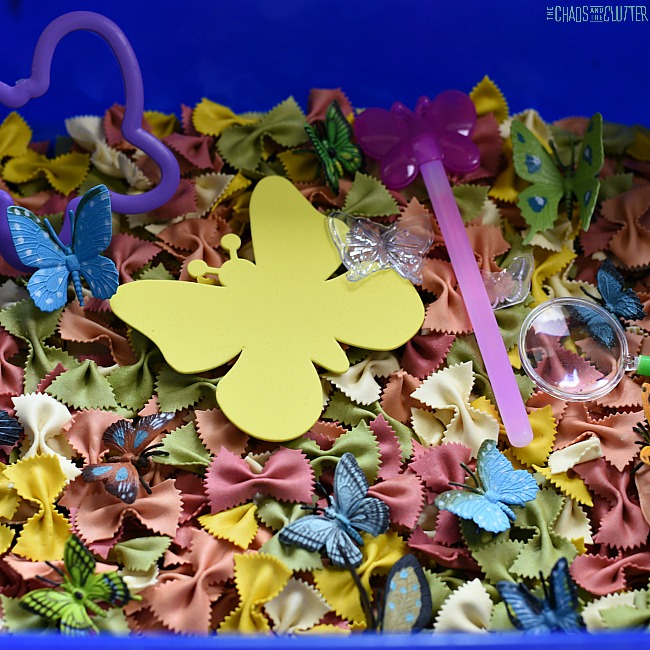
One of our daughters took her time examining the butterflies with the magnifying glass while commenting on their features. She also enjoyed squishing the silicone stamps and foam piece.

Another of our daughters went about her play very differently. She carefully picked out individual pasta shapes and methodically built a large butterfly on the counter. She planned out the colours and had everything just so. Later, she brushed the pasta into her hands and put the pieces back in the bin.

Ways to expand this and make this sensory bin part of a unit on butterflies:

I bought the shaped foam piece that went in the sensory bin in a large pack. If you do this, you can use the remaining foam to have kids decorate their own. They can use glitter pens, markers, sequins and glue, or stickers.

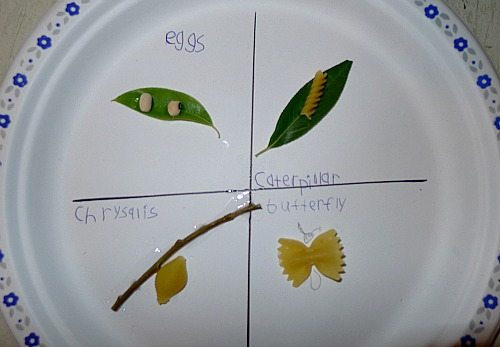
Use pasta, beans, leaves, a twig, and paper plate to create a butterfly life cycle visual.

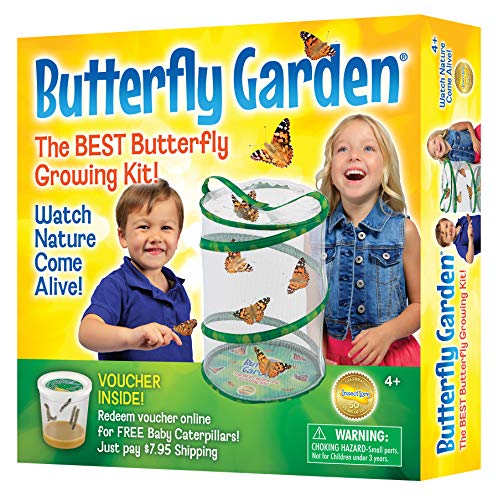
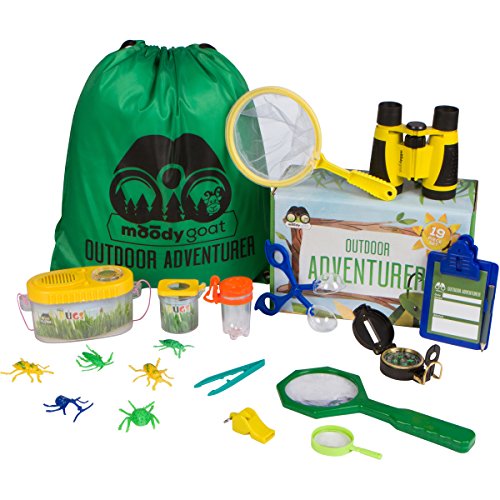
Raise your own butterflies. We did this one summer and the kids were absolutely fascinated. You can purchase butterfly raising kits that walk you through how to do this. My kids were in awe when the butterflies emerged from their cocoons.

Insect Lore Butterfly Growing Kit - With Voucher to Redeem Caterpillars LaterInsect Lore Butterfly Growing Kit – With Voucher to Redeem Caterpillars LaterInsect Lore Butterfly Growing Kit - With Voucher to Redeem Caterpillars Later

Set out books about butterflies:

Butterfly Butterfly: A Book of ColorsButterfly Butterfly: A Book of Colors
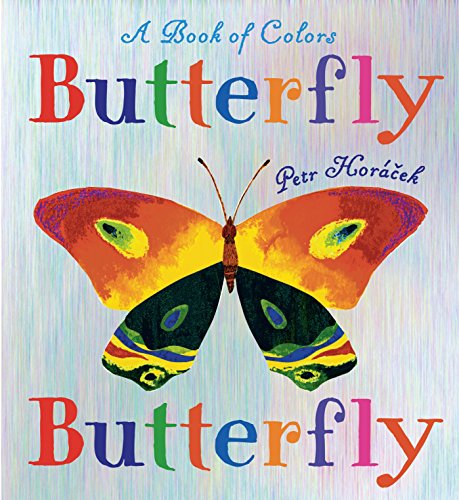
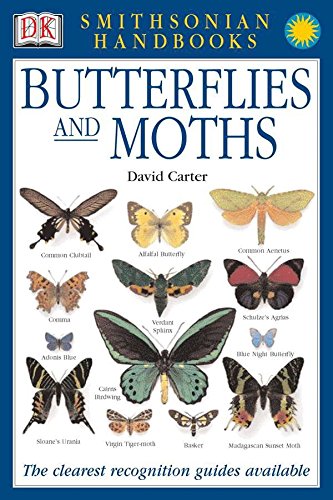
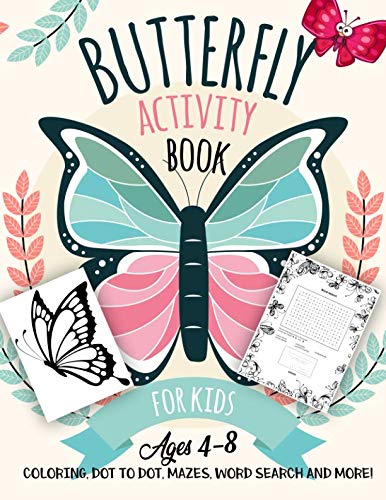
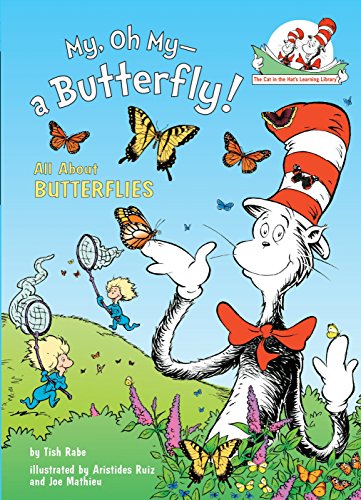
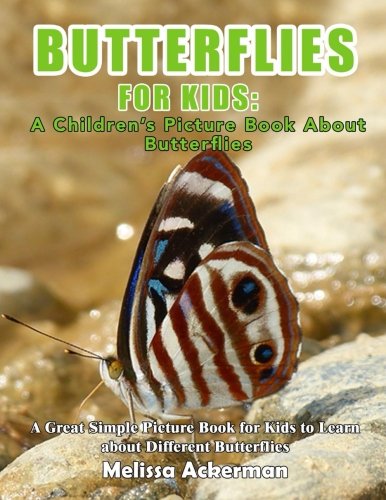
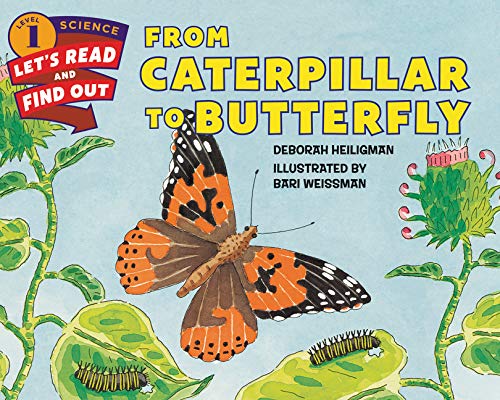
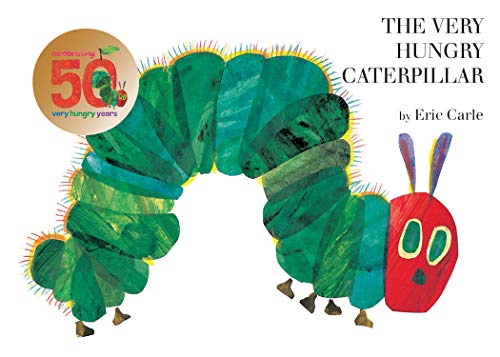
Butterfly Butterfly: A Book of ColorsHandbooks: Butterflies & Moths: The Clearest Recognition Guide AvailableHandbooks: Butterflies & Moths: The Clearest Recognition Guide AvailableHandbooks: Butterflies & Moths: The Clearest Recognition Guide AvailableButterfly Activity Book for Kids Ages 4-8Butterfly Activity Book for Kids Ages 4-8Butterfly Activity Book for Kids Ages 4-8My, Oh My--A Butterfly!: All About ButterfliesMy, Oh My–A Butterfly!: All About ButterfliesMy, Oh My--A Butterfly!: All About ButterfliesButterflies For Kids: A Children's Picture Book About ButterfliesButterflies For Kids: A Children’s Picture Book About ButterfliesButterflies For Kids: A Children's Picture Book About ButterfliesFrom Caterpillar to ButterflyFrom Caterpillar to ButterflyFrom Caterpillar to ButterflyThe Very Hungry CaterpillarThe Very Hungry CaterpillarThe Very Hungry Caterpillar

Butterfly Sensory Bag

Filed Under: Sensory, Sensory Bins Tagged With: sensory play

Mermaid Stress Balls

By Sharla Kostelyk

Homemade stress balls are so easy to make. They are so much less expensive than the store bought ones and I actually like the feel of them better as well. We have been making DIY stress balls for years, but this time, I wanted to try something a little bit different, so we made mermaid stress balls.An opaque ball contains green, blue, and clear balls and sits on a white background with confetti sprinkled on it. The words "DIY Mermaid Stress Ball" are in the middle. Below, there is a balloon attached to a small purple funnel and the filled balloon next to a small bag of white faux pearls.
I really love the way they turned out. They look super fun, but they also offer a very different tactile experience because of the textures in them. Children will enjoy exploring through their sense of touch.


Stress balls are sometimes called squeeze balls or sensory balls. Kids can get visual and tactile sensory input from these. Homemade stress balls are also a great calming tool for kids (and adults). They are perfect for including in your child’s calm down kit.
These are also small enough to be kept in a backpack, desk or a child’s room. This enables kids to have a calm down tool with them wherever they go. They also make a great fidget and are quiet to play with, so most teachers don’t mind students using them in the classroom.

Squeezing stress balls can ease tension and when combined with calm down breathing techniques, are an effective method of reducing overall stress or calming down in the moment.

*Please note that there are small parts in these stress balls and the small parts and the balloon are choking hazards so as with all sensory play activities, adult supervision should be used at all times.

How to make mermaid stress balls:

Materials needed:

  • blue, green, and clear water beads
  • faux pearls
  • holographic white glitter
  • clear balloons
  • small funnel or an empty water bottle

Water BeadsWater BeadsWater BeadsFaux PearlsFaux PearlsFaux PearlsHolographic GlitterHolographic GlitterHolographic GlitterClear BalloonsClear BalloonsClear Balloons

Directions:

  1. Soak the water beads according to the directions on the package so that they are full sized.
  2. Stretch the end of the balloon over the end of a small funnel or the tip of an empty water bottle.
  3. Add the glitter, faux pearls and water beads to the balloon. You want to fill it until it is the size you want.
  4. Tie off the end of the balloon. Cut the excess away.
  5. Your mermaid stress ball is now ready to squeeze, squish or hold.

Get 175 sensory activity ideas in convenient printable lists which are ideal for using in the home, classroom or in a therapeutic setting.

You may also want to read:

What to Include in a Calm Down Kit

Mermaid Sensory Bag

Homemade Stress Balls

Create Your Own Sensory Balls (for pennies each)

Filed Under: Sensory Tagged With: sensory play

Hair Care: Tips for Kids with Sensory Struggles

By Sharla Kostelyk

Hair care can be torture for some kids with sensory issues. While all of us have sensory preferences, for kids with Sensory Processing Disorder or autism, having their hair washed, combed, or cut can go beyond just being unpleasant. I’ve put together a list of tips to help kids who struggle with sensory issues when it comes to their hair.

a woman in a coral shirt and jeans tries to comb her daughter's hair. The daughter looks very distraught. The words "Sensory Kiddos and Hair Care" are overlaid on the image.

Lately, a lot of readers have been contacting me for advise about their child’s hair. I understand this concern well as one of our sons used to cower in the corner when he saw me reach for the hair brush. He would scream and beg me not to comb his hair.

Mornings became difficult for both of us. His beautiful curls became knotted if I gave in to his pleas not to comb it which only made it worse. And bath times were another battle ground as he hated the feeling of the water on his face when rinsing the shampoo off.

Obviously with his scalp being as sensitive as it was, there was absolutely no way he would allow a hairdresser near his head.

We got to the point where we just shaved his hair super short so that it didn’t have to be such a daily battle.

Since then, I’ve learned a lot about sensory and together, he and I have come a LONG way! He is a teenager now and actually enjoys getting his hair cut at the barber. He does prefer to keep it short still, but is happy to have it washed and cut.

A lot of sensory kiddos are super sensitive about having their hair washed, cut, combed or even touched. There are many reasons for this.

Sensory Reasons for Hair Struggles:

Vestibular – Some kids are sensitive to having their head tilted backwards or forward for rinsing when having their hair washed. Your vestibular system controls your body’s sense of balance and motion. Kids with vestibular issues can feel unsteady, uncomfortable, or even afraid when tipping their head.

Olfactory (Scent) – Your child may be sensitive to the smell of the hair products you are using on them.

Tactile – Many children with sensory issues have very sensitive scalps or are sensitive to touch in general from hands, brushes or combs, and even water. Water on their face, in their eyes, or having shampoo get in their eyes can be difficult for all kids, let alone ones with higher sensitivities. Tactile is the most common reason for problems with hair care in kids with sensory sensitivities.

Auditory – Some kids struggle with the sound of the clippers at the hairdresser or the sound of the water in a shower.

Tips for managing hair care and sensory needs:

  1. Determine the root cause. Talk to your child and also make your own observations and see if you can determine what the biggest sensory issues are. That way, you’ll be tackling things accurately.
  2. Acknowledge to them and to you that this is not a child being difficult. This is a real thing that is causing them real pain or discomfort. Doing this will give you more patience and empathy.
  3. Wash their hair less often. Kids do not need their hair washed daily (unless your physician has given you a medical reason why your child does). Every third day should be sufficient unless they happen to play in the mud on the in between days. You can also use a dry shampoo for the days in between if you’re concerned about the cleanliness of their hair.
  4. If shampoo is your main battle, skip the shampoo. Wash with water and a conditioner and use dry shampoo.
  5. Give your child more control in the process. Allow them to choose their hair products. Let them smell shampoos and conditioners at the store and decide what they like or buy unscented. Let them comb and style their own hair.
  6. Choose a low maintenance hair style for them. This was easier for me to do with my son than it was when one of my daughters had a hard time with having her hair combed and wanted it cut short, but I knew that “pretty hair” wasn’t worth the tears it would take every day to get there.
  7. Don’t expect your child to hold still while you comb or style their hair. Give them a fidget to play with or a weighted lap pad. Let them play Lego or watch TV or both. It won’t be easy for you to comb hair on a moving target, but it will be less stressful if they are less upset.
  8. Make changes. (see list below)
  • Try a different comb such as a Tangle Teaser or Wet Brush.
  • Try a bath rather than a shower or a shower rather than a bath.
  • Wash their hair in the sink rather than in the bath.
  • Try dumping water on their head using a Rinse Cup rather than having them tip their head back.
  • Have your child use a Bath Visor to avoid getting as much water on their face. You can also use this during haircuts to avoid pieces of hair getting on their face.
  • Allow your child to wear swim goggles or a snorkel mask in the bath or shower.
  • Be sure you are using an excellent detangler so that knots are not making the hair combing situation even worse.
  • Use a visual timer so that your child knows how long they have to “endure” having their hair brushed.

Rinse Cup for hair washingRinse Cup for hair washingRinse Cup for hair washingBath VisorBath VisorBath VisorDive MaskDive MaskDive MaskSwim GogglesSwim GogglesSwim GogglesVisual TimerVisual TimerVisual TimerTangle Teezer BrushTangle Teezer BrushTangle Teezer BrushWet BrushWet BrushWet BrushDry ShampooDry ShampooDry Shampoo

A note about haircuts:

Our hairstylist comes to our house and used to cut our kids’ hair where they are comfortable while they play with toys or read or watch TV to distract them. If this isn’t possible for you, pass these tips along to your salon to help them be more sensory friendly.

You also may want to ask them about the calming clipper kit. This sensory friendly barber kit is made just for kids with sensory needs. You can also use it yourself at home where your child is most comfortable.

Biggest tip about hair and sensory needs:

As odd as this sounds, don’t work at all on trying to increase your child’s ability to handle having her head or hair touched. Leave the hair alone as much as possible and instead, focus on increasing other sensory activities: sensory play, heavy work, sensory input.

If you are working with an OT, ask them about dry brushing. This type of brushing is for the skin, not the hair, but is best under the care of an OT.

By increasing your child’s range of sensory experiences (sensory diet), it will eventually begin to be easier for them to have their head and hair touched.

Get a copy of Sensory Processing Overload Signs to print off and keep as a reminder here. 

Filed Under: Sensory, Special Needs Parenting

Going on a Bug Hunt Sensory Bin

By Sharla Kostelyk

The contrast of the bright colours against the black beans makes this Bug Hunt Sensory Bin so visually appealing. If you’re brave, you can include real life bugs in this sensory activity as well!clear plastic bin filled with black beans, bug net, dandelions, bright coloured toy bugs, and bug container with blue lid
If you’re like me, you can invite your child to add insects that they find but keep your distance and insist that they keep the bin outside! Adding real life insects allows a whole other level of exploration and discovery. This sensory bin encourages interacting with nature and can begin with a nature hunt.
This activity is perfect for classrooms or preschools or homeschools. It can be incorporated into an insect unit in science or be a sensory break option during springtime. 

Bug Hunt Sensory Bin:

Materials needed:
  • plastic bin
  • dry black beans
  • plastic bugs (bright colours look best on the black background)
  • Outdoor Discovery Kit you can find it on Amazon or at Dollar Tree. The kit includes a bug net, bug catcher, tweezers, magnifying glass, and bug containers – perfect for catching and observing real bugs!
  • flowers, leaves, and grass

Outdoor Discovery KitOutdoor Discovery KitOutdoor Discovery KitPlastic BugsPlastic BugsPlastic BugsDry Black BeansDry Black BeansDry Black Beans

Instructions:
  1. Begin by putting half of the pretend insects in the plastic bin you plan to use.
  2. Add half of the flowers, grass and leaves that your child has gathered.
  3. Pour the dry black beans into the bin so that the items you have already placed inside are covered.
  4. Add the remaining plastic bugs and flowers, grass, and leaves to the bin. You can push them down a bit into the beans so that they are slightly covered.
  5. Add tweezers, a small bug net, magnifying glass, and a small container for examining specimens.
  6. Invite your child to go on a bug hunt in the bin. Have them try to identify the types of insects they find.
  7. Optional: Arm your child with the bug catcher and one of the bug containers and have them go on a real bug hunt. They can then add the bug container to the sensory bin or add the bugs themselves to the bin (be sure to do this outdoors!). 

Learning and Sensory Opportunities:

This bug hunt sensory bin offers visual, tactile, and auditory sensory input. If kids carry the bin, this offers proprioceptive feedback as it will be quite heavy. Hands-on learning will be happening while their sensory needs are met. There are opportunities for communication and vocabulary expansion while they explain their observations and ask questions.

This sensory bin provides excellent options for fine motor practise. The tweezers and the bug catcher each give kids the chance to use and improve their fine motor skills. a child hand pinching yellow tweezers that are holding a black plastic bug
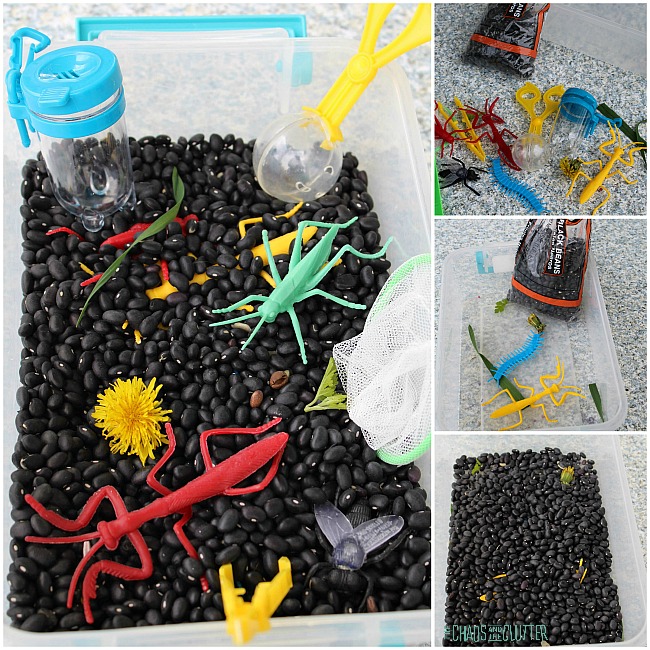
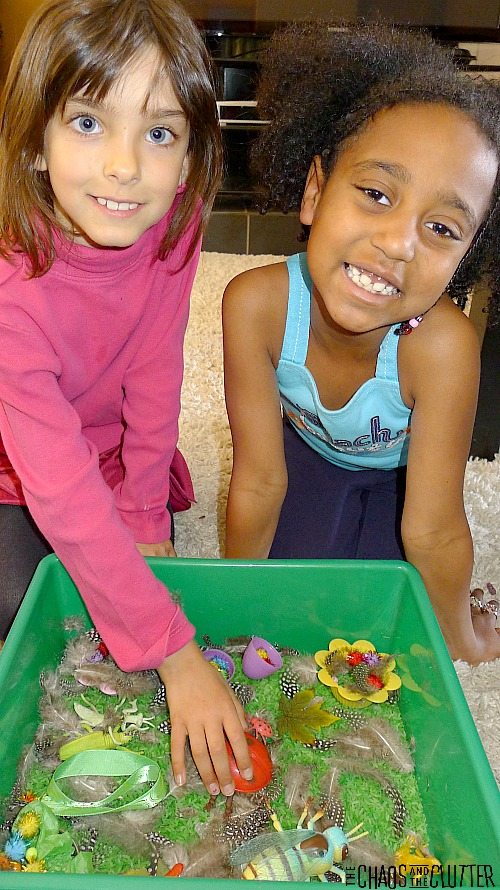
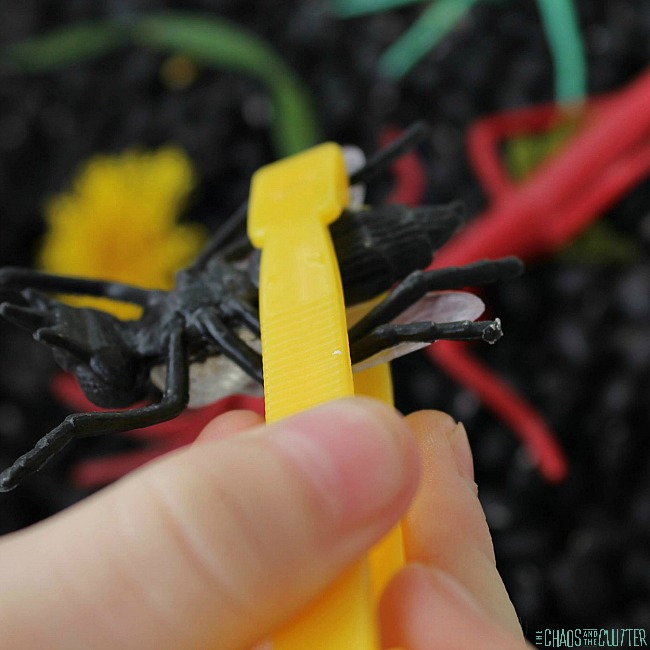
Children can learn about insects as they explore this bin. This can happen with the plastic insects only or with the addition of those found in nature. They can make observations in a nature journal or discuss what they learn. You can set out books about bugs that they can use as references.

Book Suggestions to go along with a Bug Sensory Bin:

Bugs Galore

This silly book will keep kids engaged with its retro illustrations and plenty of rhymes. Great introduction to bugs for little learners.

The Bug Book

This book is factual meets fun for preschoolers. Kids can explore all kinds of bugs in vivid photographs to learn more about the insects they might see this summer in their own backyard.

Some Bugs

With cute rhymes and vibrant illustrations, this book embraces the behaviours of backyard bugs and encourages exploration for preschoolers.

The Very Hungry Caterpillar

In this classic book, a very hungry caterpillar (as the title suggests) munches his way through a variety of goodies to transform into a beautiful butterfly.

Big Bug Book

I’m a sucker for pop-up books. This one is packed with all kinds of creepy, crawly fun!

The Ants Go Marching

This book is a good segue into taking your insect unit into other subjects such as math for preschoolers. The repetition and counting up to 5 is a great early learning approach to math that kids can’t get enough of.

Bugs GaloreBugs GaloreBugs GaloreThe Bug BookThe Bug BookThe Bug BookSome BugsSome BugsSome BugsThe Very Hungry CaterpillarThe Very Hungry CaterpillarThe Very Hungry CaterpillarThe Big Bug Book: A Pop-up CelebrationThe Big Bug Book: A Pop-up CelebrationThe Big Bug Book: A Pop-up CelebrationThe Ants Go Marching: A Count-and-Sing BookThe Ants Go Marching: A Count-and-Sing BookThe Ants Go Marching: A Count-and-Sing Book

a child's hand shown holding yellow tweezers that are pinching a black plastic bugCheck out these other great sensory bins to help kids to discover the world around them:

Insect Sensory Bin with Dry Pasta

Simple Spring Sensory BinSimple Spring Sensory Bin for kids

Filed Under: Sensory, Sensory Bins

Glow in the Dark Sensory Bottle

By Sharla Kostelyk

There are lots of ways to make a glow in the dark sensory bottle, but you know me; I like to keep things simple. Instead of making this glow through a complicated scientific process, this involves using glow in the dark items so that the hard part is done for you. bottle filled with multicoloured beads and stars and liquid on a blue and green background

I don’t know about your kids, but mine have always loved anything glow in the dark. They like to take it into the one bathroom we have that doesn’t have a window and turn the lights off so that it’s as dark as possible. 

Glow in the Dark Sensory Bottle:

Supplies to make the sensory bottle:

  • Voss style plastic water bottle* (see note)
  • clear dish soap
  • glow beads
  • bright sequins
  • glitter
  • glow ceiling stars
  • super glue

*I like to look of Voss water bottles, but sometimes Michael’s carries empty bottles that look similar but are just slightly smaller. The Michael’s ones are a bit easier for little hands to grip. The problem is that they are not always easy to find. 

VOSS Plastic Water BottlesVOSS Plastic Water BottlesVOSS Plastic Water BottlesGlow in the Dark Pony BeadsGlow in the Dark Pony BeadsGlow in the Dark Pony BeadsGlow in the Dark StarsGlow in the Dark StarsGlow in the Dark Stars

Instructions:

  1. Pour dish soap into the empty bottle until it is 2/3 of the way full.
  2. Add glow beads, glitter, sequins, and stars.
  3. Fill the remaining space in the bottle with water. Super glue the lid in place, especially if young children will be using the bottle.
  4. When your child is not playing with this sensory bottle, keep it in the light so that the “glow” items can recharge.

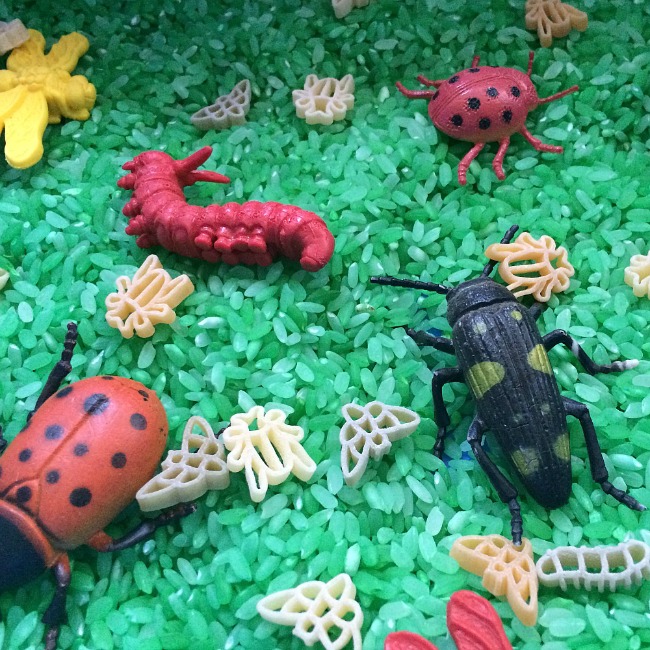
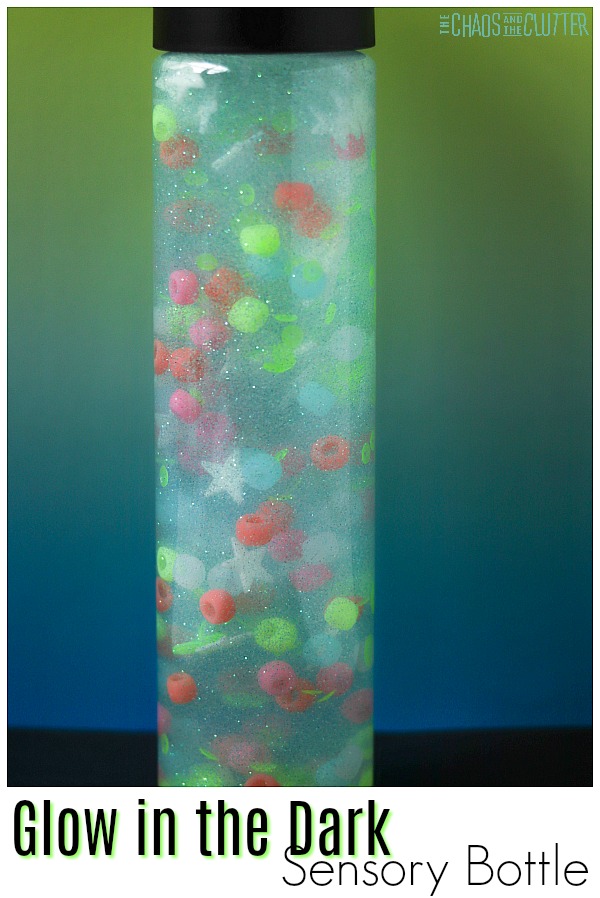
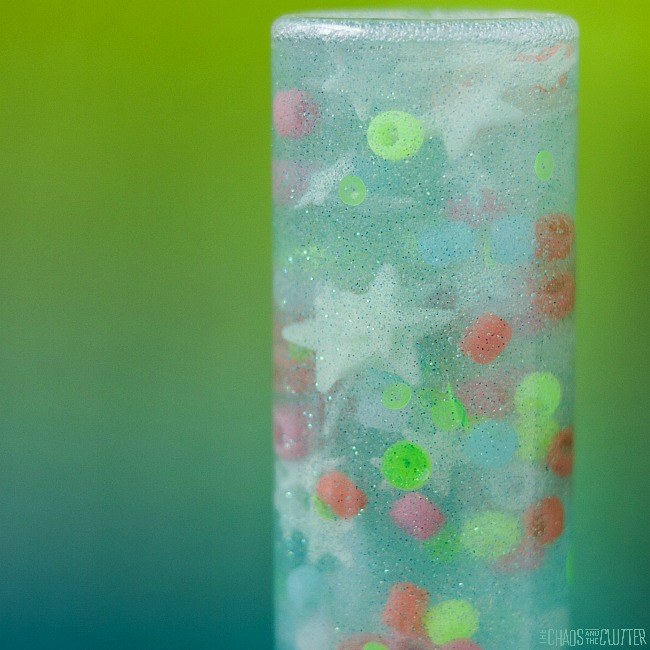
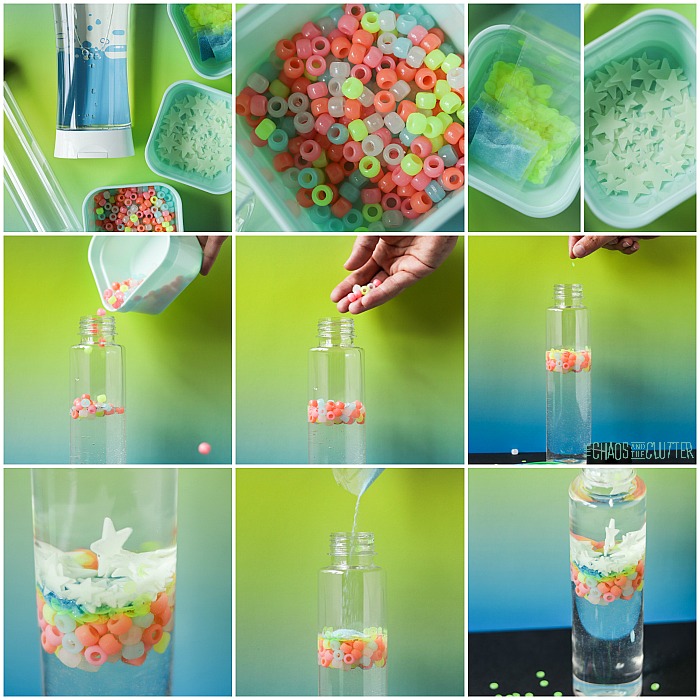
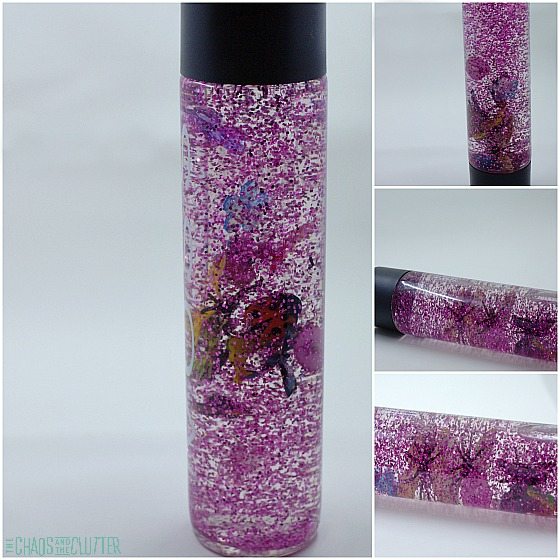
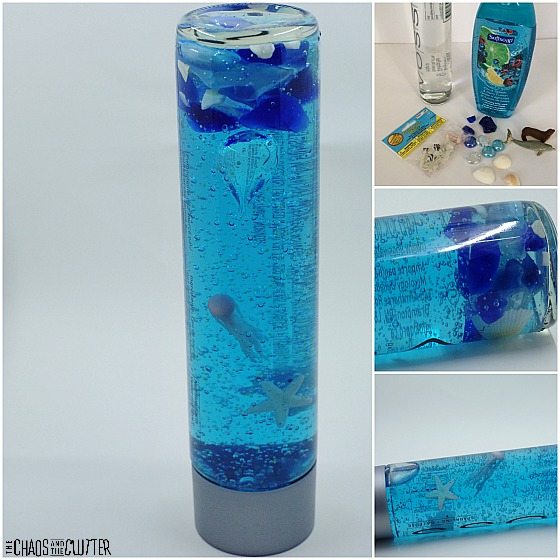
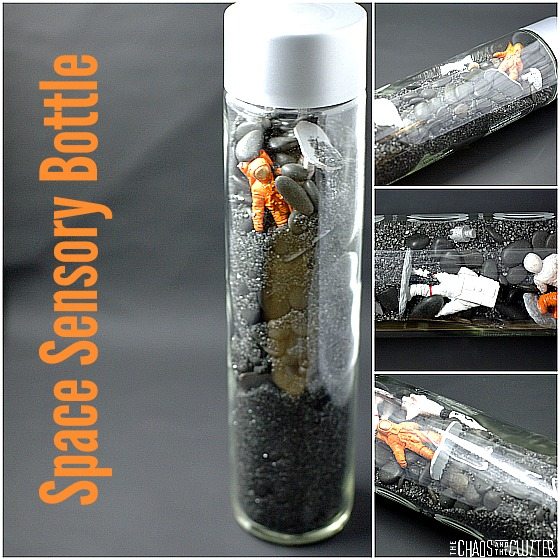
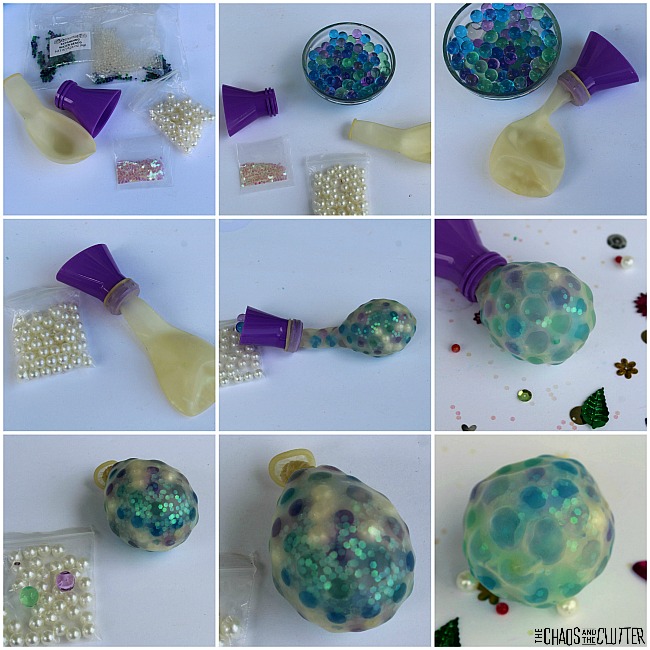
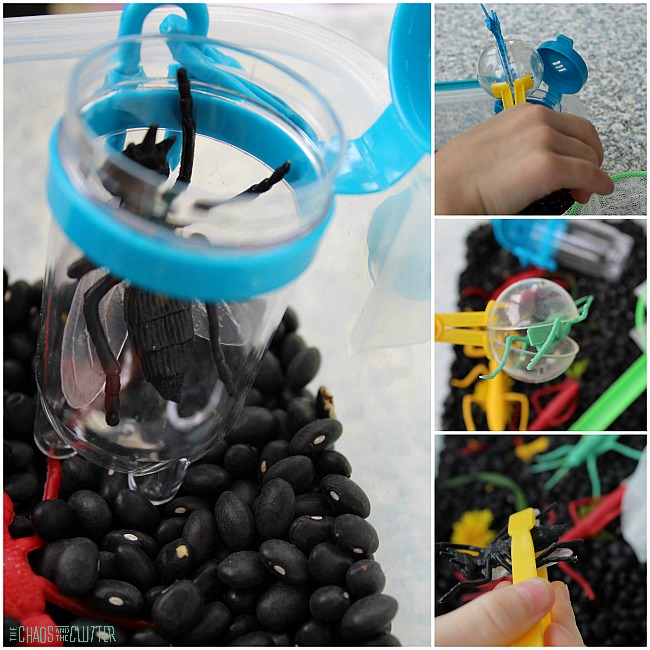
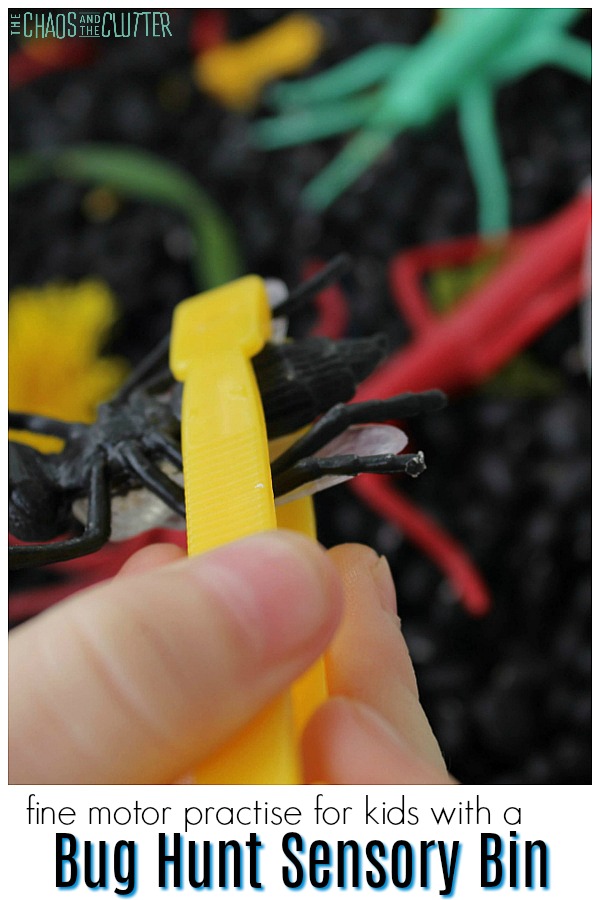
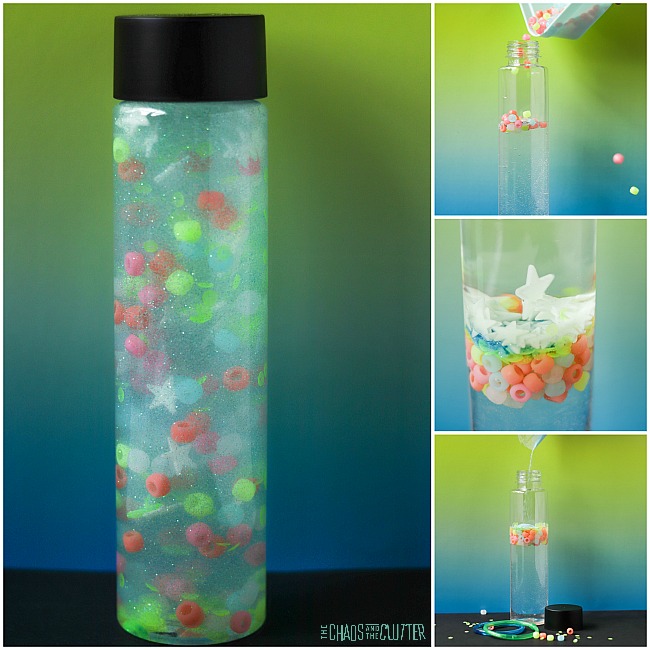
Parental supervision should be used for this or any other sensory play activity. Even if the lid is secure with glue, it is possible that your child could get it open and there are small objects inside that could be choking hazards.

Learning and Sensory Benefits:

This activity provides children the chance to improve their communication and vocabulary as they describe what they observe.

Kids can experience the change when taking the sensory bottle from the light into the dark. Older kids may want to research what it is that causes the glow in the dark items to glow and why they need to recharge. 
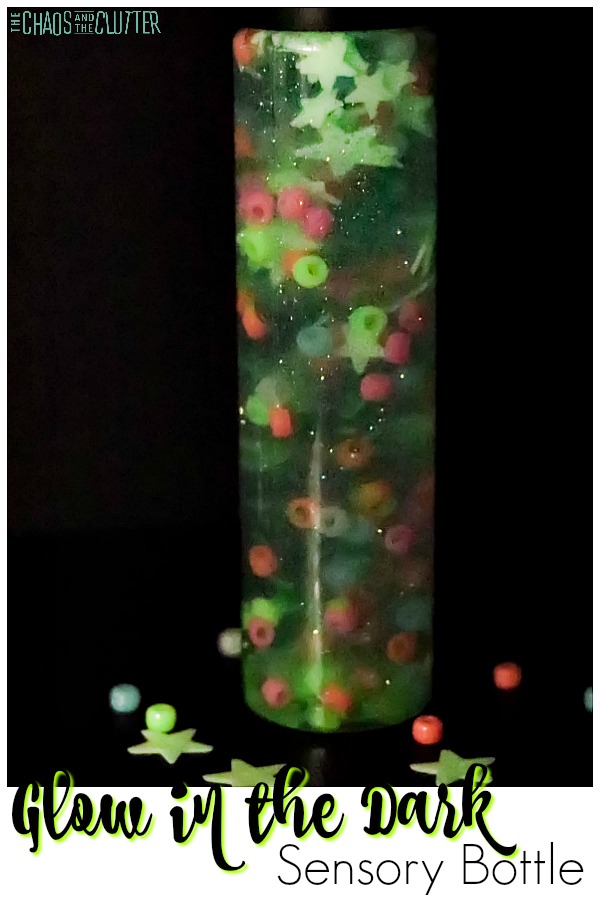
This sensory play activity offers visual sensory input as well as a bit of tactile (holding the bottle) and proprioceptive (carrying and flipping over the bottle) input.

You can also incorporate math concepts by having your child count the number of stars they see or the number of a certain colour of bead.

Join the thousands of others who have enjoyed the free 5 part email series Sensory Solutions and Activities (just pop your email into the box below) and get a printable list of 175 Great Sensory Ideas.

You might also enjoy these sensory bottles:

Spring Sensory Bottle 

Ocean Sensory Bottle (one of our all-time favourites!) Space Sensory Bottle This Space sensory bottle is naturally weighted. Kids can also use it as an I-Spy activity.

Filed Under: Sensory Tagged With: sensory bottles, sensory play

Nature Inspired Spring Sensory Soup

By Sharla Kostelyk

I love this Spring sensory soup activity. It is inspired by nature. Each soup will be different depending on what is available in your area and what your child decides to include.plastic bin filled with water filled with yellow, purple, and pink flowers, leaves, a purple cup, and a grey strainer
I like the idea of being able to gather and use local materials. Other than the plastic bin, this sensory play activity costs nothing!
 
Since you don’t need to buy any supplies, you won’t have to plan ahead before making this.

What is sensory soup?

Sensory soup is essentially a water based sensory bin. Items are added to the water and usually, kitchen gadgets are included as well to encourage kids to scoop, stir, spoon, and pour.
 
Kids can engage their senses as well as use their imaginations. They can pretend to make a soup, as well as stir and serve the soup.a child's hand dipping a yellow dandelion into water in a purple cup that is inside a sensory bin filled with water and other flowers

Spring Sensory Soup:

Materials needed:
  • plastic bin
  • spoons, ladles and tongs
  • stainer
  • small plastic cups and bowls
  • spring flowers and flower petals gathered from the yard or forest (dandelions, forget-me-nots, tulips, etc.)
  • leaves, grass, weeds, twigs, etc.
  • water
Instructions: 
  1. Explore outside with your child. Collect various flowers, grasses and weeds. Allow your child to take the lead on what they want to choose to include in their soup. You can bring a bag or container with you on your nature walk to gather things as you go.
  2. When you have collected a good assortment of natural items, fill a plastic bin about halfway with water.
  3. Float the flowers, petals, weeds, leaves and anything else you collected in the water.
  4. Add spoons and tongs to the bin. It’s best to include a variety of spoons such as slotted spoons, soup spoons, and ladles. These can be actually kitchen utensils or plastic toy ones.
  5. Add small plastic cups and bowls to the sensory bin.
  6. You can add a strainer or two as well.
  7. Invite your child to stir and serve spring soup using the utensils, cups and bowls.

Learning and Sensory Benefits:

Using the spoons will give kids the opportunity to practice manipulation skills as they transfer the flowers to the cups and bowls.

If you include measuring cups and measuring spoons, your child can practise their math skills.
 
The tongs are good for kids to practice their fine motor skills.
Water play creates the opportunity to splash and pour without worry because any that gets out of the bin will dry out and not create a mess.
 
This Spring sensory soup provides visual, tactile, and olfactory sensory input. Kids can see the different shapes and colours with their eyes. They can explore textures through touch and they can smell the leaves and flowers with their nose. They can also see how the smells change as the flowers mix together in the “soup”.

Join thousands of other people who have found help and guidance in the free 5 part email series, Sensory Solutions and Activities. (You’ll also get a printable list of 175 Great Sensory Ideas.) 

Check out some other Spring Sensory Soup ideas:

Lemonade Sensory Soup 

Calming Lavender Sensory Soup Lavender Sensory Bin

Filed Under: Sensory, Sensory Bins Tagged With: sensory play

  • « Go to Previous Page
  • Page 1
  • Interim pages omitted …
  • Page 9
  • Page 10
  • Page 11
  • Page 12
  • Page 13
  • Interim pages omitted …
  • Page 18
  • Go to Next Page »

Primary Sidebar

Categories

We are a participant in the Amazon Services LLC Associates Program, an affiliate advertising program designed to provide a means for us to earn fees by linking to Amazon.com and affiliated sites.

Copyright © 2026 • The Chaos and the Clutter • Site Design by Jeni @ The Blog Maven

Return to top of page

Copyright © 2026 · Chaos and the Clutter 2.0 on Genesis Framework · WordPress · Log in