• Skip to primary navigation
  • Skip to main content
  • Skip to primary sidebar
  • Home
  • About
  • Contact
  • Privacy + Terms
  • Affiliates

The Chaos and the Clutter

  • Facebook
  • Twitter
  • Pinterest
  • Google Plus
  • RSS
  • Email
  • School at Home
  • Sensory
    • Sensory Processing Disorder
    • Awesome Sensory Play Activities
      • Sensory Bins
      • Sensory Bottles
      • Sensory Bags
  • Family Games
    • Minute to Win It Games
  • Special Needs Parenting
    • Childhood Anxiety
    • Reactive Attachment Disorder
    • Sensory Processing Disorder
  • Store
  • Course Login

Archives for 2019

Dig for Fossils Sensory Bin

By Sharla Kostelyk

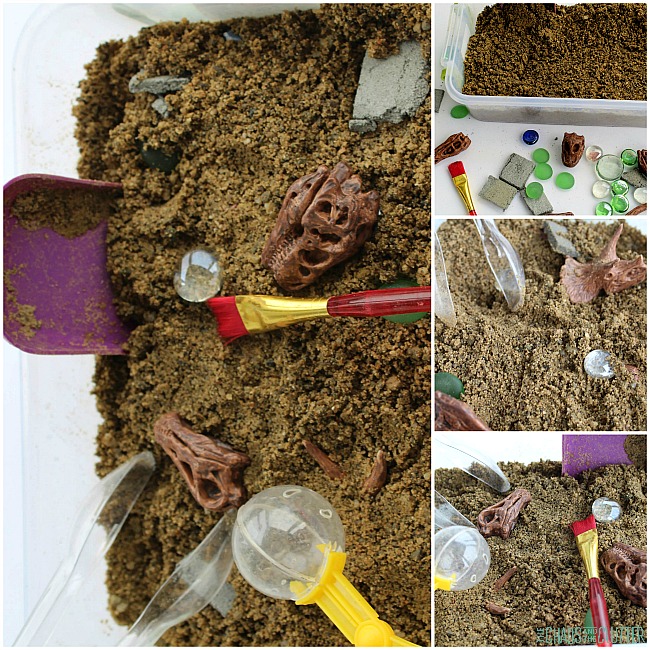
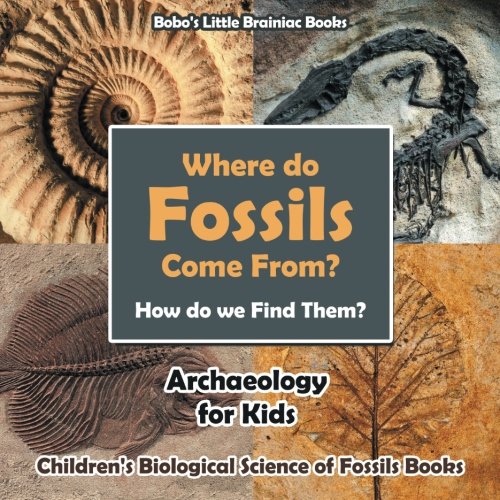
Kids will love to dig and explore in this dinosaur fossils sensory bin. It’s great for fine motor practise as well as supplementing science learning. It pairs well with a dinosaur unit. Dinosaur Fossil Sensory Bin #science #sensoryplay #sensorybins #sensory #kidsactivities
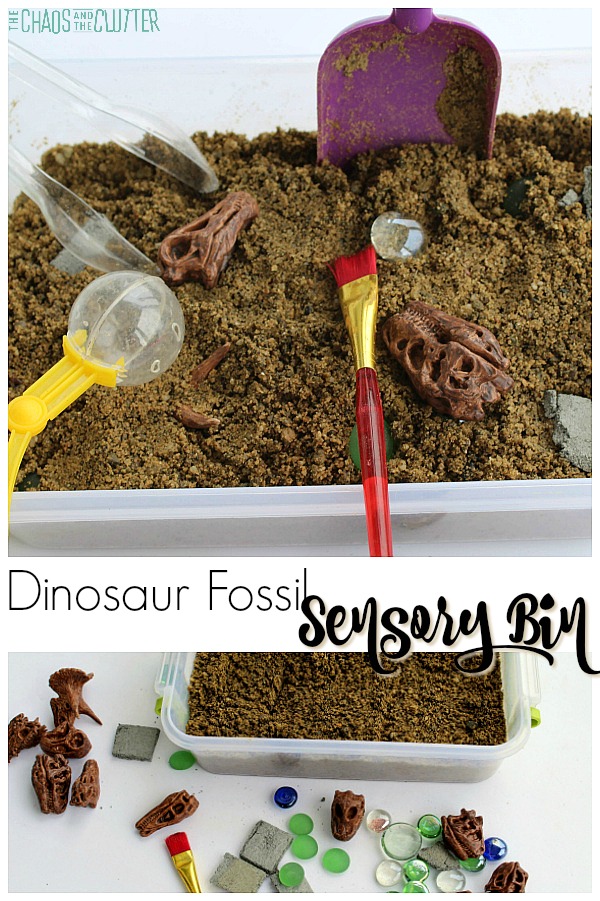
There are a variety of textures for kids to explore in this sensory play activity because of the grittiness of the sand, the smoothness of the glass beads, and the rough dinosaur skulls. This provides great tactile input. The bin also allows for visual and proprioception sensory feedback.

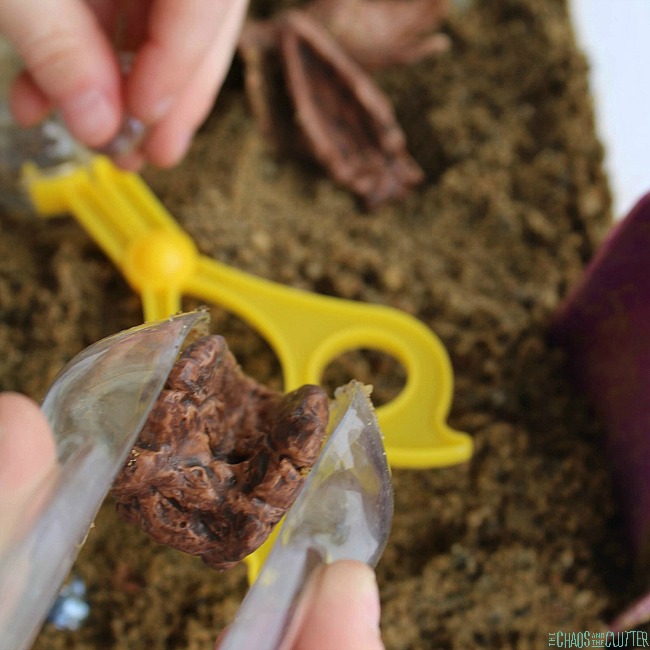
Dig for Fossils Sensory Bin:

Supplies:
  • sand
  • plastic bin with lid
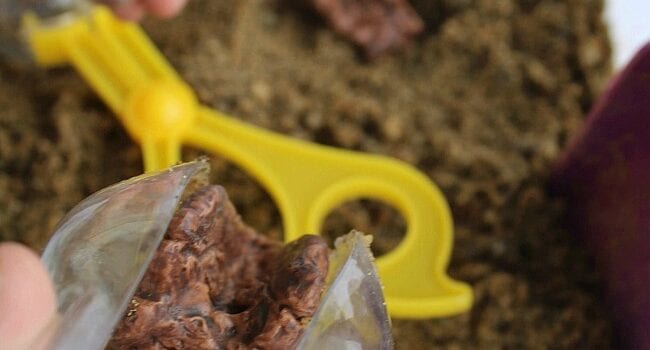
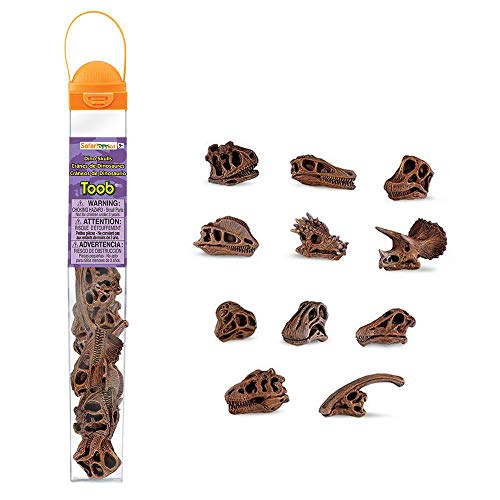
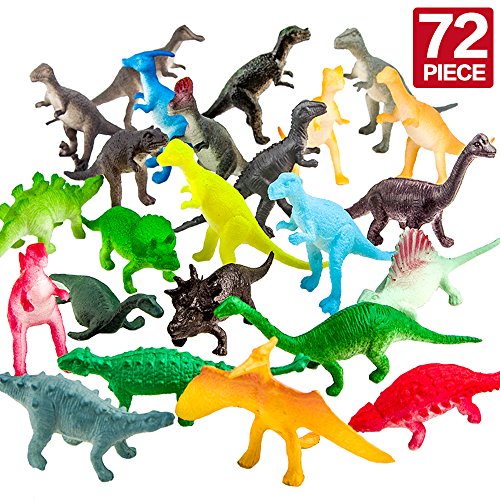
  • dinosaur skull fossils Toob
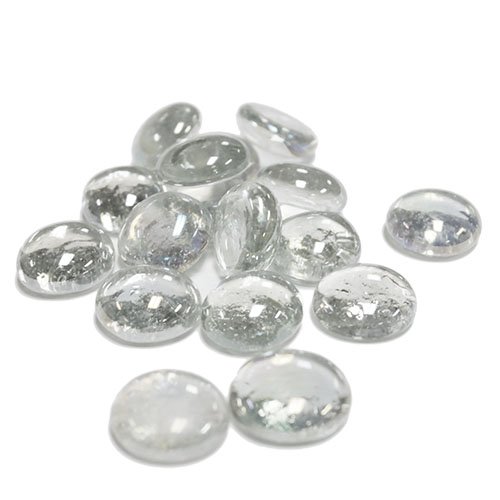
  • glass beads
  • decorative rocks
  • paint brush
  • tongs, plastic shovel or anything else your child can use to practice fine motor skills and excavate dinosaur skulls with
  • optional: magnifying glass

Dinosaur Skulls TOOBDinosaur Skulls TOOBDinosaur Skulls TOOBGlass BeadsGlass BeadsGlass BeadsNatural SandNatural SandNatural Sand

Directions:
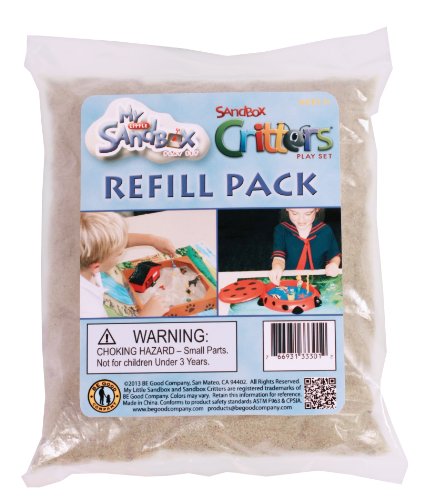
  1. Fill a plastic storage bin about halfway up with sand.
  2. Begin adding the rocks, glass beads and dinosaur skulls to the bin.
  3. Bury them in the sand.
  4. Add a few dinosaur skulls to the top and loosely bury them in the sand.
  5. Place tongs, a paint brush and sand toys in the bin.
  6. Invite your child to explore the sensory bin and excavate the contents.
  7. When playtime is over, replace the lid on the bin and give it a good shake so that the next time your child wants to explore the bin, the contents are buried in the sand again!

Learning opportunities:

If you want to expand the learning, you can set out a few books about dinosaurs and dinosaur fossils. This will allow your child to compare the dino skulls with the pictures in the books and determine which type of dinosaur it is.

You can also put out a book about excavation. Children can learn how archeologists uncover their finds. They can then mimic some of what they’ve learned in the excavation sensory bin.

Kids can dig with their hands or with the shovel or scoops. They can use the paintbrush to carefully brush sand off the fossils. The tongs can be used to examine things more closely. You can also include a magnifying glass for closer inspection of the fossils. 
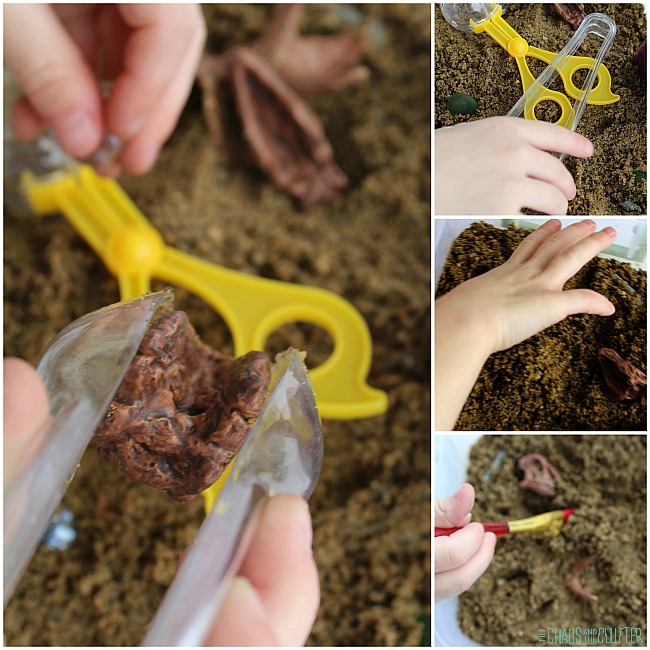
Check out these other sensory bins:

Dinosaur Sensory Bin Citrus Sensory Bin Citrus Sensory BinHistory Sensory Bin History Sensory Bin

Filed Under: Sensory, Sensory Bins

Dino-riffic Dinosaur Slime

By Sharla Kostelyk

This super fun dinosaur slime makes a perfect party favour. It’s going to be a favourite among kids. The neon green, the stretchy slime, and the dinosaurs all go together to create great sensory play.

Dinosaur Slime #sensoryplay #slimerecipes #slime #sensory #kidactivities
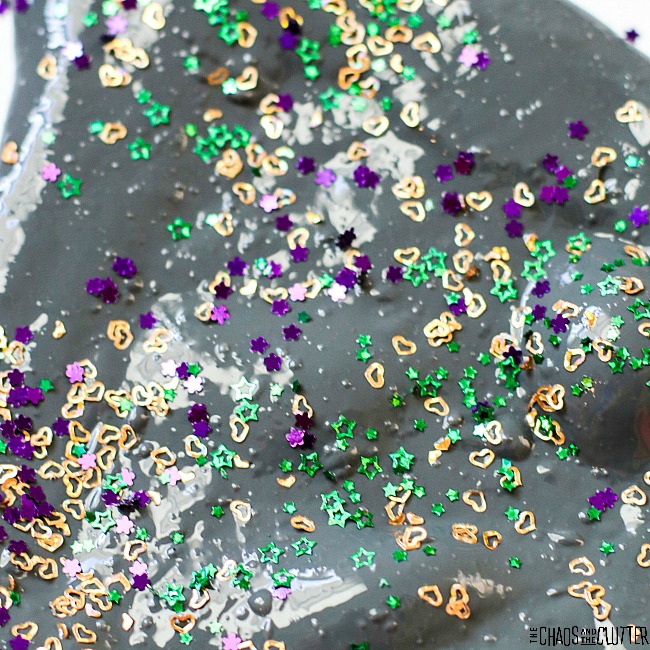
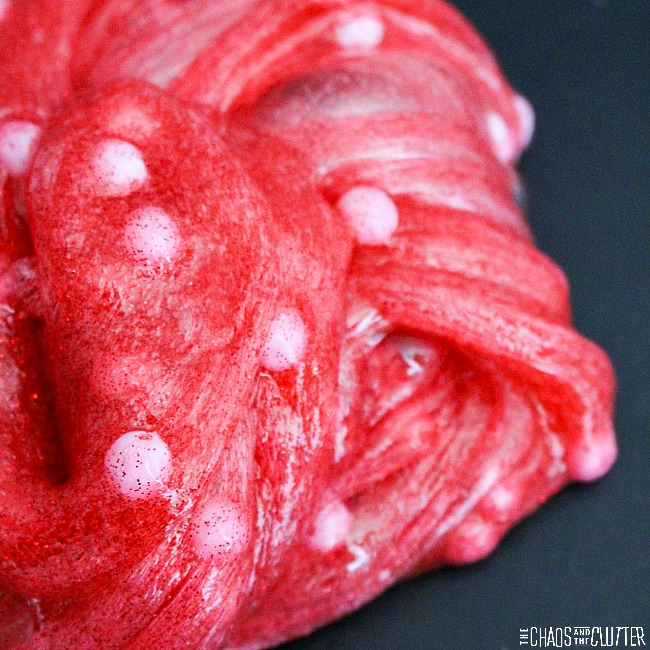
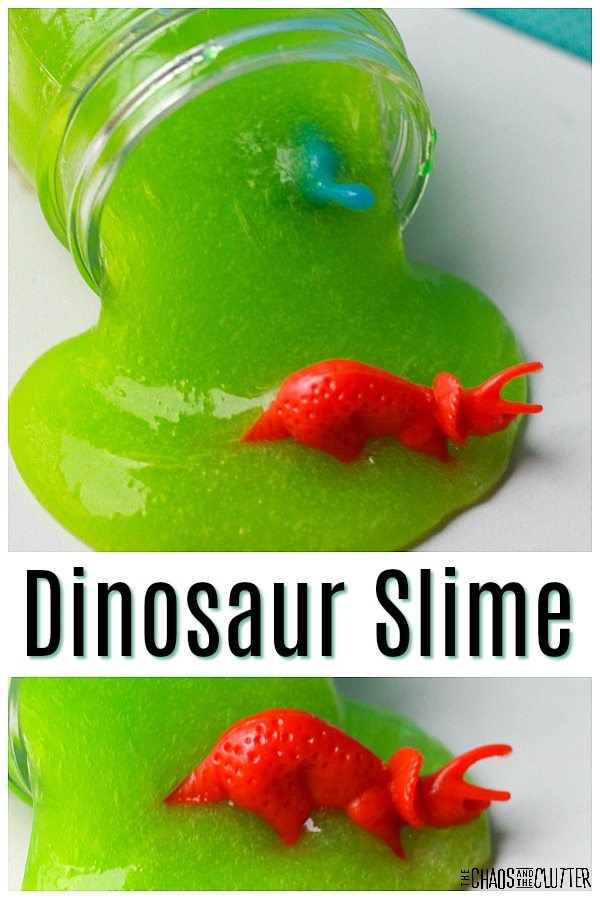
Dinosaur Slime Recipe:

Supplies:

  • ½ cup clear Elmer’s School Glue
  • ½ cup of water
  • ½ cup of liquid starch 
  • neon green food colouring paste
  • plastic dinosaur figures

Elmer's Clear School GlueElmer’s Clear School GlueElmer's Clear School GlueSmall Dinosaur ToysSmall Dinosaur ToysSmall Dinosaur ToysPurex Sta-Flo Liquid StarchPurex Sta-Flo Liquid StarchPurex Sta-Flo Liquid Starch

Directions:

  1. Pour the water and clear Elmer’s glue into a mixing bowl. Combine well.
  2. Next, add in the food colouring and stir. 
  3. Mix the water, glue and additives together well.
  4. Pour in your liquid starch and stir well for at least 30 seconds.
  5. Your slime mixture should start pulling away at the sides of your bowl when mixing. This is when you can start kneading it in your hands to see if it’s a texture you like. It should become a pliable slime ball.
  6. It’s now ready to pull out of your bowl and place on a clean, flat surface.
  7. Your slime is ready to play with. Add in your dinosaur figures.
  8. Enjoy playing with your slime! 

Notes:

The kids can help mix the glue, water and add ins. However, I recommend that an adult or older child handle the liquid starch stage of the recipe.

This makes a sticky slime, but it stretches well. If you want it to be less sticky, you can add in more of the liquid starch. The more starch you add, the less sticky it becomes. It will also become more rigid though, and more likely to break than to stretch. Always supervise young children when playing with slime or with any sensory play activity. Do not allow kids to eat slime. Although it is a fun science experiment, it should be handled with care and with adult supervision.

Dinosaur Themed Slime Party Favours:

This slime makes an adorable party favour. If you’re having a Dinosaur Birthday Party, you can either make these up ahead to include in the treat bags or you can make them with the kids at the party. Each child can take the one they make home with them.

Read about how to make slime with a large group by setting up slime stations here.

Use small jars with lids such as baby food jars. Fill the jars with a plastic dinosaur toy and slime. As an extra special touch, you can attach a plastic dinosaur to the lid with hot glue. Allow the glue to dry before screwing on the lid. 
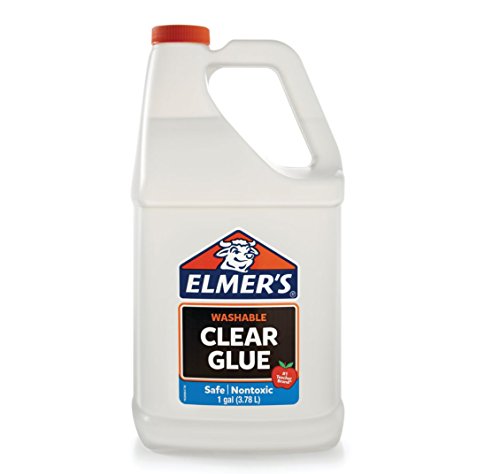
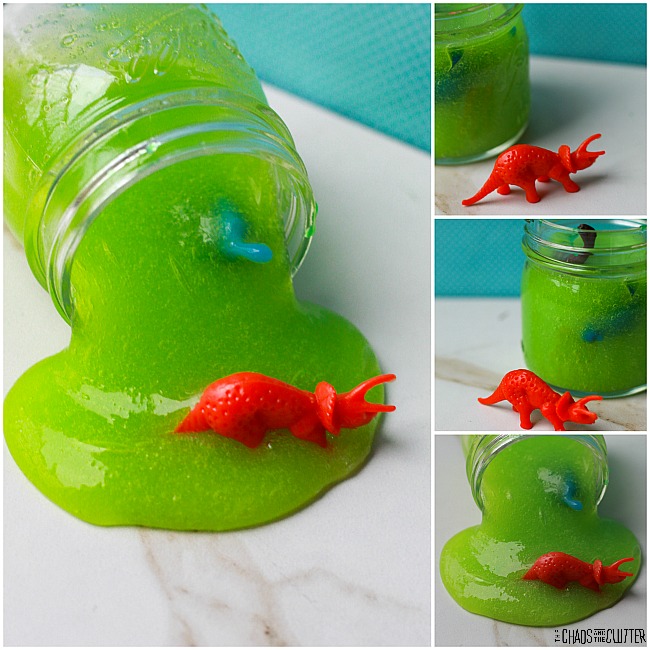
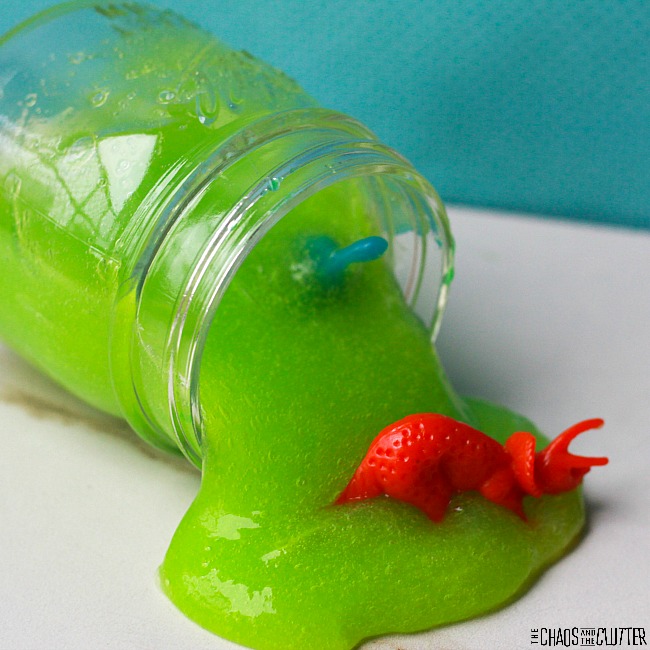
If you’d like, you can also personalize the favours by writing each child’s name on the jar in permanent marker or by decorating the jar with dinosaur stickers that the child chooses. This dinosaur slime makes a great party favour! #partyplanning #dinosaur #slime #slimerecipes #sensoryplay 
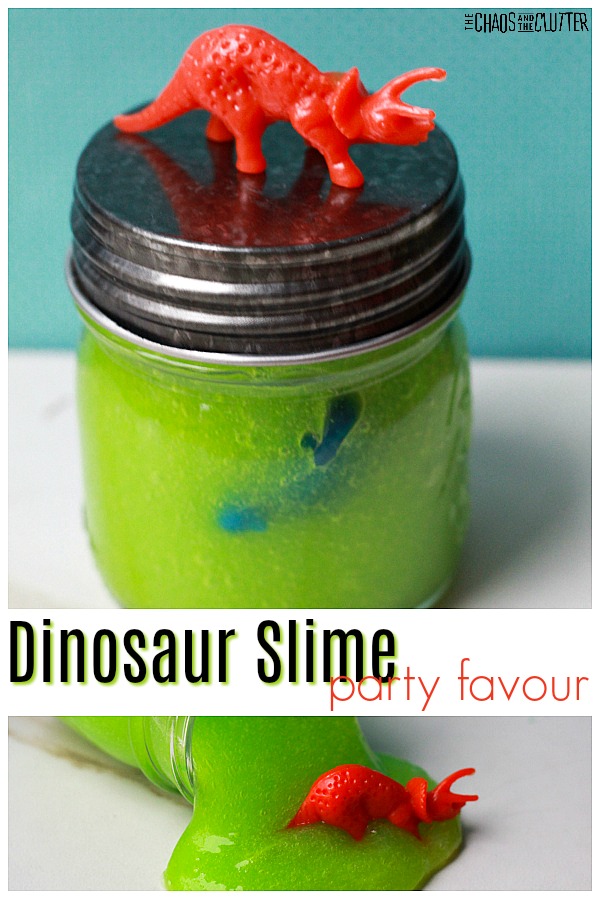
Join me for a free 5 part email series, Sensory Solutions and Activities (just put your email into the box below) and get a printable list of 175 great Sensory Ideas.

Check out some of our other fun slime recipes:

Lion King Inspired Slime Minnie Mouse Slime Unicorn Fluffy Slime 

Filed Under: Sensory Tagged With: sensory play, slime

Seashell Fossils in Playdough

By Sharla Kostelyk

This simple seashell fossils in playdough activity is easy to set up and fun for kids. It includes opportunities for hands-on learning as well as sensory play. blue playdough on a teal surface has some seashells pressed into it and a few seashells nearby. The text shown is "seashell fossils in playdough"
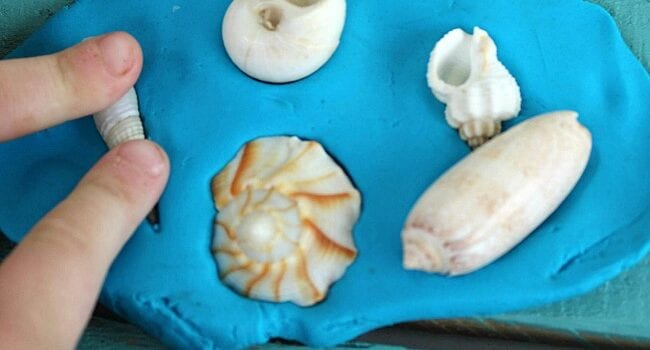
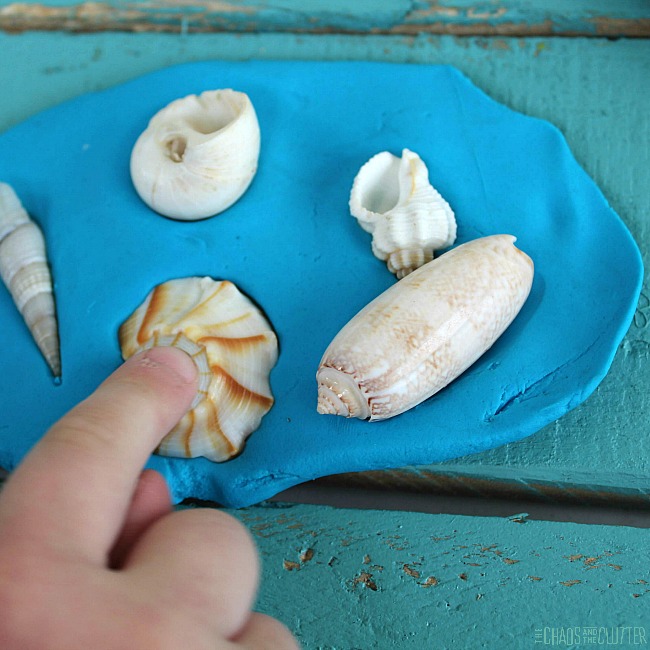
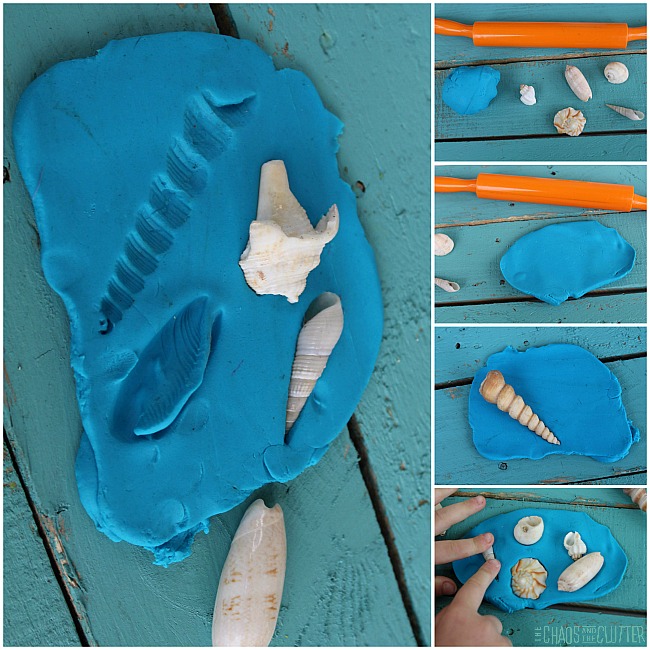
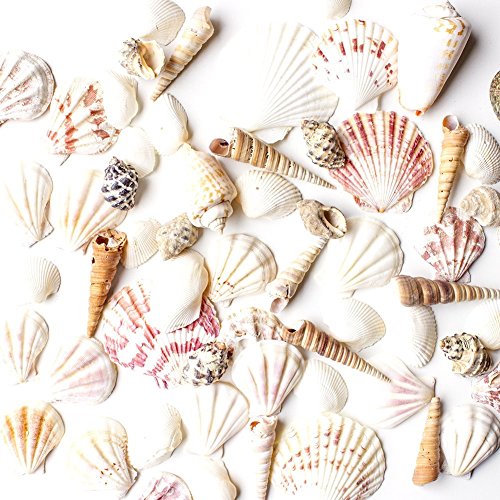
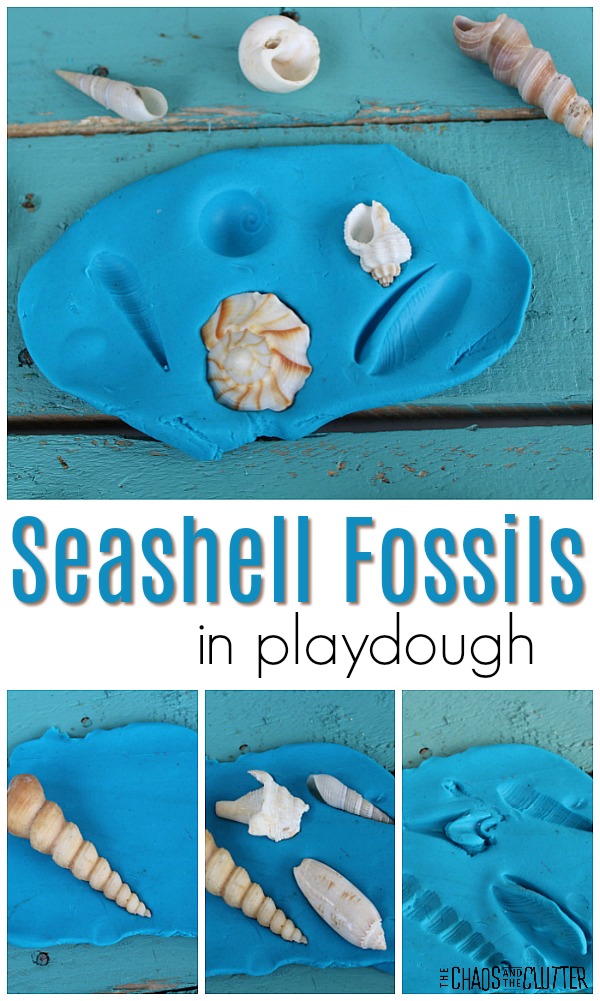
Use this activity after collecting shells at the beach on a vacation or pair it with an ocean unit study. You could also do this when studying fossils. It’s a great hands-on science activity.
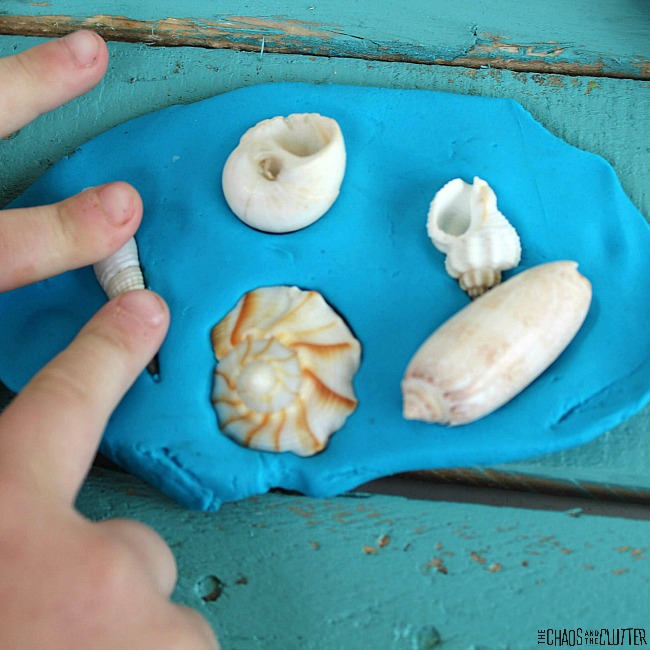
Seashell Fossils Sensory Play:

Pressing the seashells into the playdough provides good proprioceptive sensory feedback. As does rolling out the playdough. If you use scented playdough, you can add olfactory sensory input.

There are contrasting textures and colours with the soft playdough and rough and hard seashells which engage the tactile and visual sensory systems.

How to make Seashell Fossils in Playdough:

Supplies needed:

  1. playdough (homemade or purchased)
  2. seashells
  3. rolling pin

Instructions:

  1. Set out the playdough, a rolling pin, and a variety of seashells.
  2. Have your child roll make a ball with the playdough and roll it out using the rolling pin.
  3. The seashells can then be pressed into the playdough.
  4. Encourage your child to use the rolling pin or their fingers to press the seashells further into the playdough.
  5. Invite your child to carefully peel the seashells out of the playdough. Observe the faux fossils that are now displayed where the seashells used to be.
  6. For younger kids, you can also have them match the seashells that are now out of the playdough with their imprint.

Expand this activity:

  1. Set out books about seashells for your child to discover which type of seashells are in front of them and what sea creatures used to live in them.
  2. Talk about what true fossils are and how they are formed. Here are some resources to help you teach about fossils.
  • Explaining Fossils to Kids
  • What are Fossils and how are they Formed? (video)
  • Fossil Facts for Kids

Curious About FossilsCurious About FossilsCurious About FossilsWhere Do Fossils Come from?Where Do Fossils Come from?Where Do Fossils Come from?The Beachcomber's CompanionThe Beachcomber’s CompanionThe Beachcomber's CompanionSeashells, Crabs and Sea StarsSeashells, Crabs and Sea StarsSeashells, Crabs and Sea StarsSea Shells Mixed Beach SeashellsSea Shells Mixed Beach SeashellsSea Shells Mixed Beach SeashellsPlay-Doh Modeling CompoundPlay-Doh Modeling CompoundPlay-Doh Modeling Compound

Join thousands of others who have signed up for our Sensory Solutions and Activities email series and get a free sample from our Sensory Play Recipes eBook.

Some of our favourite homemade playdough recipes:

Calming Lavender Playdough

Peppermint Playdough

Snow PlaydoughSnow Playdough and invitation to play

Filed Under: Crafts and Activities Tagged With: playdough stations, sensory play

Understanding Emotions Birthday Party Printable Playdough Mats

By Sharla Kostelyk

This activity actually combines two things that I feel pretty passionately about: teaching kids about emotions and sensory play. These birthday party printable playdough mats depict common feelings kids are familiar with.black and white colouring pages of faces wearing birthday hats. There is a pink rectangle in the center. The text says "Free printable Birthday Party Playdough Mats" is overlaid on the image.

When you incorporate sensory play into learning, kids are better able to retain what they learn. Discussing emotions with them while having them shape playdough with their hands is such a good way to have them remember.

Kids can relate to the emotions they might feel while at a birthday party. The playdough mats each tell of a situation at a birthday party and the corresponding emotion.

You can use this opportunity to talk to your child not only about how they would feel if they were in that situation but what they would do. You can help guide them to the best possible response. Children who role play situations ahead of time have a better chance of choosing appropriate reaction in the actual situation.

How to use the Birthday Party Printable Playdough Mats:

To use these playdough mats, print them on paper or card stock. Laminate them or place each one into a plastic sleeve. Set them out along with some playdough. Allow your child to shape the playdough to fit inside the mats and also to create the facial expressions that correspond with each emotion. You can use store bought playdough or make your own. If you want to add a calming scent element to it, use our lavender playdough recipe. Create different colours by changing the food colouring in the recipes.

Discuss the emotions with your child. Help them express what they would feel in those situations.

Get your free printable playdough mats here and you’ll join thousands of others wanting to learn sensory solutions and activities.

Filed Under: Crafts and Activities, Printables Tagged With: sensory play

Edible Shark Fluffy Slime

By Sharla Kostelyk

You’re going to love this shark themed edible fluffy slime. It’s fun to play with and taste safe, so it’s good for toddlers or preschoolers. It smells great too (like white chocolate)! a pale blue slime sits in a swirl on a blue and white surface. A blue gummy shark candy is on top. There is an arrow pointing to the shark that says "totally taste safe". The text reads "Edible Fluffy Slime". There is a box of jello, shark candies, corn starch, and an empty bowl at the bottom.
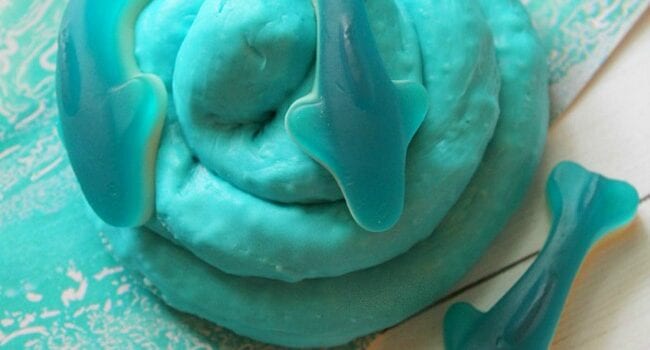
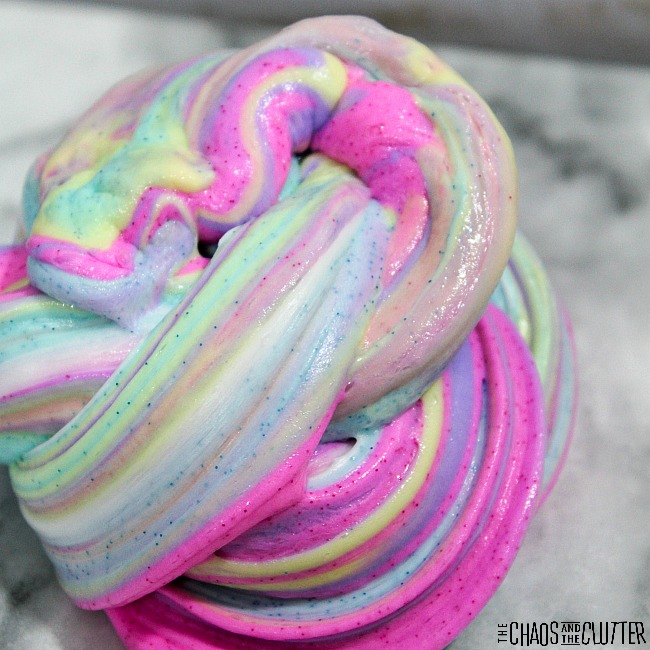
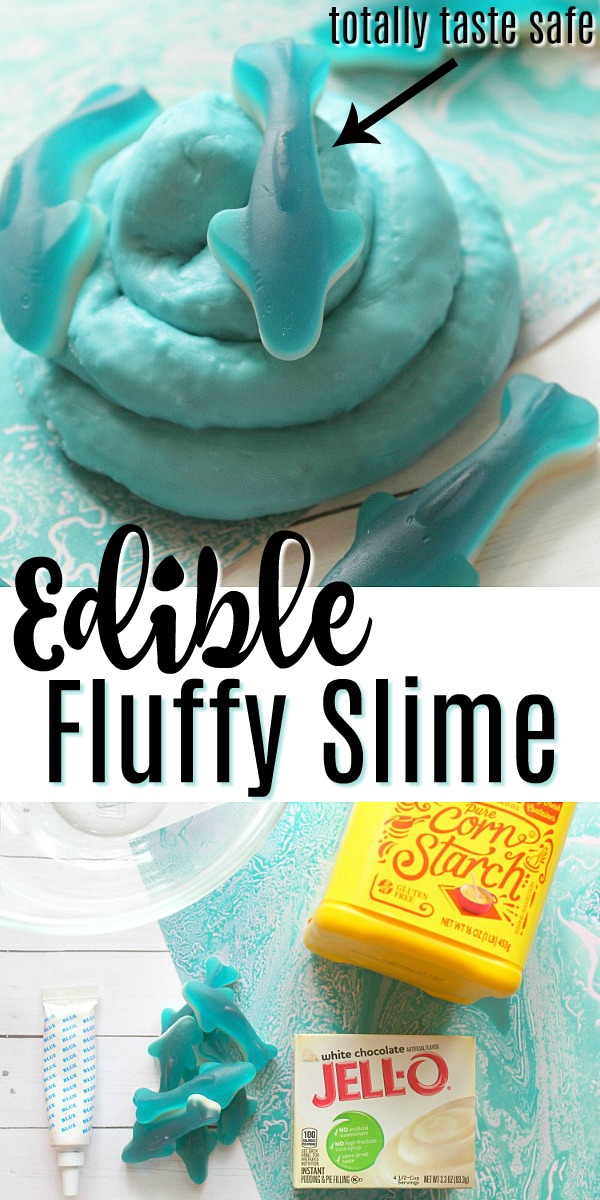
This fluffy slime recipe goes well with a unit study on the ocean or is the perfect pairing for Shark Week. You could also use it for an Ocean or Shark themed party.

Edible Shark Fluffy Slime Recipe:

Slime ingredients:

  • 1/3 cup white chocolate instant pudding mix 
  • 1 cup of cornstarch
  • blue food colouring
  • gummy sharks candy 
  • 1/3 cup water

How to make edible fluffy slime:

  1. Empty the dry pudding mix pouch into a bowl. Add the cornstarch. Mix well.
  2. Pour in the water and begin to stir quickly. There will be some clumps, but you can break them apart with your spoon. 
  3. Keep stirring and breaking the clumps. A crumbly dough will form. Add a few drops of blue food colouring so that you get just the shade you’re looking for.
  4. As soon as the crumbly dough forms, press it and knead it until the slime forms.
  5. If your mixture feels too dry and crumbly, continue to add a teaspoon of water at a time until you get the right consistency. If  it feels too wet, sprinkle in equal parts of pudding mix and corn starch until it thickens up and becomes the desired consistency.
  6. The more you stir or knead it, the better the consistency gets.
  7. Finish this slime off with gummy sharks. You can mix them in or use them to top the slime. Of course, there may be a few of the candies that find their way into little mouths!

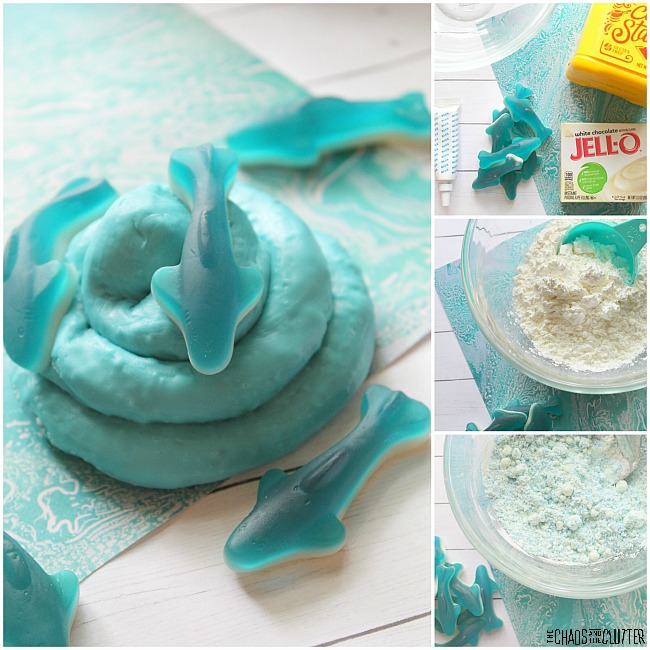
One of the nice things about edible slimes is that they are borax free. This makes them safe for all ages (though of course adult supervision should be used with this and all sensory play activities).

Taste Safe Slime Sensory benefits:

Slime is always a great sensory activity, but a taste safe slime allows even more sensory systems to be involved.

Visual – The soft blue of this slime is visually appealing.

Tactile – Little hands can touch this sensory play recipe. If you choose to add the shark gummy candies into it, it will add another texture element which is good for tactile input.

Gustatory (taste) – Since this is a taste safe slime recipe, it provides a great gustatory opportunities for licking and even biting and chewing. I wouldn’t recommend eating the whole thing though as it’s quite cornstarch-y. 
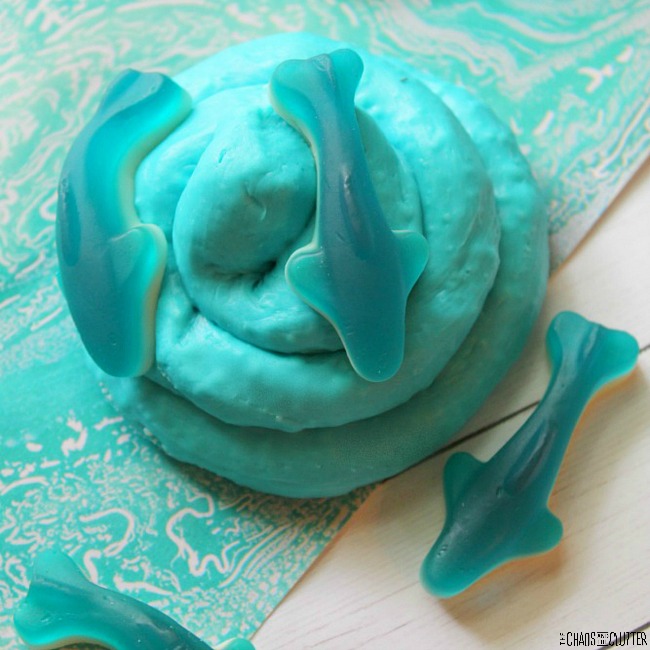
Olfactory (smell) – Sniffing fully allowed. This slime smells like white chocolate. Yum!

Proprioception – Involving the kids in the process of making the slime allows even more proprioceptive input as they knead, smash, and press. Pulling, scrunching, and stretching while playing with the slime also involves the proprioceptive system.

Looking for more awesome sensory play recipes for kids? You can grab a free sample chapter of our Sensory Play Recipes eBook here.

Check out some of our other slime recipes:

Unicorn Fluffy Slime

Minnie Mouse Inspired SlimeOn a black background sits a swirly clump of glittery red slime with white balls that look like polka dots.

Mardi Gras Slime

Filed Under: Sensory Tagged With: sensory play, slime

How to Teach Kids Kindness in a Sometimes Selfish World

a brunette woman sitting with four children around her. The text on the image says "how to teach kids kindness in a sometimes selfish world"

By Sharla Kostelyk

Raising kids is hard. Raising kids to be kind is even harder. The advances in technology are wonderful for so many things, but they also bring additional challenges, especially for parents wanting to teach kids kindness and empathy. a brunette woman sitting with four children around her. The text on the image says "how to teach kids kindness in a sometimes selfish world"

Yes, I want my children to grow up to be capable and confident. I wouldn’t hate it if they were successful in their careers and family lives. But one of the things I want most for my children is for them to be kind.

I want them to show compassion for others and to be able to look outside themselves, for them to see a need and try to meet it or at the very least, to come alongside that person and show them that they are not alone.

Why teach kindness?

Nurturing our children’s character is one of our most important jobs as parents. There are benefits to our child as well.

Showing kindness to others boosts self-image. It enriches life. Social and emotional intelligence are just as important (if not more so) than academic intelligence.

As parents, there are a few obvious ways we can teach kindness to our children:

  • model kindness
  • teach gratitude
  • talk about the feelings of others
  • discuss the joy you get out of helping others
  • be sure that your child knows that there are those less fortunate in the world

An effective way to teach kids kindness:

All the above ideas to teach kindness are necessary if you want your child to think outside of themselves, but there is one thing I have found that goes a step further and that is child sponsorship.

Child sponsorship is an activity the whole family can get involved in. In this world of cell phones and internet, although in some ways the world can feel like a small place, in others, it can be easy to feel disconnected. Sponsoring a child in a developing country can be a way to bridge that connection.

Some suggestions to make this activity even more meaningful:

    • involve your child in the process of choosing the child you want to sponsor
    • perhaps choose a child who is the same age as your child or the same gender or who has similar interests
    • send letters back and forth to your sponsored child which will allow your child to make a connection and for them to learn more about them and about their country (not sure what to write. Read what to write to your sponsored child.)
    • place the picture of your sponsored child in a prominent area in your home and talk about them or pray for them as a family
    • allow your child to help in the money aspect – this can involve them selling some of their toys at a garage sale, donating some of their allowance or birthday money, or even them sacrificing going out for ice cream or fast food so that they money that would have been spent can instead go towards the sponsored child
    • go as a family to meet your sponsor child – I know this option may not be possible for all people, but it really takes this experience to the next level as you are able to see firsthand the difference your support is making


Child Sponsorship:

Back in March, I was privileged to go to the Dominican Republic with an organization called One Child Matters. It is hard for me to put into words what my time there meant and how transformative it was for me. I fell in love with the community there and with the children that I spent time with.

But I also fell in love with One Child Matters and their heart for the people they serve. I will admit that I was somewhat skeptical going in. I didn’t know much about them or what they stand for. It didn’t take long for me to be blown away for the work they are doing there and around the world.

They don’t march into communities and assume that they have all the answers. They find well respected community members who are already working with children and partner with them. And then they ask what is needed for that particular community. It’s a smart model.

I wish I could have taken you with me so that you could have seen the need, looked into the faces of those who would benefit most from your sponsorship. The joy of the children contrasted so starkly with the tremendous poverty and conditions. But the work of One Child Matters there was already changing lives. We witnessed it.

Be the difference for one child today…

I’d like to bring you along on the journey and allow you to breathe in the smells and bear witness to the tears and the transformations. The best I can do is to invite you to take in some of the pictures and ask that you would consider if your family could help just one child.

Those of us who went on that trip have set a huge goal for ourselves to get 1,000 kids sponsored. When you hear such a big number, it sounds impossible, but not when you think about just one child. Would you help us by sponsoring just one child? Be the difference for one child today.

The amazing photos in this post are thanks to Ashlee Kay, Kaylin Perdomo, Jo Lord, David Alink, and Luis Sanchez. 

More stories from those who went on the trip:

What to Write to Your Sponsored Child – Teaching Mama

Why Meeting Your Sponsor Child is Worth the Time and Expense – Math Geek Mama

The Mother Teresa of Latin America – Preschool Inspirations

Filed Under: Parenting in the Chaos

  • « Go to Previous Page
  • Page 1
  • Interim pages omitted …
  • Page 7
  • Page 8
  • Page 9
  • Page 10
  • Page 11
  • Interim pages omitted …
  • Page 18
  • Go to Next Page »

Primary Sidebar

Categories

We are a participant in the Amazon Services LLC Associates Program, an affiliate advertising program designed to provide a means for us to earn fees by linking to Amazon.com and affiliated sites.

Copyright © 2026 • The Chaos and the Clutter • Site Design by Jeni @ The Blog Maven

Return to top of page

Copyright © 2026 · Chaos and the Clutter 2.0 on Genesis Framework · WordPress · Log in