• Skip to primary navigation
  • Skip to main content
  • Skip to primary sidebar
  • Home
  • About
  • Contact
  • Privacy + Terms
  • Affiliates

The Chaos and the Clutter

  • Facebook
  • Twitter
  • Pinterest
  • Google Plus
  • RSS
  • Email
  • School at Home
  • Sensory
    • Sensory Processing Disorder
    • Awesome Sensory Play Activities
      • Sensory Bins
      • Sensory Bottles
      • Sensory Bags
  • Family Games
    • Minute to Win It Games
  • Special Needs Parenting
    • Childhood Anxiety
    • Reactive Attachment Disorder
    • Sensory Processing Disorder
  • Store
  • Course Login

How To Melt Crayons

By Sharla Kostelyk

(This post may contain affiliate links. For more information, see my disclosure policy.)

  • Total8.0K
  • Facebook216
  • Twitter4
  • Pinterest7.7K
  • Mix
  • Yummly0

This melting crayons activity turned out so well and was a great bang-for-your-buck activity ideas. Just for something to do, we made new crayons out of our old crayon bits. It didn’t actually cost anything, but even in terms of time and effort on my part in exchange for the value, it was so worth it.
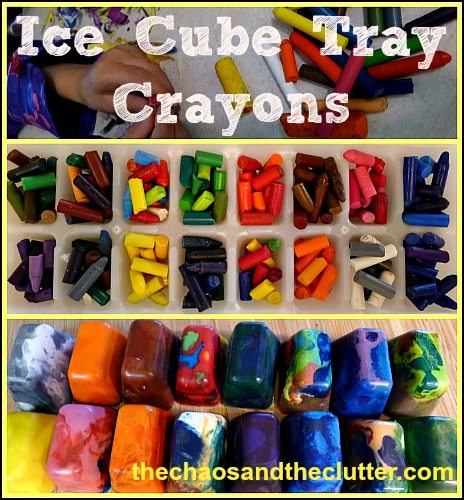
Melting Crayons In the Microwave To Make New Crayons

You know how sometimes as a mom, you spend hours preparing for an activity (running from store to store tracking down the necessary supplies, doing any prep. that is too advanced for your kids, laying everything out, helping the kids with it, not to mention the clean-up) and it occupies the kids for all of about five minutes?! Well, those kinds of crafts or activities are not what I would consider good bang for my buck!

What To Do With Old Crayons

To make these crayons, I pulled out the drawer where we keep markers, pencils, and crayons and the kids and I rifled through it to find all the old crayon bits. Then we peeled off the paper. This took quite a bit of time, but somehow, it held their attention. It was very quiet in the room as they tried to get even the most stubborn labels off.
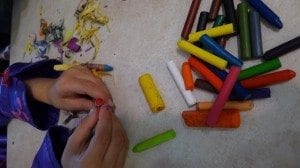
melting crayons

Next, we broke some of the larger crayons into smaller bits and I placed them into an ice cube tray.  For some, I kept it all one shade of one colour, for others, I did a mixture of bright colours.  I also made a camouflage one, one with whites, greys, and black, and one of blues and greens.
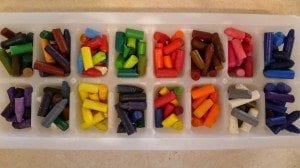
melted crayons

How To Melt Crayons 

I put the ice cube tray of crayon pieces in the microwave and set it for a few minutes. I put it in many, many times and checked it every few minutes. I found that some brands of crayons melted much more quickly than others. Here and there, I stirred them with toothpicks. When they were more or less melted, I put them in the freezer.

When I took them out of the freezer, I popped the ice cube tray crayons out on the counter. The great thing about this activity is that it continued on after we made the new crayons because of course the kids wanted to colour with the new crayons. The blue/green one worked really well to make a water effect. Super fun and easy!
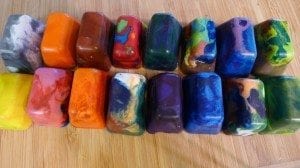
how to melt crayons

Note: I used an extra ice cube tray knowing that I probably wouldn’t be able to use it for ice again. I reasoned that since they are only $1 at the dollar store, it was worth the sacrifice. I kept the tray in case we decide to do this again as it was a great way to clean out the crayon drawer and have a little fun.

IMPORTANT UPDATE!!!

I’ve had two readers contact me to let me know that their ice cube tray melted in the microwave when they tried melting the crayons. One of them also had a fire start in the microwave after using sparkly crayons. Please use caution. Do not use crayons with glitter or shimmer in them. Set your microwave at a lower temperature and check it often. I’m assuming that some ice cube trays are made of thinner plastic than others and that is why this is happening.

More Fun Activity Ideas:

16 Toilet Roll Paper Crafts

Sensory Bottles With Instructions

60 Paper Plate Crafts

Playdough Play Mats


  • Total8.0K
  • Facebook216
  • Twitter4
  • Pinterest7.7K
  • Mix
  • Yummly0

Filed Under: Crafts and Activities

Reader Interactions

Comments

  1. Dawn says

    March 30, 2012 at 4:52 am

    They turned out great. we did this in the oven with cup cake tins. I like the size of yours better. I love the bang for the buck on time management too.
    Blessings,
    Dawn

    • Sharla says

      March 30, 2012 at 8:53 am

      I had seen the muffin tin ones but didn’t like how big they were and didn’t want to use my mini muffin tin tray because I didn’t want to wreck it. Were you able to clean your tray after?

      • Dawn says

        March 31, 2012 at 6:11 am

        I used my art and craft muffin tin so I did not try real hard to get it clean. I imagine it would be VERY difficult.
        Blessings,
        Dawn

      • Ida says

        September 15, 2013 at 8:31 am

        I have never tried this, but it seems to me that you could probably use paper tin liners (muffin cups) just like you do for cupcakes when making muffin tin crayons in the oven. It would help keep the tins cleaner. I would still have a pan dedicated specifically to non-food uses, though!

  2. Deborah says

    March 30, 2012 at 7:00 pm

    This is brilliant! I too have done the oven version, but I like that the ice cube ones are smaller. I never thought of doing it in the microwave. Great idea! Thank you for sharing your project!

    Blessings!
    Deborah

  3. kelli- AdventurezInChildRearing says

    April 29, 2013 at 12:35 pm

    pinned and shared – thanks for linking with Frugal Family 🙂 love this project!

  4. Erin says

    May 25, 2013 at 6:55 pm

    This was a complete craft fail. I checked it every few minutes, but some were still not melted and then two of the cubes plastic melted on the bottom all the way through, and I had to clean melted crayon out of my microwave. Next time I’ll definitely go the oven route.

    • Sharla says

      May 25, 2013 at 9:09 pm

      That sounds like a huge mess to clean up…ugh…I’m sorry to hear it didn’t work for you. I wonder if it depends on the thickness of the plastic in the ice cube tray or on the strength of your microwave. Thank you for the feedback. Maybe others can try setting their microwave at a lower level (or of course there’s always the oven option).

    • Margaret says

      August 5, 2013 at 9:55 am

      Mine caught on fire and melted the ice cube tray. My girls had used some shimmery crayons in the mix, which in hindsight was probably not the best idea.

      • Sharla says

        August 5, 2013 at 11:59 am

        Thank you so much for letting me know. I have added an update right into the post to warn others. Sorry that you had such a bad experience with this 🙁

  5. sincerelysarahandcrafted says

    December 5, 2013 at 10:10 am

    This worked well. I made sure I had a thick ice cube tray, put the microwave on a low setting, checked them every minute or less. I found that my thicker crayons (crayola) melted best, there were some thinner ones that never melted so I just stuck them in slots that had melted crayons. So they still became a part of our new melted creations, but didn’t actually melt on their own. Only took a little while to harden in the freezer and we got some cool color combinations. Very pleased with it. Thanks for the idea!

    • Sharla says

      December 5, 2013 at 6:14 pm

      Thanks so much for the feedback! I’m really glad to hear that it worked out for you!

  6. kascey says

    January 31, 2014 at 5:48 pm

    Mine did awesome dollar tree (ice-cube tray) lighter colors don’t melt as good i just smushed them into melted crayon until covered couldn’t tell. i ran mine 3x with 2 min run time then 2 min to help the crayons settle on their own. you rush it then, yes you will b cleaning up a mess and i used metallic but i put them at the bottom of the other colors.

  7. Jamie says

    June 24, 2016 at 1:52 pm

    We did this in the summer when my kids were little. We just sat the tray in the sun on a hot day.

  8. Vanessa says

    April 6, 2017 at 3:32 pm

    Thank you for linking up at “A Little Bird Told Me” Wednesday link party! You have been featured on Mama’s Happy Hive. 🙂

  9. Mia says

    January 12, 2019 at 4:55 pm

    From my experience..Soaking the crayons in warm soapy water makes it super easy to peel the wrappers off them, make sure to dry them well before you melt them, and crayola crayons work the best, they hold better and aren’t as oily as the others. I’ve also swirled a few drops of essential oils and fine glitter in right after melting, and got amazing results.

    • Sharla Kostelyk says

      January 14, 2019 at 6:42 am

      Great ideas! Thank you for sharing them.

  10. Jo says

    February 24, 2019 at 10:58 pm

    This is a great idea!
    Although, personally, I would never put a plastic ice cube tray in the microwave. I would use silicone, or melt them another way (like a glass dish or measuring cup) then pour into the ice cube trays.
    Plastic in the microwave is never a good idea. Not only a fire hazard, but cancer-causing carcinogens are released into the air 🙁
    I work with after-school age P-6 kids, and am always looking for new crafts and science experiments!
    Thanks for this!
    Cheers

Trackbacks

  1. Ways to Reuse Broken Crayons | Small Mama says:
    March 30, 2015 at 7:05 pm

    […] can use fancy shaped molds or simply use an ice cube tray.  The Chaos and the Clutter has step-by-step directions.  Check it […]

  2. Fun Ideas for Summer Activities - The Natural Homeschool says:
    June 21, 2017 at 4:29 am

    […] Ice Cube Tray Crayons […]

  3. 20 Geninus Ice Cube Tray Hacks says:
    June 26, 2017 at 8:36 am

    […] source […]

  4. Fun Spring Crafts for Kids - The Natural Homeschool says:
    July 18, 2017 at 10:47 am

    […] Ice Cube Tray Crayons […]

Primary Sidebar

Categories

We are a participant in the Amazon Services LLC Associates Program, an affiliate advertising program designed to provide a means for us to earn fees by linking to Amazon.com and affiliated sites.

Copyright © 2022 • The Chaos and the Clutter • Site Design by Jeni @ The Blog Maven

Return to top of page

Copyright © 2022 · Chaos and the Clutter 2.0 on Genesis Framework · WordPress · Log in