• Skip to primary navigation
  • Skip to main content
  • Skip to primary sidebar
  • Home
  • About
  • Contact
  • Privacy + Terms
  • Affiliates

The Chaos and the Clutter

  • Facebook
  • Twitter
  • Pinterest
  • Google Plus
  • RSS
  • Email
  • School at Home
  • Sensory
    • Sensory Processing Disorder
    • Awesome Sensory Play Activities
      • Sensory Bins
      • Sensory Bottles
      • Sensory Bags
  • Family Games
    • Minute to Win It Games
  • Special Needs Parenting
    • Childhood Anxiety
    • Reactive Attachment Disorder
    • Sensory Processing Disorder
  • Store
  • Course Login

Sensory

Honeycomb Sensory Activity

hexagons made of cardboard filled with honeycomb cereal on a yellow paper

By Sharla Kostelyk

Ready to celebrate the bees and spring? Our fun and engaging Honeycomb Sensory Activity is a great way to start exploring the world of bees while also providing unique sensory feedback to help your child thrive. Interesting supplies. Fun Activities. A unique smell. Taste-worthy ingredients. When playtime comes, what more could any child want? 

The top half of the image shows the hexagons filled with honeycomb and bees. The bottom half of the image shows the hexagons before they are filled, with a child's hands holding a scoop. In the center, text reads "Honeycomb Sensory Activity."

If you aren’t sure why your child needs sensory play, read The Importance of Sensory Play for Children. It highlights all of the various developmental milestones directly impacted by sensory experience. It’s huge.

From fine motor skills to neural pathways to emotional regulation, sensory play builds up a child in all of the right ways. And it’s not a huge lift for the parent either. In fact, your child might get so engrossed in playtime you have a moment or two to breathe or a chance to fix a home-cooked meal (or ten) while they play at the kitchen counter.

You might have to put up with a little bit of mess every once in a while, but that’s a small price to pay. This type of play is a win for everyone, and we have so many ideas you will never run out. 

How to Make A Honeycomb Sensory Activity

Supplies Needed

  • Honeycomb Cereal
  • Empty Toilet Paper Rolls
  • Yellow Construction Paper
  • Small Toy Bees
  • Scoop or spoon

A collage of four equal squares shows 1) an image with the supplies: honeycomb cereal, toilet paper tubes, scissors, bees and construction paper, 2) an image of cut toilet paper tubes being flattened and folded, 3) an image of hexagons made from toilet paper tubes, and 4) an image of setting up the hexagons with the other supplies for sensory play.

Step-By-Step Instructions

  1. Flatten the toilet paper roll and cut it into sections. You need at least 7.
  2. Shape each section into hexagons.
  3. Place the hexagons on the paper in a honeycomb shape.
  4. Let kids scoop the honeycomb cereal into the toilet paper roll honeycomb.
  5. Let them add bees to the honeycomb if they want to.
  6. Encourage kids to talk about the cereal’s feel, smell, and taste.

Tips to Assemble your Honeycomb Sensory Play Activity

  • Use edible bees instead of toy bees for a fun treat. This is great for little ones who put everything in their mouth. We love this adorable option. This makes it a mostly taste-safe play experience as long as you can keep the cardboard out of their mouths.
  • To easily shape the hexagons, take a flattened section. Move to a spot ⅓ of the way across. The remaining section should be twice as big. Pinch each side there to form a rectangle. Then pinch the sides once more halfway across the long side of the rectangle.
  • To form the big honeycomb, place one hexagon on the paper. Then, add hexagons so they touch each side of the first one all the way around. You should have a total of seven once you’re done.

A small child's hands hover over a scoop of honeycomb cereal and hexagons are placed on yellow construction paper where honeycomb cereal has started to be scooped into the hexagons. A plate of honeycomb cereal sits nearby.

Make Sensory Play Even More Valuable with These Tips

Provide tongs for little hands and encourage your child to pinch the tongs to move the honeycomb. This works a different set of hand muscles necessary for later skills like scissors and pencil grip. You can also encourage your child to pick up the honeycomb between thumb and forefinger to practice pincer grip. 

Give your child a scoop or spoon so that he or she can work on hand-eye coordination and muscle coordination moving scoops of honeycomb into the hexagon shapes. 

If your child has experience with scissors, you can have them help with the cutting and folding of the toilet paper tubes to make hexagons. Just remember to demonstrate (don’t just describe), go slowly, and allow imperfection. This will add one more layer of working on fine motor skills, following directions, and hand-eye coordination. 

Ways to Extend This Sensory Play Activity

Practice counting. Have your child figure out how many pieces of cereal or how many bees will fit in each hexagon. You can also practice subtraction, addition, and if you write a number in each hexagon, one-to-one correspondence and number recognition.

Talk about shapes. Show your child images or objects shaped like hexagons and talk about the number of sides, etc.

Talk about beehives and honeycomb. Look at close-up images of beehives and bees found on the internet and compare the bees honeycomb to the one you made and the cereal.

Make our Bee Life Cycle Sensory Bin and learn about the life cycle of bees.

Practice verbal skills. Ask your child to describe the cereal and other supplies — what does it look like, how does it feel, what is the taste and smell, etc.  

Read books about bees and talk about how bees eat, how honey is made and what the bees do for our world. 

Get into the science. Do this bee pollination experiment, a fun honeycomb experiment, or watch a scientific video about bees together. 

Make bee crafts or bee artwork and display it. 

Contact a local beekeeper or ask your county extension office if they have any kind of bee education programs where you can taste honey, taste honeycomb, and learn about bees from a master.

Hexagons are placed on yellow construction paper and filled with honeycomb cereal. Bees have been placed in most of the hexagons. This is the honeycomb sensory activity.

Books to Read about Bees

  • Give Bees a Chance by Bethany Barton
  • What if There Were No Bees by Suzanne Slade
  • It Starts with a Bee by Jennie Webber
  • The Honeybee by Kirsten Hall
  • UnBEElievables: Honeybee Poems and Paintings by Douglas Florian
  • The Honey Makers by Gail Gibbons
  • The Beeman by Laurie Krebs
     

Filed Under: Sensory, Simple Science Tagged With: sensory play

Textured Water Beads Stress Ball

teal balloon with lumps in it

By Sharla Kostelyk

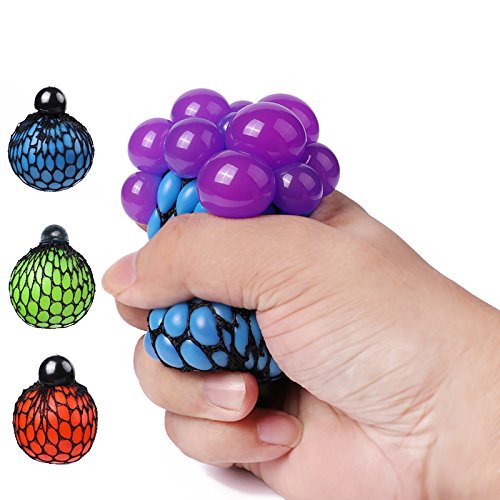
You’ve seen this in the store, and have probably had children begging for them in the aisles, but did you know it’s actually easy and fun to make your own water beads stress ball at home? You’ll have stress relief ready in minutes and the supplies to make more as needed with minimal cost. As your child squeezes and releases the ball, the water beads move around and expand the balloon in curious ways. They are so fun to play with! 

What does a Water Beads Stress Ball do?

When you have nervous energy or stress, having something to do with your hands can be a life saver. It gives you something to focus on besides whatever you are anxious about. Squeezing the ball can be hard work, and will actually build grip strength, in addition to being therapeutic. Repetitive motion helps give the brain a chance to relax.

The tactile, bumpy nature of the textured water beads stress ball provides a distraction from ruminating thoughts and helps a person stay grounded in the present moment through sensory feedback.

This homemade version looks amazing and complicated, but it is actually really simple to make. Tweens and teens can easily get in on the excitement and make their own. Each one will cost just pennies! 

If you have experimented with fidget toys, you know that sometimes all your child needs in order to be able to focus in class, calm down during a test, or function in a loud environment is something to occupy their hands. 

In addition to stress relief and emotional regulation, the stress ball also provides a sensory experience with all of the benefits of sensory play. 

How to Make Textured Water Bead Stress Balls

Supplies Needed:

  • Funnel. The whole in the funnel needs to be bigger than the expanded water beads. You can also use an empty water bottle, cut in half. 
  • Water beads
  • Balloons

Step-By-Step Instructions:

  1. Blow up your balloon and let the air out. This stretches it so that it is ready.
  2. Add your balloon to the bottom of your funnel. 
  3. Add in your material (rice, flour, or water beads) until the balloon is full. 
  4. Tie the balloon and cut the end as close to the knot as possible. 

Tips for Making the Best Water Beads Stress Ball 

  • Pre-soak the water beads before you begin. You do not have to use the full amount of water required. The more excess water the beads absorb, the more easily they will break in the ball. This will take several hours — perhaps even a full day of soaking before the beads before you are ready to make your stress ball. 
  • You can add another balloon on top to make it more secure. 
  • You can keep squishing the material down into the balloon to fill it up or leave extra space, depending on your texture preference. 

What to do with a Stress Ball

Introduce the water beads stress ball at a time that is not stressful. Kids love to play with these because they feel strange and are fun. Have them practice squeezing the ball which provides more intense proprioceptive feedback and deep muscle work for the hands.

Talk about how it feels in their hands and how it makes them feel. Ask them questions about the texture, the experience, etc. Don’t wait for a moment of big emotions to hand your child a stress ball for the first time. 

Keep it in your go bag. Whether in a purse, a backpack, a lunchbox, a diaper bag, or in the back of the car, keep a stress ball with you so that it’s around when you or your child needs one. This is a great thing to have in your Calm Down Kit.

Encourage self-regulation. By making a stress ball available to your child, you can put the power of emotional regulation in their hands. Encourage them to find what they need to calm down in the moment, before a full on meltdown happens. Remind them often that they have access to a stress ball (and/or other stress management tools) and should find it when they need it. 

If needed, you can trade out different stress-relieving toys and fidget toys so that none of them become boring. Some children will want the same thing every time and some will want variety. Figure out what works for your child. We have instructions for making a variety of different sensory balls in case this one is not what your child needs.

*Please note that balloons are a choking hazard so adult supervision should be used at all times.

Filed Under: Crafts and Activities, Sensory Tagged With: sensory play

Chai Tea Playdough

Rolled out play dough with cinnamon sticks and star anise pressed into it.

By Sharla Kostelyk

I love incorporated new and different ingredients into our playdough recipes! Embracing variety provides an ever changing sensory experience for sensory seeking kiddos of all ages. You might be surprised to know that even teenagers will come to the table to play when the playdough smells this good. Get your whole family involved in the making and playing with this Chai Tea Playdough recipe. 

The loose tea in the playdough adds texture and the aroma of the chai tea and spices smells amazing! Add cinnamon sticks and anise stars to your child’s play for a full sensory experience!

Chai Tea Playdough with cinnamon sticks and star anise for sensory play.

Chai Playdough Recipe

  • 1 cup all-purpose flour
  • 1/2 cup salt
  • 1 Tablespoon cream of tartar
  • 1/2 Tablespoon ground cinnamon
  • 1/2 Tablespoon ground ginger
  • 1 cup water
  • 1 Tablespoon vegetable oil
  • 3-4 bags of chai tea

Step-By-Step Instructions

  1. Add the flour, salt, cinnamon, ginger and cream of tartar to a medium mixing bowl. Open 2 tea bags and sprinkle the contents into the flour mixture. Whisk to combine and set aside.
  2. Add the water to a medium saucepan and heat to boil. Remove from heat and add 1-2 tea bags and steep for 3-4 minutes.
  3. Add the vegetable oil to the hot tea mixture. Stir to mix.
  4. Gently pour the flour mixture into the saucepan and stir continuously until a large lump of dough forms.
  5. Allow the playdough to cool for 5 minutes before handling.
  6. Transfer the chai tea playdough to a flat working space and knead for 3-4 minutes or until soft and pliable.
  7. Store in an airtight container (or Ziploc bag) for up to 2 weeks.

Chai Tea Playdough with rolling pin, star anise, cinanmon sticks and other tools.

Chai Tea Play Dough Invitation to Play 

If you involved your children in the process of making the playdough (which I highly recommend) the invitation to play isn’t nearly as much about a verbal invitation as it is the provision of ingredients and supplies to encourage exploration and delight. Star anise and cinnamon sticks are the two items we already recommended having on hand. But it doesn’t have to stop there! A well-rounded collection of playdough tools and toys is an excellent investment.  Since we have a pretty large collection of these tools I like to rotate the selection to keep playdough play fresh and new. Here are a few of our favorites: 

  • Playdough Rollers
  • Playdough Stamps
  • Playdough Cutting Tools

In addition to store-bought and playdough specific tools you can also gather items you already have around the house for your children to use. Since this is taste-safe playdough, you can use standard kitchen items like rolling pins, cookie cutters or cookie stamps, and child-safe knives. 

Other items from around the house can be great additions to your invitation to play! Think of things that can make impressions in the dough: varying sizes of bubble wrap, brushes, buttons, coins, straws, plastic silverware, plastic magnet letters, dice, etc. 

Though not taste safe, found items in nature can also be fun! Pinecones, rocks, sticks, holly leaves, acorns, walnuts, shells, and fossils are all great examples of things you can bring inside for playdough play. Ask your kids what else they can find to use in the playdough. They always have the best ideas!

Rolled out play dough with cinnamon sticks and star anise pressed into it.

Chai Tea Playdough Extension Activities

If the pure sensory experience a a delicious smelling dough with a funky texture isn’t enough for your kiddo, you can always add extra activities to tie the play dough play into other subject areas. From tie ins with great literature to reinforcing math concepts, play dough is a great learning aid. Here are a couple of examples.

Demonstrate simple math concepts using LEGO® impressions in the playdough. Practice addition (adding or counting the dots), subtraction (smoothing out the dots to subtract them), or multiplication (lining up the rows of impressions and counting. the outside two rows to multiply, then physically counting the full total to show how that worked.)

Read books such as Have You Seen My Acorn. Make impressions in the playdough with an acorn to mark the squirrels progress as he quizzes all the animals and chases down clues. Provide your child with a bag of Chai Tea Plaudough with an acorn hidden inside as you finish reading the book and provide an invitation to play, talking about the book as you play together. 

Why Play with Play Dough? 

The sensory benefits alone make the mess of making and playing with play dough a worthwhile experience for children. The smells, the textures, and the proprioceptive feedback provided during playdough play will help a child feel more grounded and secure. As if the sensory benefits are not enough, your child will also be improving fine motor skills, developing cricital thinking skills (What will happen if I do it this way?) and practicing verbal skills (“Mommy, look at the cake I just made!”). If encouraged, playdough play can also lend itself toward pretend play, storytelling and more! Giving your child rich and enticing free play opportunities can only help in so many ways.

Chai Tea Sensory Playdough with chai tea on the side.


Filed Under: Sensory Tagged With: playdough stations, sensory play

Bubble Painting Fish and Turtle

By Sharla Kostelyk

If you are looking for a fun and easy ocean craft you can do with household supplies you already have, try bubble painting a fish and a turtle with your kids. This exciting process art activity engages your kids in a rich sensory experience that also inspires creativity. It’s simple to do and works for all ages, as long as the artist can blow through a straw. 

The top half of the image shows two cups filled with bubbles, overflowing onto the paper to create bubble art. A straw is coming out of one of the cups. The bottom half of the image shows the finished process art. In the middle, text reads "fish and turtle bubble painting".

A win-win activity, bubble painting provides gustatory (oral) sensory feedback, helps increase fine motor skills and hand-eye coordination, stimulates the imagination, while delighting your kids at the same time. When finished, your child will have a unique work of art to enjoy.

Supplies for the Bubble Painting Fish and Turtle

  • Small Cups. Disposable cups make clean-up easier.
  • Bubble Solution. You can use a store-bought mix or make homemade bubble solution (leave out the essential oils from this recipe for this activity.)
  • Green and Blue Food Coloring.
  • Straws.
  • Thick White Paper. The kind meant for watercolor or mixed media would be good.
  • Googly Eyes or Stickers. Googly eyes that have a sticker backing are just as great for fine motor skills as the type you have to glue, and are a little less aggravating.
  • Markers or Crayons.
  • Scissors. To cut out the fish after you are finished. You could then make it into a magnet, use it it as a gift tag, etc.
  • Art Tray. I love these handy trays to keep all the mess contained. You can also use a plastic tablecloth, old newspapers, etc.

Instructions to make a Bubble Painting Fish or Turtle

  1. Fill cups 1⁄2 way with bubble solution
  2. Add 3-5 drops food coloring into each cup
  3. Place cardstock into tray
  4. Hold cup with bubbles over the paper
  5. Blow into each cup through a straw, allowing bubbles to spill over the cup and onto the paper
  6. Immediately pat dry.
  7. Once dry, add googly eyes.
  8. Color the outlines of the animals using markers or crayons.

A collage image shows four equal squares containing a different step in the process of bubble painting a fish and turtle. First image shows the cup, paint, art tray and paper. Second image shows cups with bubbles and straws on top of paper. Third and fourth image show bubbles overflowing from the cup onto the paper to create art.

Tips for the Best Bubble Painting Experience

I’ve been doing bubble painting with my kiddos since my oldest were little, and I have some tips to make things easier and better all around.

Do not use paint with younger kids. Use food coloring, because it is taste safe in the event this mouth-centered activity goes a little awry.

Throw the mess away. I recommend using disposable straws, and not a reuseable straw since it will be tricky to get the paint washed out. 

Thin as needed. If the bubble solution is to thick to blow easily, just add a little water at a time till you get the perfect viscosity.

Wear old clothes. Because you need to use food coloring, getting stains out of clothing might be tricky. You probably will be able to get stains out, but it might be more trouble than it is worth if you can find paint clothes that don’t matter. 

Take it outside. The easiest way to contain the mess is to do the whole project outside where it can be washed away when you are finished. 

Poke a hole. If you make a hole or slit in the straw about one inch below the top, it will help prevent sucking the liquid up into the mouth. This is not foolproof, but it helps.

Important Note: Only do this activity with kids who are able to blow through a straw without sucking up the bubble mixture. 

Variations for this Activity

Experiment with paints and colors. If you have older kids with little to no risk, you can experiment with different types of non-toxic paints for a more intense color and different effects. You can combine different colors and see what happens if bubbles are dipped into two different colors. 

Different Tools. The size of the straw can change up the results. Your child might also enjoy using a bubble wand instead of a straw.  

Use different bubble solutions. Each bubble solution is different. Some make big bubbles and some make tiny bubbles. Some make super strong bubbles and some are just normal. You can find all kinds of recipes on the internet to try, or you can just buy a bottle at the local store.

Make it a print. Instead of overflowing bubbles onto the paper like we did, you can instead fill up your art tray with bubbles and then press paper down onto the bubbles to make a print.

Try the blowover method. Take the paper outside and blow the bubbles onto the paper using a bubble wand. 

Cups overflowing with bubbles rest on watercolor paper, and bubbles cover the paper as they leave the cup. Each cup contains a straw.

What to Do With Your Bubble Paintings

Once you have the little fishies or turtles painted and drawn, you can cut them out. Then, you can glue magnets on the back to make refrigerator magnets or a magnet fishing game. You can use them on notecards. They can be hung on a mobile or straight on a wall. Fish and turtles can be used to decorate containers, classrooms, posters, and more! They could even be turned into ornaments.

Frequently Asked Questions

I have a toddler. Can we enjoy bubble painting?

Yes. As long as your child can blow through a straw and isn’t likely to suck through the straw, you can have fun with this activity. Your toddler will be captivated by all of the swirling, poppable color. 

I have a tween. Is bubble painting worth it? 

Yes. Older kids and adults will enjoy experimenting with different techniques, effects, and ideas to come up with even more creative bubble art.

Why should I care about doing process art with my kids?

Process art is all about the experience. Its not about the end result at all — there is no judgement. Your child is free to explore and become captivated by the experience without fear. 

More Sensory Painting Activities

  • Bubble Wrap Body Slam Painting
  • Edible Freezie Painting
  • Ice Painting
  • Cotton Ball Painting
  • Shaving Cream Polka-Dot Sidewalk Painting

Filed Under: Crafts and Activities, Sensory

Exercise Bingo Game Free Printable

cartoon kids jumping on a mini trampoline with text in a grid beside them

By Sharla Kostelyk

What if you know you need to get your kids moving more but aren’t sure how to make that happen? Maybe it’s raining outside, or maybe they are angry at their bikes or afraid of bees or something. Perhaps your child is just resistant to movement completely. Whether you need a complete change of pace or a fun way to get everyone warmed up, Exercise Bingo is the perfect choice. 

Words Exercise Bingo at the top, kids jumping on a trampoline on the left, and the printable game shown on the right.

If you’re looking for other interactive sensory Bingo experiences, our Yoga Bingo is a great option. While the suggestions in this Exercise Bingo are more alerting in terms of sensory input, the Yoga Bingo suggestions are perfect for calming.

The Benefits of Exercise Bingo

Wake up the brain. Have you seen what happens to the brain when you exercise? The heat map of the brain after exercise is incredible. All of those neural pathways light up and get ready to receive information. I like to tell my kids exercise is like magic for the brain. If your child is stuck on math, have them take a break. No matter how hard it is to put the pencil down, have the kids step away from math and gather for Exercise Bingo. Ten or fifteen minutes playing this game and you can reset your entire day and wrap your brain around math again. 

Resolve big emotions. Exercise releases endorphins, and endorphins can help calm those big emotions. So if Mom is having a grumpy day after the math struggle, she should join in Exercise Bingo too. 

Sensory Feedback. If a child has lost their place in space (proprioception), exercise is a grounding activity that will help your child get that sense of normalcy and security they crave. Pressure on muscles and joints through exercise is an invaluable sensory experience your kids will come to crave. 

The proof is in the pudding. I know for me, my kids did not believe the power of exercise until they experienced it for themselves. I showed them the pictures of the brain after exercise, and then had them try school work after cardio. Now when they are struggling, they voluntarily find a physical activity. This is something that happens over time, not overnight so don’t give up modeling Exercise Bingo with your kids. 

How to Play Exercise Bingo

Supplies

  • Printout of the sheet for each child.
  • Laminating the printouts will allow you to use them over and over with dry erase markers.
  • If you don’t want to laminate them, you could use stickers in the boxes, which is also fun.

Instructions

  1. Complete an exercise. 
  2. Mark off the box for that activity. 
  3. Complete a row to win.

Variations for Exercise Bingo

While at it’s core, the steps I described above are how to play, I love the fact that bingo gives you so much flexibility. Try any of these variations! 

Work in teams or as individuals.

Reward completion of rows, four corners, or the entire board with different levels of prizes.

You could also give a bingo award for learning four new skills, trying for arm exercises, etc. Get creative with the groupings!

Fun fact: Exercise Bingo is a great way to run off some energy at stops on long car trips! 

Exercise Bingo Printable form.

What Kids Practice During Exercise Bingo

Balance. Many of the exercises require balance and coordination to be completed correctly. Of course, they don’t have to be correct every time you play, but over time with consistency these skills will improve.

Following Directions. If they are uncertain what a specific exercise is, they will have to listen and follow instructions to get credit for the activity. 

Large Muscle Movement. Coordinating large muscle movement (gross motor skills) is an essential first step in developing small muscle movement (fine motor skills). If your child is struggling with fine motor skills, start with exercise.

Proprioception. Kids who struggle understanding where there body is in relation to the world (sensory perception) benefit so much from grounding activities that provide direct feedback about body position. That’s what exercise is – it’s proprioception practice. Yoga Bingo is another fantastic way to work on this type of feedback.

Names of Exercises. Knowing what a squat is or what tug of war is — these are actual concepts that kids should learn and recognize. It’s a whole new vocabulary. A shocking number of kids don’t know what it means to frog jump or crab walk and all of these exercises are so good for body development, but are also a part of the common shared experience — helping us relate to each other. 

Tips for Exercise Bingo Success

Keep it low key and low pressure. Turning exercise into something stressful is not a good idea, so take it easy at first, set minimal expectations, and keep everything as light and fun as possible.

Participate with your kids. Kids are amazing imitators and if they see you having fun with an activity, they are far more likely to join in. Conversely if they hear you grousing about an activity, they are far less likely to have a good attitude. Set the bar high by having a happy heart and enjoying the game.

Make sure you have plenty of useable space.  Whether inside or outside, everyone needs room to move around without bumping into each other so spread out, and clean up that toy room if necessary. 

Encourage positive participation. You don’t have to offer physical rewards like toys or candy or treats. Encouragement is so powerful! Use life-giving words to encourage your kids when you see them participating in something that stretches them, demonstrating a good attitude, or setting a good example for siblings.

Grab your free printable Exercise Bingo game here:


Filed Under: Family Games, Sensory

Harvest Sensory Bottle

A very close-up picture of the harvest sensory bottle with one of the sunflowers at the front.

By Sharla Kostelyk

Do you have toddlers to teens at home and find yourself needing a handy way to calm someone down, keep a little someone occupied in a quiet setting, or fight boredom on a long trip? You are not alone! Our Harvest Sensory Bottle is the perfect tool to have on hand this Fall when the need for distraction arises. Your children will be enthralled. 

A plastic bottle filled with various items including mixed dry beans and sunflowers to represent the harvest or fall.

If you haven’t read about sensory strewing before, be sure to check out that article to learn how valuable it is to just leave things like sensory bottles laying around, waiting to be discovered. Implementing this concept in your home can be life changing! That’s why I do what I do.

How to Make a Harvest Sensory Bottle

Supplies

  • Sticks. Gather these from outside.
  • Acorns. Gather these from outside as well. 
  • Resin Pumpkins and Leaves. Found in the Halloween section at Dollar Tree or other dollar store
  • Sunflowers. Found in the fall section
  • Mini Fall Florals. Look for the tan spiky pieces.
  • Multi-Colored Beans. 
  • Plastic Bottle. I get mine from Amazon.

Supplies for Harvest Sensory Bottle: flowers, beans, bottle, stems.

Steps to Make Sensory Bottles

  1. Wash the jar with hot soapy water and dry it.
  2. Layer the beans with the other supplies on the list. 
  3. Depending on the child, you may want to super glue the lid in place. On the other hand you might want to re-use the bottle so it is up to you.

Large image of the harvest sensory bottle with smaller close-ups of different sections of the jar.

Tips to Make Your Harvest Sensory Bottle the Best It Can Be

Do not overfill the bottle. Ideally you want the items in the sensory jar or sensory bottle to be able to move around, make noise, disappear and reappear, etc.

Even young children can enjoy sensory bottles with small objects as long as the bottles are glued shut and the activity is supervised. But the cool thing is, big kids and adults enjoy them as well! 

Can’t find everything on our list? Other small items found at the Dollar store while you are there can be equally delightful. Small erasers, beads, flowers, or toys that fit with the harvest theme can be substituted! 

Clean it off first. As you gather sticks, acorns, or other small items from the outdoors, be sure to tap the sticks on the ground to shake off any loose bark or dirt that might make a mess in the bottle and rinse any dirt off of the acorns. Give everything time to dry before you make the bottle so you don’t invite moisture to the party either.

You will probably have enough supplies to make two bottles. Sharing the expense with another mom is a great idea!

How to Use a Sensory Bottle

This calming activity can quiet an over stimulated child, help someone regain focus and concentration, end tantrums or boredom, and inspire hours of quiet exploration. Here are just some of the ways one of these bottles can provide a valuable experience for your child.

Visual Perception Skill Building.

This refers to the ability to make visual connections between to options and develop an understanding of depth, spatial relationships, and positional concepts like above, below, under, and behind. 

Problem Solving

“I’m sure I just found a purple bean. I want to find it again. Let me see how to make that reappear.” These are the kinds of thoughts that come out of sensory bottle play. 

Auditory Sensory Feedback

The sound of the beans in the bottle can have a calming or stabilizing effect. It also helps exercise those auditory discrimination skills. 

Large Muscle Movement

The smaller the child, the more of a large muscle workout a sensory bottle will be, and as they shake it, move it, turn it and bang it around they will be getting all kinds of kinesthetic feedback to the central nervous system. Just remember you cannot allow free play with a sensory bottle unless you are present to supervise. Even a glued on lid can come undone. Ask me how I know! 

Harvest Sensory Bottle Expansion Activities

  • Read books about Fall. Some suggestions include Leaf Man by Louis Ehlert and Fall Mixed Up.
  • Rake and jump in leaves together. 
  • Go on a hike in the woods to look for items in the sensory bottle. 
  • Find and draw or name each different kind of item in the sensory bottle. 
  • Visit a field of sunflowers.
  • Talk about the four seasons.

A very close-up picture of the harvest sensory bottle with one of the sunflowers at the front.

More Fantastic Sensory Bottles to Make

We love this Thanksgiving Sensory Bottle and its the perfect time of year to buy the supplies for both this and the Harvest one at the same time. For some extra fun, make this I Spy Birds Sensory Bottle. The I Spy bottles are perfect for taking on long car rides or events that will get tedious for little ones. We have so many different sensory bottle ideas, but one more I want to specifically call out that I think you will love is the Van Gogh Inspired Starry Night Sensory bottle.  

Filed Under: Sensory Tagged With: sensory bottles, sensory play

  • Page 1
  • Page 2
  • Page 3
  • Interim pages omitted …
  • Page 48
  • Go to Next Page »

Primary Sidebar

Categories

We are a participant in the Amazon Services LLC Associates Program, an affiliate advertising program designed to provide a means for us to earn fees by linking to Amazon.com and affiliated sites.

Copyright © 2025 • The Chaos and the Clutter • Site Design by Jeni @ The Blog Maven

Return to top of page

Copyright © 2025 · Chaos and the Clutter 2.0 on Genesis Framework · WordPress · Log in