• Skip to primary navigation
  • Skip to main content
  • Skip to primary sidebar
  • Home
  • About
  • Contact
  • Privacy + Terms
  • Affiliates

The Chaos and the Clutter

  • Facebook
  • Twitter
  • Pinterest
  • Google Plus
  • RSS
  • Email
  • School at Home
  • Sensory
    • Sensory Processing Disorder
    • Awesome Sensory Play Activities
      • Sensory Bins
      • Sensory Bottles
      • Sensory Bags
  • Family Games
    • Minute to Win It Games
  • Special Needs Parenting
    • Childhood Anxiety
    • Reactive Attachment Disorder
    • Sensory Processing Disorder
  • Store
  • Course Login

Crafts and Activities

Textured Water Beads Stress Ball

teal balloon with lumps in it

By Sharla Kostelyk

You’ve seen this in the store, and have probably had children begging for them in the aisles, but did you know it’s actually easy and fun to make your own water beads stress ball at home? You’ll have stress relief ready in minutes and the supplies to make more as needed with minimal cost. As your child squeezes and releases the ball, the water beads move around and expand the balloon in curious ways. They are so fun to play with! 

What does a Water Beads Stress Ball do?

When you have nervous energy or stress, having something to do with your hands can be a life saver. It gives you something to focus on besides whatever you are anxious about. Squeezing the ball can be hard work, and will actually build grip strength, in addition to being therapeutic. Repetitive motion helps give the brain a chance to relax.

The tactile, bumpy nature of the textured water beads stress ball provides a distraction from ruminating thoughts and helps a person stay grounded in the present moment through sensory feedback.

This homemade version looks amazing and complicated, but it is actually really simple to make. Tweens and teens can easily get in on the excitement and make their own. Each one will cost just pennies! 

If you have experimented with fidget toys, you know that sometimes all your child needs in order to be able to focus in class, calm down during a test, or function in a loud environment is something to occupy their hands. 

In addition to stress relief and emotional regulation, the stress ball also provides a sensory experience with all of the benefits of sensory play. 

How to Make Textured Water Bead Stress Balls

Supplies Needed:

  • Funnel. The whole in the funnel needs to be bigger than the expanded water beads. You can also use an empty water bottle, cut in half. 
  • Water beads
  • Balloons

Step-By-Step Instructions:

  1. Blow up your balloon and let the air out. This stretches it so that it is ready.
  2. Add your balloon to the bottom of your funnel. 
  3. Add in your material (rice, flour, or water beads) until the balloon is full. 
  4. Tie the balloon and cut the end as close to the knot as possible. 

Tips for Making the Best Water Beads Stress Ball 

  • Pre-soak the water beads before you begin. You do not have to use the full amount of water required. The more excess water the beads absorb, the more easily they will break in the ball. This will take several hours — perhaps even a full day of soaking before the beads before you are ready to make your stress ball. 
  • You can add another balloon on top to make it more secure. 
  • You can keep squishing the material down into the balloon to fill it up or leave extra space, depending on your texture preference. 

What to do with a Stress Ball

Introduce the water beads stress ball at a time that is not stressful. Kids love to play with these because they feel strange and are fun. Have them practice squeezing the ball which provides more intense proprioceptive feedback and deep muscle work for the hands.

Talk about how it feels in their hands and how it makes them feel. Ask them questions about the texture, the experience, etc. Don’t wait for a moment of big emotions to hand your child a stress ball for the first time. 

Keep it in your go bag. Whether in a purse, a backpack, a lunchbox, a diaper bag, or in the back of the car, keep a stress ball with you so that it’s around when you or your child needs one. This is a great thing to have in your Calm Down Kit.

Encourage self-regulation. By making a stress ball available to your child, you can put the power of emotional regulation in their hands. Encourage them to find what they need to calm down in the moment, before a full on meltdown happens. Remind them often that they have access to a stress ball (and/or other stress management tools) and should find it when they need it. 

If needed, you can trade out different stress-relieving toys and fidget toys so that none of them become boring. Some children will want the same thing every time and some will want variety. Figure out what works for your child. We have instructions for making a variety of different sensory balls in case this one is not what your child needs.

*Please note that balloons are a choking hazard so adult supervision should be used at all times.

Filed Under: Crafts and Activities, Sensory Tagged With: sensory play

Bubble Painting Fish and Turtle

By Sharla Kostelyk

If you are looking for a fun and easy ocean craft you can do with household supplies you already have, try bubble painting a fish and a turtle with your kids. This exciting process art activity engages your kids in a rich sensory experience that also inspires creativity. It’s simple to do and works for all ages, as long as the artist can blow through a straw. 

The top half of the image shows two cups filled with bubbles, overflowing onto the paper to create bubble art. A straw is coming out of one of the cups. The bottom half of the image shows the finished process art. In the middle, text reads "fish and turtle bubble painting".

A win-win activity, bubble painting provides gustatory (oral) sensory feedback, helps increase fine motor skills and hand-eye coordination, stimulates the imagination, while delighting your kids at the same time. When finished, your child will have a unique work of art to enjoy.

Supplies for the Bubble Painting Fish and Turtle

  • Small Cups. Disposable cups make clean-up easier.
  • Bubble Solution. You can use a store-bought mix or make homemade bubble solution (leave out the essential oils from this recipe for this activity.)
  • Green and Blue Food Coloring.
  • Straws.
  • Thick White Paper. The kind meant for watercolor or mixed media would be good.
  • Googly Eyes or Stickers. Googly eyes that have a sticker backing are just as great for fine motor skills as the type you have to glue, and are a little less aggravating.
  • Markers or Crayons.
  • Scissors. To cut out the fish after you are finished. You could then make it into a magnet, use it it as a gift tag, etc.
  • Art Tray. I love these handy trays to keep all the mess contained. You can also use a plastic tablecloth, old newspapers, etc.

Instructions to make a Bubble Painting Fish or Turtle

  1. Fill cups 1⁄2 way with bubble solution
  2. Add 3-5 drops food coloring into each cup
  3. Place cardstock into tray
  4. Hold cup with bubbles over the paper
  5. Blow into each cup through a straw, allowing bubbles to spill over the cup and onto the paper
  6. Immediately pat dry.
  7. Once dry, add googly eyes.
  8. Color the outlines of the animals using markers or crayons.

A collage image shows four equal squares containing a different step in the process of bubble painting a fish and turtle. First image shows the cup, paint, art tray and paper. Second image shows cups with bubbles and straws on top of paper. Third and fourth image show bubbles overflowing from the cup onto the paper to create art.

Tips for the Best Bubble Painting Experience

I’ve been doing bubble painting with my kiddos since my oldest were little, and I have some tips to make things easier and better all around.

Do not use paint with younger kids. Use food coloring, because it is taste safe in the event this mouth-centered activity goes a little awry.

Throw the mess away. I recommend using disposable straws, and not a reuseable straw since it will be tricky to get the paint washed out. 

Thin as needed. If the bubble solution is to thick to blow easily, just add a little water at a time till you get the perfect viscosity.

Wear old clothes. Because you need to use food coloring, getting stains out of clothing might be tricky. You probably will be able to get stains out, but it might be more trouble than it is worth if you can find paint clothes that don’t matter. 

Take it outside. The easiest way to contain the mess is to do the whole project outside where it can be washed away when you are finished. 

Poke a hole. If you make a hole or slit in the straw about one inch below the top, it will help prevent sucking the liquid up into the mouth. This is not foolproof, but it helps.

Important Note: Only do this activity with kids who are able to blow through a straw without sucking up the bubble mixture. 

Variations for this Activity

Experiment with paints and colors. If you have older kids with little to no risk, you can experiment with different types of non-toxic paints for a more intense color and different effects. You can combine different colors and see what happens if bubbles are dipped into two different colors. 

Different Tools. The size of the straw can change up the results. Your child might also enjoy using a bubble wand instead of a straw.  

Use different bubble solutions. Each bubble solution is different. Some make big bubbles and some make tiny bubbles. Some make super strong bubbles and some are just normal. You can find all kinds of recipes on the internet to try, or you can just buy a bottle at the local store.

Make it a print. Instead of overflowing bubbles onto the paper like we did, you can instead fill up your art tray with bubbles and then press paper down onto the bubbles to make a print.

Try the blowover method. Take the paper outside and blow the bubbles onto the paper using a bubble wand. 

Cups overflowing with bubbles rest on watercolor paper, and bubbles cover the paper as they leave the cup. Each cup contains a straw.

What to Do With Your Bubble Paintings

Once you have the little fishies or turtles painted and drawn, you can cut them out. Then, you can glue magnets on the back to make refrigerator magnets or a magnet fishing game. You can use them on notecards. They can be hung on a mobile or straight on a wall. Fish and turtles can be used to decorate containers, classrooms, posters, and more! They could even be turned into ornaments.

Frequently Asked Questions

I have a toddler. Can we enjoy bubble painting?

Yes. As long as your child can blow through a straw and isn’t likely to suck through the straw, you can have fun with this activity. Your toddler will be captivated by all of the swirling, poppable color. 

I have a tween. Is bubble painting worth it? 

Yes. Older kids and adults will enjoy experimenting with different techniques, effects, and ideas to come up with even more creative bubble art.

Why should I care about doing process art with my kids?

Process art is all about the experience. Its not about the end result at all — there is no judgement. Your child is free to explore and become captivated by the experience without fear. 

More Sensory Painting Activities

  • Bubble Wrap Body Slam Painting
  • Edible Freezie Painting
  • Ice Painting
  • Cotton Ball Painting
  • Shaving Cream Polka-Dot Sidewalk Painting

Filed Under: Crafts and Activities, Sensory

Cool Whip Play Dough

a ball of white dough sits atop a container of Cool Whip

By Sharla Kostelyk

Did you know that the simple act of playing with play dough has incredible benefits for kids? It’s a fantastic tool to keep in your parenting toolbox at all times. This taste-safe recipe for Cool Whip Play Dough is a fun way to engage your kids in sensory play for thirty minutes, an hour, or maybe an entire afternoon. 

The top half of this image shows a collection of cookie cutters and dough rollers with a container of Cool Whip and play dough with various letters pressed into it. The bottom half of the image shows a container of Cool Whip with play dough balled on top of it. In the center, text reads "Cool Whip Play Dough".

We like to make new and exciting playdough recipes to change things up, even though we love our Basic Homemade Playdough Recipe for everyday use. This recipe is so fun for kids because it is edible playdough, and they can help make this simple recipe. In fact, I recommend letting your kids help whenever possible!

Pro Tip: This is the perfect way to use up Cool Whip you forgot about over the holidays and found in your freezer three months later!

Cool Whip Play Dough Recipe

  • 8 oz. frozen Cool Whip
  • 1 cup powdered sugar
  • 2-3 cups cornstarch
  • Food coloring – optional

A close up of a container of Cool Whip with a large ball of play dough on top.

How to Make Cool Whip Play Dough

  1. In a medium bowl, add the frozen Cool Whip and 1 cup of powdered sugar. Stir to mix together well.
  2. Add 1 cup of cornstarch to the Cool Whip and powdered sugar, then mix again.
  3. If you’d like to add food coloring, add 4-5 drops and mix in.
  4. Place the Cool Whip mixture back into the container and refreeze overnight.
  5. Add the Cool Whip mixture into a bowl.
  6. Add another cup of cornstarch and mix well with a spoon.
  7. If the mixture is still sticky, add another 1⁄2 cup of cornstarch and knead with your hands.
  8. Play!

Pro Tip: If the Cool Whip play dough is still sticky, add the remaining 1⁄2 cup of cornstarch and knead well. More cornstarch may be needed as the dough absorbs moisture in the air over the next few days.

The steps to make this Cool Whip Play Dough Recipe are demonstrated in picture form with a mixing bowl, plastic spoon, and the ingredients (cool whip, powdered sugar, corn starch).

How to Store Cool Whip Play Dough

This is not the kind of play dough you can keep on the counter. Instead, store your leftover edible playdough in an air tight container in the refrigerator for 2-3 days.

Variations

You can substitute some of the cornstarch with chocolate cocoa powder or strawberry drink mix powder for different flavors. 

A bit of peppermint flavoring (not extract) will make this the perfect Christmas or winter play dough and add that amazing smell for sensory play. I don’t recommend using extracts because of the bitter taste of uncooked alcohol, but you can find alcohol-free flavoring oils in the cake decorating section of your local craft store.

Playing with Play Dough

I’m always looking for common household objects that will make our playdough play more fun. Set out the play dough with a few interesting possibilities and create an invitation to play. Here are some fantastic ideas for things that either cut play dough or make fun imprints, and most of these you already have or can grab at the dollar store.

  • Plastic Cups
  • Plastic Cookie Cutters (letters and numbers are fabulous!)
  • Cookie Press Cutters 
  • Dough Roller
  • Toy Rings or Jewelry
  • Lego® or Duplo®  (this may be a permanent sacrifice, so proceed with caution). 
  • Plastic silverwear (knives, forks, spoons)
  • Combs
  • Plastic Beads
  • Bubble Wrap
  • Hair Brush
  • Whisk
  • Plastic Animals
  • tooth brushes
  • doggy toothbrush 
  • leaves, flowers, and plants

Pro Tip: Contain the mess with play dough mats. I hear parents mention repeatedly that the reason they don’t do “XYZ” is because they don’t like the mess. As grown-ups we can figure out ways to contain and deal with that mess for a few years so that our kids get the powerful benefits of sensory play. Our Play Dough Mats Bundle can help you, and will even extend the fun! As a side note, this edible play dough wipes up easily with a hot wash cloth, and stray pieces on the floor may be snapped up by your pets.

A collection of cookie cutters and dough rollers with a container of Cool Whip and play dough with various letters pressed into it.

The Benefits of Play Dough Play

This playdough provides significant sensory feedback, including tactile (touch), proprioceptive from the squeezing and squishing of the dough, and gustatory (taste) sensory input. If you add smelly food-safe flavoring oils it can also add olfactory (smell) sensory input just like our Pudding Playdough or Melting Ice Cream Playdough.

Besides sensory input, play dough also builds fine motor skills, hand-eye coordination, imagination, concentration, and problem solving.

Like most sensory play, playdough is therapeutic and can relieve stress or tension as a calm-down activity for both kids and adults. Try our Calming Lavender Scented Playdough.

This is a huge list of benefits, and doesn’t even touch on ideas for using play dough to extend learning in math, science, and other academic areas — check out Dinosaur Fossils in Playdough as an example!

Tips to Keep Play Dough Time Fun and Interesting

Even though the sensory input is invaluable, some kids might find play dough boring after a while, and need inspiration to keep enjoying the experience. Here are some ideas.

Change up the toys. Don’t give your child all the things for play dough all at once, keep a few different bags of play dough tools and toys to rotate through. 

Change up the recipes. We have a huge and growing collection of play dough recipes on our site!

Connect it to hobbies and interests. Whatever your child is into right now can be connected to sensory play whether its play dough or sensory bins. Dinosaurs? No problem. Counting. Easy! Flowers? Piece of cake! 

Change the smell. Some kids may dislike the natural smell of our play dough recipes. Add a drop or two of essential oils, extracts, or food-safe flavorings to keep it fresh. *Make sure to use food-safe ingredients if your child puts everything in their mouths!

More Thematic Play Dough Recipes Your Child will Love

Frozen Inspired Elsa Microwave Playdough

Peter Rabbit Playdough Invitation to Play

Apple Tree Colour and Counting Playdough Game

Rainbow Playdough Colour and Counting Game

Filed Under: Crafts and Activities, Sensory Tagged With: sensory play

5 Little Ducks Activities for Preschool

sensory bottle laying on the book 5 Little Ducks

By Sharla Kostelyk

Give your little one a chance to have some fun as they learn with these cute 5 Little Ducts activities. Make your own duck-filled sensory bottle for your kids to play with as they enjoy the book. They’ll have fun using their different senses to play along as you read a sweet nursery rhyme book.sensory bottle with a rubber duck and blue beads in it next to a children's book

5 Little Ducks Sensory Bottle:

Supplies needed:

  • 16 ounce sensory bottle
  • 5 ounce bottle of Elmer’s Clear Glue
  • 5 small rubber duck toys
  • Blue glass stones/gems
  • Water

glue, two empty bottles, 5 small rubber duck toys, and blue beads

Instructions:

  1. Open the sensory bottle. Pour the whole bottle of glue into the bottle.
  2. Add the glass stones and gems to the bottom of the bottle, then place the ducks inside.
  3. Fill the bottle with water, leaving a little room at the top empty.
  4. Close the lid. Secure the lid with tape or glue, if desired, to ensure the bottle doesn’t leak.
  5. Shake the contents of the bottle until all the glue, gems, and ducks move around freely.

Note: You may have bubbles appear shaking the bottle for the first time. Allow the bubbles to settle and disappear after shaking.

glue, blue beads, small rubber duck toys, and clear bottles

5 Little Ducks Preschool Activities

This cute duck craft is the perfect way to have some fun as you read! That’s because this sensory bottle goes along with the story in the popular children’s book, 5 Little Ducks.sensory bottle laying on the book 5 Little Ducks

In the book, a mother duck patiently awaits Spring, when her five baby ducks – all grown up – return with their new families. Throughout the story, your preschooler will have the chance to practice counting and color recognition, making it a great way to reinforce the concepts they’re learning in school.

Read the book aloud to your kids or watch this YouTube read-along. 

And after you finish reading the story, you can continue the learning process as your little ones make and play with their own sensory bottle. Once the bottle is put together, they can:

  • Count the ducks in the bottle as they are reading, moving the bottle around.
  • Match the colors in the bottle to the colors in the book.
  • Watch the gems sink to the bottom while the ducks float to the top.

small hand holding a sensory bottle with blue water and rubber ducks in it

Other Activities to Correspond with the 5 Little Ducks Book and Song:

  • 5 Little Ducks Storytelling Sensory Tub
  • 5 Little Ducks Math Activities
  • Printable Preschool Number Line for 5 Little Ducks 
  • 5 Little Ducks Printable Pack
  • 5 Little Ducks Activities for Kindergarten
  • Felt Board for 5 Little Ducks Learning and Play
  • 5 Little Ducks Fingerplay
  • Count and Circle 5 Little Ducks Craft
  • Hands on Fun with the 5 Little Ducklings
  • 5 Little Ducks Nursery Rhyme Rocks
  • Printable Duck Puppets and Song

You may be interested in these other book related kids activities:

  • A Bad Case of Stripes Activities
  • Boom Chicka Boom Boom Activities
  • Click Clack Moo Cows That Type Activities

Filed Under: Crafts and Activities Tagged With: sensory bottles, sensory play

Pudding Playdough

pink circle cookie cutter next to yellow playdough covered in candy sprinkles

By Sharla Kostelyk

Having taste safe sensory play recipes creates a wonderful opportunity for toddlers and preschoolers to create. With just 3 ingredients, this pudding playdough is easy to make and it’s completely edible.yellow play dough topped with multicolored sprinkles
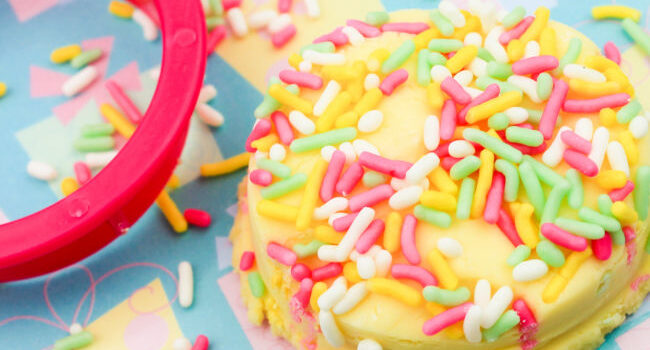
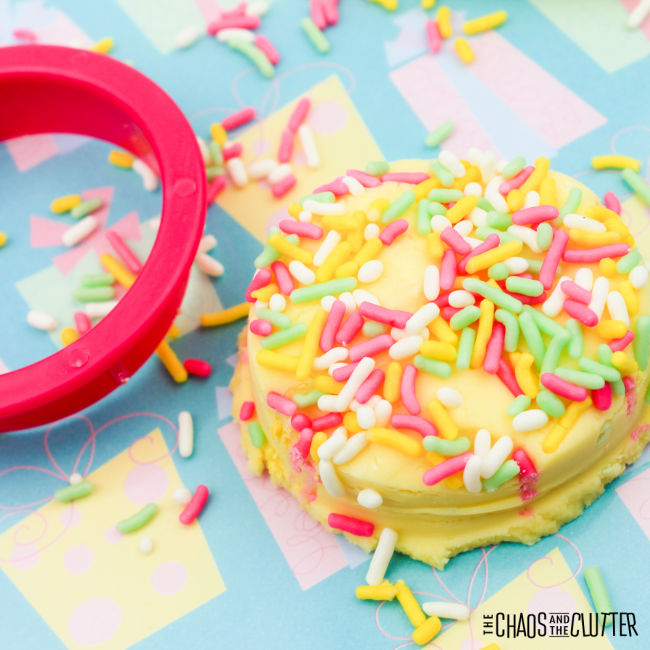
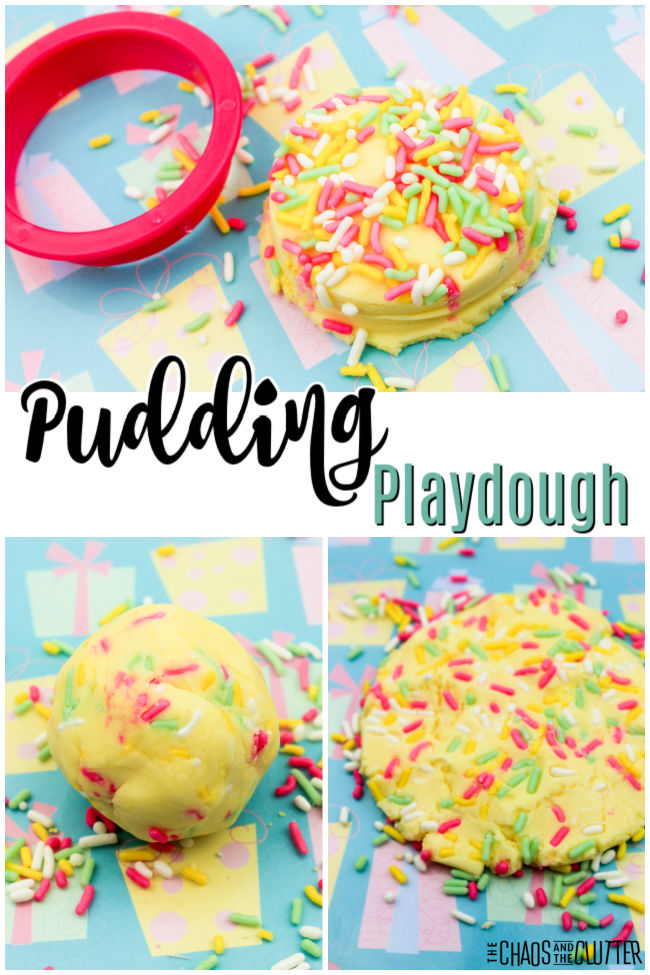
Kids can mould and shape to their heart’s content. It’s such a fun activity.

We love creating taste safe sensory play recipes like our Edible Shark Fluffy Slime, Condensed Milk Edible Paint, or Edible Freezie Painting.

Pudding Playdough Recipe:

Supplies needed:

  • ¼ cup vanilla flavored instant pudding mix (note: if you purchase the 3.4 oz. box, you will have some left over to make a second batch)
  • 1 cup cornstarch
  • ⅓ cup warm water
  • mixing bowl
  • mixing spoon
  • candy sprinkles (optional)
  • cookie cutters (optional)

Instructions:

  1. Add the pudding mix to the mixing bowl.
  2. Add half of the corn starch to the bowl.
  3. Pour in the water.
  4. Stir to mix the dough.
  5. Add in the other half of the corn starch.
  6. Mix well.
  7. Finish by kneading the dough with your hands until you get the desired consistency. The dough should feel soft to the touch when you start mixing and should not be sticky.
  8. If you find that your dough is sticky, add more corn starch.

If you want, you can add the candy sprinkles to the dough.collage of photos of making playdough out of vanilla pudding

Your child can play with the playdough on the table or on a plastic play mat for easy cleanup.

You can set out cookie cutters to add a fine motor element to the playdough station.

When done playing, store any leftover dough in an airtight container in the fridge.

pink circle cookie cutter next to yellow playdough covered in candy sprinkles

Sensory Benefits:

The dough naturally smells of vanilla because of the vanilla pudding mix, so there are many sensory elements to this playdough. It gives tactile (touch), olfactory (smell), proprioceptive from the squeezing and squishing of the dough, and gustatory (taste) sensory input. 

Why use taste safe playdough?

The high salt content in regular playdough can be dangerous when eaten. For young children who are at that age and stage of putting everything in their mouths or for older kids who have a hard time understanding not to eat the dough, taste safe dough provides a wonderful alternative.collage of photos of yellow playdough topped with edible sprinkles
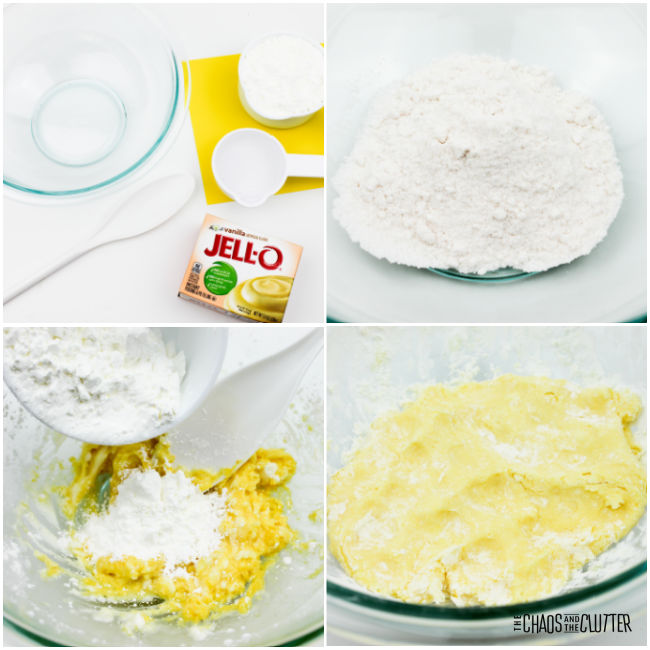
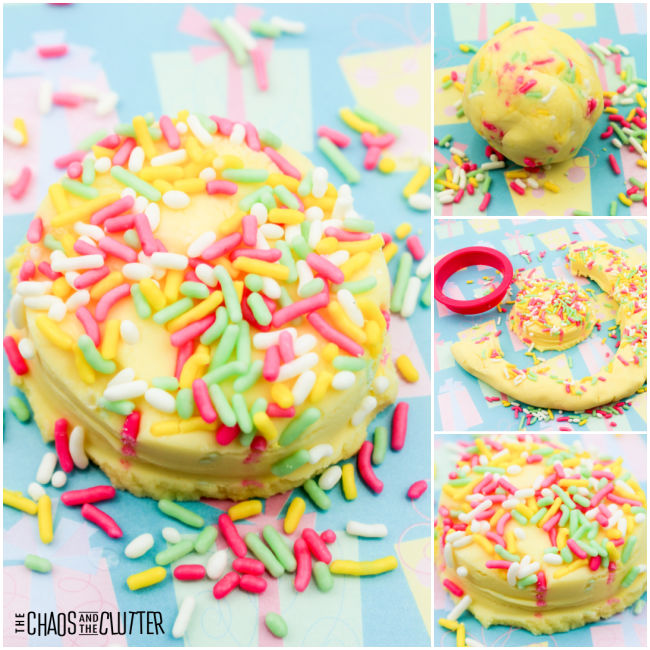
The ingredients are ones that you may already have in your pantry which is another benefit to choosing to make this edible pudding play dough.

Variations on this pudding playdough recipe:

  • Use lemon pudding mix, chocolate pudding mix, or butterscotch pudding mix to change the flavour and the colour.

Looking for more awesome sensory play recipes for kids? You can grab a free sample chapter of our Sensory Play Recipes eBook here.

Check out some of our other taste-safe play recipes:

Condensed Milk Paintice cube tray with paint while a hand paints a rainbow with a yellow brush

Shark Fluffy Slime

Filed Under: Crafts and Activities Tagged With: playdough stations, sensory play

Grab Bag Game

dice that each show a 4 rolled sit among candy and small toys

By Sharla Kostelyk

Create a simple grab bag game for Christmas or your next party. Try it to change up the way you do party favor bags or gift exchanges at your events. In this game, everyone is a winner! That’s what makes it perfect for all ages.

dice and an assortment of small toys and candyGrowing up, there were always loot bag (also known as treat bags or party favors) at our birthday parties. It’s something that I continued doing for my own kids, but I noticed that over the years, they became more expected and seemingly less appreciated by party guests. 

That’s when I began to think of new ways to incorporate that into the event. Sometimes, that meant having an epic Put Away Scavenger Hunt and having the treat bags be the prize at the end of the hunt. This was usually somewhere like in the dryer when they returned the dryer balls or in the garage when they returned the wrench.

Setting up a homemade prize punch game is another twist to the usual favor bags.

This grab bag game is another idea that keeps the favor bags exciting and memorable.dice that each show a 4 rolled sit among candy and small toysIt also creates another party activity that helps pass the time. And if you’re a parent, you know that that can be a very important thing on those party days!

I’ve also included suggestions below on how to adapt the game for adults and how to create a Christmas grab game game or gift exchange version.

How to Play the Grab Bag Game:

Supplies needed:

  • Brown paper bags
  • Permanent marker
  • Candy
  • Small treats or toys (see list of suggestions for bag fillers below)
  • Dice

Instructions:

  1. Put a pile of treats on the floor or in a tray on the table.
  2. Write names on brown paper bags in black marker and put the bags in a circle around the pile down so that names are showing.
  3. Have each person sit in front of their bag.
  4. Take turns rolling the dice.
  5. When you roll doubles, you get to pick a treat from the pile and add it to the bag with your name on it.
  6. When all the treats are gone, the game is over.
  7. Everyone gets to keep their bag filled with treats.

collage of photos of small treats and the treats in a brown paper bag

Variations of the game:

  • For teens and adults, you can play so that on your turn if you don’t roll doubles, the dice pass to the next person. When playing with younger kids, it’s usually best to let everyone continue rolling until they get doubles and then continue on.
  • Tailor the prizes to the theme of the party. For instance if you’re hosting a dinosaur themed birthday party, you can choose dinosaur shaped candy, dino figurines, dino crayons, dino temporary tattoos, etc. You can also use coloured paper bags that coordinate with the party’s colours to go along with the theme and decorations.

Grab Bag Gift Exchange Game:

To play this as a gift exchange game, have each party guest bring one or two items to add to the pile. You can give them a suggested dollar limit or even request that all the gifts be along the same lines such as all gift cards or all books, socks, or holiday ornaments.

The first person to roll doubles will get first dibs on what they most want in the treat pile. The game continues until all the gifts have been taken.

This may of course result in some guests walking away with multiple gifts while others get none. For this reason, this version of the game is best played with adults. It creates a frantic race to roll doubles and lots of hilarious ribbing back and forth!

box of small treats sits on the floor next to three paper bags with names on it

Christmas Grab Bag Game:

It’s easy to create a Christmas version of this game. At your holiday party, you can play either the gift exchange version of this game or the regular version. Make it more festive by using Christmas candy or Christmas themed gifts. 

You can decorate brown paper bags with Christmas drawings or stickers or you can use red and green paper bags to add even more of a holiday feel. 

The great thing about this game is that you can include anyone from preschoolers to grandparents. 

List of suggested favors for kids:

  • candy
  • playdough
  • small figurines
  • toy cars
  • temporary tattoos
  • spinning tops
  • crayons
  • costume jewelry
  • silly straws
  • slinkys
  • slap bracelets
  • slime
  • stretchy animals
  • coins
  • bubbles
  • sensory items
  • fidget toys
  • pencils
  • notepads
  • mini flashlights

brown paper bag filled with candy and small toys

List of suggested favors for teens and adults:

  • gift cards
  • nail polish
  • makeup
  • lotions
  • face mask packets
  • playing cards
  • candles
  • books
  • candy
  • socks
  • markers
  • money
  • gardening seeds
  • homemade or store bought soap
  • cookie cutters
  • tools
  • keychains
  • drinks
  • chocolate
  • coffee mugs
  • reusable water bottles
  • pens
  • notebooks
  • flashlights
  • wine
  • hats 
  • lip chap
  • wooden or metal logic puzzles
  • headlamp toques/beanies

Suggested favors for Christmas:

  • any of the items on the above lists
  • candy canes
  • hot chocolate packets
  • hand warmers
  • Christmas ornaments
  • Christmas decorations
  • hot chocolate bombs
  • Christmas crackers
  • holiday cookie cutters
  • holiday baking
  • poinsettas
  • pinecone fire starters
  • snowman bath bombs
  • stockings
  • ugly Christmas sweaters

Get your free printable Christmas Gift Exchange Dice Game. 

Check out some of our other party games:

  • Minute to Win It Games
  • Minute to Win It Dollar Store Games
  • Minute to Win It Build (LEGO) Edition
  • The Flour Game
  • The Bag Game
  • Prize Punch Game
  • Saran Wrap Ball Game

Filed Under: Christmas, Crafts and Activities, Family Games

  • Page 1
  • Page 2
  • Page 3
  • Interim pages omitted …
  • Page 35
  • Go to Next Page »

Primary Sidebar

Categories

We are a participant in the Amazon Services LLC Associates Program, an affiliate advertising program designed to provide a means for us to earn fees by linking to Amazon.com and affiliated sites.

Copyright © 2025 • The Chaos and the Clutter • Site Design by Jeni @ The Blog Maven

Return to top of page

Copyright © 2025 · Chaos and the Clutter 2.0 on Genesis Framework · WordPress · Log in