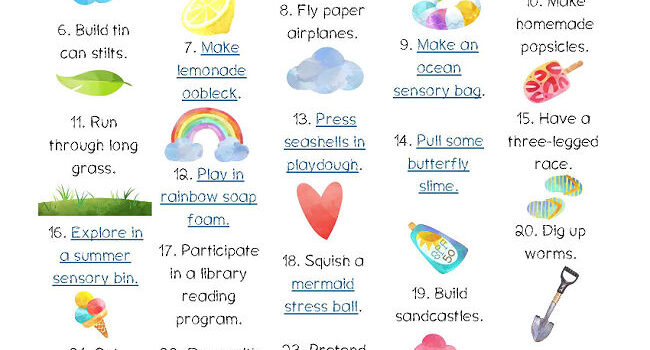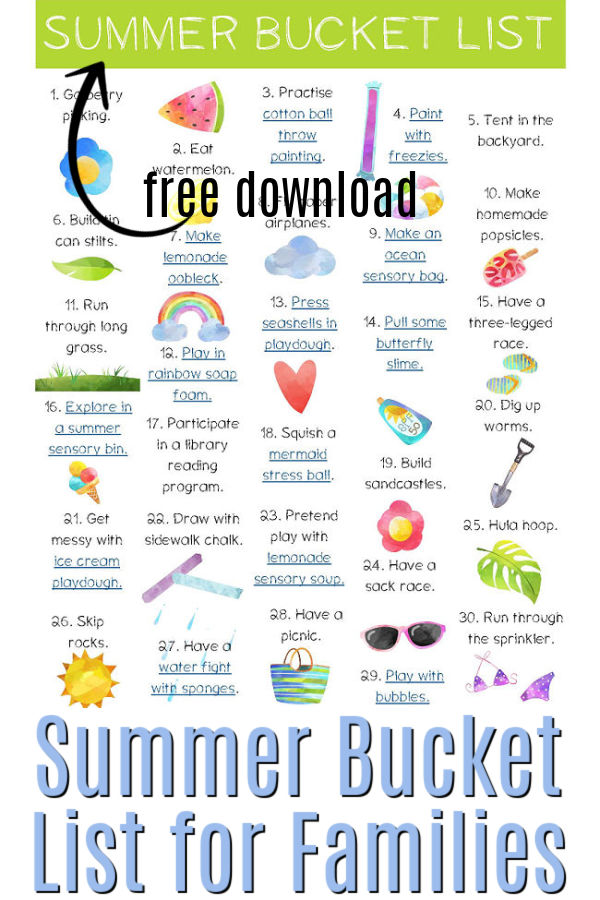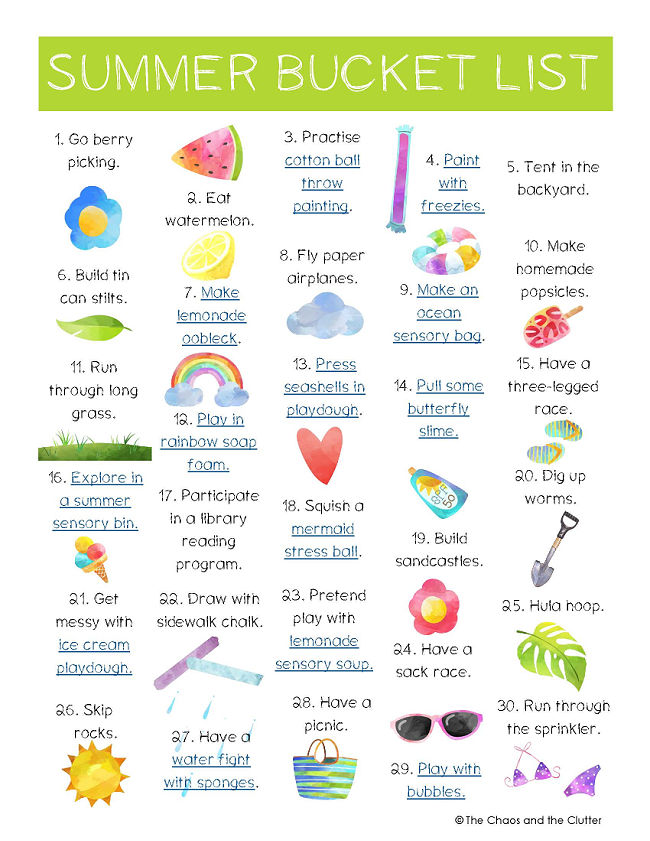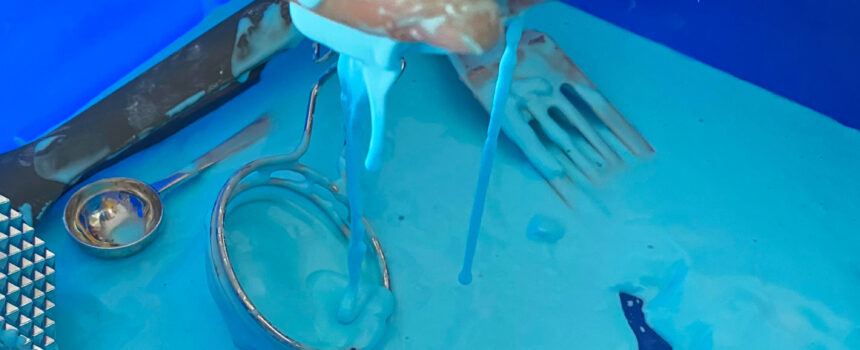
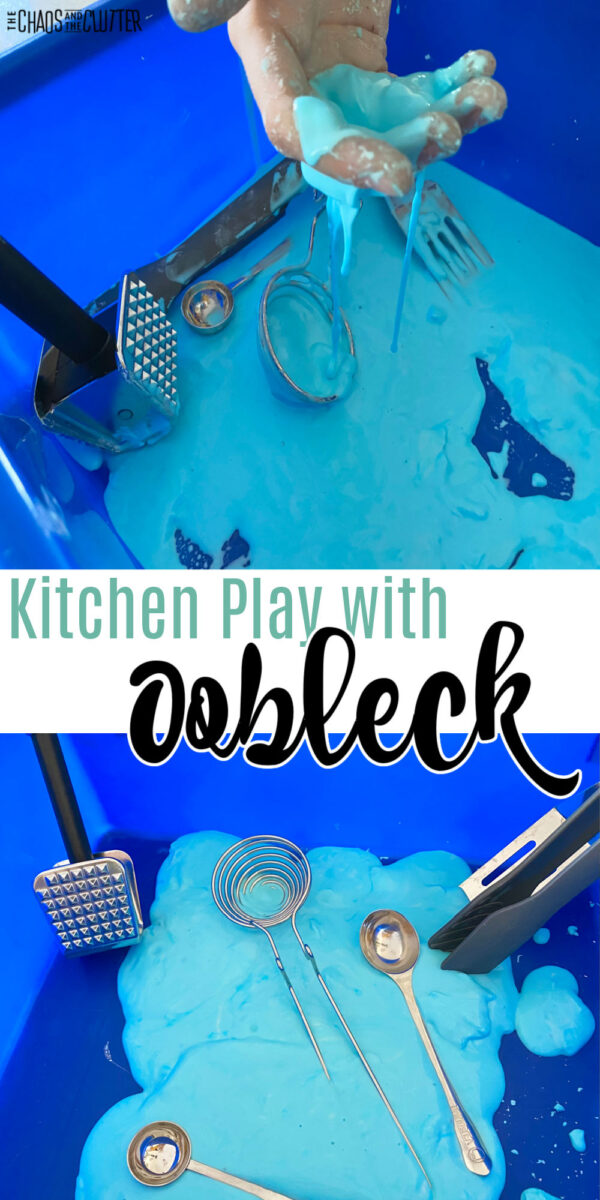
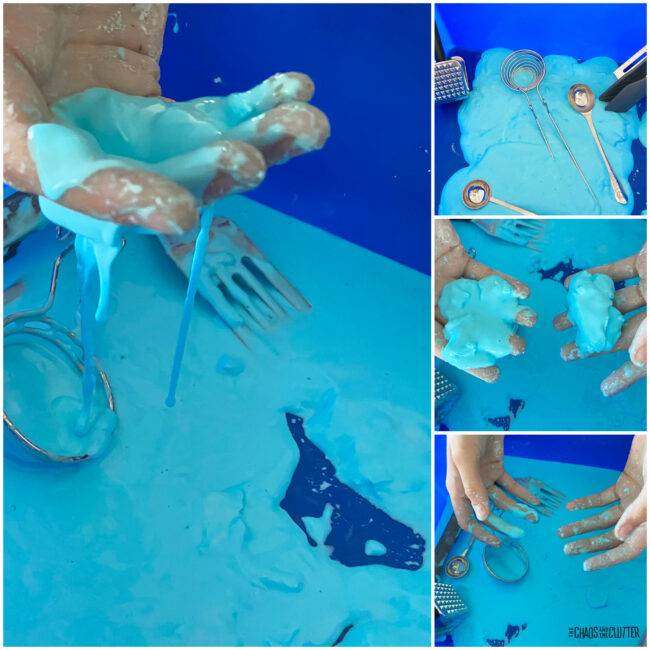
Easily set up hours of fun for your child using common household items and a few pantry supplies with this kitchen oobleck. You’ll likely have everything you need to create this play experience already in your home.
 Of all the sensory play recipes, oobleck is the absolute easiest. Chocolate oobleck makes a great pretend mud for play use. We also have made Easter oobleck, Candy Cane oobleck, and lemonade oobleck. Our kids have had so much fun with all of them and I loved how easy they were to make.
Kitchen Oobleck:
Supplies needed:
- 4 cups cornstarch
- 2 cups water
- food colouring
- plastic bin
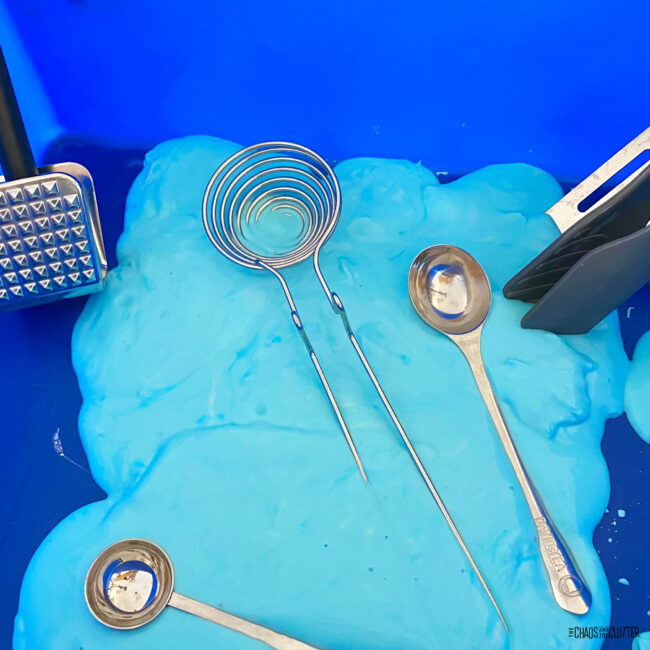
- kitchen tools
Directions:
- In a large bowl, stir some food colouring into the water. Mix in the cornstarch to create the oobleck.
- Pour the oobleck into a sensory bin (plastic bin) and set the bin on the floor.
- Add in some kitchen tools for exploration through play.
- Invite your child to discover and learn with the oobleck and kitchen tools.
What kitchen tools should I use?
Really, there is no right or wrong answer here. Use your imagination and invite your child to choose tools as well.
Here are some household items we found worked well:
- potato masher
- slotted spoon
- small strainer
- funnel
- fork
- spoon
- spatula
- garlic press
- tongs
- egg separater
- meat tenderizer
Cleanup tips:
We love, love, love messy play, but you can set out a shower curtain or dollar store plastic tablecloth underneath the bin to contain the mess in you want.
Never put oobleck down the drain as it will clog.
Clean the kitchen tools as you normally would since the ingredients in the oobleck are edible.
How the Science of Oobleck Works:
Oobleck is not only a great sensory activity, it is also a learning one. Oobleck is what’s known as a non-Newtonian fluid or a suspension. That means it can mimic qualities of both a solid and a liquid.

It’s made of only two ingredients, but it’s the combination of those ingredients that creates the unique properties that can be both a liquid or a solid. When pressure is applied, the cornstarch molecules bond together to create a solid state.
As your child explores through play, they can discover the changes in state that happen as this goes from liquid to solid.
Looking for more great sensory play recipes? Join thousands of others who are loving the five day email series, Sensory Activities and Solutions and you’ll get a free sample of our Sensory Play Recipes eBook.

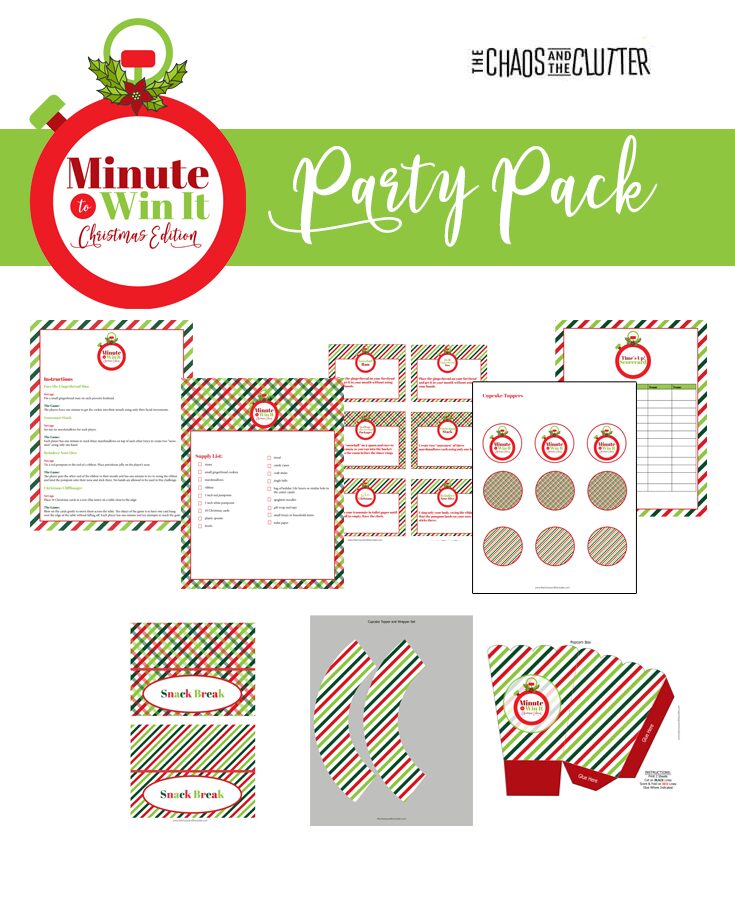
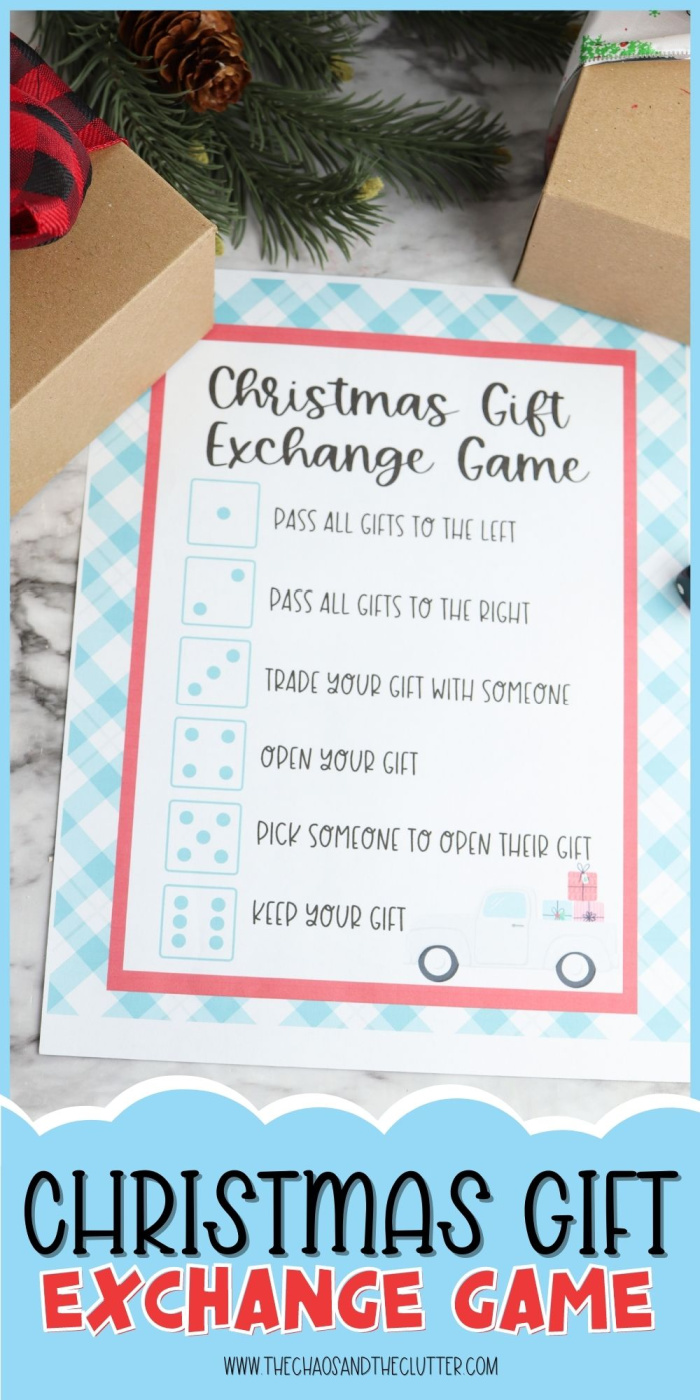
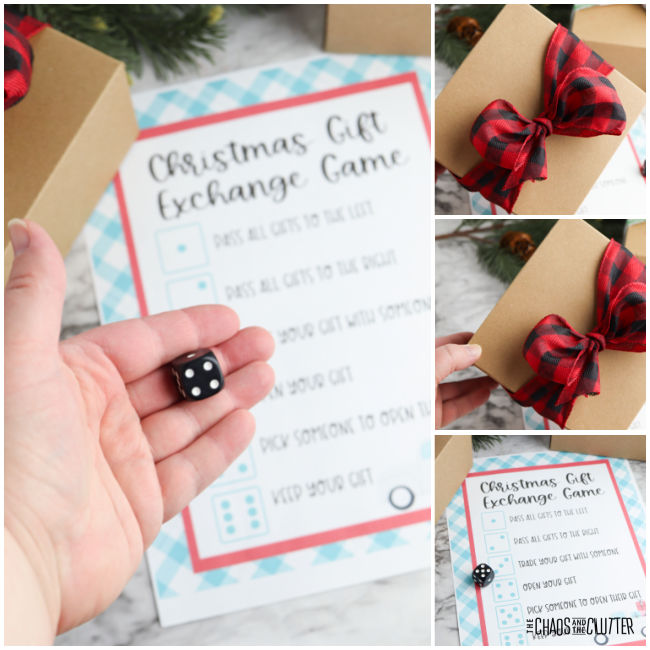
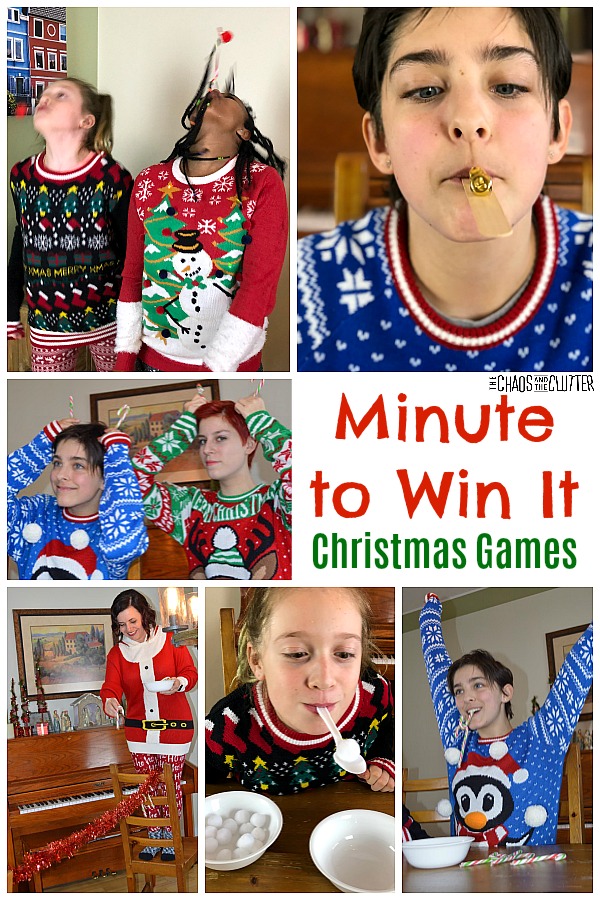 Whether you’re planning a large holiday party or a small family gathering, these games will bring laughter and fun. (You can also check out our
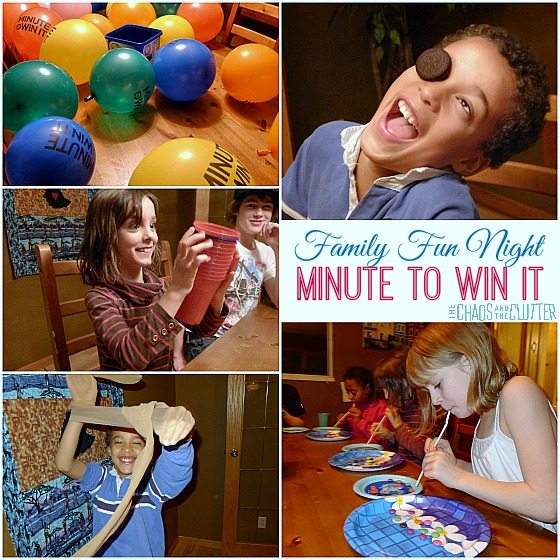
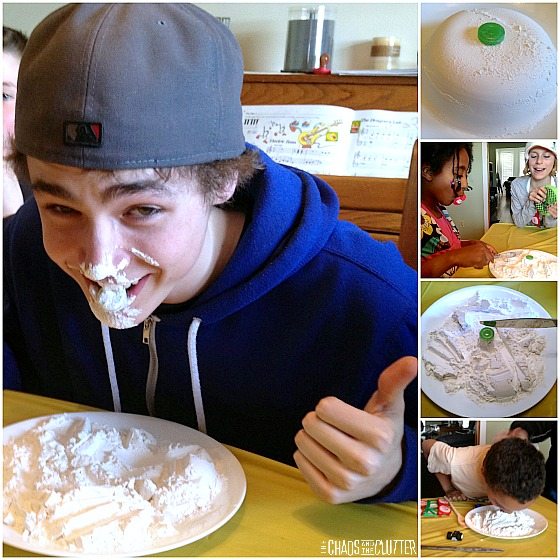
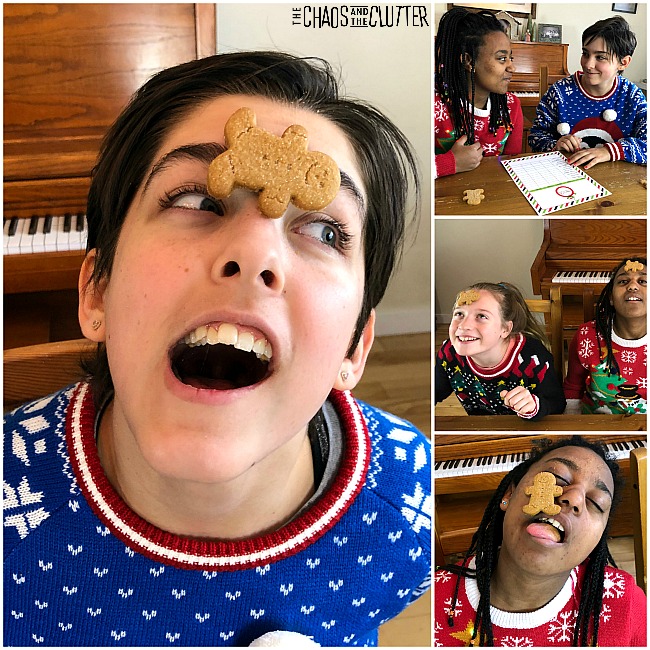 This is a great game to play in a large group. Everyone can play at the same time or you can play head to head.
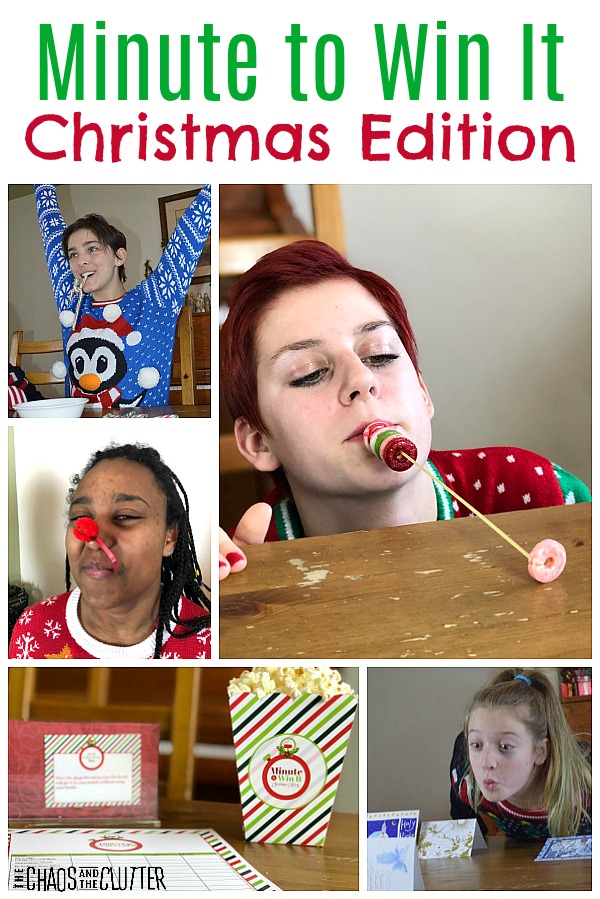
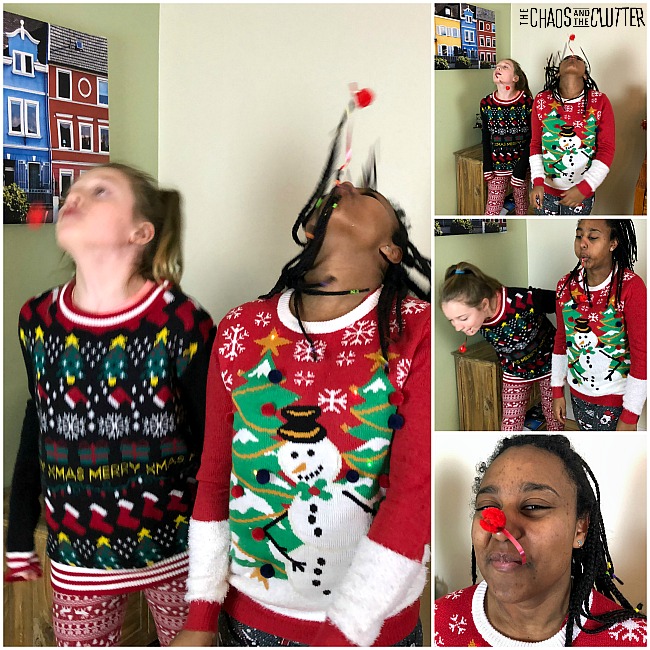 The player starts with the other end of the ribbon in their mouth. They then have one minute to attempt to swing the ribbon and land the pompom onto their nose and stick there. No hands are allowed to be used in this challenge.
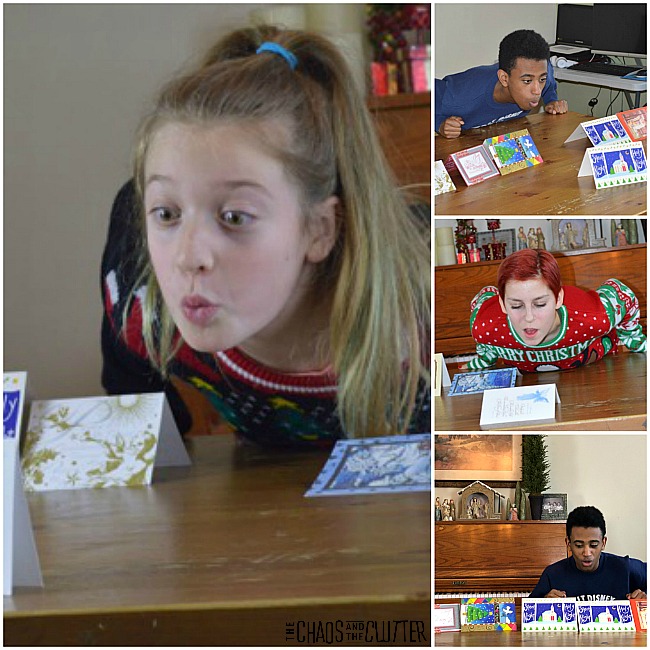 Blow the cards gently to move them across the table. The goal is to have one card hang over the edge of the table without falling off. Each player has one minute and ten tries to reach the objective.
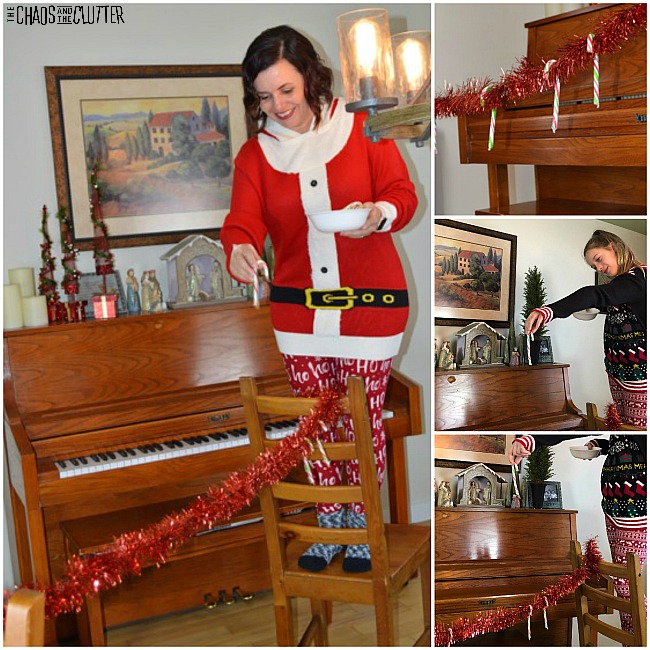 Have the player stand on the chair and drop candy canes, attempting to have them hang on the garland. You can have another player on the opposite chair playing at the same time.
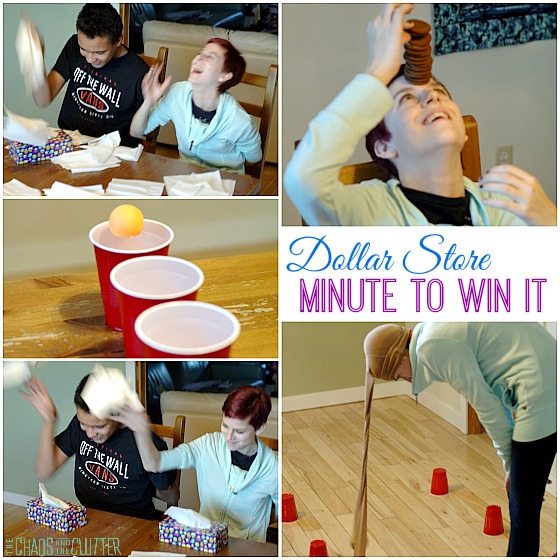
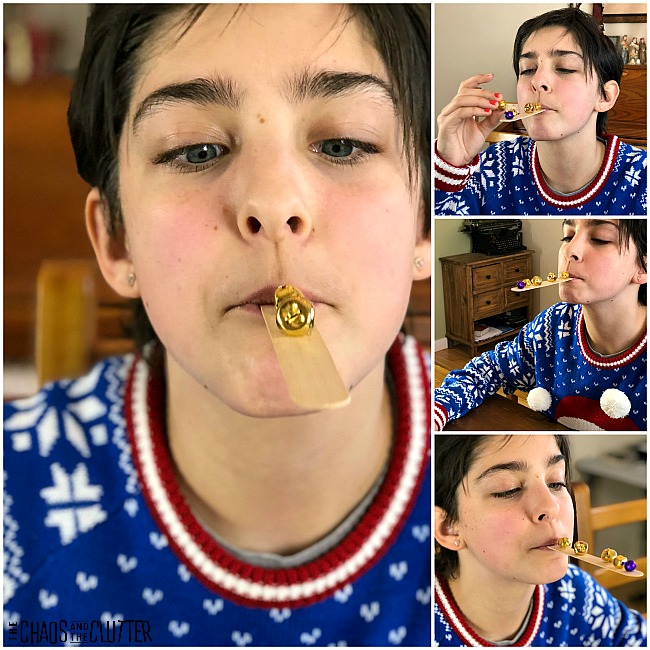 For young children, use the wider craft sticks. To make it more challenging for adults, use regular sized popsicle sticks. You can also vary the size of the jingle bells to create more difficulty.
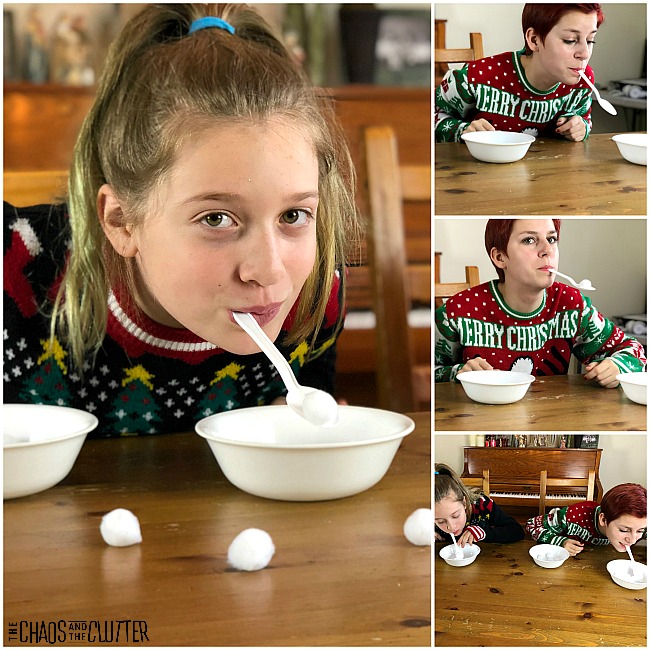 This game is quite challenging, so for younger kids, start with less pompoms or cotton balls in their bowl.
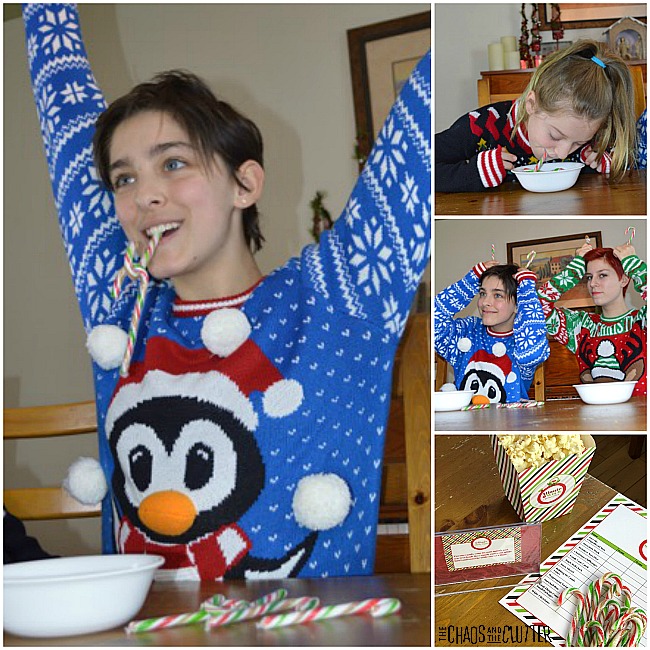 The goal of the game is to move 5 candy canes out of the bowl. The time to beat is one minute.
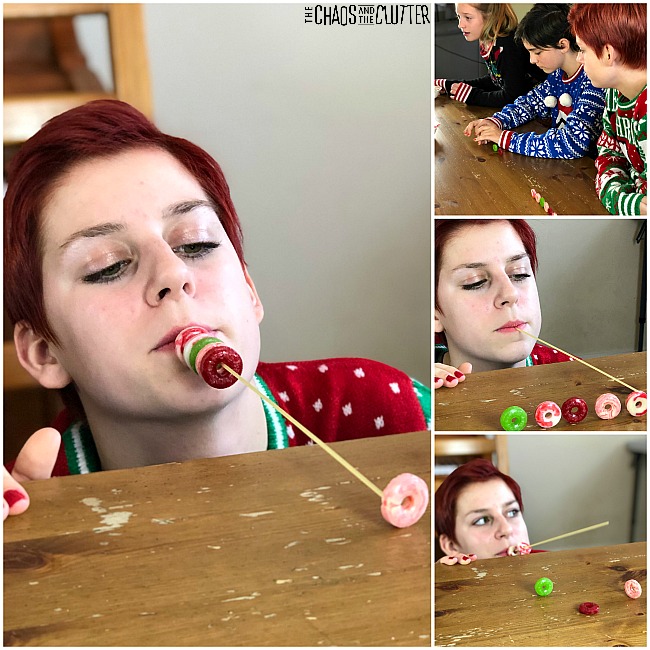 The player must pick up all the candy using only the spaghetti noodle in their mouth. They must stack all six candies onto their noodle in under one minute.
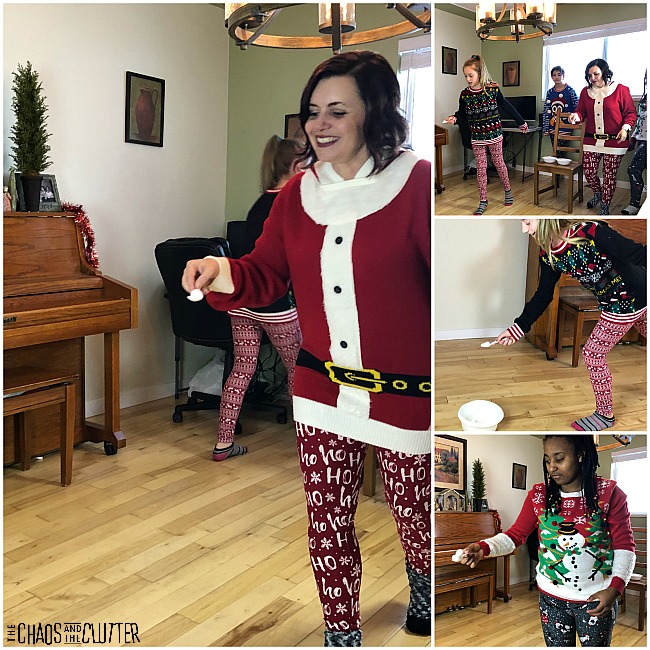 This game works with groups as a relay or with two players racing against each other. Each of the players places a white pompom (snowball) on a plastic spoon and races to place it in a bucket across the room. The player or team to fill the bucket with the most “snowballs” in one minute wins.
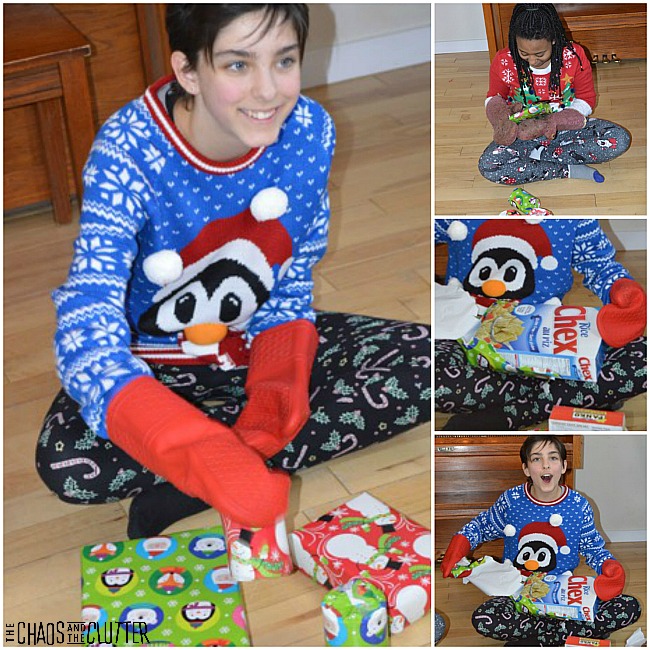 See how many gifts players can open in one minute while wearing oven mitts. This is quite a funny one to watch!
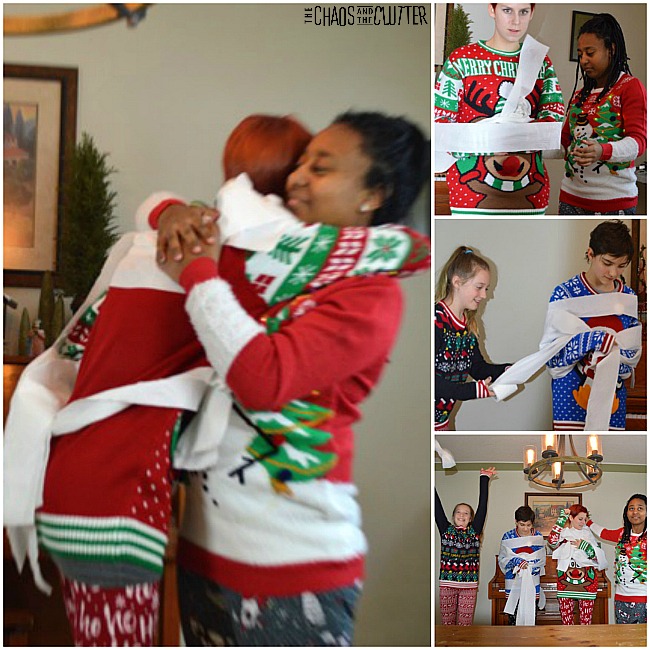 The team that completely uses their toilet paper first wins. It’s fun to see what method the teams come up with to do this quickly.