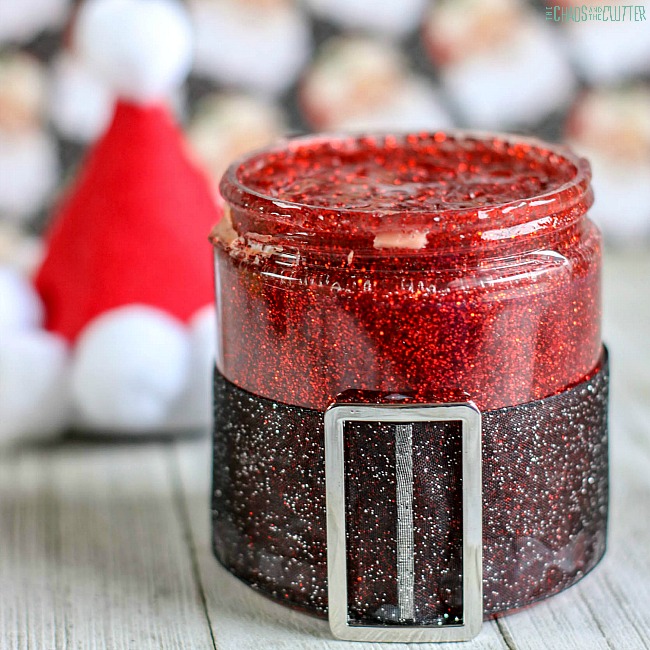
This Santa Slime makes such a cute DIY Christmas gift for kids to make to give their friends, cousins, or siblings. It’s a fun holiday crafting project to put together.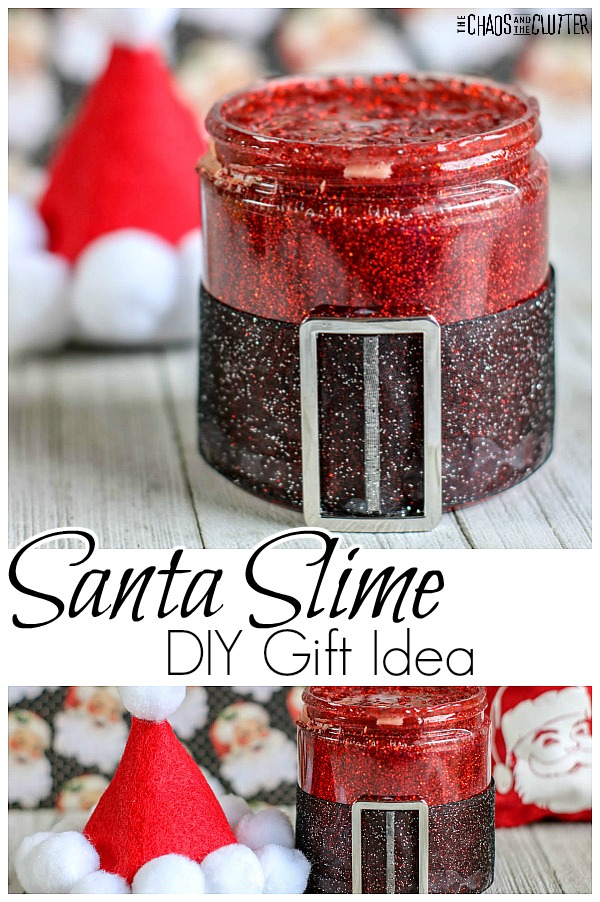
Santa Slime:
Supplies needed:
- 8 oz. plastic storage jar with lid (you can sometimes find them at Michael’s or you can order them from Amazon here)
- 6 oz. bottle Elmer’s red glitter glue*
- about 1/2 cup warm water
- ½ tsp. baking soda
- 1½ Tbsp. contact lens solution (containing boric acid)
*If you can’t find red glitter glue, you can instead use clear glue and add a lot of red glitter.
For decorating the jar, you will also need:
- 1 sheet of red felt
- large silver slide buckle (used: Sew-ology at Hobby Lobby)
- black ribbon (to fit the buckle)
- white 1 inch pompoms
- glue stick or hot glue
 Slime directions:
- Empty the red glitter glue into a large bowl.
- Fill the empty glue bottle with 1/2 cup warm water and seal with the lid. Give it a few shakes to combine the remaining glue with the water. Pour into the bowl with glue and stir well to combine.
- Add the baking soda to the glue and stir to mix thoroughly.
- Squirt the contact lens solution into the glue mixture and stir well. (Note that regular glue will require less contact lens solution than glitter glue. Add the contact lens solution slowly, mixing between additions, and add only enough to bring the glue together into a soft ball.)
- Remove the slime from the bowl allowing any excess liquid to remain in the bowl. At this point, the Santa slime will be sticky. Start to play with the slime, kneading it as you would bread dough to bring the slime together. The slime is ready to use when it’s no longer sticky.
- When it’s not being played with, store the slime in an airtight container in the fridge.
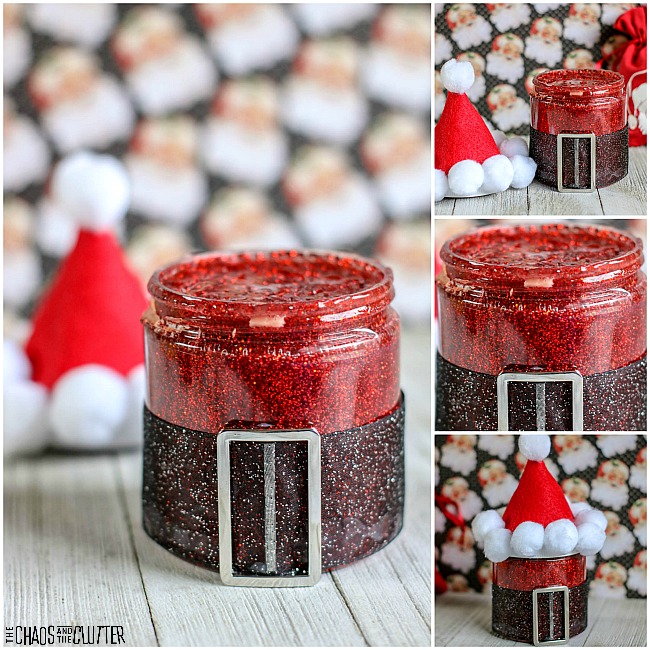 To decorate the Santa jar:
- Trace the circumference of the jar lid on a piece of red felt. Cut it out. Glue it to the top of the lid.
- Trace around the outside of a 28 oz. can onto the felt. Cut that circle out and cut into two equal halves. Discard one half (unless you’re making two of these) and twist the other into a cone to form the Santa hat. Secure it with glue. Attach the hat to the lid with glue. Allow it to dry completely before attaching the pompoms.
- Glue the pompoms around the edge of the lid and one at the top of the hat. Allow the glue to dry.
- Measure the ribbon around the jar, leaving room for it to overlap slightly. Cut the ribbon there.
- Add the buckle to the ribbon and then glue the buckle and the ribbon to the jar. If you want the back of thee belt to line up with the back seam of the hat, put the lid on the jar prior to adding the belt.
Are you looking for other sensory play recipes for kids? Join us for a free five day email series on Sensory Activities and Solutions and get a sample of our Sensory Play Recipes eBook.
