• Skip to primary navigation
  • Skip to main content
  • Skip to primary sidebar
  • Home
  • About
  • Contact
  • Privacy + Terms
  • Affiliates

The Chaos and the Clutter

  • Facebook
  • Twitter
  • Pinterest
  • Google Plus
  • RSS
  • Email
  • School at Home
  • Sensory
    • Sensory Processing Disorder
    • Awesome Sensory Play Activities
      • Sensory Bins
      • Sensory Bottles
      • Sensory Bags
  • Family Games
    • Minute to Win It Games
  • Special Needs Parenting
    • Childhood Anxiety
    • Reactive Attachment Disorder
    • Sensory Processing Disorder
  • Store
  • Course Login

Sharla Kostelyk

Simple Spring Sensory Bin

By Sharla Kostelyk

Our sensory bin this week was actually one that I made when I was speaking last week at the Alberta Home Educators Conference. I made a simple Spring sensory bin during my session to demonstrate to those who attended how easy it is to make sensory bins.

Simple Spring Sensory Bin for kids

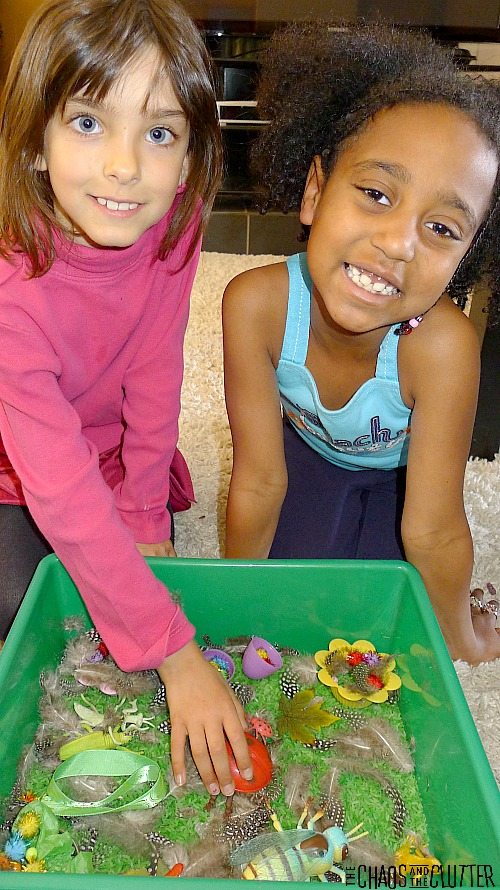
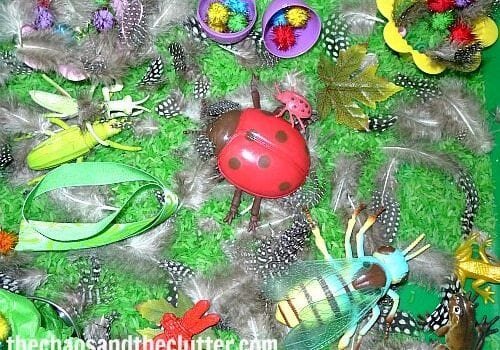
To make this simple spring sensory bin, I used rice dyed green to look like grass, play bugs of different textures, stretchy frogs, feathers, glittery pom-poms, green tissue paper, a plastic Easter egg, green ribbon, flower shaped muffin liners, a silk leaf, and a metal scoop.

simple-spring-sensory-bin

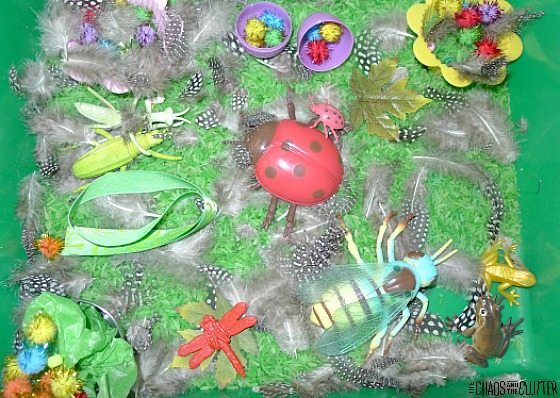
I love all the bright colours in this sensory bin. The different textures such as the fluffy feathers, the scaly plastic spider, the crinkly tissue paper, the smooth metal on the scoop, the silky ribbon, the bumpy dragonfly, and the grainy rice make this such a fun bin to play in.

If you are looking for information on making sensory bins, you may be interested in my book. The Ultimate Guide to Sensory Bins

Filed Under: Homeschooling, Sensory Bins

How To Melt Crayons

By Sharla Kostelyk

This melting crayons activity turned out so well and was a great bang-for-your-buck activity ideas. Just for something to do, we made new crayons out of our old crayon bits. It didn’t actually cost anything, but even in terms of time and effort on my part in exchange for the value, it was so worth it.

Melting Crayons In the Microwave To Make New Crayons

You know how sometimes as a mom, you spend hours preparing for an activity (running from store to store tracking down the necessary supplies, doing any prep. that is too advanced for your kids, laying everything out, helping the kids with it, not to mention the clean-up) and it occupies the kids for all of about five minutes?! Well, those kinds of crafts or activities are not what I would consider good bang for my buck!

What To Do With Old Crayons

To make these crayons, I pulled out the drawer where we keep markers, pencils, and crayons and the kids and I rifled through it to find all the old crayon bits. Then we peeled off the paper. This took quite a bit of time, but somehow, it held their attention. It was very quiet in the room as they tried to get even the most stubborn labels off.

melting crayons

Next, we broke some of the larger crayons into smaller bits and I placed them into an ice cube tray.  For some, I kept it all one shade of one colour, for others, I did a mixture of bright colours.  I also made a camouflage one, one with whites, greys, and black, and one of blues and greens.

melted crayons

How To Melt Crayons 

I put the ice cube tray of crayon pieces in the microwave and set it for a few minutes. I put it in many, many times and checked it every few minutes. I found that some brands of crayons melted much more quickly than others. Here and there, I stirred them with toothpicks. When they were more or less melted, I put them in the freezer.

When I took them out of the freezer, I popped the ice cube tray crayons out on the counter. The great thing about this activity is that it continued on after we made the new crayons because of course the kids wanted to colour with the new crayons. The blue/green one worked really well to make a water effect. Super fun and easy!

how to melt crayons

Note: I used an extra ice cube tray knowing that I probably wouldn’t be able to use it for ice again. I reasoned that since they are only $1 at the dollar store, it was worth the sacrifice. I kept the tray in case we decide to do this again as it was a great way to clean out the crayon drawer and have a little fun.

IMPORTANT UPDATE!!!

I’ve had two readers contact me to let me know that their ice cube tray melted in the microwave when they tried melting the crayons. One of them also had a fire start in the microwave after using sparkly crayons. Please use caution. Do not use crayons with glitter or shimmer in them. Set your microwave at a lower temperature and check it often. I’m assuming that some ice cube trays are made of thinner plastic than others and that is why this is happening.

More Fun Activity Ideas:

16 Toilet Roll Paper Crafts

Sensory Bottles With Instructions

60 Paper Plate Crafts

Playdough Play Mats


Filed Under: Crafts and Activities

Paper Plate Banjo

By Sharla Kostelyk

We are spending a few weeks doing the letter “M”. This week, we focused on Music. We read “The Musical Life of Gustav Mole” and did a lot of corresponding activities. After I read it to the kids, I put the book and accompanying CD into the workbox rotation so that each of the kids had a chance to listen to the CD and read along. The CD included music from different instruments in the book.


I had bought a Gustav Mole game and the kids played it a lot.  It taught about the different musical instrument families and there were various levels of difficulty (something we look for in games so that multiple kids can benefit from them).


I printed a lot of worksheets about classifying musical instruments and music terminology that I put in their workboxes to complete including a musical instruments mini book.

We made banjos and we had parades around the house using those and shakers and various other music instruments.

To make the banjos, we glued three beads to the top of a paint stick (got them for free from the hardware store) and attached (using packing tape) the stick to the back of two plastic plates stapled together.  Then we “strung” three elastics across the plates.  We also experimented with tightening and moving the elastics to see if that changed the sound.


This little guy (Gustav Mole puppet) was a lot of fun for the kids to find in their workboxes!


Filed Under: Crafts and Activities, Homeschooling

Learning Activities for the Letter “K”

By Sharla Kostelyk

Learning the Letter K

For our “K” week, the sensory bin was a knights and kings theme.

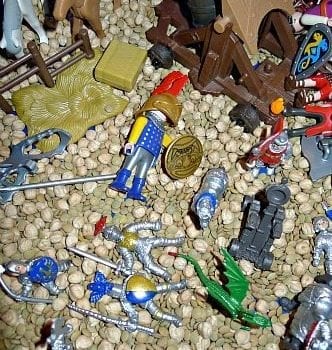
The base of this sensory bin is made up of dried chickpeas and lentils. I added a toob of knights and used knight and king related Playmobile.

I also made a simple St. Patrick’s Day sensory bin for this week.

I used a green bin, shamrock garland, little plastic Leprechaun hats, gold and green St. Patty’s coins, and homemade green playdough.

This is my sweet ones listening to me read them a story.  The bean bag chair in the reading corner gets a lot of use, though mostly just when one or two of them at a time are having some quiet reading time!

For our “K” week, we had lots of fun workbox activities including:

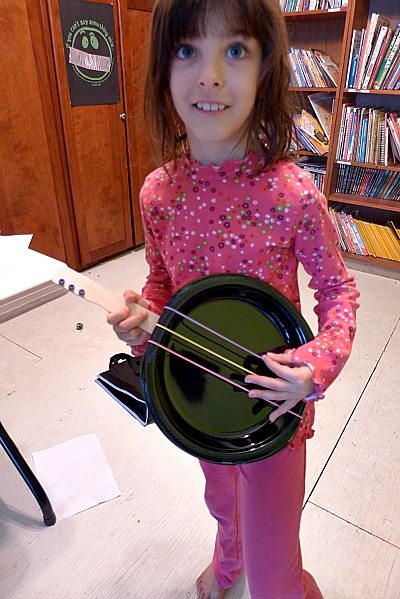
The roll a kite game went over well.  I think it was from Confessions of a Homeschooler.

This kite sizing activity is from Confessions of a Homeschooler.

Dancing Queen seems proud of completing this.

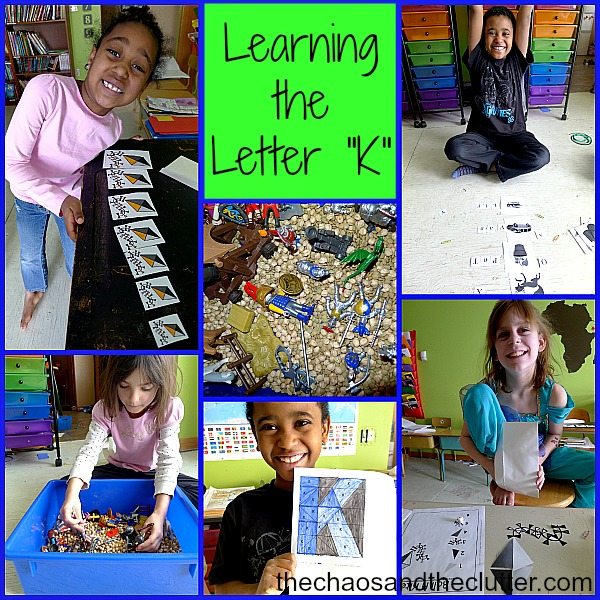
Someone is really proud of himself!  Snuggle Puppy put together a whole section of the floor filled with letters strung into words to match with the corresponding pictures.

a little activity to differentiate between the lower case and upper case “k”

I like this picture of Granola Girl playing in the sensory bin because she is so obviously enthralled!

Fred played a hockey game at Rexall Place, which was pretty exciting.  We took Miss Optimism, Einstein, and Snuggle Puppy with us to watch and it was fun to see Fred play in that huge arena!

Fred got two or three assists in the game and did really well, though he wasn’t happy with his performance because his new stick needed to be shortened!  I was a proud mom (mind you, I would be proud even if he sat on the bench the whole time)!

Snuggle Puppy, Granola Girl, and Dancing Queen took ski lessons and Miss Optimism and Einstein took snowboard lessons. They had THE BEST TIME!!!


Miss Optimism has been really wanting to learn how to cook so I bought her a children’s cookbook (it’s not my favourite one and I will be looking for a better one).

Her first attempt was egg salad open faced flower shaped sandwiches topped with pepper slices.


…the finished product! All the other kids really liked it and she has made it once or twice since then.


I guess it should come as no surprise that this recipe of two chocolate chip cookies with ice cream between them rolled in sprinkles was an instant family hit!

open faced sandwich with ham, sliced hard boiled eggs, and black olives – this one was hit and miss with the other kids and with Miss Optimism herself!

(obviously, all of these were made before we started our gluten free experiment)

We continued our Story of the World. The kids’ memory verse was “We love because He first loved us.” – I John 4:19.

I read Leah’s  Pony to the kids, one of my all-time favourite books. I cried a lot while reading it. It doesn’t seem to matter how many times I read it…I still cry. We discussed the book and The Great Depression. (The book is about a young girl who tried to save her family’s farm during the Depression.)

In the past, we’ve never done anything special for St. Patrick’s Day. We’re not Irish and I didn’t really know what the holiday was all about other than Leprechauns and pots of gold, so I didn’t see the point in celebrating it, until I read this post. I read the story to the kids and we did some fun activities including these crafts.  For the templates, click here.


The pot of gold craft was made using construction paper, tissue paper, glue, and gold coins (from our sensory bin!)

The shamrock was made using a green bingo dabber (though Miss O. didn’t have the patience to wait for the green, so she layered blue on top of yellow and that worked too)

We had some playdates, the kids went to their gymnastics classes, they made progress in their Math U See and A Reason for Handwriting. Next week, we will start preparing for Easter and start the letter “M”. I have so many plans for the letter “M” that it will take several weeks.  I think that our first “M” unit will be Magnets.

If you are looking for information on making sensory bins, you may be interested in my book. The Ultimate Guide to Sensory Bins

Filed Under: Homeschooling, Sensory Bins

Ice Cream Theme Unit Study

By Sharla Kostelyk

This week we eased into homeschooling. The letter of the week was “Ii” and our theme was ice cream. With an ice cream unit study, it came as no surprise that there was little complaining from the kids!

Our ice cream unit study included a lot of hands-on fun activities as well as some learning thrown in for good measure.Monday, we took all the kids to see “We Bought a Zoo” (great movie) and the kids and I played Scoop Em’ Up.

Ice Cream Stacking GameThe goal of the game is to get all 12 scoops of ice cream of the cone. We all tried many times, but only one of the kids was able to do it and even then, it was only the one time. It’s harder than it looks!

As part of our unit study, the kids completed some worksheets related to ice cream. We incorporated a bit of math by graphing people’s flavour preferences, the kids coloured a sundae and glued sprinkles on top, there were dot-to-dot worksheets, and ones related to colours.

Granola Girl went a little overboard with the sprinkles!!!

It was interesting that the results of the ice cream flavours survey differed considerably when chocolate and vanilla were not offered as options.

This simple worksheet was a fun reinforcer of the colours.

I found different ice cream printable worksheets on:

2 Teaching Mommies

Kidsparkz

Mama’s Monkeys

Spell Out Loud

We had some friends over for a playdate after the worksheets were done and we decided to carry over our theme through lunch.  I made this for each of the kids:

-the “cones” are quesadillas on whole wheat tortillas

-the “scoop” on the first one is Greek yogourt with sprinkles in a flower tin

-the “scoops” on the second are a cucumber slice, a meat slice, and a carrot slice

-the “scoop” on the third is an orange slice

The kids thought the ice cream themed lunch was super cool!

Later in the day, I gave each of the kids some ice cream in a bowl and set out two trays of toppings for them to have fun with.

-coconut

-mini chocolate chips

-mini coloured marshmallows

-organic fruit gummy bears

-banana slices

-sprinkles


Also to go with the ice cream unit study, I made an ice cream sensory bin. The kids spent a lot of time playing in it.


We are going to make ice cream in a bag tomorrow and maybe have one more taste of ice cream as we fill out the ice cream observations worksheet.

Ice Cream Theme squareNext week, our homeschool will be back in full swing. It will be a busy week as I plan for my book launch and we have my mother-in-law’s birthday and my niece’s wedding. We are so excited for the wedding and for seeing our out of town relatives!

Filed Under: Homeschooling, Sensory Bins

Christmas Shopping

By Sharla Kostelyk

The past few years, I have had a harder and harder time with gift giving at Christmas. Most of us in North America already have so much and it’s hard to justify spending money on more “stuff” when there are so many around the world who don’t have the basic necessities of life. We have cut back drastically on our overall Christmas spending and have also changed what we spend on! There are two main ways we now choose our Christmas gifts.

We buy gifts such as a goat for a family in a developing country to give to my mom or mosquito nets for a family in an area where Malaria is an issue for a friend or give a donation to an organization benefitting impoverished children in the name of a loved one. If you would like to consider giving such a gift, here are some websites to check out:

One Child

Compassion (for Canadians)

Compassion (for Americans)

Vulnerable Children

We buy gifts that support adoptive families in their efforts to fundraise to bring children who need a family home.  Not only does supporting these efforts help children get a forever family, it encourages the families.  If you’d like to join me in supporting adoption in a practical way, please check out these links:

Africa Sleeps Sleep caps – 5% goes towards Vulnerable Children Society and the rest towards raising funds for this family’s adoption from Lesotho (they have already adopted 2 daughters from Ethiopia).  Dancing Queen is getting 2 of these in her stocking (shhh, don’t tell her)!

Hope t-shirts and Etsy creations This amazing family has such a beautiful story!  They adopted a son from Uganda and are going back to adopt his 2 best friends.

Wild Prairie Farms Selling everything from soaps to t-shirts to coffee and more, this family’s fundraiser will not only help them bring 2 more children home from Ethiopia (they already have 3 Ethiopian born children), it will help them relocate to Ethiopia all together to serve there.

Reece’s Rainbow Angel Tree This wonderful organization allows people to donate directly to the adoption funds of special needs orphans around the world.

Happy Christmas shopping everyone!

Filed Under: Christmas

  • « Go to Previous Page
  • Page 1
  • Interim pages omitted …
  • Page 119
  • Page 120
  • Page 121
  • Page 122
  • Page 123
  • Interim pages omitted …
  • Page 128
  • Go to Next Page »

Primary Sidebar

Categories

We are a participant in the Amazon Services LLC Associates Program, an affiliate advertising program designed to provide a means for us to earn fees by linking to Amazon.com and affiliated sites.

Copyright © 2026 • The Chaos and the Clutter • Site Design by Jeni @ The Blog Maven

Return to top of page

Copyright © 2026 · Chaos and the Clutter 2.0 on Genesis Framework · WordPress · Log in