• Skip to primary navigation
  • Skip to main content
  • Skip to primary sidebar
  • Home
  • About
  • Contact
  • Privacy + Terms
  • Affiliates

The Chaos and the Clutter

  • Facebook
  • Twitter
  • Pinterest
  • Google Plus
  • RSS
  • Email
  • School at Home
  • Sensory
    • Sensory Processing Disorder
    • Awesome Sensory Play Activities
      • Sensory Bins
      • Sensory Bottles
      • Sensory Bags
  • Family Games
    • Minute to Win It Games
  • Special Needs Parenting
    • Childhood Anxiety
    • Reactive Attachment Disorder
    • Sensory Processing Disorder
  • Store
  • Course Login

Sharla Kostelyk

Teaching Children About Blindness

Teaching Sighted Children About Blindness

By Sharla Kostelyk

Browsing through the shelves at the bookstore, I happened across perhaps one of the coolest children’s books I have ever seen! As a side note, I do not allow myself to go into bookstores often as I get lost in all that there is to see there and spend far too much time (and money) so this was a rare treat. The book that caught my eye was called The Black Book of Colors.

Teaching Sighted Children about Blindness through activities, discussion and an amazing book.
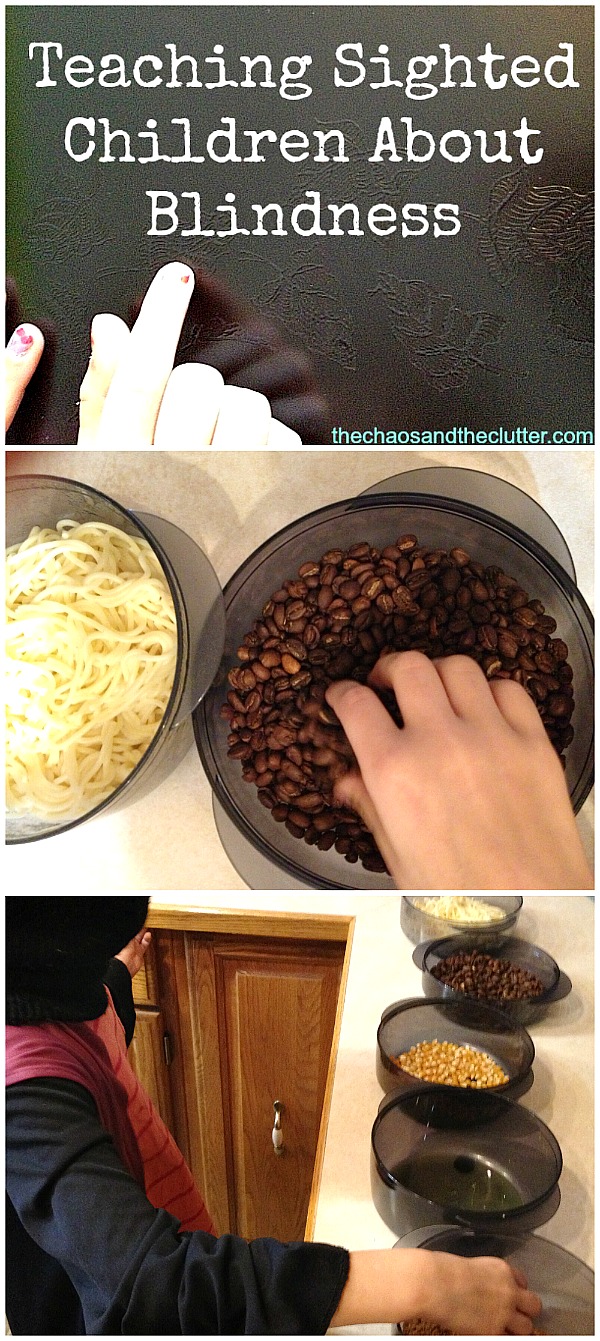
The title of the book intrigued me so I opened it up to take a peek and was met with black pages with raised black pictures that had to be felt more than seen. On the opposing page was text in white along the bottom with the braille version at the top. The book explained what colors “look” like to someone who is blind.

Teaching Sighted Children About BlindnessI decided to turn it into a small unit study so I planned a few activities for the kids to go along with the book.

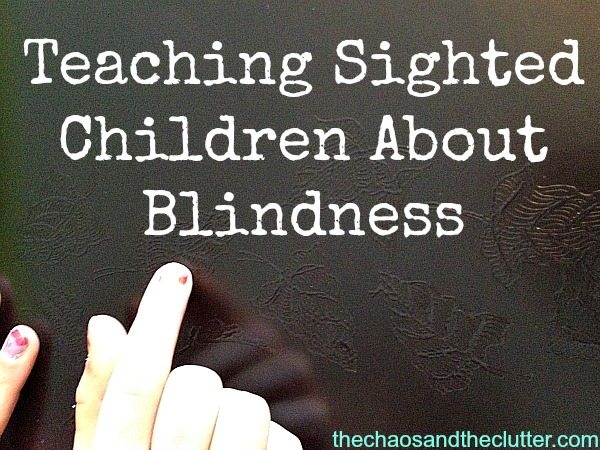
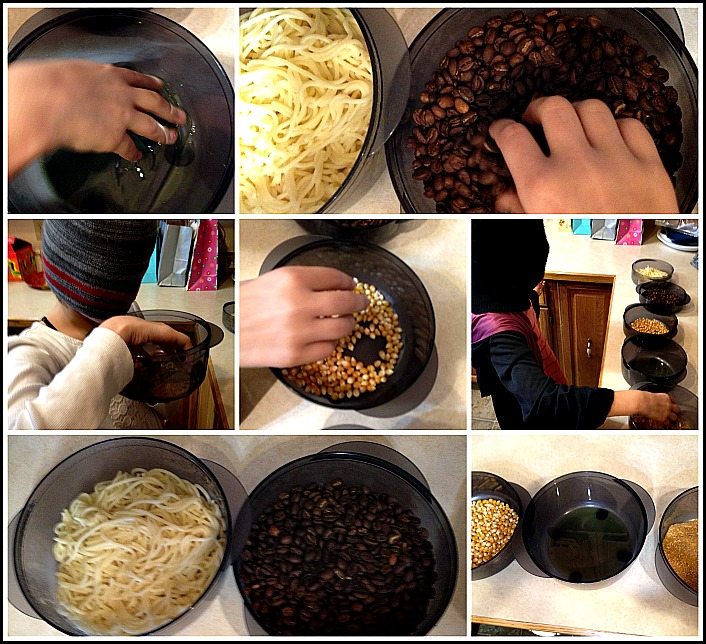
I set up containers of coffee beans, cooked spaghetti, dish soap, popcorn kernels, and taco spice seasoning. I blindfolded the kids and brought them into the kitchen one at a time. They had to guess what was in each container using their other senses, hearing, tough, smell, and even taste if they were brave enough! It was a fun activity that led naturally into discussion about how those who are blind use their other senses to navigate the world.

guessing based on senses other than sightI read the Black Book of Colors to the kids and they later took turn reading it themselves and feeling the pictures and Braille letters.

The kids also took turn trying to navigate their way through the house while blindfolded and talked about their observations. They also took turns helping to guide each other using their voices.

I found a wonderful online resource for sighted kids who wanted to learn more about blindness. It has information about Louis Braille, braille trivia and games.

There is a Braille alphabet printable at Enchanted Learning.

Lastly, we watched the Helen Keller Nest video and the kids completed the corresponding workbook. They love Nest videos and found this one especially interesting.

Filed Under: Homeschooling

Non-Food Sensory Bin Fillers

By Sharla Kostelyk

I get asked on a regular basis for ideas for sensory bin fillers that are not food. Some preschools and schools do not allow food items in the sensory bins in their classrooms and there are some parents that feel it is wasteful to use food in their bins at home. Food items such as dried rice, pasta or beans are such an easy base for a sensory bin. It can be a bit more challenging to think of creative ideas that are not edible but with a bit of imagination, there are many options.

Non-Food Sensory Bin BasesAs all sensory bins go, the only limits really are your imagination, but here are some suggestions as to what you can use as a base that are not food. I’ve added links to many of them so that you can check out examples of how they can work in a sensory tub.

  • cotton balls
  • pompoms
  • Kidfetti
  • feathers
  • foam bits
  • shredded paper
  • Easter grass
  • beads
  • Epsom salts
  • confetti
  • water
  • ice
  • snow
  • sand
  • dirt
  • buttons
  • packing peanuts
  • shaving cream
  • soap shavings
  • mud
  • rocks
  • water beads
  • glass beads
  • seashells
  • ribbon curls
  • leaves (real or plastic)
  • corks
  • building blocks
  • fabric scraps
  • costume jewelry
  • grass (real or fake)
  • tinsel
  • baby oil 
  • lotion or gel
  • silk or plastic flowers
  • streamers
  • corn silk
  • play coins
  • toys
  • aquarium rocks
  • shavings
  • cotton batting

For instructions on how to create a sensory bin, information about why they are so beneficial for children, relevant recipes, printable idea lists and more, get your copy of my ebook Sensory Bins: the What, the How & the Why .

Sensory Bins Cover 3D

Filed Under: Sensory Bins

Homemade Christmas Crackers with Scripture Verses

Homemade Christmas Crackers with Scripture Verses

By Sharla Kostelyk

When I was growing up, we always went to my Grandma’s house in Vegreville on Boxing Day to celebrate Christmas with my aunt, uncles and cousins. There was a kid’s table and at each place setting there was a Christmas cracker so I associated them as part of the holidays and wanted them to be a tradition I incorporated into my own family someday.

When I was a young mom of two kids and The Husband was a student, we didn’t have an extra penny. We had moved back to our hometown to be closer to family when our baby was sick with kidney complications and The Husband had gone back to school. That year, I had worked hard making crafts to sell at a sale in our basement so that we would have money to buy food and a few gifts at Christmas so there was certainly no chance I could afford to buy Christmas crackers. I decided to make them.

Homemade Christmas Crackers with Scripture VersesI added a numbered strip of paper into each one that had a part of the Christmas story. When put in order, they told the story. I used scriptures from different gospels and pieced them together. At our Christmas Eve celebration that year, we all (adults too) opened our Christmas crackers and read our scripture verses in the right order to retell the story of Jesus’ birth.

Christmas story in scripture verses

This year, I slipped strips of paper into the crackers that all said the same thing. “For unto us a Child is born.”-Isaiah 9:6

To make the crackers, you need:

  • empty toilet paper rolls
  • tissue paper
  • small toys or candy
  • paper
  • ribbon, tape or string

Fill the empty toilet paper roll with candy or little toys or trinkets. I used to also make crowns out of tissue paper and fold them tightly to fit them in just like a store bought Christmas cracker. Slip your paper with the scripture verse or encouragement in.

Roll the cardboard tube in tissue paper. Secure the ends by tying ribbon (or tape or string) at the ends of the roll, leaving some tissue paper sticking out each end. Decorate using ribbon. You can also curl the ends of the ribbon using scissors.

DIY Christmas Crackers with scripture verses

Sometimes the most obvious answer is right in front of you. If you look closely at the picture of the single Christmas cracker, you may notice that the decorative strip around it is made of tin foil. I cut a thin strip of tin foil, wrapped it around to decorate and secured it with a glue stick. My friend Christie was here at the time and gently pointed out that I could always just use ribbon which would be much easier! I decorated the rest using ribbon! I tell you this only to say that if you didn’t have ribbon and wanted to add some flair to your crackers, you could use tin foil.

Filed Under: Christmas, Crafts and Activities

Felt Stocking Ornaments

Felt Stocking Ornaments

By Sharla Kostelyk

I remember making these ornaments with my grandma one year when I was about 9. They are easy to make but younger children will need an adult to do the sewing part for them. One of the things I like about them is that they really allow for creativity. They can be simple or you can pull out the glitter glue and embellishments and let your kids go to town!

Felt Stocking Ornamentsmaterials needed:

felt pieces
scissors
string or yarn
glue
sewing needle
optional: embellishments such as glitter glue, sequins, buttons, faux fur, foam shapes, stickers

Trace the shape of a stocking onto a piece of paper and cut it out. Lay the cutout onto the piece of felt and trace two of the stockings with a marker or chalk. Cut them both out.

Lay the pieces of felt together so that the marker outline is on the inside (not visible). Starting at the top of the stocking, sew down around the stocking and up the other side, leaving an opening across the top.

We tried to do the sewing with a plastic needle so that the younger kids could sew theirs, but it was too difficult to get through the two layers of felt so we used metal sewing needles. The older kids sewed their own (the ones pictured above) and we sewed for the younger kids.

Felt Stocking Ornaments at The Chaos and The Clutter

The kids cut shapes out of the scraps of felt remaining (in the other colour) to add some flair to their stockings. I didn’t give them any instruction for this bit and just let them create. I also set out some faux fur that some of them added to their ornaments. Some of the kids chose to add a loop to the top of theirs to hang on the tree while others chose to keep it as a cute mini stocking without adding a loop. These crafts are actually quite sweet!

Filed Under: Christmas, Crafts and Activities

Snowman Crafts & Activities

By Sharla Kostelyk

It’s the time of year when snowmen are making their appearance outdoors. I thought it might be fun to bring some of that snowman cuteness indoors as well with some crafts, ornaments, play dough, activities, and gift ideas. Adorable!!!

Snowman Crafts & Activities as featured on the Toddler & Preschooler Moms Pinning Party

Printable Snowman Countdown Calendar from Mamas Like Me

CD Snowman Ornaments from Happy Hooligans

Melted Snowman Ornament from We Made That

Paint Stirrer Snowman from Enchanted Homeschooling Mom

Sparkly Snowman Playdough from The Connection We Share

Simple Snowman Ornament from B-Inspired Mama

Snowman Hot Cocoa Gift from We Made That

Snowman Suncatcher from Craftulate

Snowman in a Jar Playdough Kit from The Connection We Share

Build a Snowman Activity Tray from Happy Hooligans

These snowman crafts and activities are perfect for winter, especially on the days that are too cold for going outside and making a real one.

These are our personal favourite snowman activities:

Melted Snowman Sensory Bottlemelted-snowman-sensory-bottle-squarePaper Plate Snowglobe

Simple paper plate snowglobe craft is a great winter project for kids

Filed Under: Crafts and Activities

Rice Krispie Candy Houses (a gingerbread alternative)

Rice Krispie Candy Houses

By Sharla Kostelyk

When I was growing up, my fondest memories of holiday preparations was making our Rice Krispie houses. We made them for as long as I can remember. There were one or two years when we tried making gingerbread houses but they were flops. One year, our icing wasn’t right and the pieces of the house wouldn’t stick together. Another, the gingerbread broke into tiny pieces when we were trying to assemble it so by the time I had my own family, I didn’t even attempt gingerbread and stuck with what I knew would work.

Rice Krispie Houses...a Holiday Tradition at The Chaos and The Clutter
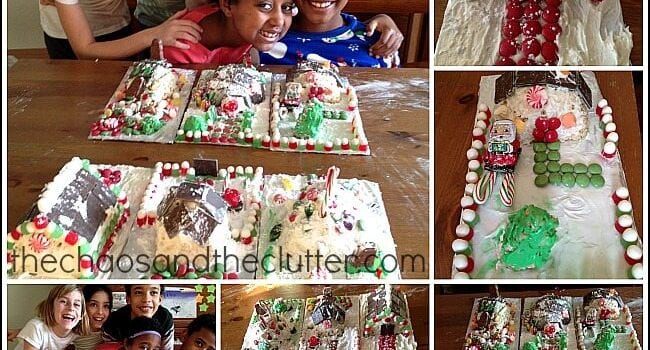
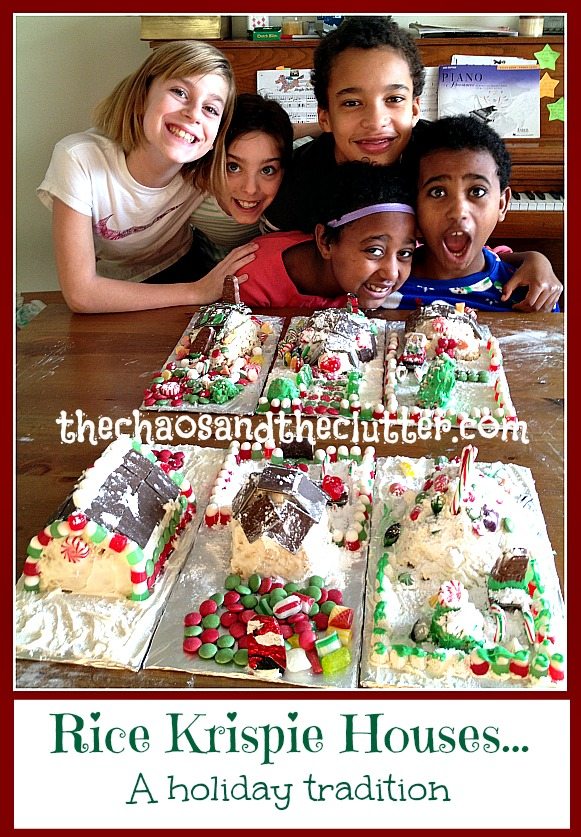
Rice Krispie houses are easy to make and as an added bonus, as long as you use gluten free Rice Krispies, you can make these gluten free. Some years, we make one large house while other years, each of the kids make their own. One year for Miss Optimism’s December birthday, all the party guests made their own candy house to take home.

To begin, cover a cardboard base with tin foil. Next, make a batch of Rice Krispie square base. (To make these six houses, I had to make 2 batches.)

Melt 1/2 cup butter or margarine with 5 1/2 cups mini marshmallows. You can do this in the microwave or on the stovetop. Stir in 6 cups of Rice Krispies cereal (regular or gluten free). While the mixture is still warm, drop it onto the prepared cardboard bases.

Have the kids shape into the desired shape. This can be the shape of a house or an igloo or a snowman or anything else their imagination comes up with. We usually also shape a small amount of the Rice Krispie mixture into a tree for the yard.

shaping rice krispie houses
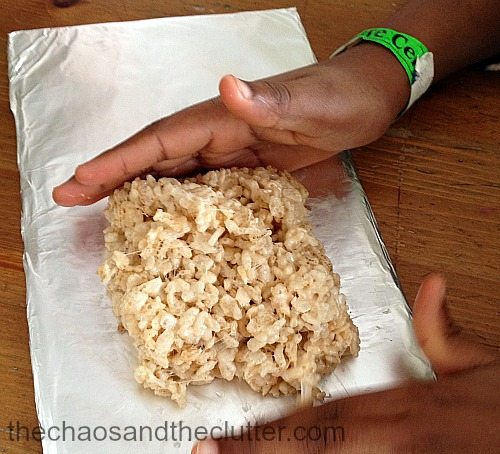
Next, cover the structure and the base with white icing. You can use store bought icing or make your own. We made a simple butter, icing sugar and milk icing. We make a small amount of green icing for the trees.

icing candy houses
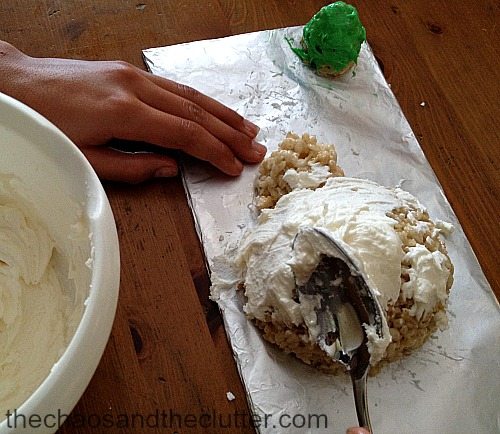
Next comes the really fun part…decorating the houses with candy. There are no rules or instructions for this part. I like to buy the mint chocolate square wafers because they make good shingles for the roof or shutters or doors. I try to provide an assortment of candies so that they can create whatever they want. (two mini candy canes and a chocolate mint wafer makes a good Santa sleigh!)

candy houses
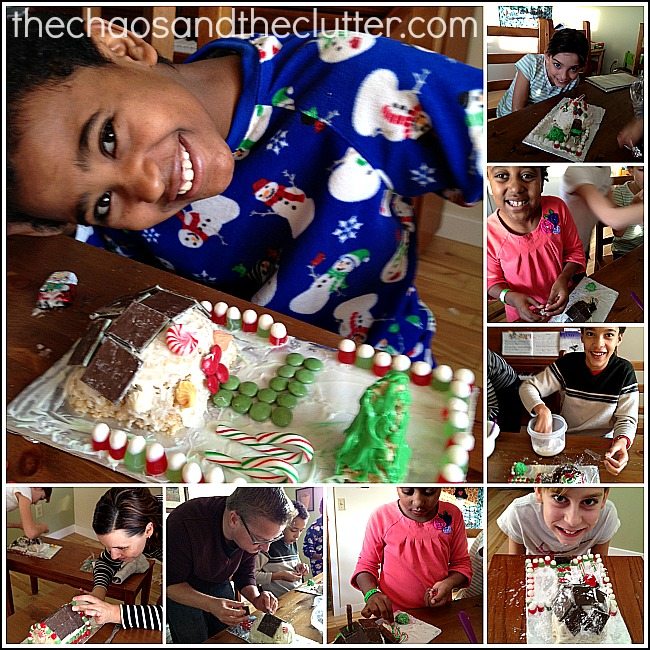
To finish off the cute little houses, sprinkle a little bit of icing sugar on top for the look of snow. And then of course there is the eating! Our kids certainly were happy to have their own candy houses to eat.

Rice Krispie Candy Houses
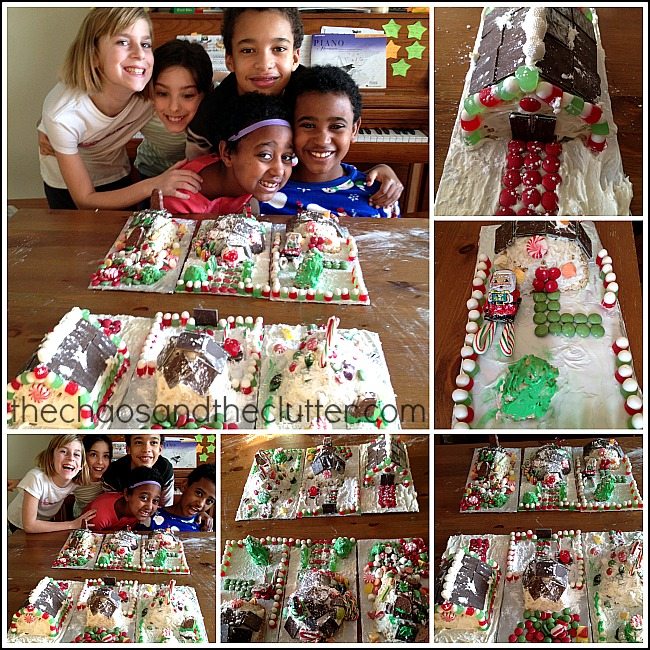
What are your Christmas traditions? I love this list of Christmas traditions shared by another family.

Filed Under: Christmas, Crafts and Activities

  • « Go to Previous Page
  • Page 1
  • Interim pages omitted …
  • Page 102
  • Page 103
  • Page 104
  • Page 105
  • Page 106
  • Interim pages omitted …
  • Page 128
  • Go to Next Page »

Primary Sidebar

Categories

We are a participant in the Amazon Services LLC Associates Program, an affiliate advertising program designed to provide a means for us to earn fees by linking to Amazon.com and affiliated sites.

Copyright © 2026 • The Chaos and the Clutter • Site Design by Jeni @ The Blog Maven

Return to top of page

Copyright © 2026 · Chaos and the Clutter 2.0 on Genesis Framework · WordPress · Log in