• Skip to primary navigation
  • Skip to main content
  • Skip to primary sidebar
  • Home
  • About
  • Contact
  • Privacy + Terms
  • Affiliates

The Chaos and the Clutter

  • Facebook
  • Twitter
  • Pinterest
  • Google Plus
  • RSS
  • Email
  • School at Home
  • Sensory
    • Sensory Processing Disorder
    • Awesome Sensory Play Activities
      • Sensory Bins
      • Sensory Bottles
      • Sensory Bags
  • Family Games
    • Minute to Win It Games
  • Special Needs Parenting
    • Childhood Anxiety
    • Reactive Attachment Disorder
    • Sensory Processing Disorder
  • Store
  • Course Login

Sensory

Create Your Own Sensory Bin

By Sharla Kostelyk

Sensory bins have always been something that I have created for the kids with very little input from them. Once I create them, the kids play with them, but the process of making them has always been something that is mine. Normally, I choose a theme, plan out what I’m going to include, make a list or take notes, go shopping for supplies if I need to, and then assemble the sensory bin. Sometimes in a pinch, I will go over to my sensory supplies cupboards and throw something together but usually, I have a plan.
Create your own Sensory Bin...a creative challenge for kids

Sarah from Little Bins for Little Hands put out a challenge to set out a bin with white rice and allow our kids to create their own sensory bin without any instruction from us. It sounded like fun and I was really interested to see what my kids would come up with so I took her up on it!

I set out five bins on the table, each filled with a layer of plain white rice. I did give one instruction to the kids which was that they should steer clear of adding anything wet to the bins (we have experienced several times what happens when liquid is added to a sensory bin that has rice as a base and it’s not pretty!).

It was so neat to see not only the kids’ personalities represented in their finished bins, but also to see their sensory preferences. Our older kids who weren’t home at the time the five younger kids made their bins were actually able to later guess whose was whose just based on personality!

The kids know where I keep the sensory supplies and they have been itching to get their hands on the stuff in those drawers! One of the first questions they asked me was if they were allowed to use those items. I say “yes”. The second question they asked was if they were allowed to add food or things they found in the kitchen. I say “yes” to that as well.

They tore off in search of items to add to their bins. It was clear from the beginning that some had a clear plan while others were just adding what felt good to them or what they saw their siblings add to theirs!
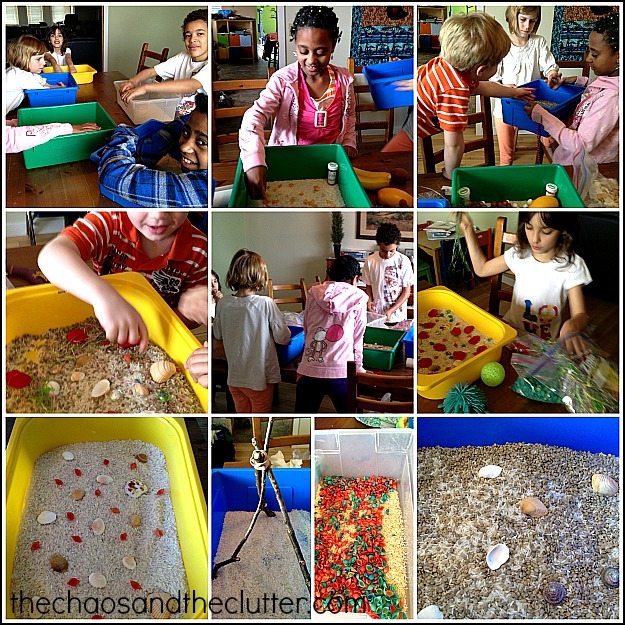
creating their own sensory binsI have to be 100% honest and say that it was painful for me to watch some of this process. It was painful to watch certain things get mixed together when I knew there would be no hope of separating them again and it was painful sometimes not to offer instruction or give suggestions. I was sometimes cringing when I saw what they were adding, so this was as much a learning exercise for me as it is for them.

Here are the kids and their completed sensory bins:
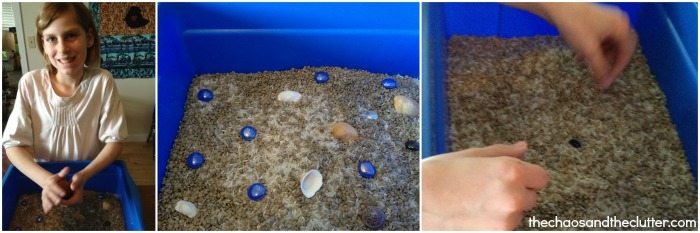
Miss Optimism sensory binMiss Optimism chose to add Kidfetti to the rice as a base. It’s interesting because the Kidfetti has a very similar feel to the rice. It’s smooth and soft. She initially added some glass stones and sea shells to create a beach scene, but in the end, she ended up taking all of those out because she preferred the feel of her bin without them. Later that day, she hid a coin in the bin and made a game out of having the other kids retrieve it.
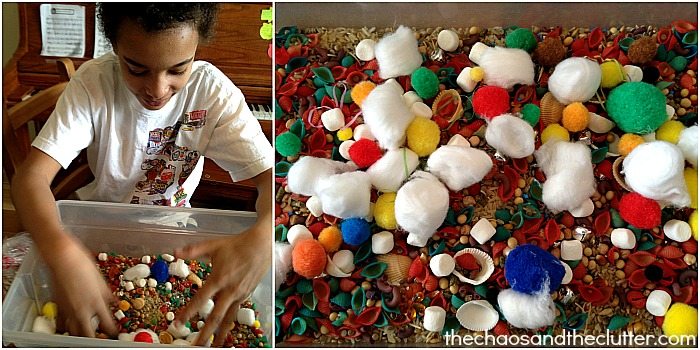
Einstein sensory binEinstein added anything he could get his hands on and just loved the feel of all the different textures. MORE is MORE apparently for Einstein! He added Kidfetti, dried lentils, dried chickpeas, birdseed, dried beans, mini marshmallows, dyed pasta shells and macaroni, pompoms, jingle bells, cotton balls, shells, Easter grass, and ribbon. He pretty much used every sensory bin filler that I had!
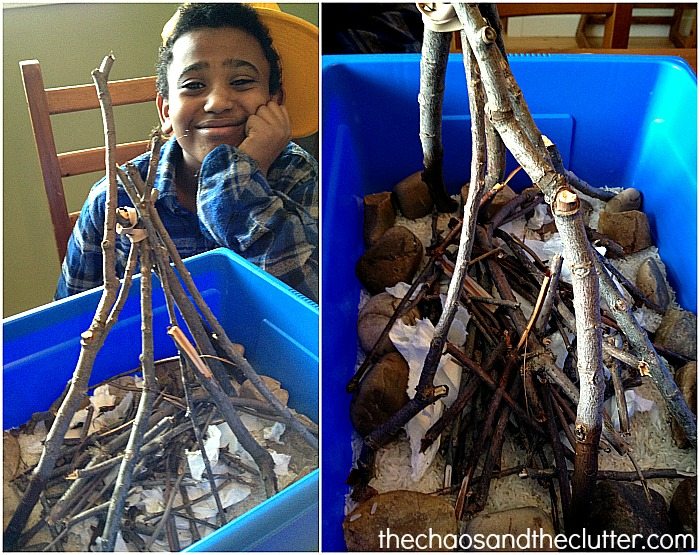
Snuggle Puppy sensory binSnuggle Puppy headed straight outside to gather items for his bin. He had a plan from the beginning and his bin was less about sensory and more about story. He told me to tell my “people that read your blog” that the title of this is “Mommy’s first time camping”. He is obviously excited that I am going to be coming camping for the first time in his life this upcoming summer. He used sticks, twigs, shredded paper, and rocks to create a campfire scene.
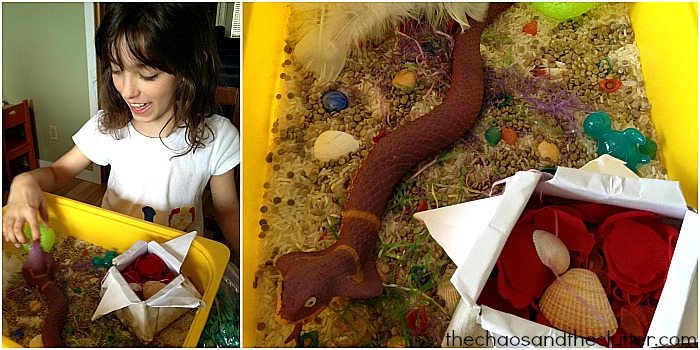
Granola Girl sensory binGranola Girl started with a very organized bin that can best be described as minimalist but as the time passed, she began to be influenced by her siblings and add some of the things they were adding. She used Kidfetti, an origami box, silk flower petals, seashells, shaped ice cubes, feathers, Easter grass, dyed pasta shells, a ball, a stretchy frog, and a squishy snake.
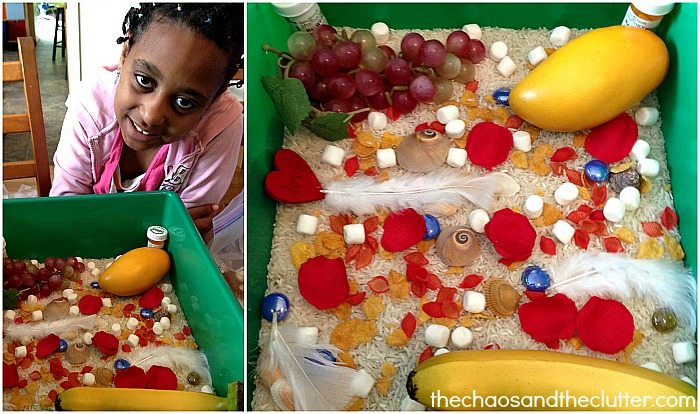
Dancing Queen sensory binDancing Queen’s sensory bin had a distinctive theme of food. She used both real and pretend food. She added corn flakes, mini marshmallows, glass beads, feathers, shells, a wooden heart, flower petals, her pill bottles, and a pretend mango (her favourite fruit), bananas and grapes. She also threw in some red dyed pasta.

If you are interested to see how other kids reacted to this sensory bin challenge, there are a number of blogs who are sharing their experiences with this.
rice sensory bin challenge

Little Bins For Little Hands

A Mommy’s Adventures

Craftulate

Creative World of Varya

FSPDT

Gift of Curiosity

Glittering Muffins

Here Come the Girls

Kids Play Space

Lalymom

Life Over C’s

Life with Moore Babies

Minne-Mama

P is for Preschooler

Preschool Inspirations

School Time Snippets

Squiggles and Bubbles

Still Playing School

Suzy Homeschooler

Teach Beside Me

Teach me Mommy

 If you are looking for other sensory play activities, you may be interested in following my Sensory Bins Board on Pinterest.

Check out my book on Sensory Bins! It is fantastic!
Filed Under: Sensory, Sensory Bins Tagged With: sensory bin, sensory play

Money Saving Sensory Solutions

Money Saving Sensory Solutions

By Sharla Kostelyk

Equipping your home to adapt to a child with sensory needs can be expensive. I was astonished to find just how expensive some of the sensory tools were. Five of our kids have Sensory Processing Disorder so the search for sensory solutions that wouldn’t break the bank is a journey I have been on for many years now. I have managed to come up with a lot of low cost options that work just as well as the items that are sold by specialty stores for a fraction of the cost.

Money Saving Sensory Solutions

Here are some of the items we have adapted or found a lower cost solution for:

Weighted vests, capes or clothing

Many children have a much easier time regulating themselves when they are wearing weighted vests or clothing. Sewing your own may save money. I don’t know how to sew though.

If you are like me and don’t sew, you can buy a vest with pockets such as a fly fishing vest and add weights to the pockets.

Weighted neck rolls can be as effective for some children as weighted capes are and are usually much less money.

For some of my kids, wearing very tight fitting outfits underneath their clothing is as effective, if not more effective than weighted clothing. We accomplish this by buying gymnastics suits that are a few sizes too small and having them wear them under their regular clothes. In this way, they still get the feeling of the extra pressure. Gymnastics leotards that go down to the mid-thigh (biketards) and/or have sleeves are what we’ve found to work the best.

You may be able to find second hand gymnastics outfits online, in consignment stores or from friends whose kids have outgrown them. As with all things sensory, it’s best if you can have your child try it on before buying. Avoid things with itchy fabrics like glitter or sequins.

Fidget toys and chewelry

Actual sensory fidget toys are ridiculously expensive! This may sound like the wackiest thing ever, but pet toys can make excellent fidget toys. They are often rich in texture and durability and they are a fraction of the cost of fidget toys!

Obviously, I am recommending that you buy new toys from the pet store or online for your child, not have them play with your dog’s toy!
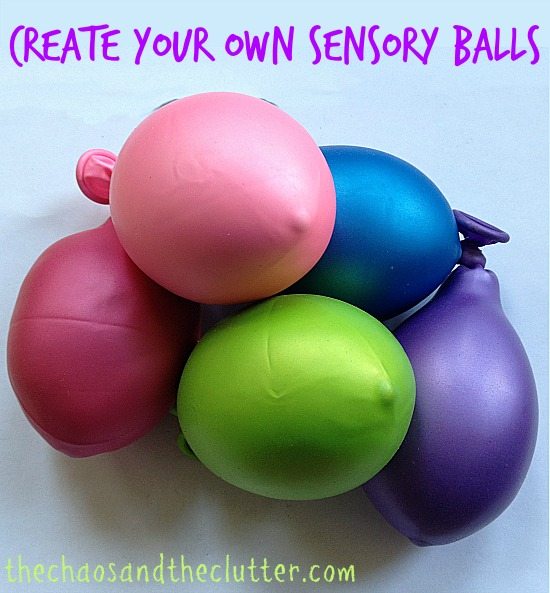
We make our own sensory balls for pennies. I have full instructions for making your own here.

Create Your Own Sensory Balls (for pennies each)Knobby balls are fairly inexpensive and can be used as fidget toys or for sensory activities.

Other low cost things that work for fidget toys include playdough (this recipe for homemade Lavender Scented Playdough is calming as well), silly putty (you can make your own easily), pencil toppers or pencil grips, sponges (from the Dollar store!), ribbons, stones, beads (also from the Dollar store), rubber band balls, and baby toys.

Lanyards can double as chewlery and are much less expensive. My kids also like using those coil keychains that are often given away by companies at Trade Fairs as bracelets that they can chew on.

One of my readers suggested buying teething beads in the baby section and stringing them onto a pretty ribbon to make a necklace (homemade chewlry).

Seat aids

Some of our kids have Movin’ Sit cushions but they are a bit pricey. Another solution is to buy therabands (exercise bands) and put them around the legs of the chair or desk. An even cheaper solution is to do this with scraps of stretchy fabric or old nylons. This will provide your child with sensory feedback when they swing their legs.

Bean bag chairs can be another solution for sitting but they also tend to be a bit pricey.

Textured disks like the kind you can buy at Ikea make good seat disks.

You can fill a large sock with rice to make a weighted lap snake. Those microwaveable heat packs also make good weighted lap pads. These can help with staying seated and feeling more regulated while seated.

Weighted Blankets

Weighted blankets are expensive. There’s really no way to sugar coat it. You can make your own if you know how to sew or you can make a very heavy quilt or blanket. My aunt made some heavy blankets for our kids using old jeans. The denim is very heavy (and free if you collect ripped jeans from people you know).

If you don’t know how to sew (and don’t have an aunt who will make you blankets out of denim!), you can also try buying heavy down comforters when they go on sale.

If you do decide to buy a weighted blanket, be sure to let your child try it out before you spend the money on it as some kids don’t like them. Only two of our kids with Sensory Processing Disorder like them but two ones that do, love them! I was able to purchase our weighted blankets from Innovaid and were allowed to try them first to ensure that the kids would like them.

There is also an excellent tutorial on how to make your own stretchy sensory sheet.

Larger sensory items

You can save so much money by making your own things from items you can buy at hardware stores, fabric stores and Dollar stores. Examples include such things as making your own hammock, platform swing, tire swing, rock climbing wall, ball pit (you can also make a simpler one using a blow up pool or playpen and balls or cut up pool noodles), parachute, and lycra swings. (Click on each of the words to be taken to a tutorial for how to make these yourself.) You can make a crash pad by filling a duvet cover with foam pieces.

There are some things that are almost essential to have when you have a child with sensory needs but that just are expensive. These include such things as trampolines or mini trampolines and the Hop Bouncer. For items such as these, my best suggestion is to check Kijiji, Craigslist, eBay, Freecycle, the local paper, swap and buy and sell groups online, and garage sales. This should make the prices much more affordable and enable you to save for them and pay cash instead of going into debt to buy new ones.

Other sensory solutions

You can make your own sensory tunnel or tube (often called a Sensory Sock) using stretchy fabric for a fraction of the cost of buying it.

Use old couch cushions for compression sandwiches.

Create your own sensory bins, sensory boards and sensory bottles.

Ikea has some great sensory solutions that are quite inexpensive such as a swing and rings that can be hung indoors, their egg swivel chair, tunnels and small tents, a great hanging chair that swings as well as surrounds them like a small hammock (it’s called the EKORRE), and items such as textured cushions, and soft lights.

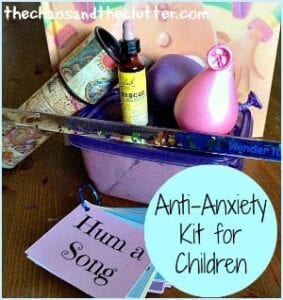
For the anxiety often associated with SPD or ASD, I highly recommend my anti-anxiety kit for kids. It works so well with our kids and can be customized to what works with your own child. You can make yours very inexpensively.

Create an Anti-Anxiety Kit for Your Child including free printable relaxation prompts

Instead of buying expensive noise blocking headphones, try inexpensive ear plugs, cotton or ear muffs.

Drums can be a good outlet for kids with sensory needs but can be made using household items like ice cream pails, pots and pans, and empty coffee tins.

You may also be interested in reading:

Surviving Public Bathrooms with a Child with Sensory Issues

Must Haves for Kids with Sensory Needs

Resources to Teach Kids About Emotions and How to Manage Them

What money saving sensory solutions have you found?

Join me for a free 5 part email series, Little Hearts, Big Worries offering resources and hope for parents.

Filed Under: Sensory, Special Needs Parenting

Easter Sensory Play

By Sharla Kostelyk

Easter is one of my favourite holidays. I love the Spring, so fresh with possibilities and of course, I love what Easter signifies. As we approach that time of year, I thought I would share with you some fun sensory play suggestions that you can incorporate with your kids or students.

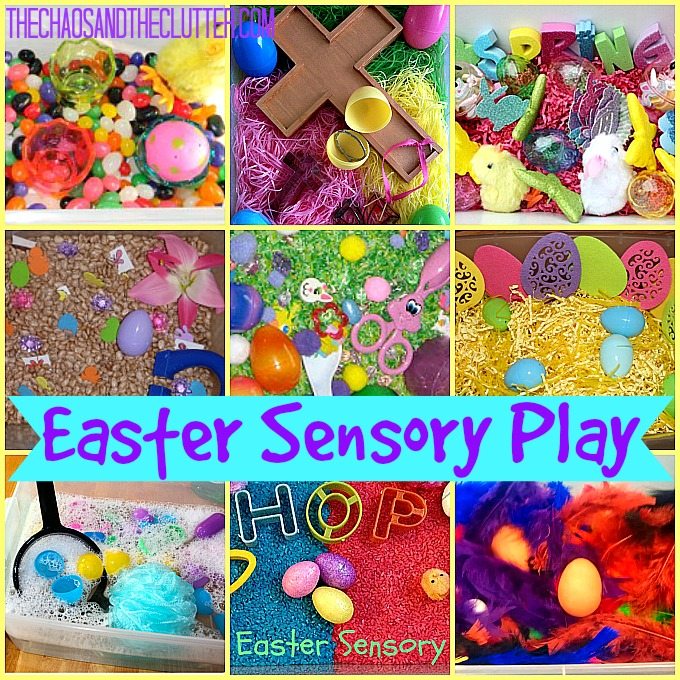
From jelly beans (a taste sensation!) to fuzzy chicks and feathers to all the sound and sight opportunities that the plastic eggs hold in store, there are so many activities, games and bins that you can create this time of year to incorporate sensory play.Easter Sensory Play Ideas

pictured in the collage above:

Jelly Bean Sensory Bin from Stir the Wonder

Christ-Centered Easter Sensory Bin from The Chaos and The Clutter

Easter Sensory Bin and Activities from Fantastic Fun and Learning

Magnetic Easter Sensory Tub from Suzy Homemaker

Easter Sensory Box from Rubber Boots and Elf Shoes

Easter Egg Sensory Tub from Teaching Mama

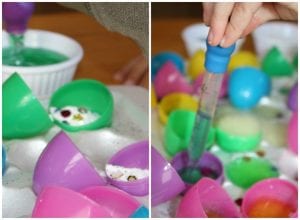
Easter Egg Wash Sensory Play from Little Bins for Little Hands

“Hoppy” Easter Sensory Bin from The Chaos and The Clutter

Montessori Inspired Easter Shelves from Montessori Nature

Here are some other suggestions from around the web for Easter sensory fun:

Sensory Eggs from TwoDaloo

DIY Easter Sensory Activities from Montessori on a Budget

Easter Sensory Play Table from Learning 4 Kids

Fizzy Eggs Baking Soda Science from Little Bins for Little Hands

Easter Egg Baking Soda ScienceMontessori Inspired Easter Activities from Living Montessori Now

Sight Words Easy Egg Sensory Bin from There’s Just One Mommy

Easter Sensory Sink from Frogs and Snails and Puppy Dog Tail

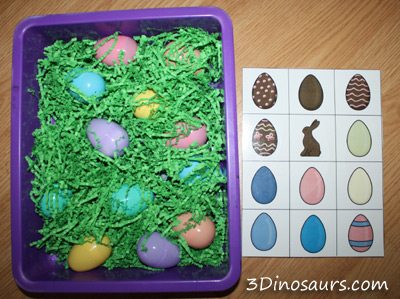
Easter Egg Matching Sensory Bin from 3 Dinosaurs

Easter Egg Matching Sensory BinSensory-tastic ways to Dye Easter Eggs from Sugar Aunts

How We Used our Easter Sensory Bin from Gift of Curiosity

Easter Egg Sensory Bin from And Next Comes L

Easter Sensory Bin from Love, Play Learn

If you are looking for other Easter activities, you may be interested in following my Easter board or my Christ-Centered Easter board on Pinterest.

If you are looking for other sensory activities, join me for a free 5 part email series Sensory Solutions and Activities and get your Sensory System Behaviours Easy Reference Cards.

Filed Under: Crafts and Activities, Sensory

Surviving Public Bathrooms with a Child with Sensory Issues

By Sharla Kostelyk

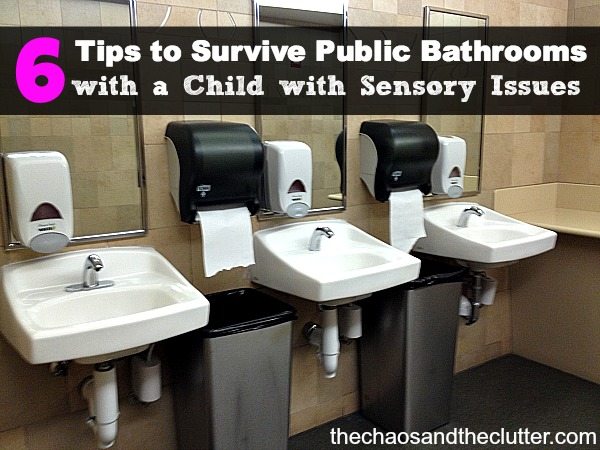
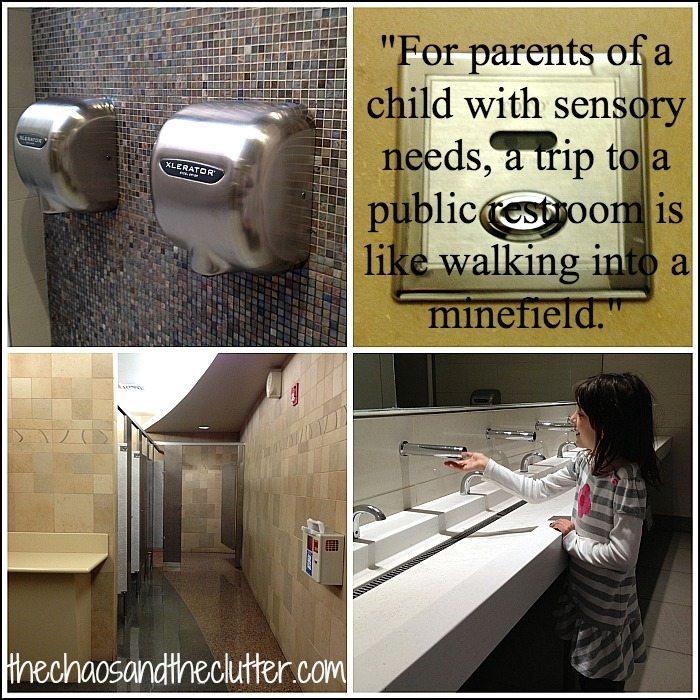
For the parents of a child with sensory needs, a trip to a public restroom is like walking into a minefield. The hand dryers that sounds like jet engines, the automatic flush toilets that are equally as loud, the automatic sinks, the paper towel dispensers…can all make for a very difficult experience. I’m guessing that whoever designed these places did not have a child with sensory issues!

6 Tips to Surviving Public Bathrooms with a Child with Sensory Issues

For parents of children with SPD (sensory processing disorder) or even kids who just have sensory issues, the fear of those gosh-darn-it-just-plain-awful public toilets are enough to have you avoiding outings altogether.

For children who are sensory avoidant (sensory defensive), these bathrooms are a nightmare. With the loud noises, the strong wind that comes out of the hand dryers that literally moves the skin like some kind of futuristic science experiment, the unexpected surprises thanks to so many things being automated, the potpourri of smells, and the glare of the lights, it’s no wonder for them they can be a very scary place.

For children who are sensory seeking, these bathrooms have the opposite effect. They are like a playground of sensory stimulation with their sights and sounds and smells! In these cases, the trips to the bathroom are more of a nightmare for the parents than for the child.

Lucky me (!), I have kids with both types of issues so those trips to restrooms in malls, airports, restaurants, recreation centres, theatres, grocery stores, museums, and other locations are something I used to dread. Over time, I have gathered some tricks and secrets that have made this less of a challenge for our family.

public bathroom tips for children with sensory issues

Here are some tips that I’ve acquired over the years to make these trips to public washrooms a bit more bearable:

Avoid them when possible

This may seem like an obvious solution, but it is a highly effective one. Whenever possible, avoid using the restroom in public buildings. This means not only reminding all of your children to use the washroom before you leave home but also being sure to use it yourself just before leaving. There is no way to ensure that you will never have to use a public restroom, but using the “facilities” at home before going out will at the very least cut back the amount of times you have to face the public ones.

Covering the automatic flush sensor

Carry small stickers or post it notes with you in your purse to cover the automatic flush sensor. This way, your child won’t have to fear the terrible noise going off without warning and can pee in peace!

Familiarity helps

Whenever possible, visit public restrooms that are familiar to you and your child. This will make it easier both because it is familiar and because you can both be better prepared and know what to expect. It’s not always a possibility but if you can always shop at the same grocery store and park near the same entrance to the mall, you can increase the chances that the restrooms will be ones your child is more comfortable with.

Giving them advance warning

Talk to your child ahead of time about what they can expect in a public washroom. Let them know that you will be there with them, supporting them and helping them in any way you can. Encourage them to talk openly with you about which parts you find the most challenging. Address their fears. Brainstorm ideas together for ways to avoid or minimize those challenges.

For sensory seekers, lay out the expectations before you go in. Dayna from Lemon Lime Adventures says that she tells her son that he can only touch things one time. Having expectations such as these laid out beforehand will lessen problems while there. Another suggestion would be for kids to keep their hands in their pockets.

Come prepared

Other than bringing small stickers or post it notes for covering the automatic flush sensors (which are also good for covering the sensors on the taps and hand dryers as well), you can also bring sound dampening earmuffs or noise blocking headphones to keep out the loud and sudden noises that can occur. Even if you are able to cover the sensor on the toilet your child is using, you can’t cover the sensors on the toilets other people are using! Bring hand sanitizer or antibacterial wipes to wash up with so that you can avoid the sink area entirely. This not only allows you to avoid the water, but the powerful dryers as well.

Acknowledge the challenges and give praise

Surviving that minefield is a praise-worthy accomplishment for both you and your kiddo. Acknowledge that you know it wasn’t easy for them and are proud of them for their efforts.

Thankfully, the terror that public washrooms used to hold for my kids is losing its grip as they get older and as they get better skills under their belt for dealing with their sensory needs.

Join me for a free 5 part email series, Little Hearts, Big Worries offering resources and hope for parents.


If you have a child with sensory issues, you may be interested in reading:

Money Saving Sensory Solutions

Must Haves for Kids with Sensory Issues

Create Your Own Anti-Anxiety Kit for Children

Filed Under: Sensory, Special Needs Parenting

Easter Egg and Bunny Sensory Bin

By Sharla Kostelyk

I like to keep a stash of coloured rice on hand for things just such as this. Since I had already dyed the rice, I was able to throw this sensory bin together really quickly.

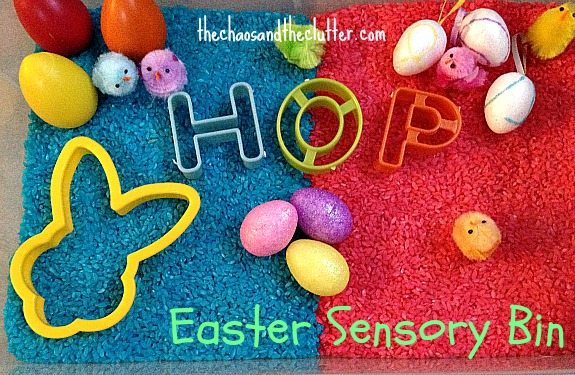
Easter Egg and Bunny Sensory BinTo make this Easter sensory bin, I used blue and pink rice, egg shakers (a really great sensory tool!), glittered foam eggs, styrofoam eggs, fuzzy chicks, a bunny cookie cutter, and cookie cutters to spell out the word “HOP”.
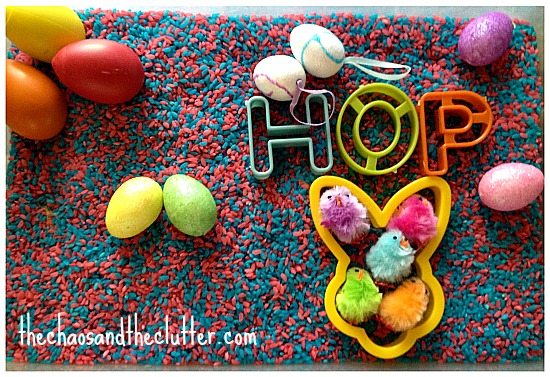
The kids enjoyed this bin but it was Granola Girl who took the biggest liking to it. She especially seemed to like to group things by colour. She also liked to keep the blue and pink rice on their respective sides. Unfortunately, I didn’t get a picture after any of her sessions with the bin. I did manage to get this picture of the bin after Snuggle Puppy finished playing with it. He obviously had no issues with mixing the different colours of rice!

Hop Easter Sensory Bin

You may also want to check out our Christ-centered Easter sensory bin from last year. If you are looking for more sensory bin ideas or information, you may be interested in my book and by following my Sensory Bins board on Pinterest.

The Ultimate Guide to Sensory Bins

Join me for a free 5 part email series Sensory Solutions and Activities and get your Sensory System Behaviours Easy Reference Cards.

Filed Under: Sensory, Sensory Bins Tagged With: sensory bin, sensory play

Silk Flowers Sensory Bins

Spring Flowers Sensory Bin

By Sharla Kostelyk

These silk flowers sensory bins were made easily using silk flowers and flower petals. These are a very easy sensory bin filler. I find most of mine at the dollar store.

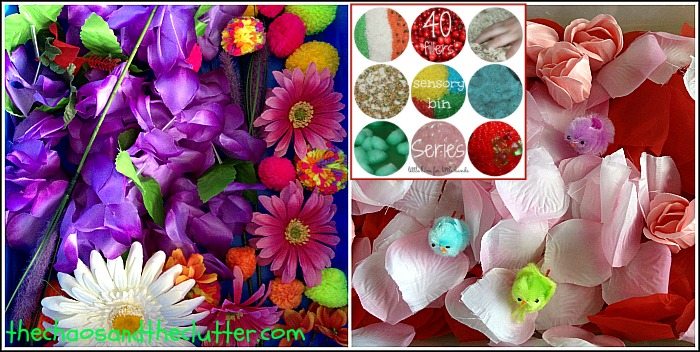
Flower and Flower Petal Sensory Bin IdeasSpring is coming! After a winter that seemed longer (or maybe just colder) than most, I am very ready to welcome it. As part of my plan to welcome spring a bit early, I made two Spring themed sensory bins. The first one I made very simply with two colours of silk flower petals, soap flower petals (I knew that my sensory sensitive kids would NOT be fans of the smell of the regular rose scented ones so I bought softer grapefruit smelling ones), and little chicks. It was a very simple bin but had a good contrast of textures between the coarser soap petals and the silk petals and then the fuzzy chicks. With the presence of the little chicks, this bin could also double as an Easter sensory experience.
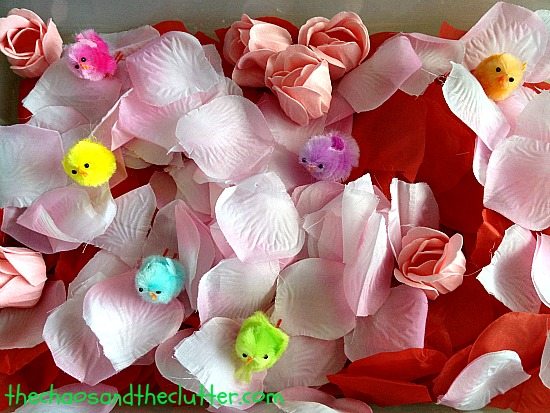
Spring Chick Sensory BinThe other bin is one that I love because it is full of bright and cheerful colours! For me, Spring is all about colour. This bin was so pretty.
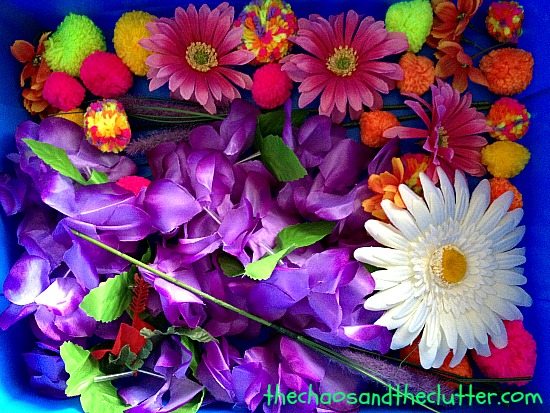
For this sensory bin, I used a purple silk flower lei, many different silk flowers in an assortment of colours, silk leaves, a large daisy hairclip, and really bright pompoms. The kids really enjoyed this bin. Granola Girl enjoyed grouping the flowers and pompoms according to colour while some of the other kids just wanted to dig their hands in and play in a more random way.

Spring Flowers Sensory BinSilk flowers and flower petals are a very easy bin filler because they add colour, a nice soft texture and they hold up well to play and even do well if they get wet. You can easily float them in water.

If you have any sensory bins that you silk flowers or flower petals, please link them up so that others can find more ideas for incorporating this easy sensory bin filler into their sensory play as well.

If you are looking for information on making sensory bins, you may be interested in my book. The Ultimate Guide to Sensory Bins

Filed Under: Sensory, Sensory Bins Tagged With: sensory bin, sensory play

  • « Go to Previous Page
  • Page 1
  • Interim pages omitted …
  • Page 42
  • Page 43
  • Page 44
  • Page 45
  • Page 46
  • Interim pages omitted …
  • Page 50
  • Go to Next Page »

Primary Sidebar

Categories

We are a participant in the Amazon Services LLC Associates Program, an affiliate advertising program designed to provide a means for us to earn fees by linking to Amazon.com and affiliated sites.

Copyright © 2026 • The Chaos and the Clutter • Site Design by Jeni @ The Blog Maven

Return to top of page

Copyright © 2026 · Chaos and the Clutter 2.0 on Genesis Framework · WordPress · Log in