• Skip to primary navigation
  • Skip to main content
  • Skip to primary sidebar
  • Home
  • About
  • Contact
  • Privacy + Terms
  • Affiliates

The Chaos and the Clutter

  • Facebook
  • Twitter
  • Pinterest
  • Google Plus
  • RSS
  • Email
  • School at Home
  • Sensory
    • Sensory Processing Disorder
    • Awesome Sensory Play Activities
      • Sensory Bins
      • Sensory Bottles
      • Sensory Bags
  • Family Games
    • Minute to Win It Games
  • Special Needs Parenting
    • Childhood Anxiety
    • Reactive Attachment Disorder
    • Sensory Processing Disorder
  • Store
  • Course Login

sensory play

Stuck in the Mud with Playdough

By Sharla Kostelyk

Usually it’s the ridiculously simple activities that kids like best and this one is no exception. This has been a favourite at our house for over ten years. I know exactly when we started doing it because I remember being over at my friend Julie’s and seeing her son playing it. I was the mom of three boys at the time so I knew instantly that it would be a hit at my house. I was right.

The premise is this: boys like cars; boys like mud; kids like play dough. It’s about that simple.

Stuck in the Mud Playdough Game

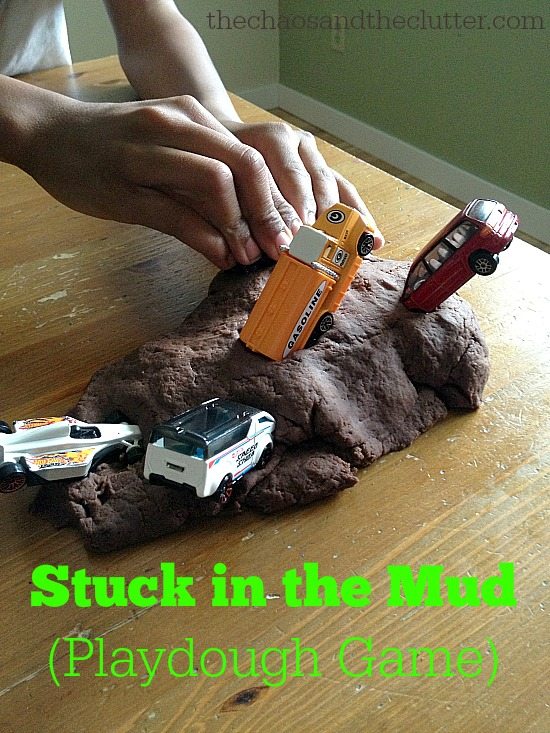
For this activity, you need brown playdough and some cars or trucks. I use chocolate playdough most of the time because I like the scent and consistency.

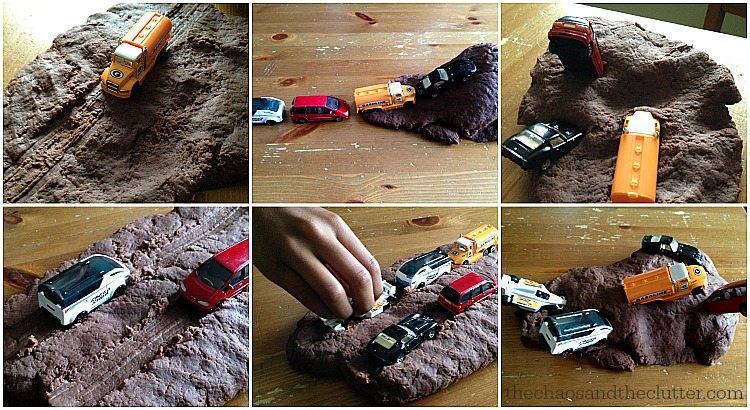
Once you suggest that they pretend the playdough is mud, kids, (boys especially) love to make roads in it, hills and valleys, and of course, get vehicles stuck. Then they can send their tow trucks to rescue the stuck vehicles or extract them via helicopter or whatever their imagination comes up with.

We always call this Stuck in the Mud. If I say to my kids, “do you want to play stuck in the mud?”, they know exactly what I’m talking about and seem to enjoy it as much now as they did when they were toddlers. It’s also a great simple sensory idea.

I wanted to share this simple activity with you but needed to get a few pictures in order to do so. I tried making my usual chocolate playdough recipe, but I was distracted and missed half a cup of flour plus I substituted hot chocolate mix for the cocoa. The result was that it was lumpy, strange in colour, sticky, and burnt. The pot took forever to scrub because of the playdough burnt to the bottom of it and I was feeling pretty darn frustrated!

I didn’t have enough cream of tartar or arm muscles to try another batch, so I did what any mom would do and looked up a recipe for no-cook chocolate play dough. I didn’t like the consistency or look of it as much as I like my usual recipe, but it was way easier to make and the kids didn’t seem to mind.

I asked if they wanted to play Stuck in the Mud and Einstein ran off to get some cars! This type of sensory play never seems to get old!

Stuck in the MudIf you are looking for other playdough ideas, you may want to follow my Playing with Playdough board on Pinterest. What is your favourite way to play with play dough?

Join me for a free 5 part email series Sensory Solutions and Activities and get your Sensory System Behaviours Easy Reference Cards.

Filed Under: Crafts and Activities, Sensory, Simple Sensory Solutions Tagged With: sensory play

Simple Summer Sensory Activity

By Sharla Kostelyk

Summer offers a whole new range of sensory options as you can now move many activities outside and have easier cleanup and more room to move. Last year, I ran a series on simple Summer Sensory Activities and I am finding that now that the weather is nice, we are doing more of our sensory “work” outside again.

Simple Summer Sensory Activity
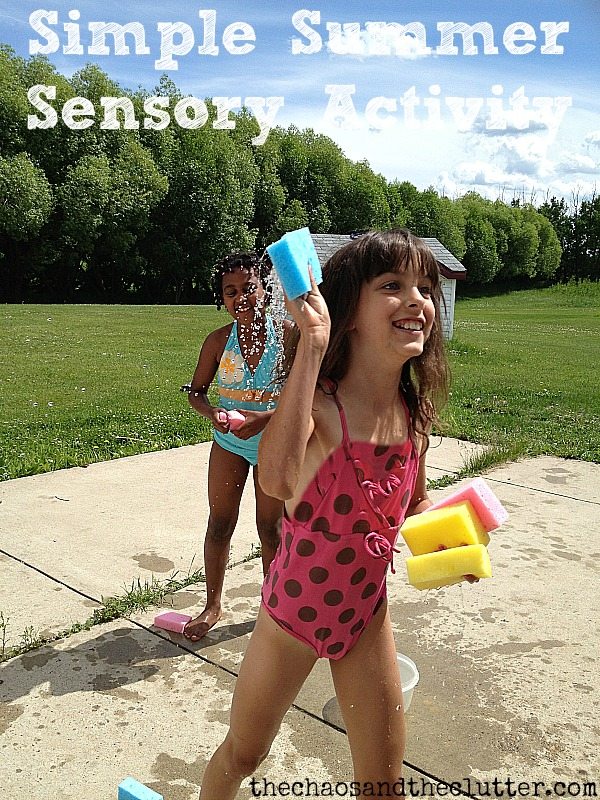
The kids had so much fun with this and they had no idea that they were actually doing really important sensory work! Setting this activity up could not be any simpler. All that is needed is a bucket full of water and some sponges. I bought two packs of six sponges each at the dollar store. For twelve sponges, I spent $2 and I am planning to turn them into two other sensory activities after this, so it was a very cost effective idea. If you already have sponges around the house, this can be a free activity.

Most kids love a good water fight, but there are two problems with a typical water fight at our house. One is that we live in the country and have to have our water trucked in so we can’t waste too much of it. The other is that in a water fight involving hoses or water guns, things tend to deteriorate quickly and an actual fight usually ensues. We had better luck with the sponges and I was clear to lay out the ground rules before they started. One of the ground rules was that mommy was not a target!

The kids not only got the sensory feedback of the water and the sponges, they also got the feedback from wringing out the sponges, particularly overtop of their siblings’ heads!!!

sensory water fight with sponges
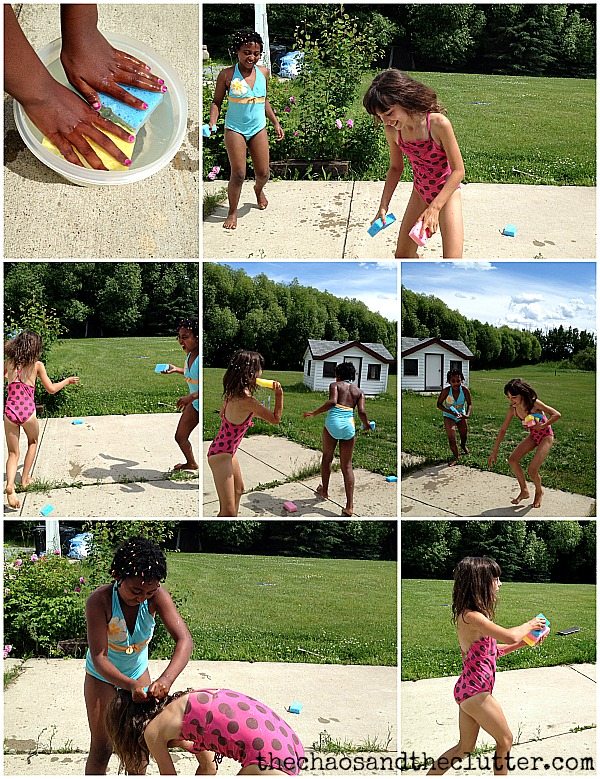
This easy activity can easily be turned into another sensory game using the same bucket of water and sponges. If the water fight disseminates into chaos or if the kids get bored, they can go over and wash your car or the side of the house. You can add soapy bubbles to the water for this if you want (don’t add the bubbles to the water fight portion of the activity lest someone get it in their eyes) and you’ve now created another simple summer sensory activity and possibly, created enough time for yourself to run and throw a load of laundry in the wash or read a few pages in a book!

If you are looking for other easy activities to do with your kids this summer, you may be interested in joining me for a free 5 part email series Sensory Solutions and Activities and get your Sensory System Behaviours Easy Reference Cards.

Filed Under: Sensory, Simple Sensory Solutions, Summer Sensory Activities Tagged With: sensory play

5 Trampoline Games

Trampoline Games and Activities

By Sharla Kostelyk

Please note: Trampolines are responsible for many injuries and common sense and adult supervision should be used with all of these activities. I am not responsible for any injuries that occur as a result of playing these games. As a parent, you know your child’s skill level and ability best and can determine if they are ready for these activities.

Trampoline Games and fun ideas that will keep the kids happy for hours!
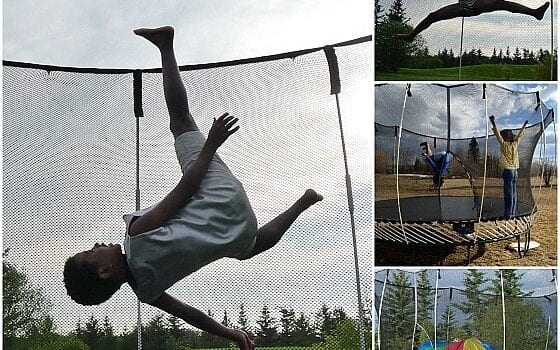
As the parent of seven kids, five with sensory issues, our trampoline has been our best investment. We have had ours for 8 years and this year after daily use and being left outside for six winters in the deep snow, the bottom finally tore, making it unusable. I am so used to being able to use the trampoline as a brain break for the kids and they are so used to being able to use it to help keep themselves regulated that it was a miserable few months for all of us without it.

I didn’t want to have to buy a whole new one but then a friend told me that Springfree sells replacement parts. We ordered a replacement mat and The Husband and a friend of his spent an afternoon attaching it and now our trampoline is as good as new!

5 Trampoline Games (plus 5 bonus ideas)
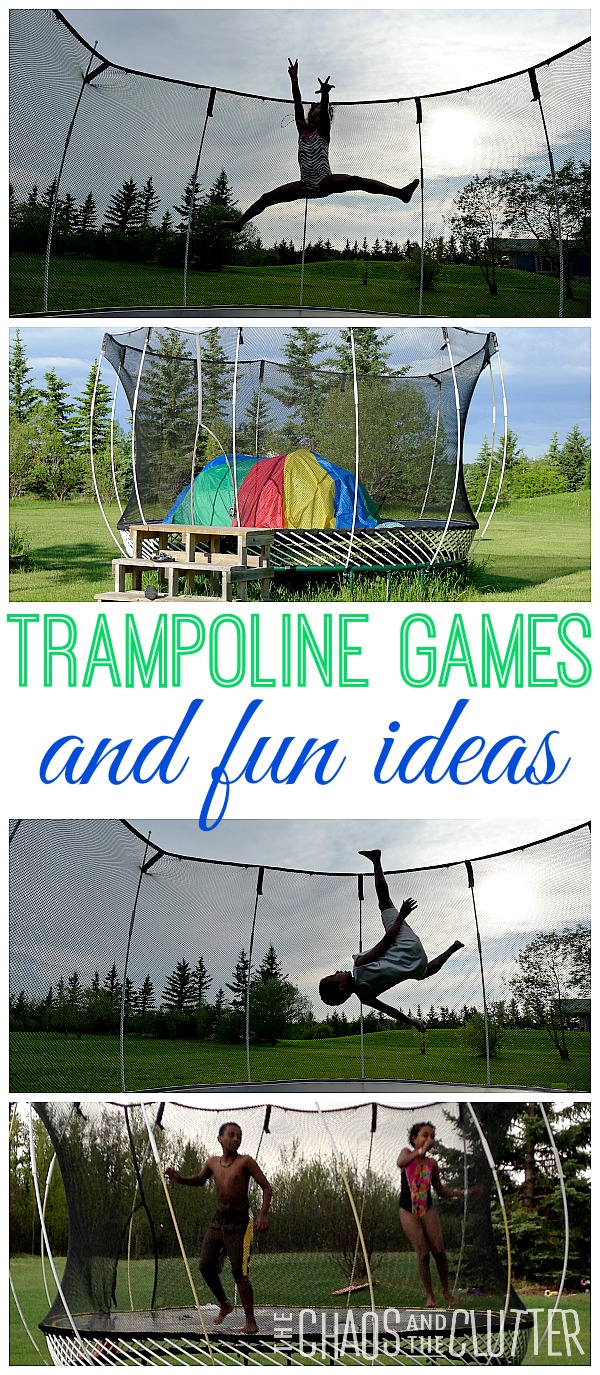
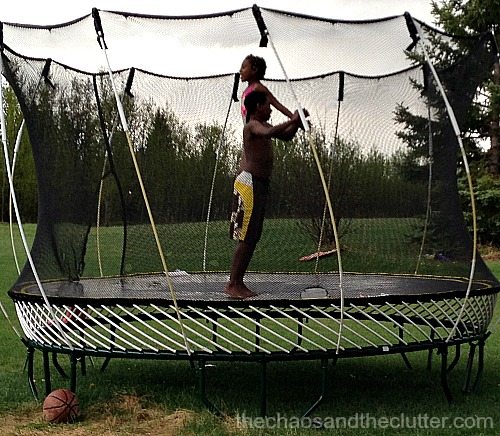
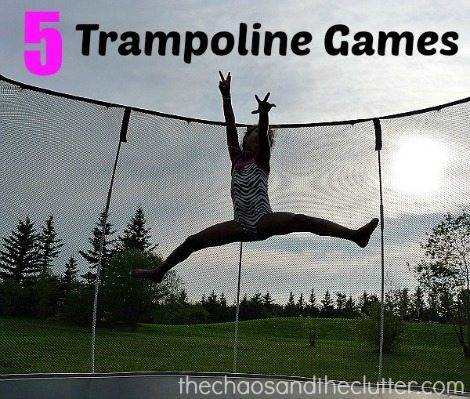
In celebration of our newly functional trampoline, I thought I would share some of the games our kids play. Some are classic trampoline games and some they invented themselves.

All are fun.

For those of you who have children with sensory issues or SPD (sensory processing disorder), it may be worthwhile to note that these games are examples of proprioceptive sensory play. Find more activities for proprioception.

Trampoline Games and Activities

Bum Wars

There is no trampoline game more classic than bum wars! The premise of this is that the last one standing wins! You need at least 2 players but can be played with more. Each player jumps a few times to warm up and then when agreed, they each drop down to their bums and then jump back up, landing on their feet. Each player is only allowed one bum bounce and one feet bounce. If they do double of either, they are out. The game is more challenging if there are adults and children playing because of the weight differences. (ask me how I know!)

Velodome

This is a game invented by my children. It can only be played on a trampoline with a net. One player is chosen to be “it”. Everyone, including that player places their outside hand on the net. This hand must stay on the net at all times. In this version of tag, players run around the outside of the trampoline as fast as they can, with their outside hand on the net. The player who is “it” attempts to tag the other players. Once tagged, they are out and can sit in the middle of the trampoline or as a safer alternative, can exit the trampoline entirely!

Popcorn

This is another classic game. One person sits in the middle of the trampoline, holding their knees to their chest. The other person jumps and tries to get the “popcorn to pop” (to get the person’s arms to pop open).

Four Boxes

I think my kids invented this one. It doesn’t totally make sense because our trampoline is round, but it would make sense on a rectangular or square trampoline and they have fun with it and that’s what matters! The person who is “it” closes their eyes and counts to 10, standing in the middle of the trampoline. Everyone else moves to a corner of the trampoline. When he says “10”, everyone stops moving. With his eyes still closed, “it” points to a corner and everyone there is out.

Poison Balls

Put some balls on the trampoline. In this trampoline game, the kids pretend that the balls are poison and jump while trying to avoid the balls, which of course roll around unpredictably. If someone is touched by a ball, they are out and must sit out for the rest of the round. To add to the sensory experience, you can use other items instead of balls such as pillows, stuffed toys, crumbled tin foil, or other soft items your imagination can think up.

Other trampoline fun:

1. Our kids love getting their bathing suits on and jumping in the rain. The water makes the trampoline bouncier. This can also be achieved by putting a sprinkler under the trampoline. trampoline in the rain 
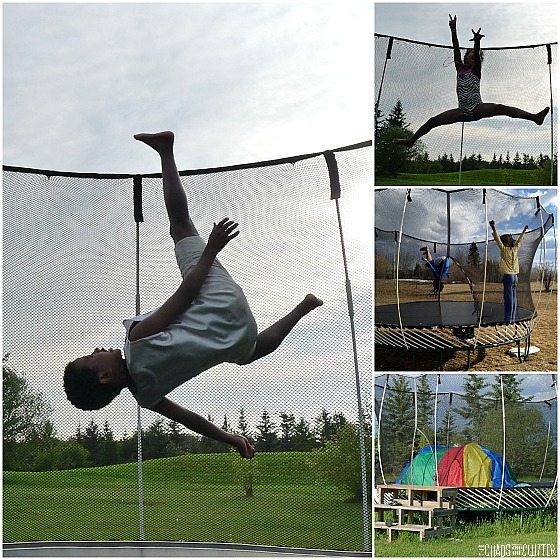
2. Another favourite trampoline activity here is having sleepovers on it. They set up sleeping bags and have a campout using the trampoline as their huge bed.

3. Lay out a large sheet of bubble wrap on the trampoline mat and let the kids jump!

4. We attach an old parachute to ours (you can see in one of the pictures below how the wind poofs it out and makes it like a tent inside). I don’t know how safe or smart it is to do it, but the kids really like jumping inside their homemade bouncy castle! trampoline fun
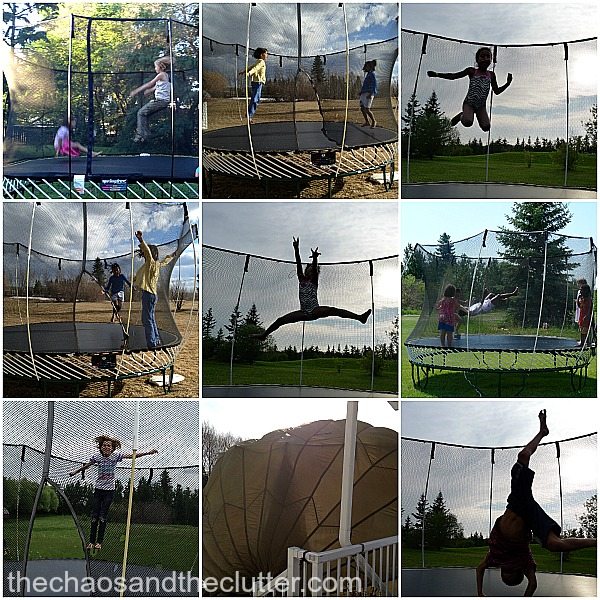
5. Have the kids do tricks like multiple bum drops or flips or jumping as high as they can and try to imitate or beat the one who went before them. Again, trampolines can be dangerous. We are fortunate in that we have not had any major injuries, but please do use caution.

Join me for a free 5 part email series Sensory Solutions and Activities and get your Sensory System Behaviours Easy Reference Cards.

Sensory Station Ideas

A Bucket List for a Simpler Summer

Photo Scavenger Hunt

Filed Under: Crafts and Activities, Sensory Tagged With: sensory play

Tactile Sensory Cards

Tactile Sensory Cards

By Sharla Kostelyk

I am participating in the 6 Days of Sensory Play Challenge. I am late due to some issues and extra appointments for some of the kids so mine will not be on the right day but I do have plans for all of them so if you can bear with me, I will be getting to each of them and sharing my ideas.

For Tactile Sensory Play, I created some simple sensory cards. Tactile play involves touch so things such as sensory bins work well. Since we do so many sensory bins, I decided to try something a bit different and make these cards for the kids to explore different textures.

Tactile Sensory Cards
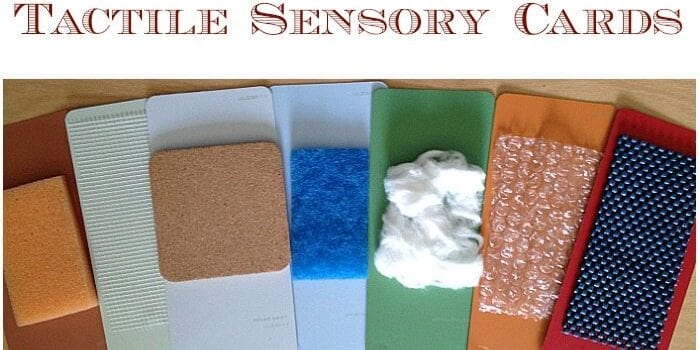
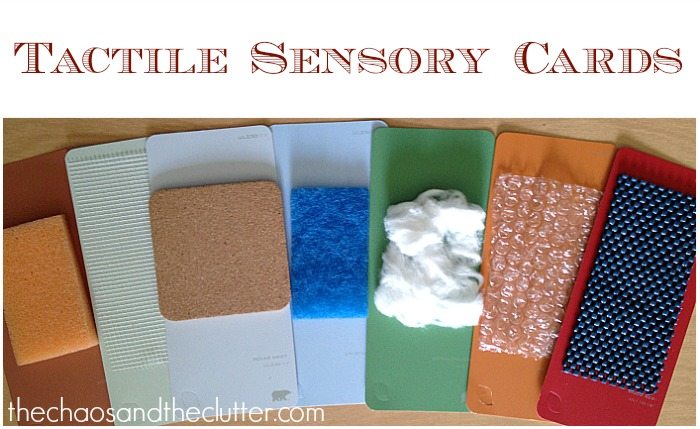
These are very simple to make and allow kids to explore textures and even get used to textures that they made not be as comfortable with. I used paint chips (since I seem to be making everything out of paint chips lately!) but you can make these on cardstock if you prefer.

I glued things onto the paint chips that represented a variety of textures. I used sponge, bristle pad, bubble wrap, foam, cork, tin foil, mesh, cotton, rubber, and sand. The great thing about these is that you can make them using things that you have in your home already and they don’t have to cost a penny. Sensory solutions do not have to be expensive.

You could use pretty much anything that you can glue down: rice, beans, sandpaper, wire, tissue, fabric swatches, corrugated cardboard… What other ideas can you come up with?

The kids enjoyed playing with these tactile sensory cards and even tried to identify which was which with their eyes closed once they got used to them. When they were done playing, I put them into a large resealable bag and instantly made this into another busy bag!

Join me for a free 5 part email series Sensory Solutions and Activities and get your Sensory System Behaviours Easy Reference Cards.

Filed Under: Sensory Tagged With: sensory play

Create Your Own Sensory Bin

By Sharla Kostelyk

Sensory bins have always been something that I have created for the kids with very little input from them. Once I create them, the kids play with them, but the process of making them has always been something that is mine. Normally, I choose a theme, plan out what I’m going to include, make a list or take notes, go shopping for supplies if I need to, and then assemble the sensory bin. Sometimes in a pinch, I will go over to my sensory supplies cupboards and throw something together but usually, I have a plan.

Create your own Sensory Bin...a creative challenge for kids

Sarah from Little Bins for Little Hands put out a challenge to set out a bin with white rice and allow our kids to create their own sensory bin without any instruction from us. It sounded like fun and I was really interested to see what my kids would come up with so I took her up on it!

I set out five bins on the table, each filled with a layer of plain white rice. I did give one instruction to the kids which was that they should steer clear of adding anything wet to the bins (we have experienced several times what happens when liquid is added to a sensory bin that has rice as a base and it’s not pretty!).

It was so neat to see not only the kids’ personalities represented in their finished bins, but also to see their sensory preferences. Our older kids who weren’t home at the time the five younger kids made their bins were actually able to later guess whose was whose just based on personality!

The kids know where I keep the sensory supplies and they have been itching to get their hands on the stuff in those drawers! One of the first questions they asked me was if they were allowed to use those items. I say “yes”. The second question they asked was if they were allowed to add food or things they found in the kitchen. I say “yes” to that as well.

They tore off in search of items to add to their bins. It was clear from the beginning that some had a clear plan while others were just adding what felt good to them or what they saw their siblings add to theirs!

creating their own sensory bins
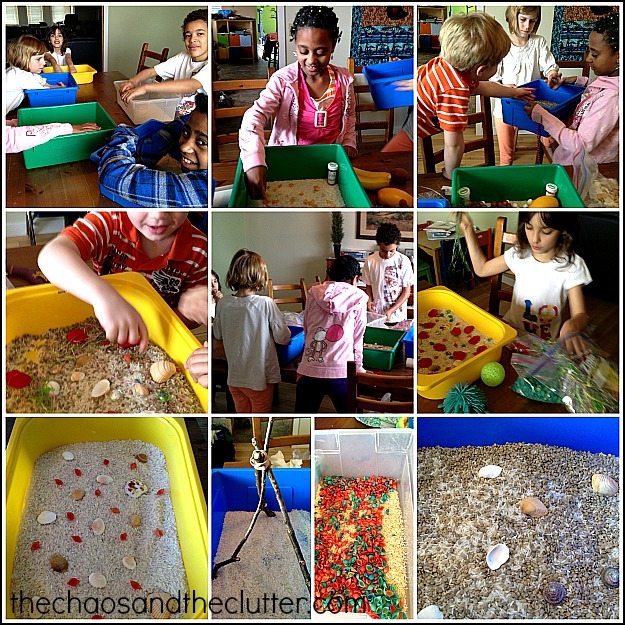
I have to be 100% honest and say that it was painful for me to watch some of this process. It was painful to watch certain things get mixed together when I knew there would be no hope of separating them again and it was painful sometimes not to offer instruction or give suggestions. I was sometimes cringing when I saw what they were adding, so this was as much a learning exercise for me as it is for them.

Here are the kids and their completed sensory bins:

Miss Optimism sensory bin
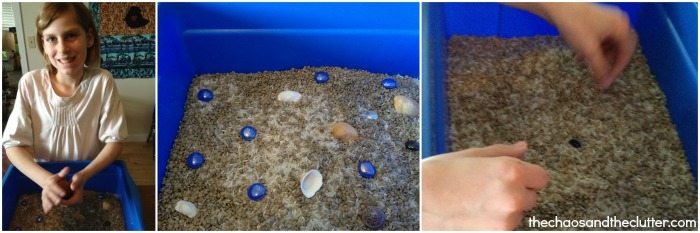
Miss Optimism chose to add Kidfetti to the rice as a base. It’s interesting because the Kidfetti has a very similar feel to the rice. It’s smooth and soft. She initially added some glass stones and sea shells to create a beach scene, but in the end, she ended up taking all of those out because she preferred the feel of her bin without them. Later that day, she hid a coin in the bin and made a game out of having the other kids retrieve it.

Einstein sensory bin
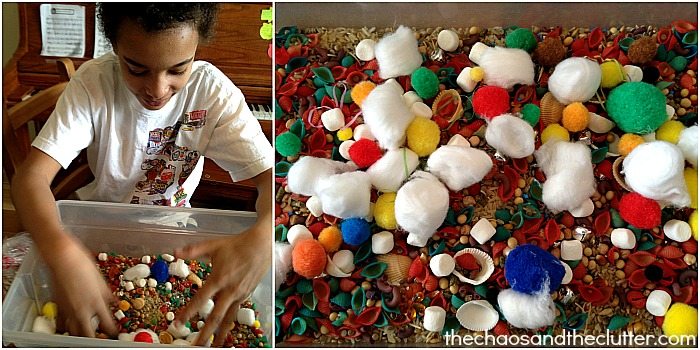
Einstein added anything he could get his hands on and just loved the feel of all the different textures. MORE is MORE apparently for Einstein! He added Kidfetti, dried lentils, dried chickpeas, birdseed, dried beans, mini marshmallows, dyed pasta shells and macaroni, pompoms, jingle bells, cotton balls, shells, Easter grass, and ribbon. He pretty much used every sensory bin filler that I had!

Snuggle Puppy sensory bin
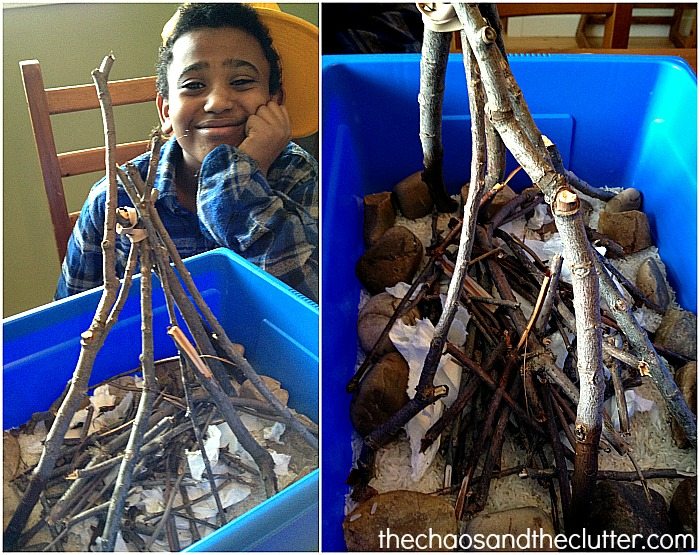
Snuggle Puppy headed straight outside to gather items for his bin. He had a plan from the beginning and his bin was less about sensory and more about story. He told me to tell my “people that read your blog” that the title of this is “Mommy’s first time camping”. He is obviously excited that I am going to be coming camping for the first time in his life this upcoming summer. He used sticks, twigs, shredded paper, and rocks to create a campfire scene.

Granola Girl sensory bin
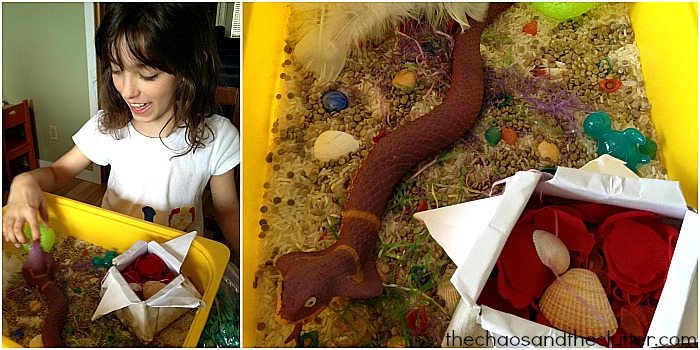
Granola Girl started with a very organized bin that can best be described as minimalist but as the time passed, she began to be influenced by her siblings and add some of the things they were adding. She used Kidfetti, an origami box, silk flower petals, seashells, shaped ice cubes, feathers, Easter grass, dyed pasta shells, a ball, a stretchy frog, and a squishy snake.

Dancing Queen sensory bin
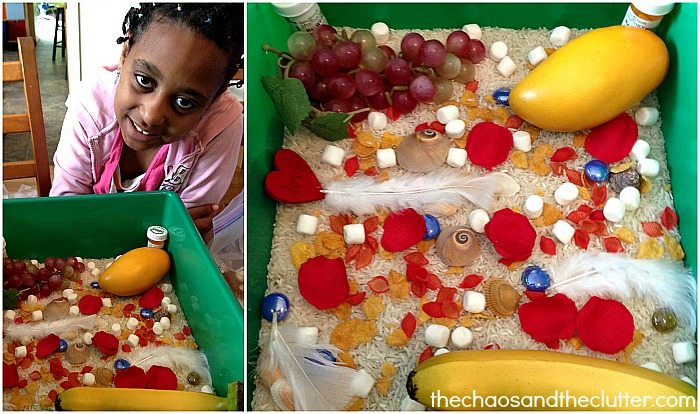
Dancing Queen’s sensory bin had a distinctive theme of food. She used both real and pretend food. She added corn flakes, mini marshmallows, glass beads, feathers, shells, a wooden heart, flower petals, her pill bottles, and a pretend mango (her favourite fruit), bananas and grapes. She also threw in some red dyed pasta.

If you are interested to see how other kids reacted to this sensory bin challenge, there are a number of blogs who are sharing their experiences with this.

rice sensory bin challenge

Little Bins For Little Hands

A Mommy’s Adventures

Craftulate

Creative World of Varya

FSPDT

Gift of Curiosity

Glittering Muffins

Here Come the Girls

Kids Play Space

Lalymom

Life Over C’s

Life with Moore Babies

Minne-Mama

P is for Preschooler

Preschool Inspirations

School Time Snippets

Squiggles and Bubbles

Still Playing School

Suzy Homeschooler

Teach Beside Me

Teach me Mommy

 If you are looking for other sensory play activities, you may be interested in following my Sensory Bins Board on Pinterest.

Check out my book on Sensory Bins! It is fantastic!

Filed Under: Sensory, Sensory Bins Tagged With: sensory bin, sensory play

Easter Egg and Bunny Sensory Bin

By Sharla Kostelyk

I like to keep a stash of coloured rice on hand for things just such as this. Since I had already dyed the rice, I was able to throw this sensory bin together really quickly.

Easter Egg and Bunny Sensory Bin
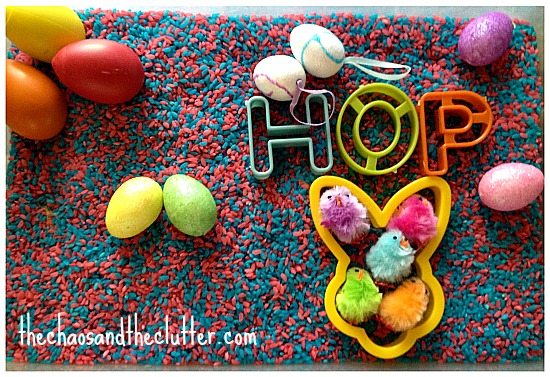
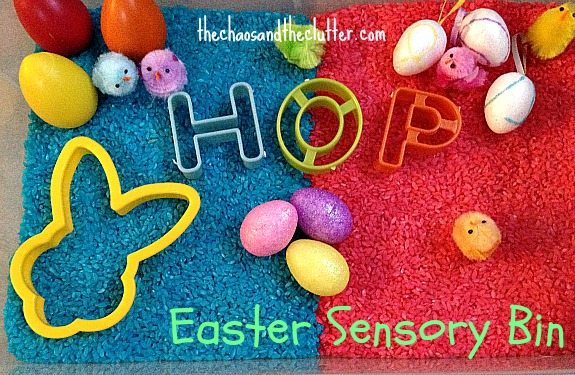
To make this Easter sensory bin, I used blue and pink rice, egg shakers (a really great sensory tool!), glittered foam eggs, styrofoam eggs, fuzzy chicks, a bunny cookie cutter, and cookie cutters to spell out the word “HOP”.

The kids enjoyed this bin but it was Granola Girl who took the biggest liking to it. She especially seemed to like to group things by colour. She also liked to keep the blue and pink rice on their respective sides. Unfortunately, I didn’t get a picture after any of her sessions with the bin. I did manage to get this picture of the bin after Snuggle Puppy finished playing with it. He obviously had no issues with mixing the different colours of rice!

Hop Easter Sensory Bin

You may also want to check out our Christ-centered Easter sensory bin from last year. If you are looking for more sensory bin ideas or information, you may be interested in my book and by following my Sensory Bins board on Pinterest.

The Ultimate Guide to Sensory Bins

Join me for a free 5 part email series Sensory Solutions and Activities and get your Sensory System Behaviours Easy Reference Cards.

Filed Under: Sensory, Sensory Bins Tagged With: sensory bin, sensory play

  • « Go to Previous Page
  • Page 1
  • Interim pages omitted …
  • Page 37
  • Page 38
  • Page 39
  • Page 40
  • Page 41
  • Interim pages omitted …
  • Page 45
  • Go to Next Page »

Primary Sidebar

Categories

We are a participant in the Amazon Services LLC Associates Program, an affiliate advertising program designed to provide a means for us to earn fees by linking to Amazon.com and affiliated sites.

Copyright © 2026 • The Chaos and the Clutter • Site Design by Jeni @ The Blog Maven

Return to top of page

Copyright © 2026 · Chaos and the Clutter 2.0 on Genesis Framework · WordPress · Log in