• Skip to primary navigation
  • Skip to main content
  • Skip to primary sidebar
  • Home
  • About
  • Contact
  • Privacy + Terms
  • Affiliates

The Chaos and the Clutter

  • Facebook
  • Twitter
  • Pinterest
  • Google Plus
  • RSS
  • Email
  • School at Home
  • Sensory
    • Sensory Processing Disorder
    • Awesome Sensory Play Activities
      • Sensory Bins
      • Sensory Bottles
      • Sensory Bags
  • Family Games
    • Minute to Win It Games
  • Special Needs Parenting
    • Childhood Anxiety
    • Reactive Attachment Disorder
    • Sensory Processing Disorder
  • Store
  • Course Login

sensory play

Citrus Sensory Bin

Citrus Sensory Bin

By Sharla Kostelyk

I first got the idea for making this sensory bin when my neighbour was telling me that you can dry out limes. I thought it would be neat to combine some elements of real food with other items in a sensory bin. I liked the idea of keeping some of the natural scents and textures.

Citrus Sensory Bin

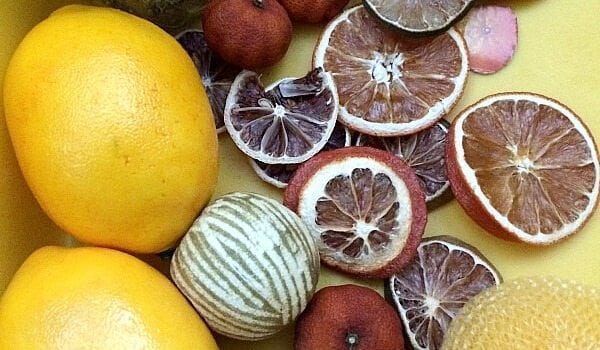
This took me on a bit of an experimental journey into drying citrus! I had some limes that I had taken some of the zest off for a recipe (that’s why there are stripes on the limes in the picture!) and I set them on top of the registers so that when the heat came on, they would dry out.

Drying the limes worked really well so I decided to try the same process on oranges and lemons. The larger fruit didn’t fare as well.

I wasn’t deterred. I then tried slicing oranges and lemons and limes and drying the slices in the same way I had dried the limes. I threw a few more of the whole fruit on there as well to see if I might have better luck the second time around. The larger lemons and orange didn’t work out but the citrus slices did.

drying citrus
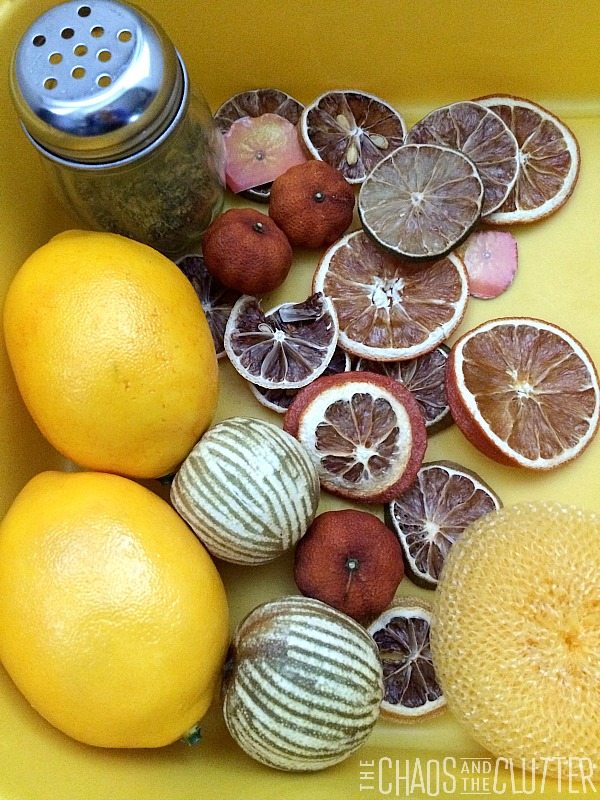
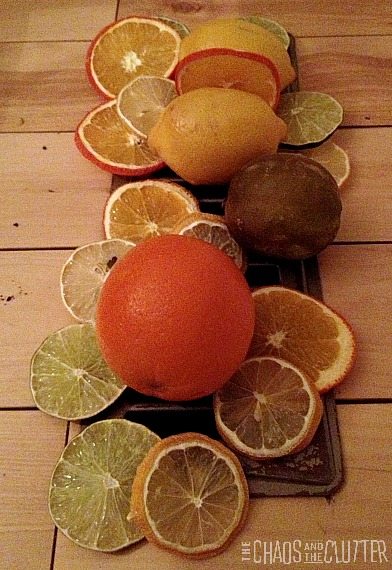
For the sensory bin, I used dried lemon, orange and lime slices, the dried limes, some dried mini mandarin oranges, 2 plastic lemons, some oranges I had cut out from the cardboard box the mandarins came in, and a yellow scrubber. I also added a shaker of lemon pepper to put another element of citrus scent in the bin.

It was a very different sensory bin than what we usually make so it was a nice change and the kids thought it was neat that it used real fruit.

If you are looking for information on making sensory bins, you may be interested in my book. The Ultimate Guide to Sensory Bins

Join our free 5 part email series Sensory Solutions and Activities and get our Sensory System Behaviours Easy Reference Cards.

Filed Under: Sensory, Sensory Bins Tagged With: sensory bin, sensory play

History Sensory Bin

By Sharla Kostelyk

I find it easiest to create sensory bins that have some type of theme to them. If there is something that we are studying in homeschooling, a sensory bin along that theme can further reinforce what the kids are learning as well as providing an opportunity for sensory play.

Last week, the kids watched the classic musical “Annie Get Your Gun“. They adored it and are still singing “no, you can’t get a man with a gu-un”! Granola Girl was even singing it through the aisles in the grocery store the other day!

Since they were already so interested and asking lots of questions, I decided to expand their learning and teach them about the history of Annie Oakley, the woman the movie is based on and about that time in history. I happened to have a Wild West TOOB which had an Annie Oakley figurine in it (I hadn’t even noticed that when I bought it!) so I used that to create a sensory bin that would allow the kids to play and expand on the story they had watched in the movie.

History Sensory Bin
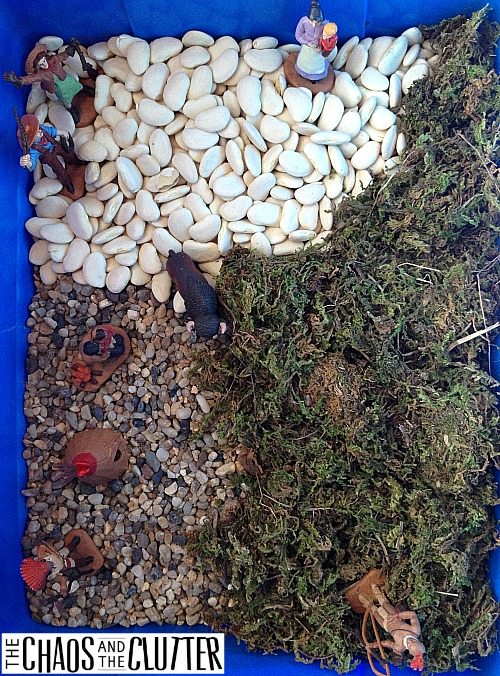
For the base of the bin, I used dry white beans in one section, aquarium rocks that we had left over from a science experiment we had done the week before in another section and I finished it off with an area of moss. Then I added the Wild West TOOB figures and let the kids play.

I know that my sensory bin may not be completely historically accurate, but the point of it is to get the kids more interested in history and its characters by letting them explore. They loved that there was an Annie Oakley figure and had such fun reenacting scenes from the movie.

You can create a history sensory bin to go with any period in history (think Ancient Greece or Ancient Egypt) or that is centred on a specific historical figure (think inventors, artists, politicians or heroes).

For hundreds of other sensory bin ideas, you can also follow my Sensory Bins board on Pinterest.

Follow Sharla Kostelyk’s board Sensory Bins on Pinterest.

If you are looking for information on making sensory bins, you may be interested in my book. The Ultimate Guide to Sensory Bins

Join our free 5 part email series Sensory Solutions and Activities and get our Sensory System Behaviours Easy Reference Cards.

Filed Under: Homeschooling, Sensory, Sensory Bins Tagged With: sensory bin, sensory play

Winter Wonderland Sensory Bin

Winter Wonderland Sensory Bin

By Sharla Kostelyk

For the start of our holiday season this year, I thought I would create a sensory bin with a winter wonderland theme. It’s a stark difference from our usual Christmas sensory bin with bright holiday colours, but the kids were delighted by it.

Winter Wonderland Sensory Bin
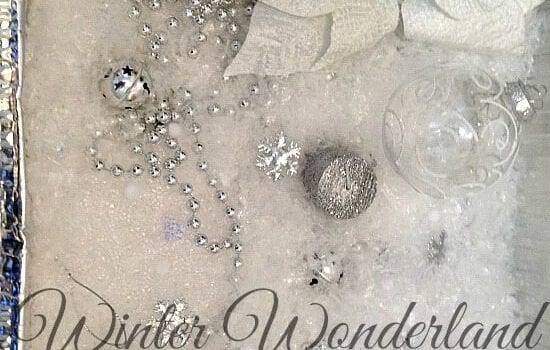
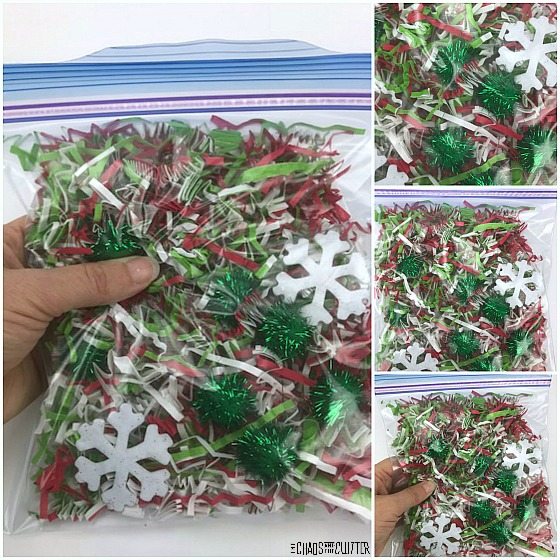
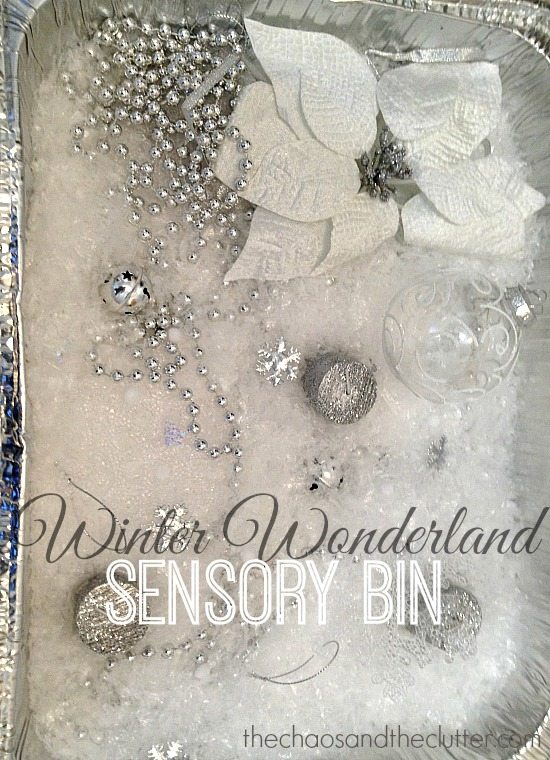
I used a large foil roasting pan as the bin because I thought the silver looked best with what I was planning. For the bin’s base, I used shredded snow. I bought a bag of it from the dollar store and when I examined it once I got home, what it looked like was shredded bubble wrap, so it would be easy enough to make your own.

I added silver candles, silver puffy snowflakes, large clear plastic snowflakes, silver beads, jingle bells, silver ribbon, small white pompoms, a clear plastic ornament with white and silver detailing, and a white poinsettia clip.

Playing with Winter Wonderland Sensory Bin
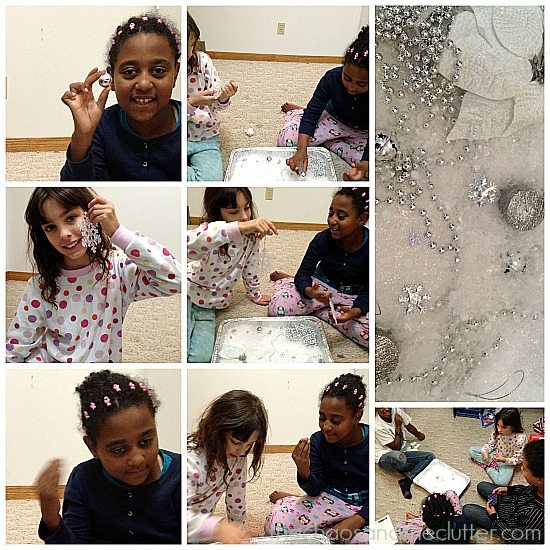
My kids have been enjoying the bin.Dancing Queen gravitated towards exploring the sounds by listening to the jingle bells and the crinkle of the beads. Granola Girl was initially after a more tactile experience and found the texture of the clear snowflakes very appealing. She kept touching them to her face as well as running her fingers over the ridges.

The boys were most interested in the feel of the fake snow and they may have had a small “snowball” fight with the white pompoms! Such funny creatures boys are! They can even find a way to make a sensory bin an action packed adventure!

If you are looking for more sensory ideas or information, you may be interested in my book and by following my Sensory Bins board on Pinterest.

The Ultimate Guide to Sensory Bins

Join our free 5 part email series Sensory Solutions and Activities and get our Sensory System Behaviours Easy Reference Cards.

Winter Sensory Tray

Gluten Free Candy Cane Playdough

Winter Sensory Bin

Filed Under: Crafts and Activities, Sensory, Sensory Bins Tagged With: sensory bin, sensory play

Gluten Free Candy Cane Playdough

By Sharla Kostelyk

Growing up, one of my neighbours had the Playdoh Barber Shop, you know the one where you could make their hair grow by pushing play dough in and then cut it with really dull plastic scissors! We played it almost every time I was over. I also had a friend from school who had the Playdoh McDonald’s set and I had fun playing it when I went over to her house. My parents didn’t have extra money for things like play sets, but my aunt used to make us play dough that was perfect in its consistency and I had just as much fun playing with a rolling pin and cookie cutters with homemade play dough as I did with their fancy play sets!

Gluten Free Candy Cane Playdough

My aunt’s play dough recipe has been my go-to for making play dough for my kids. I’ve altered the basic recipe to create a few of our own favourites such as our calming lavender playdough and our delicious smelling chocolate playdough.

Usually for the holidays, I make the kids gingerbread playdough but I thought I would change things up this year and attempt to make gluten free playdough, something I’ve never tried. We have a lot of different gluten free flours because Einstein is on a gluten free diet so I reasoned that I could adapt my aunt’s recipe and make some scented candy cane dough.

Gluten Free Candy Cane Playdough Recipe:

1 cup rice flour
1 cup cornstarch
1/2 cup salt
3 Tbsp. cream of tartar
1 Tbsp. vegetable oil
1 tsp. or more peppermint extract or 10 drops of peppermint essential oil
1 cup boiling water
food colouring or food paste
optional: glitter

Mix the dry ingredients in a pot and stir in the oil, peppermint extract, water. Note: If you are only making one colour, you can add your food colouring to this step but if making multiple colours, knead the colour in at the end.

Cook over medium heat, stirring constantly, being sure to scrape the sides and the bottom. Cook until the dough forms a ball. Remove from heat. Place it on a piece of wax paper. Knead. If you are adding glitter, this would be the time. Let cool. Store in an airtight container or in a resealable bag.

Working with the gluten free dough was quite different than regular dough. I made one attempt at a non-cook version and ended up having to repeatedly heat it up in the microwave so went back to the stovetop method. The rice flour doesn’t bind the same way regular flour does so if you find it is too sticky, try adding more cornstarch.

Scented Gluten Free Candy Cane Playdough
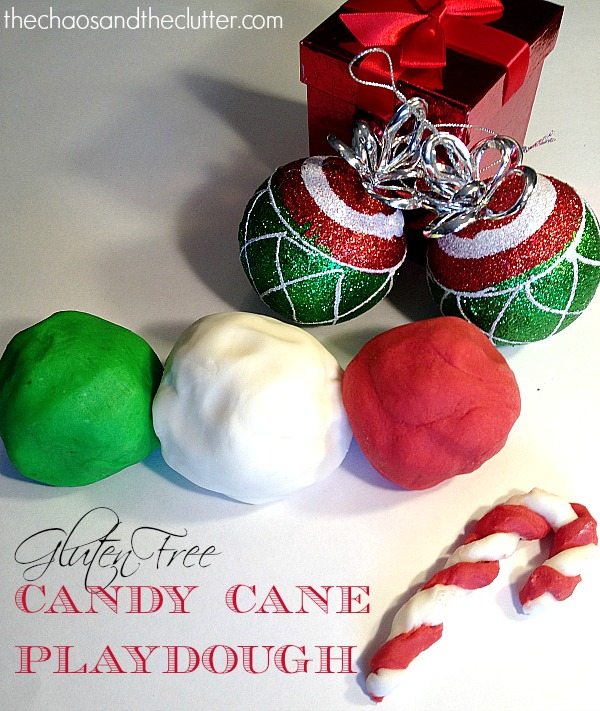
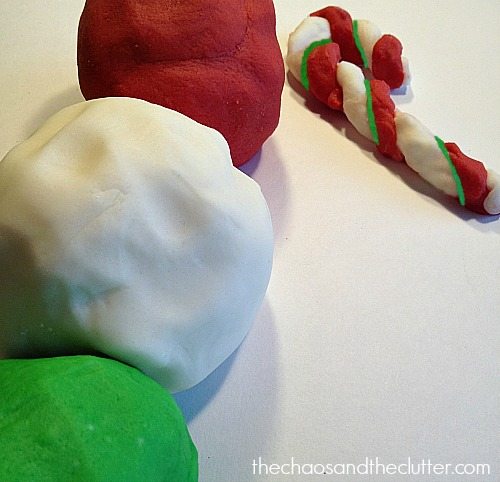
I only made one recipe and split it into three sections. I left one white, made one red and the other green. Between the colours and the peppermint scent, this dough is perfect for shaping into candy canes, candy sticks and holiday wreaths.

Looking for other playdough recipes and ideas? You may be interested in following my Playing with Playdough board on Pinterest.

Follow Sharla Kostelyk’s board Playing with Playdough on Pinterest.

Gingerbread Playdough Station

Free Printable Playdough Mats

Calming Lavender Scented Playdough

Filed Under: Christmas, Crafts and Activities, Sensory Tagged With: sensory play

Holiday Jingle Bell Slime

By Sharla Kostelyk

This Jingle Bell Slime is one of the first slimes we ever made. It’s a pretty basic slime recipe, but the holiday twist makes it extra fun.Jingle Bell Holiday Slime #slime #christmasslime #holidayslime #sensoryplay
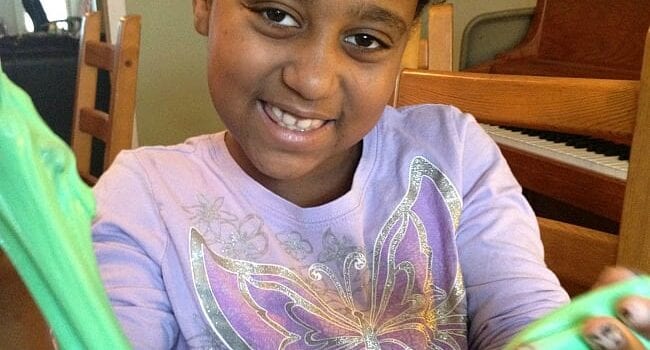
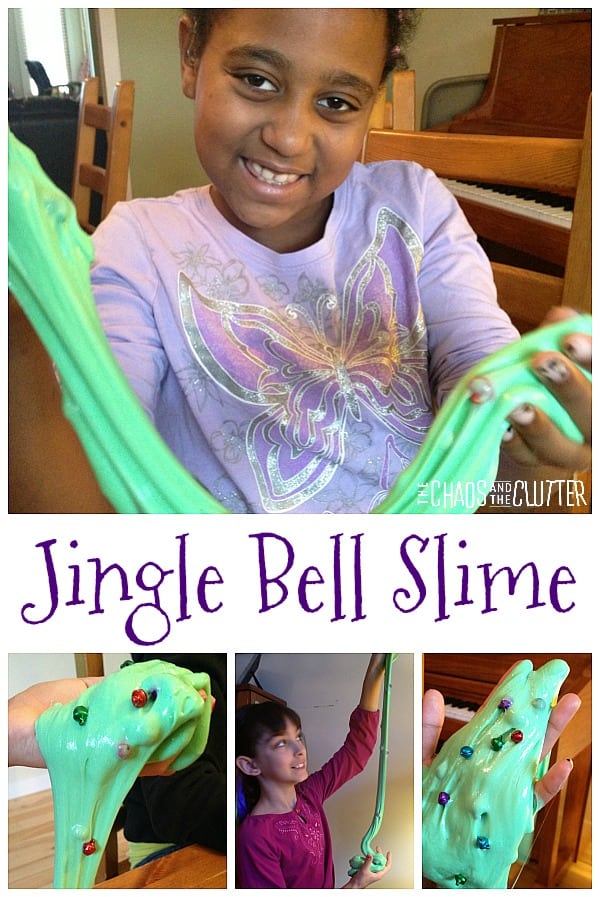
We love trying out all different kinds of slime recipes. When I came up with the idea to make holiday theme slime, the kids were all in!

When I was out shopping for the ingredients (a very short list!), I had trouble locating liquid starch. I googled “where to find liquid starch in Canada” on my phone while in the laundry aisle at the grocery store and found an awesome article. She writes about an alternative to liquid starch for those who live in places where it is hard to find.

Jingle Bell Slime Recipe:

  • 8 oz. Elmer’s washable school glue*
  • about 1/2 cup liquid starch
  • green food colouring
  • brightly coloured jingle bells

*Important note: don’t bother trying to make slime with cheaper glues. Elmer’s is the most consistently reliable when it comes to slime success, so just stick with that. making holiday slime
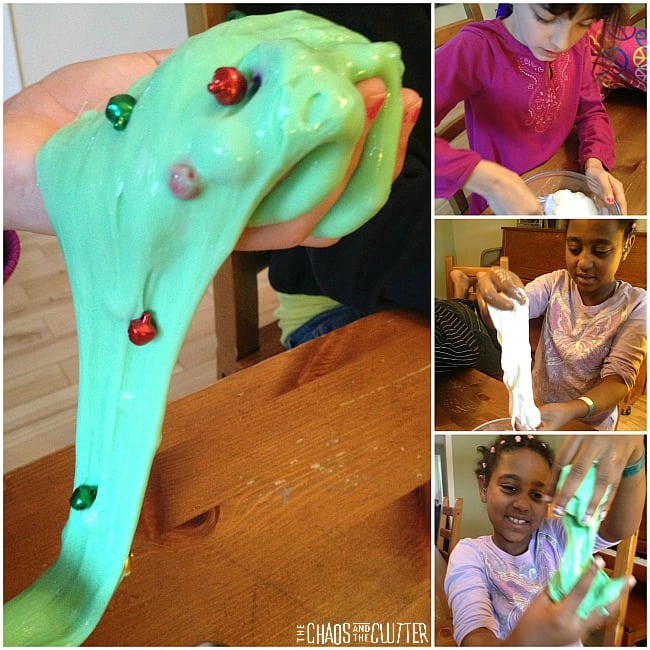
Pour the glue into a bowl. Add some drops of green food colouring and mix it well. With slime, I like to use wide craft sticks for mixing so that I can throw them out after.

Add some liquid starch into the glue mixture about a Tablespoon at a time while stirring. Continue to add liquid starch until the slime doesn’t stick to the side of the bowl. This will be about 1/2 cup total, but may be a little less or a little more.

Once it’s pulling away from the sides and forming a bit of a ball, knead it by hand to finish mixing. Once it’s been stretched and pulled and pushed and folded until it has reached slime consistency, add in some jingle bells and start playing. 
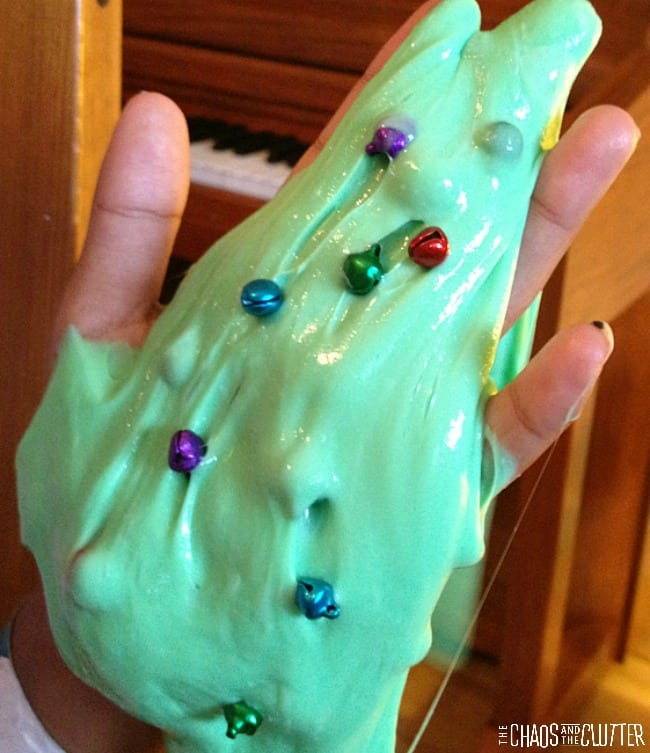
It adds a bit of difference and texture interest if you use different sizes of jingle bells.

When the slime isn’t being played with, store it in an airtight container. If you’re a “slime mama”, chances are all of your Tupperware containers are full of slime already so in a pinch, a resealable plastic bag will do.

After playing with it for quite awhile, the kids asked me if it was the same as the Flarp Noise Putty that they get every year in their stocking. When I thought it was similar, they decided to put it to the test and sure enough, it makes the same noise. (I guess we won’t need to buy Flarp this year since we can now make our own!)

Once they made this discovery, there was a lot of laughter going on at our house! I had to tape this short video five or six times because the other kids were laughing so hard that it was impossible to hear the noise of the putty!

Check out these other holiday theme sensory activities:

Peppermint Scented Christmas Playdough Christmas Sensory Bag 

Filed Under: Christmas, Crafts and Activities Tagged With: sensory play

Flower Petal Fingerpaint

By Sharla Kostelyk

Making flower petal fingerpaint turned out to be an interesting science and art activity. We were surprised by what colours were made with the flowers and even by how the smells changed throughout the process.

Fingerpaints made with Flower Petals
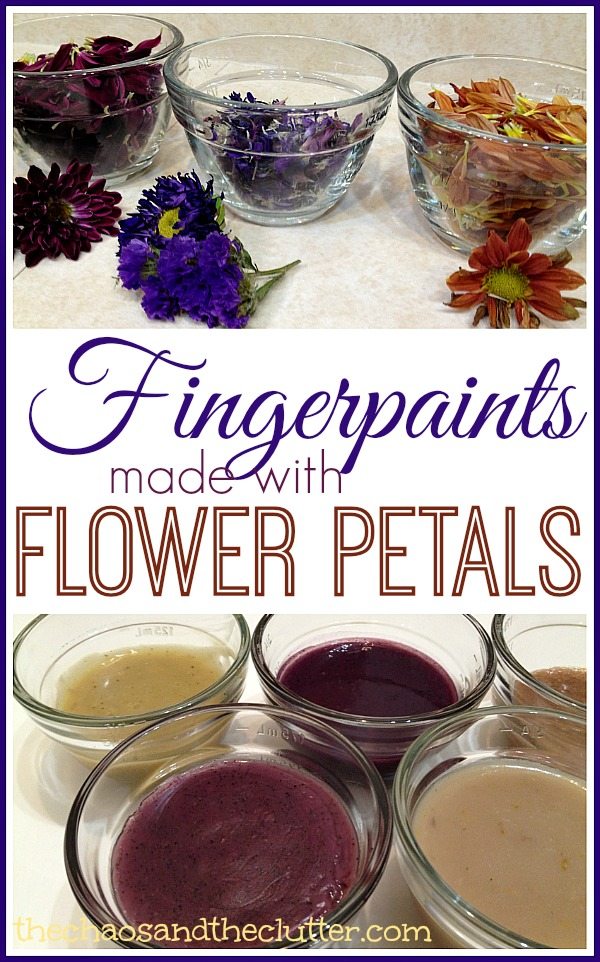
My neighbour had given me a beautiful fall bouquet of flowers and after a week or so, it had begun to look a bit on the sad side. The flowers were drooping and had started to wither but there were such gorgeous colours in the bouquet that it really seemed a shame to throw it away.

fall flower bouquet
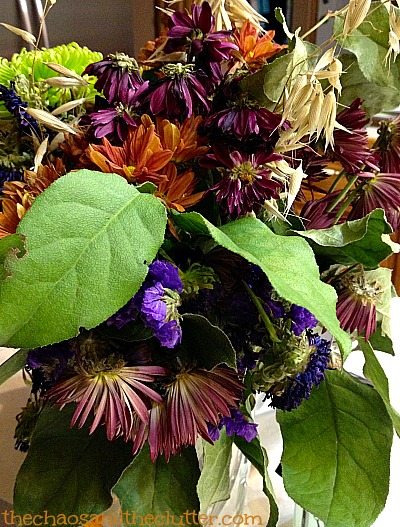
I was trying to think of a way to use the flowers and decided to make them into a hands-on history lesson to demonstrate to the kids how clothing and linens used to be dyed using flowers and other items found in nature.

Once the colours were created though, I realized that I could turn them into paints and extend the activity to cover science, art and sensory elements.

The kids and I started by pulling off the petals and grouping like colours together. We used small clear bowls that have measuring lines on the sides so that it was easy to measure how much of each colour we had collected.

Homemade Fingerpaints made with Flower PetalsWe added water and the petals to a pot and brought the mixture to a boil. Once it was at a rolling boil, we turned it down to simmer and let it simmer for half an hour. We stirred it from time to time and also used a pestle to press the petals to get more colour from them. The reason we let the mixture simmer for so long was so that some of the liquid could boil off and the colour could become more concentrated.

Snuggle Puppy came up with the idea to try to create green paint using the stems and leaves from the bouquet so he filled a pot with those and used the same process. The colour of that one created more of a yellowy colour than green and had a very earthy smell.

making paint from leaves and stemsOnce we had achieved a strong enough colour, we drained the liquid into a bowl placed beneath a strainer and pressed the petals with the pestle.

The liquid then went back into the pot and I whisked in a bit of flour and brought that to a boil, stirring the whole time. Once it was boiling, it only took a few minutes at most for the paint to reach the consistency I was looking for. I then took it off the heat, poured it into the small bowls we had used for the petals earlier and it was ready to paint with.

Flower Petal Fingerpaint Recipe:

3/4 – 1 cup of flower petals
1 1/2 – 2 cups of water
1 Tbsp. flour

Bring water and flower petals to a boil over medium-high heat in a pot. Turn heat to low. Simmer for half an hour.

Place a strainer over a bowl and drain the coloured water through the strainer. Press the petals to get maximum colour.

Put the water back into the pot and whisk in the flour. Bring it to a boil, stirring the whole time. Remove from heat.

steps to making fingerprint using flower petals
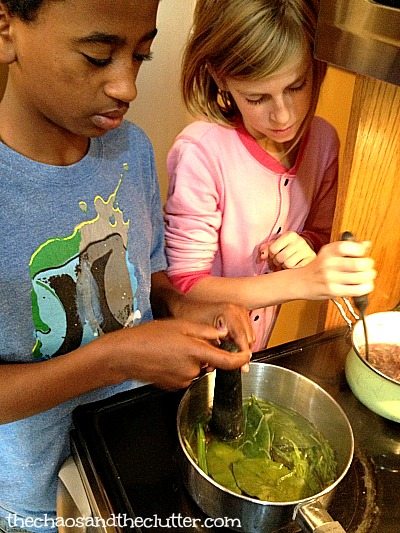
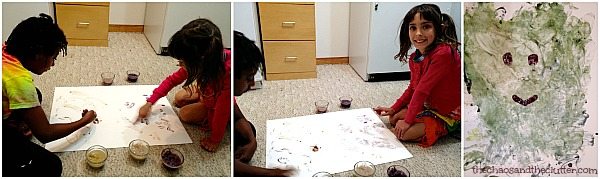
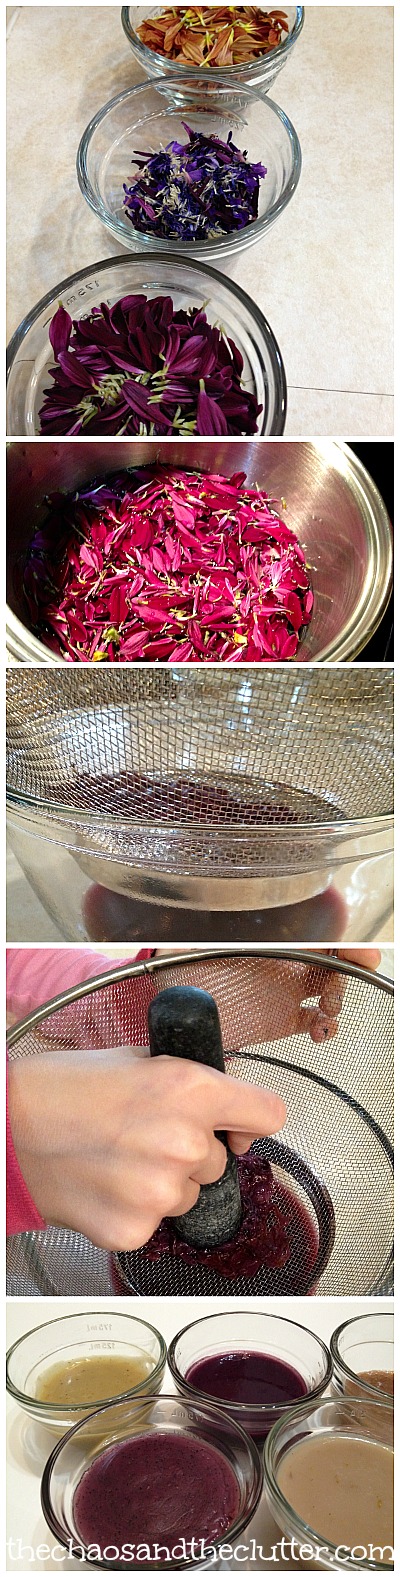
The paints had different smells depending on the type of flowers used. The colours did not turn out the way we expected them to. The purple petals created an unattractive greenish-brown colour. The red flowers created a burgundy-purplish colour. The leaves and stems made a yellowish colour. The orange petals created a light brown.

Before we made each colour, I had the kids hypothesize about what colour they thought would result. When other colours were the result, we discussed what factors may have contributed to that. It became a very interesting science lesson.  Honestly, one of the colours looked pretty gross so we had a bit of a laugh over that!

Miss Optimism wanted to know what would happen if she mixed several colours of flower petals together. The result was a purple with specks of a darker shade.

After we had made five colours of flower petal fingerpaint, I let the kids start painting. Granola Girl and Dancing Queen painted a cute looking monster on a large poster paper. This had both sensory (touch, sight and smell) and art elements. I love it when one activity can encompass so many different things!

fingerpainting with flower petal paint

Shaving Cream Painting

Condensed Milk Painting

Pumpkin Puffy Paint

If you are looking for other fun activities to do with your kids, you may want to join our free 5 part email series Sensory Solutions and Activities and get our Sensory System Behaviours Easy Reference Cards.

Filed Under: Crafts and Activities, Homeschooling, Sensory, Simple Science Tagged With: sensory play

  • « Go to Previous Page
  • Page 1
  • Interim pages omitted …
  • Page 35
  • Page 36
  • Page 37
  • Page 38
  • Page 39
  • Interim pages omitted …
  • Page 45
  • Go to Next Page »

Primary Sidebar

Categories

We are a participant in the Amazon Services LLC Associates Program, an affiliate advertising program designed to provide a means for us to earn fees by linking to Amazon.com and affiliated sites.

Copyright © 2026 • The Chaos and the Clutter • Site Design by Jeni @ The Blog Maven

Return to top of page

Copyright © 2026 · Chaos and the Clutter 2.0 on Genesis Framework · WordPress · Log in