• Skip to primary navigation
  • Skip to main content
  • Skip to primary sidebar
  • Home
  • About
  • Contact
  • Privacy + Terms
  • Affiliates

The Chaos and the Clutter

  • Facebook
  • Twitter
  • Pinterest
  • Google Plus
  • RSS
  • Email
  • School at Home
  • Sensory
    • Sensory Processing Disorder
    • Awesome Sensory Play Activities
      • Sensory Bins
      • Sensory Bottles
      • Sensory Bags
  • Family Games
    • Minute to Win It Games
  • Special Needs Parenting
    • Childhood Anxiety
    • Reactive Attachment Disorder
    • Sensory Processing Disorder
  • Store
  • Course Login

Sharla Kostelyk

Board Games for Reading and Spelling

By Sharla Kostelyk

Board games are one of the most frequently used resources in our homeschool for all subjects. There are so many games that can be used to teach kids necessary skills including reading and spelling.

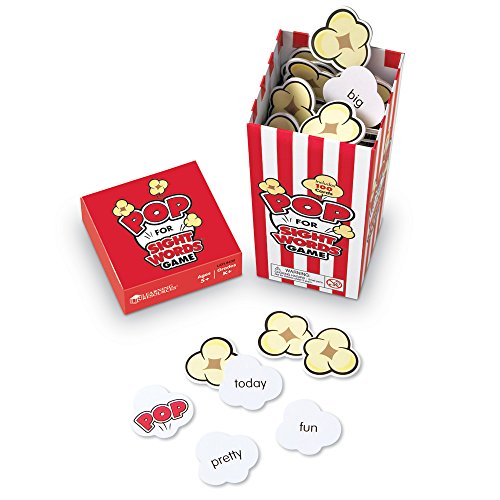
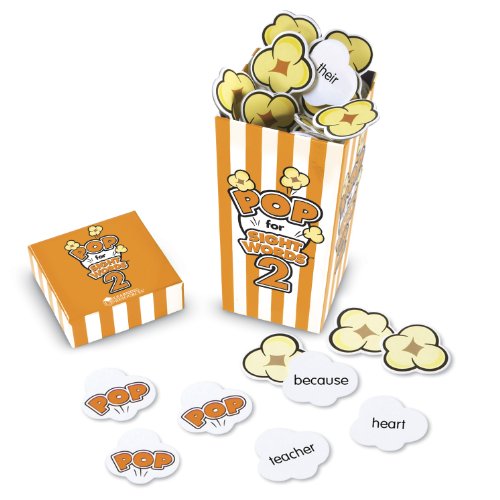
The games that we have been using the most lately for sight word practise are the Pop Words games. I like that my early readers can play with my established readers and all enjoy themselves because the addition of the “Pop” cards (which make you lose all your earned cards) makes it a more even playing field.

Board Games for Reading & Spelling

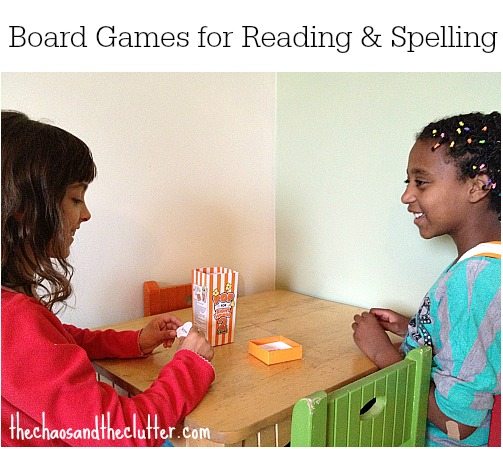
Look for games that are adaptable for your child’s abilities and fun to play. Children retain information better when they are relaxed which is one of the reasons that learning through board games is so effective.

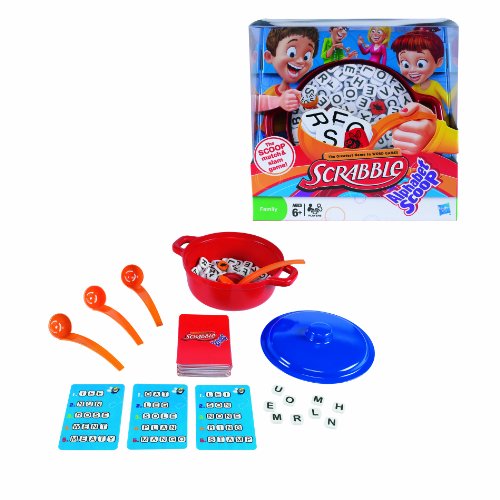
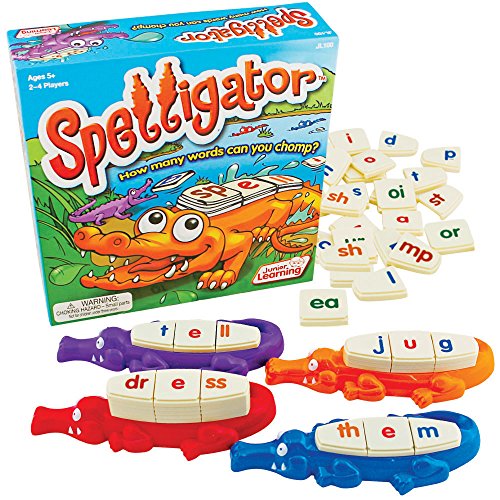
Board Games for Reading and Spelling:
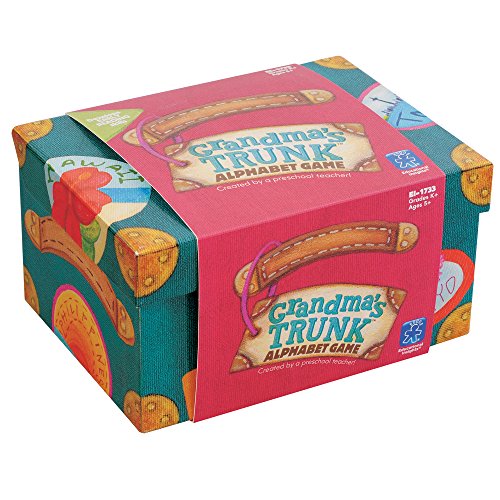
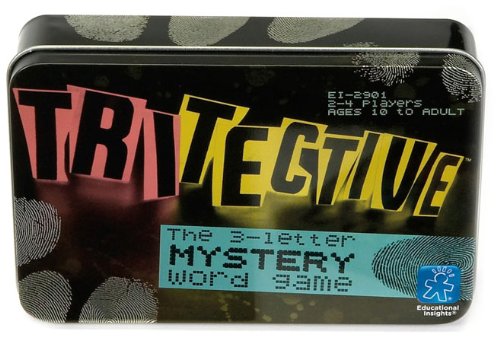
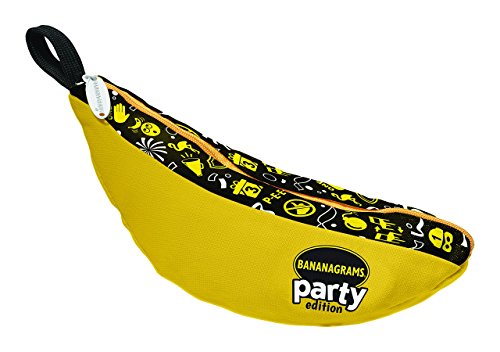
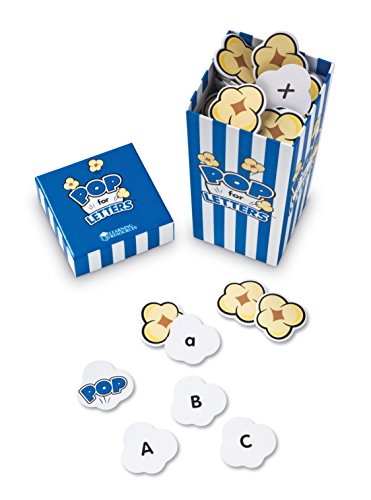
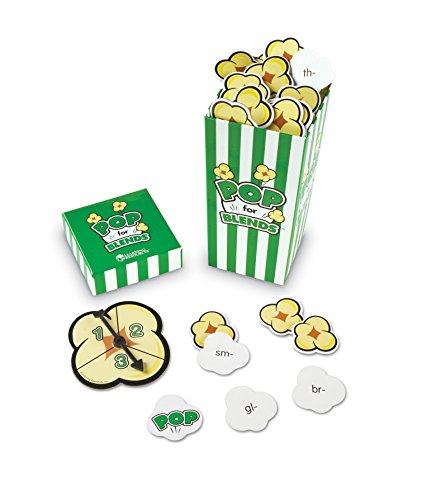
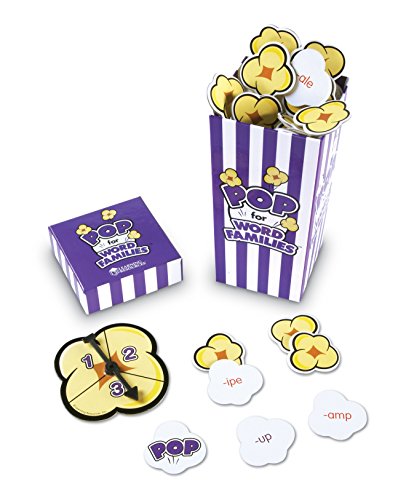
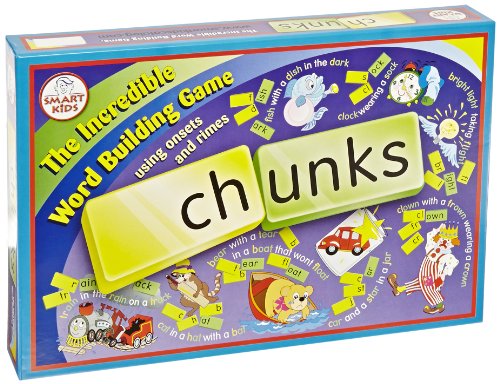
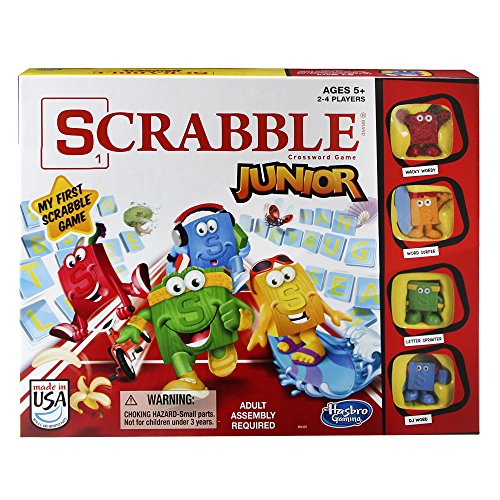
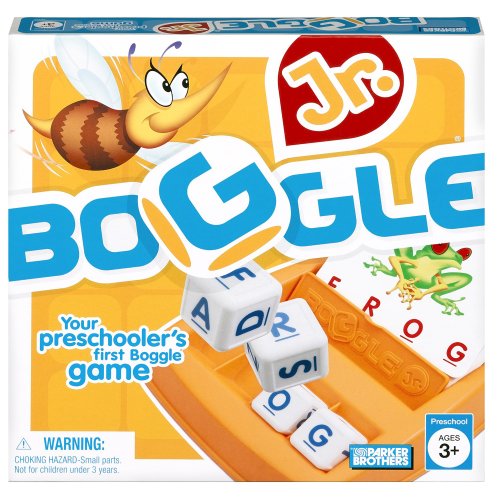
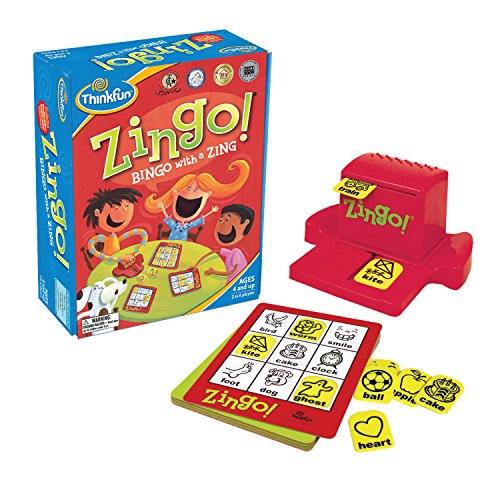
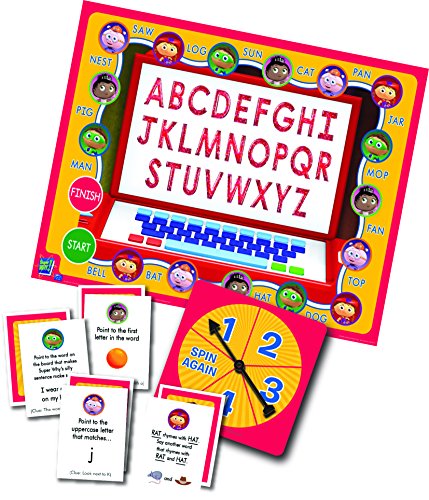
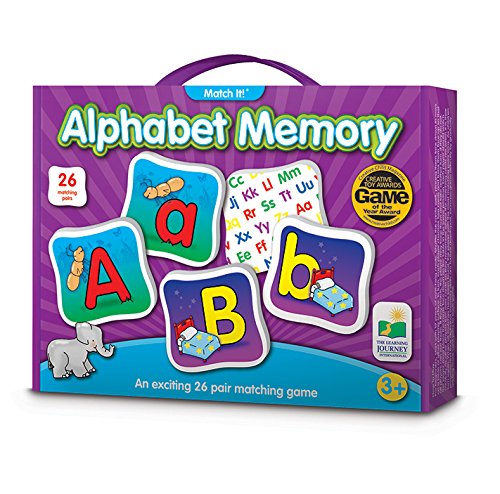
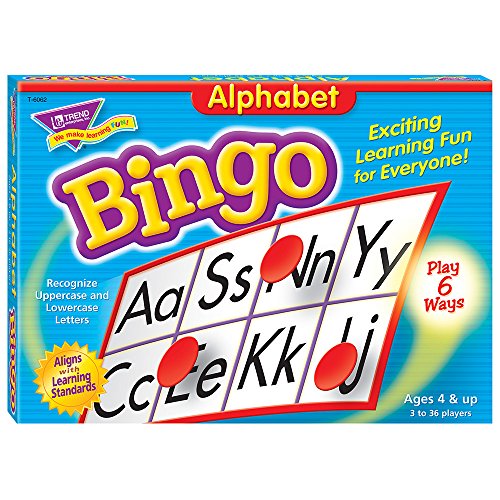
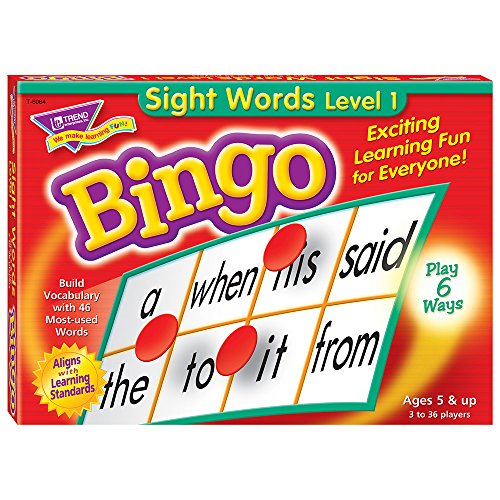
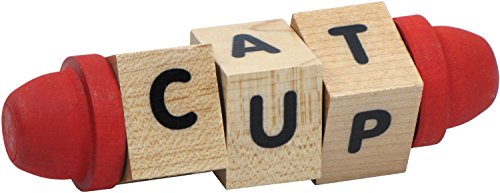
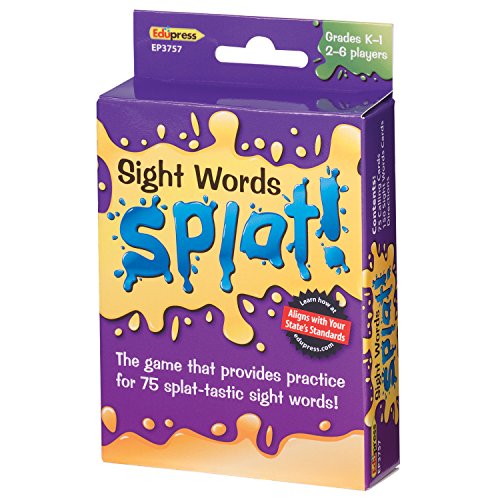
Scrabble Alphabet ScoopScrabble Alphabet ScoopSpelligator Board GameSpelligator Board GameEducational Insights Grandma's Trunk Alphabet GameEducational Insights Grandma’s Trunk Alphabet GameEducational Insights Tri-Tective - The 3-Letter Mystery Word GameEducational Insights Tri-Tective – The 3-Letter Mystery Word GameBANANAGRAMS Party EditionBANANAGRAMS Party EditionLearning Resoures POP for LettersLearning Resoures POP for LettersLearning Resources Pop for Blends GameLearning Resources Pop for Blends GameLearning Resources POP for Word Families GameLearning Resources POP for Word Families GameLearning Resources Pop For Sight Words GameLearning Resources Pop For Sight Words GameLearning Resources Pop for Sight Words 2 GameLearning Resources Pop for Sight Words 2 GameThinkFun What's GnuThinkFun What’s GnuDidax Chunks The Incredible Word Building Game - Set ofDidax Chunks The Incredible Word Building Game – Set ofScrabble Junior GameScrabble Junior GameBoggle Junior GameBoggle Junior GameZingo Sight WordsZingo Sight WordsSuper WHY! ABC Letter GameSuper WHY! ABC Letter GameThe Learning Journey Match It! SpellingThe Learning Journey Match It! SpellingThe Learning Journey Match It! Memory, AlphabetThe Learning Journey Match It! Memory, AlphabetAlphabet Bingo GamesAlphabet Bingo GamesTrend Young Learner Bingo Game, Sightwords (T6064)Trend Young Learner Bingo Game, Sightwords (T6064)Spinny Speller - Made in USASpinny Speller – Made in USALearning Resources Snap It Up! Phonics & Reading Card GameLearning Resources Snap It Up! Phonics & Reading Card GameEdupress 1435934 Edupress EP3757 Grades K to 1, 1.3Edupress 1435934 Edupress EP3757 Grades K to 1, 1.3Sight Words Level A Pocket Flash CardsSight Words Level A Pocket Flash Cards

Make Your Own:

Hangman is a classic game and all that it required is a pen (or pencil) and paper. This simple guessing game is great for kids who are just learning to read and spell.

Playing with Scrabble or Upwords tiles to create words and make your own games is also easy to do.

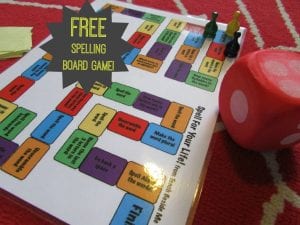
Teach Beside Me has created a board game called Spell for Your Life that you can print for free.

free spelling gameThe Measured Mom has a free spelling game. It has a Fall theme but can be adapted for any word list you are working on.

Free Fall Spelling GameThe Measured Mom also has a really cool train game to help in teaching long A spelling. While you’re over at The Measured Mom, poke around a bit. She has a lot of free printable board games for a variety of teaching topics and you are likely to find one that will fit your needs.

Train Spelling GameTeach Mama has a game called Wordo which can be adapted for teaching letters or whole words.

Word Game
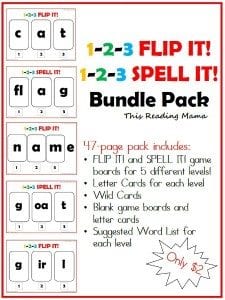
This Reading Mama has a short vowel spelling game printable pack that is available for just $2. That is certainly much less than what a board game at the store will cost.

1-2-3 Flip it Spell it

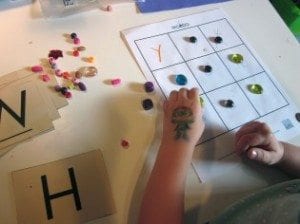
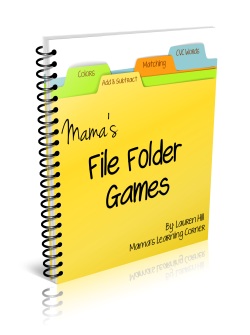
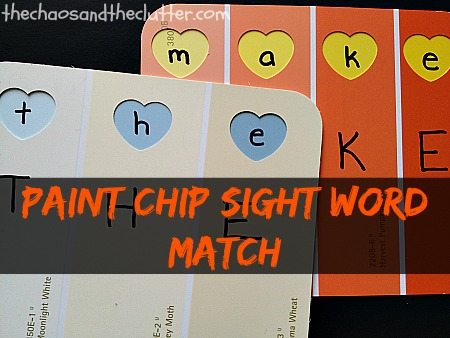
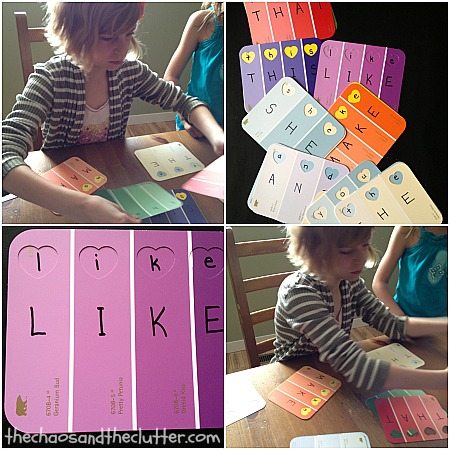
File Folder Games can also be a good way to reenforce sight words or other concepts.
File Folder Games Ebook from Mama's Learning CornerBoard games have been part of our kids’ learning for as long as I can remember. I think the thing I like most about them is that not only are they learning without realizing it, we are also creating family memories and spending time together!

If you are interested in finding more learning/teaching ideas, you may be interested in following my Homeschooling Board on Pinterest.

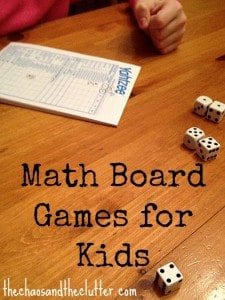
You may also be interested in reading how we use Math Board Games for learning.

Math Board Games for Kids

Filed Under: Homeschooling

7 Busy Bags with Paint Chips

7 Busy Bags with Paint Chips

By Sharla Kostelyk

Paint chips are great for making all sorts of crafts and activities with because they come in so many colors and their thickness makes them easy to work with and easy for little hands to handle. There is really no end to what you can do with paint chips.

I use busy bags with the younger kids and have made several with paint chips as they are free and due to our recent renovations, we have a lot of them.

7 Busy Bags with Paint Chips

Paint Chip Sight Word Match

Materials needed:

  • paint chips
  • permanent marker
  • medium or large resealable bag

Paint Chip Sight Word Match

This easy activity is great for reenforcing sight words. I made ours with the sight words the kids are currently learning and can continue to add more. These are so easy to make and don’t cost anything.

To create these cards, take two paint chips per word and punch large holes in one of them.  I used the heart shaped punch again, but regular squares will do. Lay it on top of the other card so that you line up the words properly. Write lowercase letters on one card, through the holes made and uppercase letters on the other. Place them all into a bag.

The activity is much more challenging if you use different colours so that the kids have to match them up based on the letters and not based on colour.

Paint Chip Sight Word Activity

Paper Clip Colour Match

Materials needed:

  • paint chips in various colours
  • paper clips in corresponding colours
  • sandwich bag

paper clip paint chip busy bag
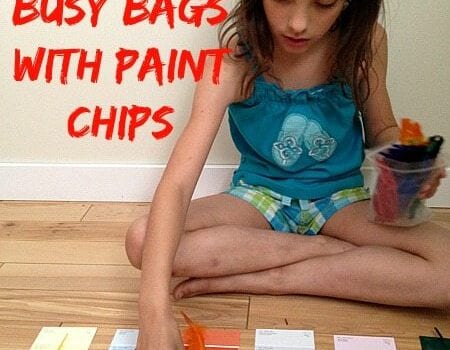
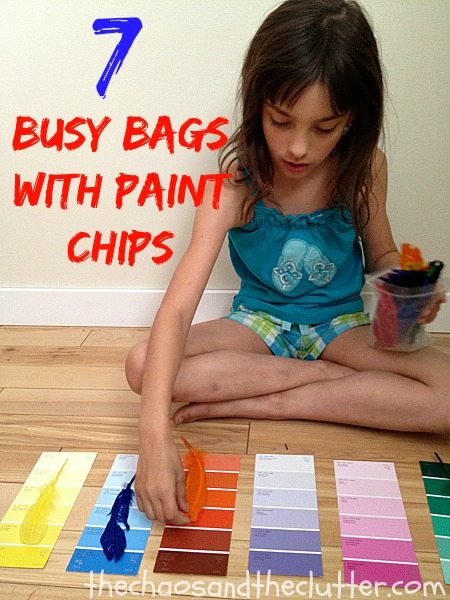
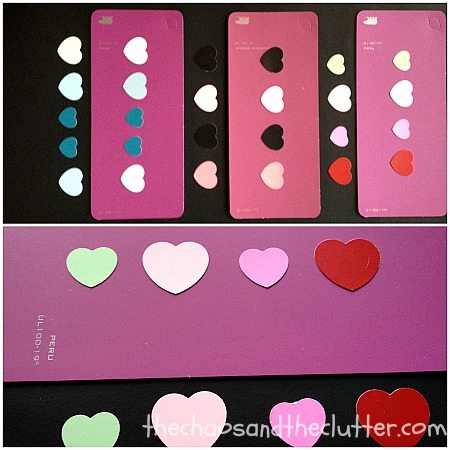
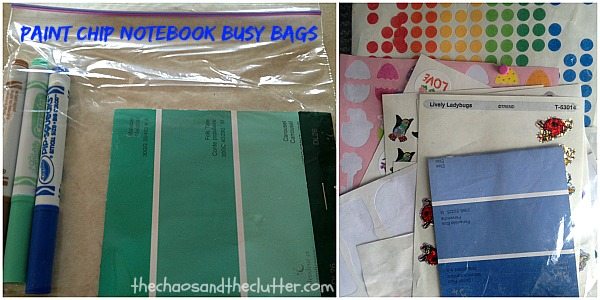
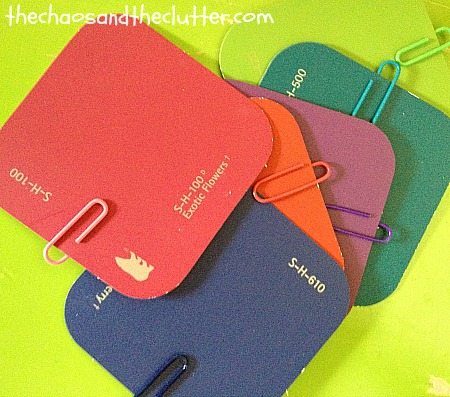
It doesn’t get much more simple than this! Throw some paint chips and paper clips of the same colour into a sandwich bag and toss it into your busy bag box. Your child can then attach the paper clips onto their same coloured paint chips for colour matching and fine motor skill practise.

Paint Chip Colour Matching

Materials needed:

  • paint chips (2 of each colour necessary)
  • wooden clothespins
  • glue
  • large resealable bag
  • optional: large hole punch

Paint Chip Colour Match Busy Bag
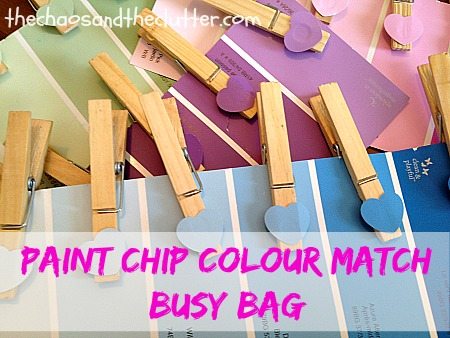
In order to create this activity bag, you will need to take two identical paint chips and cut a shape out of each shade of colour in one. I used a heart shaped hole punch. Glue these shapes onto the ends of wooden clothespins and place the intact paint chips and the clothespins into a resealable bag.

This activity is good as a more advanced colour matching game for kids as some of the shades can be similar and difficult to differentiate.

Paint Chip Color Sort Busy Bag

Materials needed:

  • paint chips in various colours
  • pompoms
  • feathers
  • medium or large resealable bag
  • optional: tweezers for fine motor practise

Paint Chip Color Sort Busy Bag
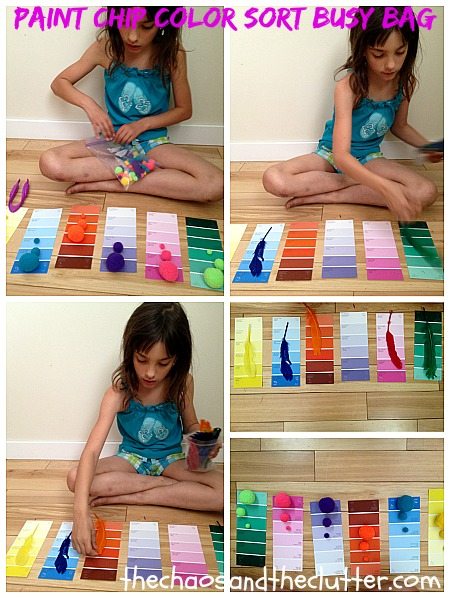
This is a simple bag to put together. Just throw some paint chips and colored pompoms and feathers in a resealable bag. I added some plastic tweezers in case the kids wanted to use those for placing the pompoms on the paint chips. I also threw in three sizes of pompoms so that if they wanted to, they could create patterns with the sizes.

Paint Chip Color Swatch

Materials needed:

  • paint chips
  • binder ring
  • possibly: small hole punch

Paint Chip Color Swatch
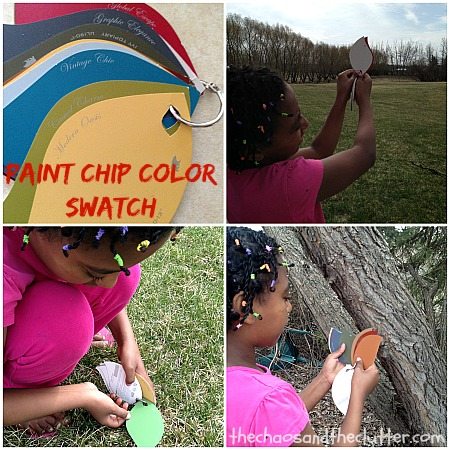
I was able to find paint chips that already had a hole punched in the corner but if using paint chips that don’t have this feature, punch a hole into each paint chip, thread them through a binder ring and it is ready to go! When using this activity, your child can find objects inside or outside that match up with the colors in their color swatch.

Paint Chip Patterning

Materials needed:

  • paint chips in various colours
  • glue
  • medium or large resealable bag
  • optional: shaped hole punch

Paint Chip Patterning
To create these, cut out shapes from paint chips (I used a heart hole punch in two different sizes but you could cut out squares or any other shape) and glue them onto another paint chip. It works best if the paint chip you glue them onto is a long solid coloured one. Cut out identical shapes and colours to enclose in the bag so that your child can recreate the pattern on the cards.patterning with paint chips

Paint Chip Notebooks Busy Bags

Materials needed:

  • paint chips
  • white paper
  • staples
  • stickers and/or markers or crayons
  • resealable bag

Last year, we made tiny notebooks out of paint chips. The kids each made their own but afterwards, we didn’t do anything with the notebooks until I thought of creating them into easy busy bags. I threw notebooks into resealable bags with stickers or with markers or crayons for the perfect little activity bag on the go!

You can read about how we created our paint chip notebooks (by clicking on the highlighted words) and create your own. The kids love them more than other mini notebooks because they are so proud to have made them themselves!

Paint Chip Notebook Busy BagsIf you are looking for other busy bag ideas, you may be interested in following my Activity Bags Board on Pinterest. You might also want to sign up for email updates as I will be sharing many of our simple and inexpensive busy bag ideas in the coming weeks.

Busy bags are perfect for bringing on road trips, using in waiting rooms or giving to younger kids while you do homeschooling or homework with older ones.

Filed Under: Busy Bags, Crafts and Activities

Speech Therapy in Your Own Home

By Sharla Kostelyk

Disclaimer: We received 3 free sessions in order to complete this review and I was compensated for my time, however the experiences and opinions are honest and all my own. I was not required to post a positive review. (In fact, I was such a fan, we chose to pay for additional sessions for another one of our daughters!) For more information, please see my disclosure policy. 

It was truly a privilege to be able to try out this service and to now be able to tell you about it. As a Special Needs mom, I sometimes feel like my life is just made up of appointments. Being able to access quality online speech therapy at home was such a relief. It eliminated some of my appointments and some of my stress. We were actually so impressed by this service that when the complimentary sessions for Dancing Queen that were provided in order for me to write this review were over, we chose to pay for sessions for Granola Girl!

How You Can Access Speech Therapy at Home

How online speech therapy works:

The first step in accessing this private speech therapy is to visit the webpage that profiles their speech therapists. The profiles offer both professional and personal information about the available therapists which allows you to find someone that you think would be a really good fit for you and for your family.

Once you have chosen your therapist, you arrange a time for an initial consultation that works for your schedule. At the consultation, you discuss with your therapist what would work best for you and/or your child and make a plan to move forward.

You then choose a private speech therapy package of either 5, 10 or 20 hours and pay for your sessions. Your sessions will then be arranged through e-mail at a time that works well for you and you begin.

You need access to a computer with a microphone and speakers. All the sessions take place online using GoTo Webinar, a very user friendly program.

What I love about Hello Foundation’s service:

They offer a free initial consultation.

This is a great way to see if this type of service is right for your family and to gauge how many sessions you will need.

You are in your own home.

There are so many benefits to this:

  • You don’t need to arrange for child care for your other kids.
  • You don’t have to drive anywhere. This saves time and gas money.
  • Your child feels comfortable because they are in a place that they feel safe and are used to.
  • If you have a laptop, you can have the session in whatever room you want to so you can minimize distractions and choose a room that your child is very familiar with.
  • You can be in your pyjamas. Your child can be in their pyjamas.
  • You can do other things while your child is having their session (during one session, I actually was doing Dancing Queen’s hair while she was doing her speech therapy!)
  • It is ideal for homeschoolers as it doesn’t interrupt the homeschool schedule.

The sessions start and end on time.

So often in taking the kids to appointments, we find ourselves sitting in waiting rooms, well, waiting. It is frustrating and a huge waste of time. It is also hard to plan around appointments when you don’t know how long they will actually be. My experience with Hello Foundation was that the speech therapy sessions began exactly on time and ended when they were scheduled to. This allowed me to make other plans on those days and not be wasting any time in a waiting room.

Anyone can access this speech therapy. 

Sometimes parents in smaller communities are limited in being able to access services such as speech therapy. Even larger communities can have long wait lists or conditions that prevent parents from being able to access the service but online speech therapy is something that all families can use.

Our experience with speech therapy online:

I looked through Hello Foundation’s online therapist profiles and chose Sasha. I had read on her profile that some of her experience included working at a VA hospital with veterans. As soon as I read that, I knew that she would be uniquely qualified to work with Dancing Queen, as she would likely have an understanding of PTSD and its effects on the brain. It turned out that she was a wealth of information and provided me with suggestions for not only improving Dancing Queen’s speech, but her overall cognitive function.

Sasha was easy to work with, encouraging, positive, and very good with Dancing Queen. I found Sasha to be very professional but also approachable, gentle and kind.

We decided to target two issues in regards to Dancing Queen’s speech. The first was that she has always said “way” instead of “or”. We aren’t sure why this is, but we assume it is because English is not her first language and it is just a word that she mis-learned and then got into the habit of saying it that way. We have tried to correct it ourselves without much success. She showed some progress with it in working with Sasha and continues to improve.

The other issue we were focusing on was her not properly pronouncing her “th” sound. Sasha worked with her on this and as well provided me with games and activities that we could do ourselves to strengthen this skill.

She was even able to bring up different visuals on the screen to use with Dancing Queen during online sessions.

online speech therapy with visual

With having the ability to both see and hear each other, Sasha was able to demonstrate things such as sticking the tongue out when making the “th” sound as well as being able to give Dancing Queen reminders when she saw that she was forgetting to stick her tongue out. (We don’t normally encouraging the sticking out of tongues, but of course make an exception when it comes to learning to make the “th” sound!!!)

speech therapy for the "th" sound
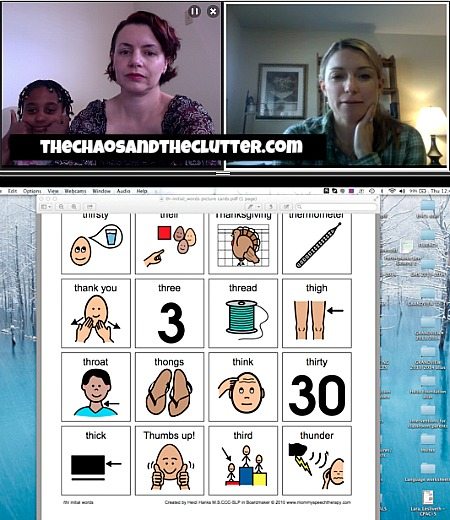
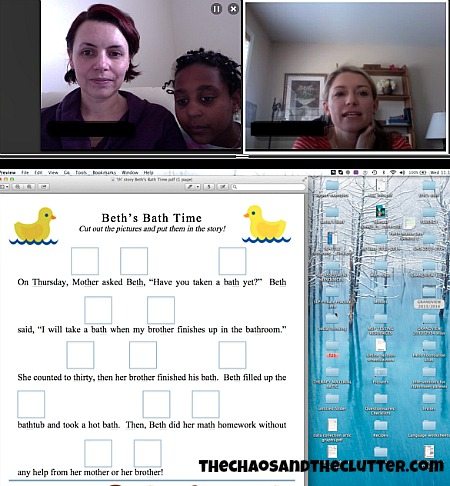
Sasha sent follow up e-mails with further information for what we had discussed during sessions and with worksheet and games for me to do with Dancing Queen to continue the speech therapy on our own.

Sasha and I also worked together without Dancing Queen in the room in order for her to offer me specific suggestions on reducing her cognitive load and therefore enable her to learn more effectively in general. One of the big struggles with Dancing Queen’s PTSD (post traumatic stress disorder) is the effect it has on her cognitive functioning. It causes lack of attention and focus and a lack of retention, so homeschooling has been quite a challenge. Sasha offered many suggestions to help me lessen the work that Dancing Queen has to do with her brain in other areas to hopefully open her up to learning.

I have only just begun to implement these suggestions, so can’t yet report the outcome, but I found the suggestions to be excellent. They lined up with what I had previously researched about PTSD and its effects on the brain. The suggestions were concrete and customized for Dancing Queen and for our family situation. I appreciated that Sasha took the time to research ideas for us in between sessions and that she gave me the ability to move forward on my own.

Dancing Queen looked forward to her sessions and loved working with Sasha!

Additional information:

If you are a busy mom of Special Needs kids, I really encourage you to contact Hello Foundation and find out how they might be able to help you.

In addition to speech therapy, Hello Foundation also offers social skills training, which can be of particular benefit to children on the autism spectrum.

You can follow Hello Foundation on Facebook or on their blog.

Filed Under: Special Needs Parenting

10 Jello Science Experiments

10 Jello Science Experiments

By Sharla Kostelyk

This week, we’ve been exploring through jello science. This started as a practical way for me to use all the extra jello I bought when attempting to make fingerpaint that flopped, but it ended with some really fun science experiments and more than a few giggles!

The coolest jello science experiments ever.

Fizzing and Colour Mixing Jello Experiment:

The first science experiment we did was a slightly different take on the usual baking soda and vinegar chemical reactions eruption. This one has a colour mixing sensory twist.

We started with vinegar, baking soda, blue jello, and yellow jello. I set out a clear baking dish and set two smaller dishes inside it. Into each of those dishes, I added baking soda and about half a packet of the jello and stirred them. Then I had Miss Optimism pour vinegar into the dishes and we watched it erupt.

jello science eruption experiment

Since we used two primary colours, we had hypothesized that they would create a third colour once they mixed and sure enough, the blue and yellow created green.

This jello science experiment soon turned into a sensory experience. As Miss Optimism put it, “it’s gooey, like wet sand”. She played for more than half an hour in the sensory goop, playing until the liquid was entirely green.

This hands-on learning activity is great for preschoolers up to elementary schoolers. It also makes a simple science fair project.

jello colour mixing experiment

This science experiment is one of many awesome activities that you can find in The Sensory Science Book Volume 1.  

Enzyme versus Protein Jello Experiment:

The next jello science experiment we did was to see if adding pineapple will always prevent jello from setting. Einstein had read on the box of jello that adding kiwi or pineapple will prevent jello from setting.

Does Adding Pineapple Always Prevent Jello from Setting?
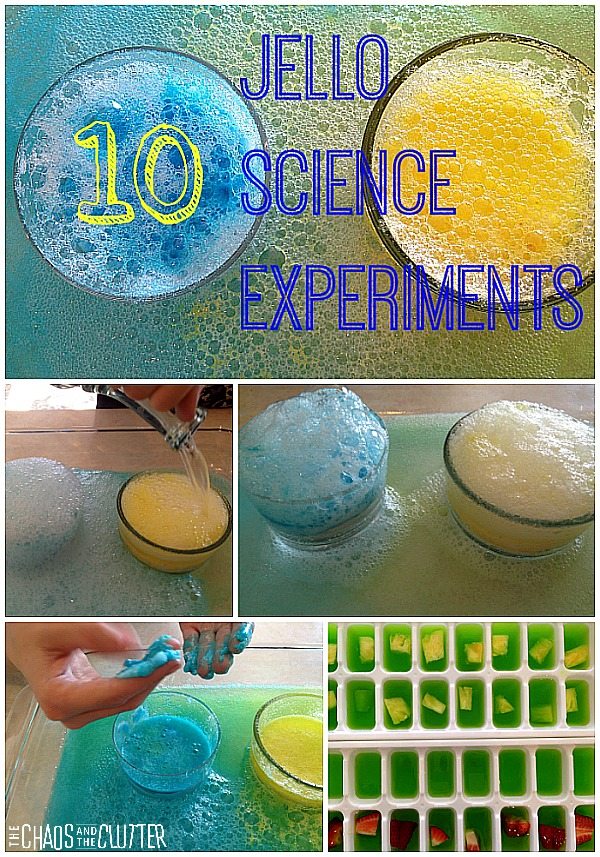
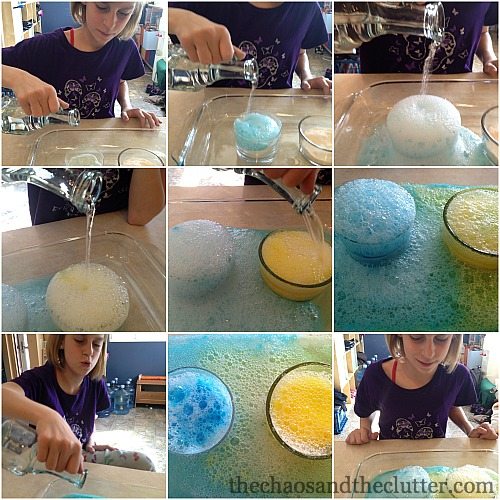
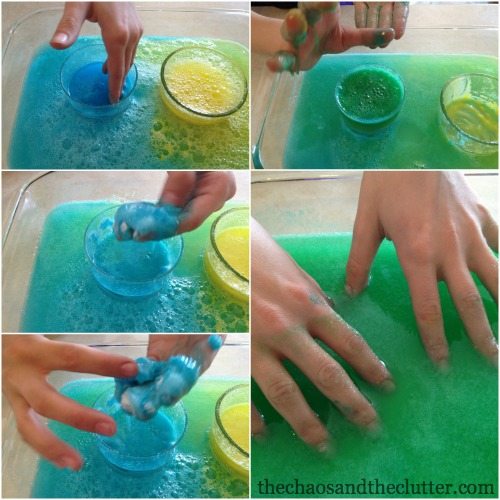
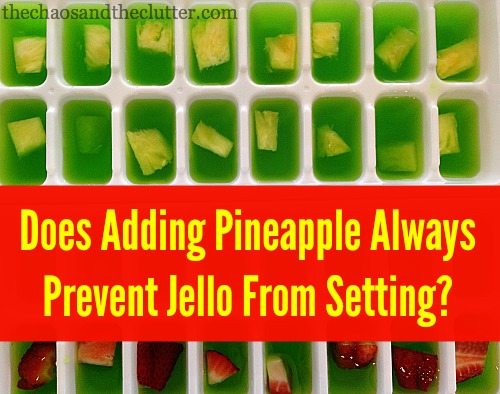
We began by adding pieces of fresh pineapple to one row in an ice cube tray. I then roasted pineapple and we added a row of cooked pineapple to the tray. We did this to see if cooking the pineapple would make a difference as opposed to using the fresh fruit. We mixed up jello according to the package directions and poured it in the tray.

In another tray, we set out one row of strawberry pieces to see how the jello would react to that fruit and in the last row, added nothing so that we could use that row as our control. We added jello to that tray as well and put both trays in the fridge to set overnight.

jello setting science experiment
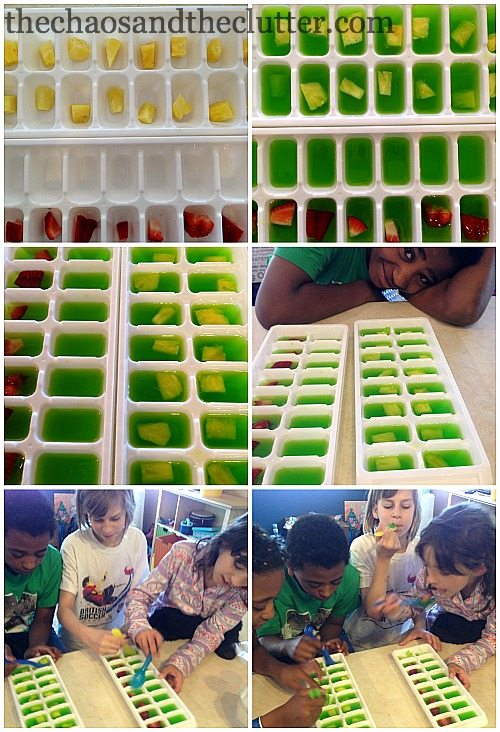
In the morning, we found that all the rows had set except the row with the fresh pineapple which was still green liquid. This activity was kitchen science at its best. The kids ate the results just to be sure they were accurate!
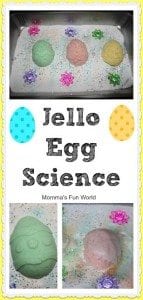
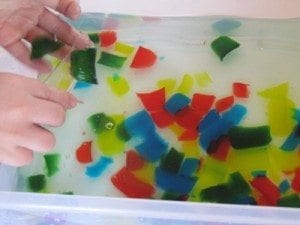
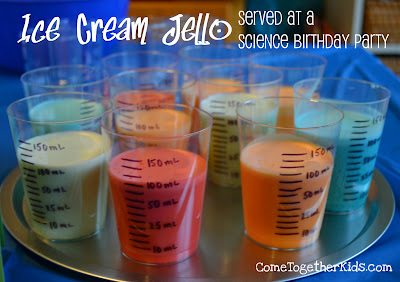
We read about how pineapple has an enzyme that breaks down protein and therefore prevents jello from setting. We deduced that cooking the pineapple had broken down the enzymes or caused them to be inactive which allowed the jello with the cooked pineapple to set.

Strawberries do not contain bromelain and do not affect the structure of jello.

With our one remaining Jello packet, the kids took all of our fun ice cube tray moulds (Titanic, Lego blocks and Lego mini fig) and made themselves some fun shaped jello to eat!

Edible Animal Cell:

This isn’t the first time we’ve explored science with the help of jello. A few years ago, we made this edible cell out of jello for one of the science units we were studying.

edible cell out of jelloOther Cool Jello Science Experiments:

Learn Play Imagine has a super cool Glowing Jello Experiment.

glowing jelloExperiment with changes in matter with frozen jello sensory play from The Imagination Tree.

frozen jello science changes of matterMomma’s Fun World did a fun experiment with jello egg science.

jello egg scienceKids Activities Blog offers a really great idea for teaching kids about turbulence on planes. This would be especially good for kids who either have a fear of flying or who have never been on an airplane. Science to conquer fears!

Turbulence on a Plane taught through jelloTeach Preschool offers a wonderful hands-on science experience with The Wonders of Bright and Colourful Gelatin.

exploring gelatinScience Buddies has a really awesome centripetal force jello experiment. I actually wrote out the steps and considered doing this with the kids but it is a bit advanced for where my kids are at. It may be one we do in the future though.

centripetal force jello experimentThis ice cream jello from Come Together Kids is so cute! I love the way she made the cups!

ice cream jelloIf you are looking for other fun and easy science experiments, check out The Sensory Science Book that will get kids excited about science!

Filed Under: Homeschooling, Simple Science

Sensory Bin Cleanup

By Sharla Kostelyk

Since I wrote my book on Sensory Bins, one of the most common questions I get is about the cleanup. Although I do address both how to prevent or cut down on messes and how to clean them up in the book, I have a few additional suggestions and I’d love to hear your suggestions as well.

Hate the messiness of sensory play? Here are some tips.Image credit: MatHayward / 123RF Stock Photo

One of the easiest ways to clean up of course is to avoid the mess in the first place or to control where the mess happens. Sensory sinks are a great way to contain the mess of a sensory bin in an easy to clean area. Here’s an example of a sensory sink from Teaching Mama.

playing-with-penguins-1024x682

The bathtub is another great location for a sensory bin. The deck or backyard are other great areas to house your sensory play when the weather allows it. Controlling where the mess happens will help you with clean up later.

Another tip is to place your sensory bin inside a larger, deeper container such as a Rubbermaid storage tub. This way, any spilling over of the materials will go into the tub instead of all over your floor. This works especially well with little ones as they then have to bend way over to access the sensory bin and don’t quite have the leverage to throw its contents all over the floor!

I suggest that you never have sensory bin play on a carpet as carpet are harder to clean. Many sensory bin bases can easily be swept up after play as long as they are dry bases.

Dry sensory bin bases are easy to clean up as long as they don’t get wet. Try to teach your kids to keep water or other liquids away from those sensory bins. My kids are a bit older and are very good about this but when we have little ones come over, which is fairly often, water does get mixed into a dry bin from time to time. Water and dyed purple rice for example was a bit more unpleasant to clean up. It also meant that I couldn’t re-use that purple rice in a subsequent bin as it had to be thrown out. Water and black beans or dry lentils are also some of the mishaps we’ve had around here.

At the dollar store, you can buy shower curtain liners. They often come in clear but you can get them in pretty much every colour under the sun if you want to create a more cheerful look to accompany the play. These are great for placing underneath a sensory bin, particularly a bin with a messy base such as this one from Fun at Home with Kids.

ooey gooeyYou can use all kinds of things for a drop cloth underneath your sensory bins including old blankets, an actual painter’s canvas drop cloth, or plastic disposable tablecloths (these can also be found at the dollar store). If you are using something such as the shower curtain liner or the plastic tablecloth and things really get out of hand, then you can always bundle up the mess afterwards and throw the whole thing away and only have spent $1.

Of course no matter how well you plan and prepare, sensory bins are probably going to lead to messes. A few months ago, one of the younger kids who was over visiting dumped two of our sensory bins together. One was our desert sensory bin and the other was a construction sensory bin. I had been planning to make other bins using the sand base of the desert bin and sand is not the cheapest base out there, so I decided I was going to have to find a way to salvage it.

I removed all the larger items and then used a colander placed above a large Ziploc bag to sift out the sand from the Kidfetti (also one of the more expensive sensory bin fillers) so that I would be able to re-use both bases. It was a bit of a tedious task but it worked!

separating sensory bin bases

The best rule of thumb really is not to create sensory bins that have a potential mess factor that you aren’t willing to live with!

Now if cleaning up sensory bins just isn’t your thing but you still want your kids to be able to enjoy some sensory play, you can always fill a sink full of water and bubbles and have them clean their toy cars or dishes. You can even have them clean some real dishes while they’re at it!

For instructions on how to create a sensory bin, information about why they are so beneficial for children, relevant recipes, printable idea lists and more, get your copy of my ebook Sensory Bins: the What, the How & the Why.

Sensory Bins Cover 3DWhat tips have you found for cleaning up sensory bins?

Join me for a free 5 part email series Sensory Solutions and Activities and get your Sensory System Behaviours Easy Reference Cards.

Filed Under: Sensory, Sensory Bins Tagged With: sensory bin

Create Your Own Sensory Bin

By Sharla Kostelyk

Sensory bins have always been something that I have created for the kids with very little input from them. Once I create them, the kids play with them, but the process of making them has always been something that is mine. Normally, I choose a theme, plan out what I’m going to include, make a list or take notes, go shopping for supplies if I need to, and then assemble the sensory bin. Sometimes in a pinch, I will go over to my sensory supplies cupboards and throw something together but usually, I have a plan.

Create your own Sensory Bin...a creative challenge for kids

Sarah from Little Bins for Little Hands put out a challenge to set out a bin with white rice and allow our kids to create their own sensory bin without any instruction from us. It sounded like fun and I was really interested to see what my kids would come up with so I took her up on it!

I set out five bins on the table, each filled with a layer of plain white rice. I did give one instruction to the kids which was that they should steer clear of adding anything wet to the bins (we have experienced several times what happens when liquid is added to a sensory bin that has rice as a base and it’s not pretty!).

It was so neat to see not only the kids’ personalities represented in their finished bins, but also to see their sensory preferences. Our older kids who weren’t home at the time the five younger kids made their bins were actually able to later guess whose was whose just based on personality!

The kids know where I keep the sensory supplies and they have been itching to get their hands on the stuff in those drawers! One of the first questions they asked me was if they were allowed to use those items. I say “yes”. The second question they asked was if they were allowed to add food or things they found in the kitchen. I say “yes” to that as well.

They tore off in search of items to add to their bins. It was clear from the beginning that some had a clear plan while others were just adding what felt good to them or what they saw their siblings add to theirs!

creating their own sensory bins
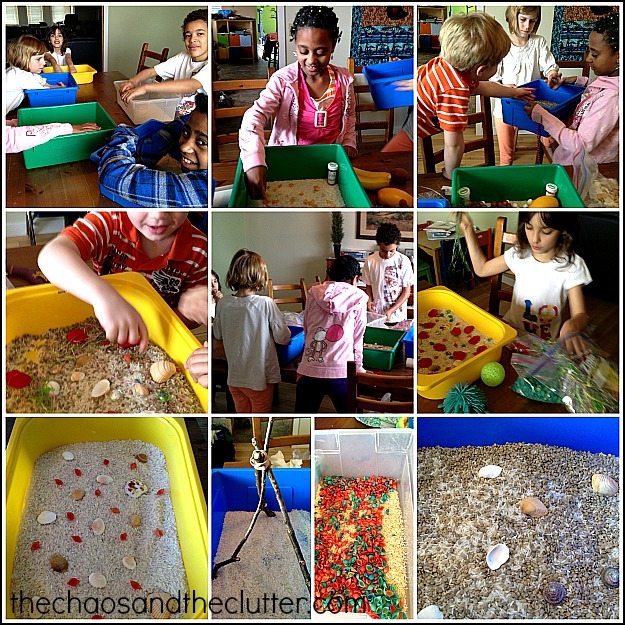
I have to be 100% honest and say that it was painful for me to watch some of this process. It was painful to watch certain things get mixed together when I knew there would be no hope of separating them again and it was painful sometimes not to offer instruction or give suggestions. I was sometimes cringing when I saw what they were adding, so this was as much a learning exercise for me as it is for them.

Here are the kids and their completed sensory bins:

Miss Optimism sensory bin
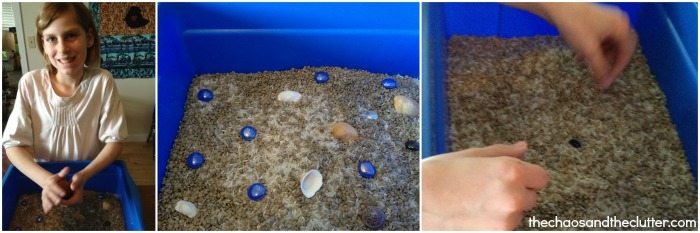
Miss Optimism chose to add Kidfetti to the rice as a base. It’s interesting because the Kidfetti has a very similar feel to the rice. It’s smooth and soft. She initially added some glass stones and sea shells to create a beach scene, but in the end, she ended up taking all of those out because she preferred the feel of her bin without them. Later that day, she hid a coin in the bin and made a game out of having the other kids retrieve it.

Einstein sensory bin
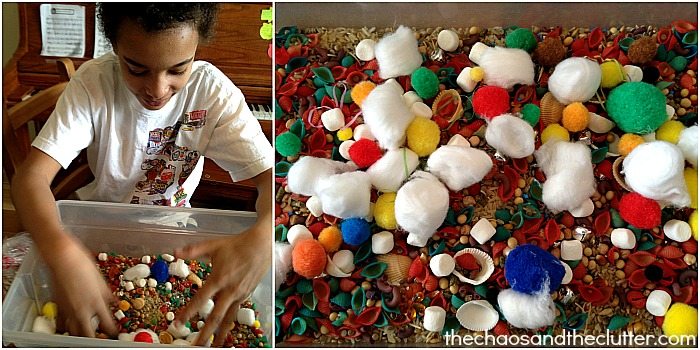
Einstein added anything he could get his hands on and just loved the feel of all the different textures. MORE is MORE apparently for Einstein! He added Kidfetti, dried lentils, dried chickpeas, birdseed, dried beans, mini marshmallows, dyed pasta shells and macaroni, pompoms, jingle bells, cotton balls, shells, Easter grass, and ribbon. He pretty much used every sensory bin filler that I had!

Snuggle Puppy sensory bin
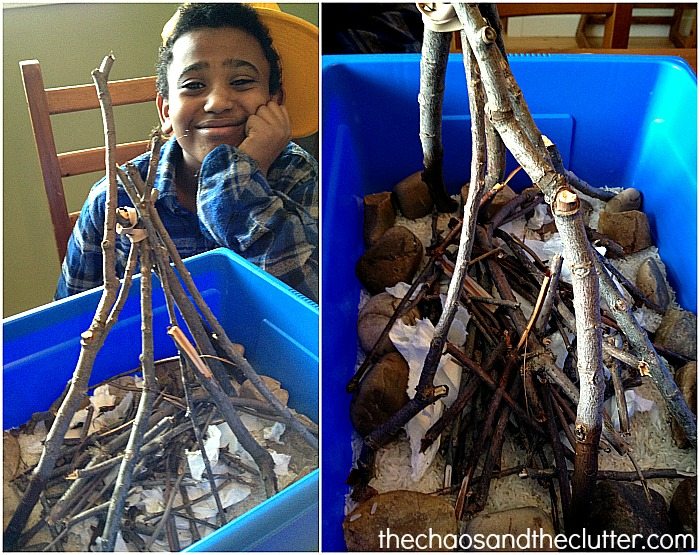
Snuggle Puppy headed straight outside to gather items for his bin. He had a plan from the beginning and his bin was less about sensory and more about story. He told me to tell my “people that read your blog” that the title of this is “Mommy’s first time camping”. He is obviously excited that I am going to be coming camping for the first time in his life this upcoming summer. He used sticks, twigs, shredded paper, and rocks to create a campfire scene.

Granola Girl sensory bin
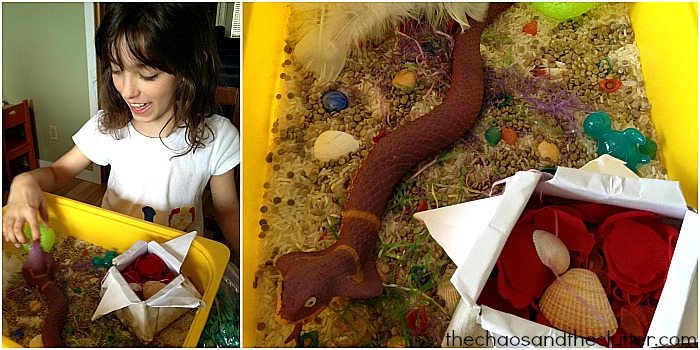
Granola Girl started with a very organized bin that can best be described as minimalist but as the time passed, she began to be influenced by her siblings and add some of the things they were adding. She used Kidfetti, an origami box, silk flower petals, seashells, shaped ice cubes, feathers, Easter grass, dyed pasta shells, a ball, a stretchy frog, and a squishy snake.

Dancing Queen sensory bin
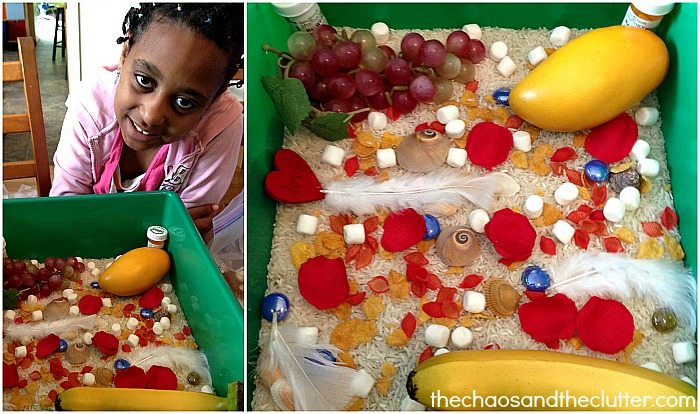
Dancing Queen’s sensory bin had a distinctive theme of food. She used both real and pretend food. She added corn flakes, mini marshmallows, glass beads, feathers, shells, a wooden heart, flower petals, her pill bottles, and a pretend mango (her favourite fruit), bananas and grapes. She also threw in some red dyed pasta.

If you are interested to see how other kids reacted to this sensory bin challenge, there are a number of blogs who are sharing their experiences with this.

rice sensory bin challenge

Little Bins For Little Hands

A Mommy’s Adventures

Craftulate

Creative World of Varya

FSPDT

Gift of Curiosity

Glittering Muffins

Here Come the Girls

Kids Play Space

Lalymom

Life Over C’s

Life with Moore Babies

Minne-Mama

P is for Preschooler

Preschool Inspirations

School Time Snippets

Squiggles and Bubbles

Still Playing School

Suzy Homeschooler

Teach Beside Me

Teach me Mommy

 If you are looking for other sensory play activities, you may be interested in following my Sensory Bins Board on Pinterest.

Check out my book on Sensory Bins! It is fantastic!

Filed Under: Sensory, Sensory Bins Tagged With: sensory bin, sensory play

  • « Go to Previous Page
  • Page 1
  • Interim pages omitted …
  • Page 96
  • Page 97
  • Page 98
  • Page 99
  • Page 100
  • Interim pages omitted …
  • Page 128
  • Go to Next Page »

Primary Sidebar

Categories

We are a participant in the Amazon Services LLC Associates Program, an affiliate advertising program designed to provide a means for us to earn fees by linking to Amazon.com and affiliated sites.

Copyright © 2026 • The Chaos and the Clutter • Site Design by Jeni @ The Blog Maven

Return to top of page

Copyright © 2026 · Chaos and the Clutter 2.0 on Genesis Framework · WordPress · Log in