• Skip to primary navigation
  • Skip to main content
  • Skip to primary sidebar
  • Home
  • About
  • Contact
  • Privacy + Terms
  • Affiliates

The Chaos and the Clutter

  • Facebook
  • Twitter
  • Pinterest
  • Google Plus
  • RSS
  • Email
  • School at Home
  • Sensory
    • Sensory Processing Disorder
    • Awesome Sensory Play Activities
      • Sensory Bins
      • Sensory Bottles
      • Sensory Bags
  • Family Games
    • Minute to Win It Games
  • Special Needs Parenting
    • Childhood Anxiety
    • Reactive Attachment Disorder
    • Sensory Processing Disorder
  • Store
  • Course Login

Simple Science

How Do Folded Mountains Form: Science For Kids

By Sharla Kostelyk

Folded mountains are the most common type of mountain, representing the world’s largest mountain ranges. Some of the more famous ranges include the Rockies, Andes, Himalayas, and the Alps. This simple science experiment helps demonstrate how they are formed.
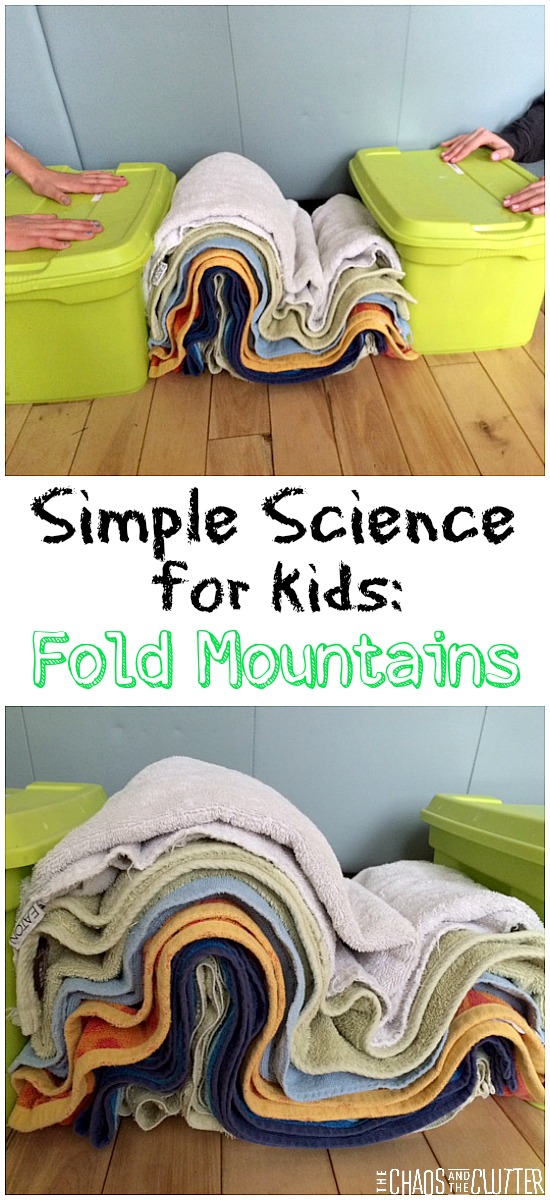
This is a great hands-on science experiment to explain how fold mountains are formed.Fold mountains occur near convergent or compressional plate boundaries. Plate movement creates fold mountains as the plates move towards each other. This movement causes layers of sedimentary rock on the ocean floor to become wrinkled and folded. These mountains are found between two continental plates.

I love that this science experiment didn’t cost any money and was a great visual for explaining how fold mountains are formed.

Materials needed:

towels
two boxes

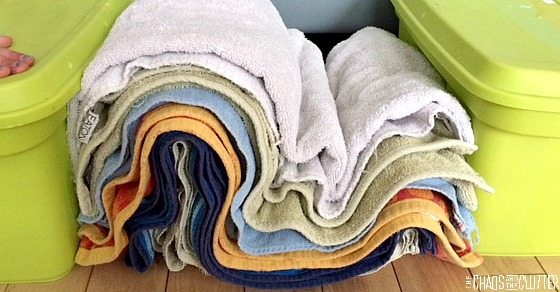
  1. Lay down a stack of towels, each one folded in half. The folds will be more obvious if you use towels of various colours, but monochromatic will work if that’s all that you have.
  2. Put a box on either side of the towels.
  3. The boxes represent the continental plates while the towels represent the buildup of sediment on the sea bottom.
  4. Push the boxes (continental plates) towards each other and observe the “mountains” being formed.
  5. Ask your kids to make observations about the folds and the shape.
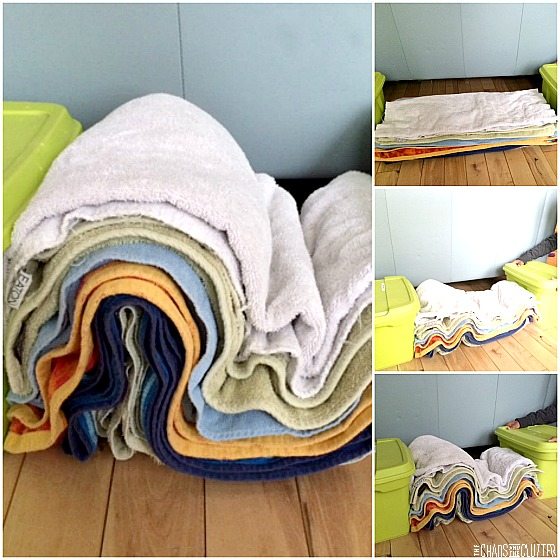
This is a great hands-on science experiment to explain how fold mountains are formed.When we did this science experiment, I told the kids that the boxes represented the continental plates and that the towels represented the sedimentary rock layers, but I didn’t tell them what the outcome of the experiment would be. As the towels began to rise and take shape, I asked them what they thought was happening. Most of them were able to guess that it was becoming a mountain.

They took turn moving the boxes towards each other and saw that the outcome was always the same, though sometimes a slightly different shape was formed.
This is a great hands-on science experiment to explain how fold mountains are formed.Our kids have seen the Rockies as we drive through them nearly every year, so they were able to easily picture what those mountains look like. If your children (or students) are not as familiar with fold mountains, I would suggest showing them some images of what fold mountains look like.

Vocabulary words that may be helpful for this lesson:

sedimentary, plates, continent

If you are looking for other ways to make science come alive for kids, you will want to check out our Simple Science board on Pinterest or check out some of our other science experiments.

Follow Sharla Kostelyk’s board Simple Science on Pinterest.
Layers of the Earth Science Experiment

Earthquake Experiment

Making Groundwater

Make Your Own Windsock

Jello Science Experiments

Gravity Defying Beads

Melting Ice Experiment

Filed Under: Simple Science

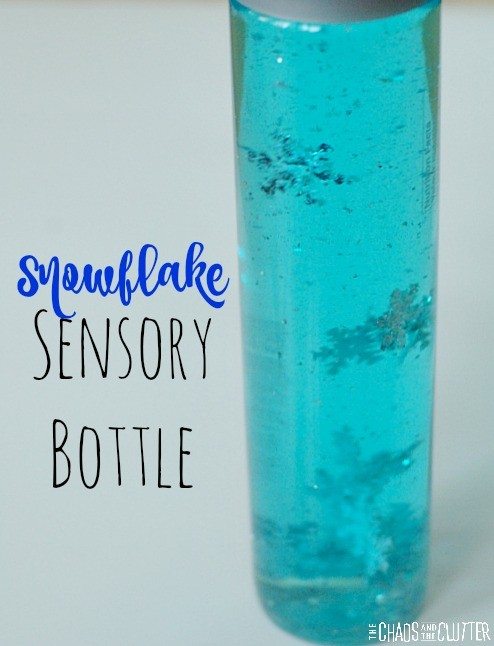
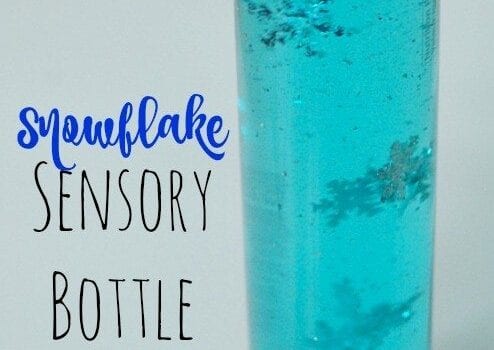
Snowflake Sensory Bottle and Science Lesson

Snowflake Sensory Bottle and simple science lesson

By Sharla Kostelyk

Making this snowflake sensory bottle also offers the opportunity for a simple science lesson. The results are so pretty.

Snowflake Sensory Bottle and simple science lesson

Materials needed:

  • empty water bottle (I used a Voss water bottle because I like the look of the lid)
  • blue food colouring
  • silver glitter
  • snowflake confetti

Fill the empty water bottle with water, almost to the very top. Add glitter and snowflake confetti.

This is where the science lesson comes in: Water is a polar liquid so it dissolves other liquids which are also polar or somewhat polar. Once you explain this to the kids, ask them if they think that food colouring is polar or non-polar, or in simpler terms, ask them if they think that food colouring will dissolve in water.

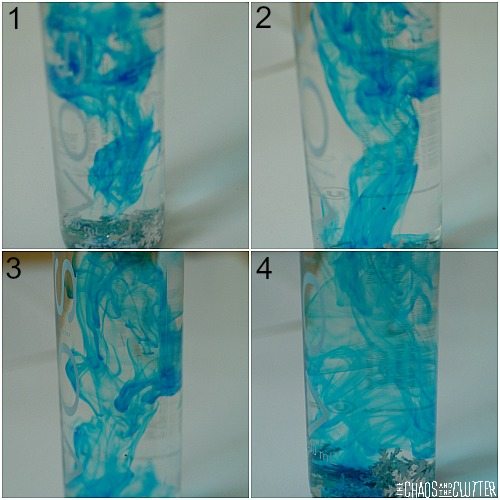
Then have one of the kids squeeze some drops of blue food colouring into the sensory bottle and observe what happens.

sensory bottle scienceThe kids will observe that the food colouring does dissolve in the water which means that it is also a polar liquid.
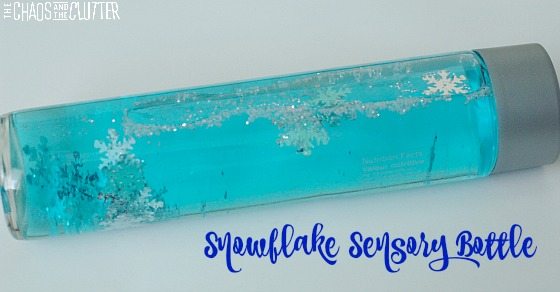
Snowflake Discovery BottlePut the lid on the bottle. If you are going to be using this snowflake sensory bottle with younger kids, you may want to secure the lid in place using a hot glue gun.
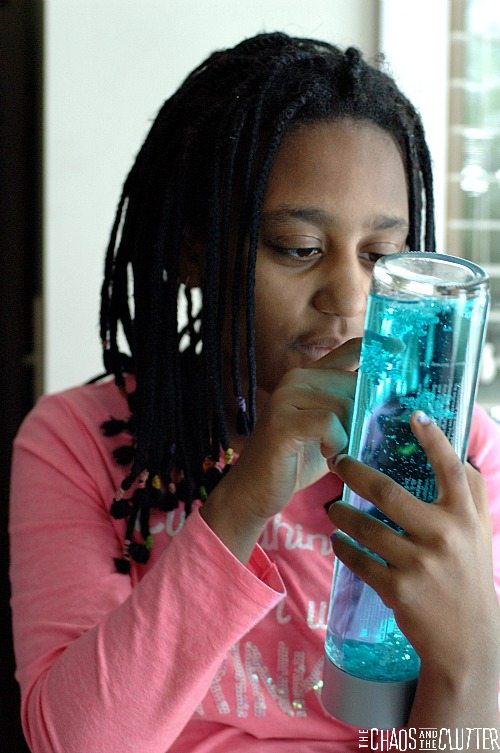
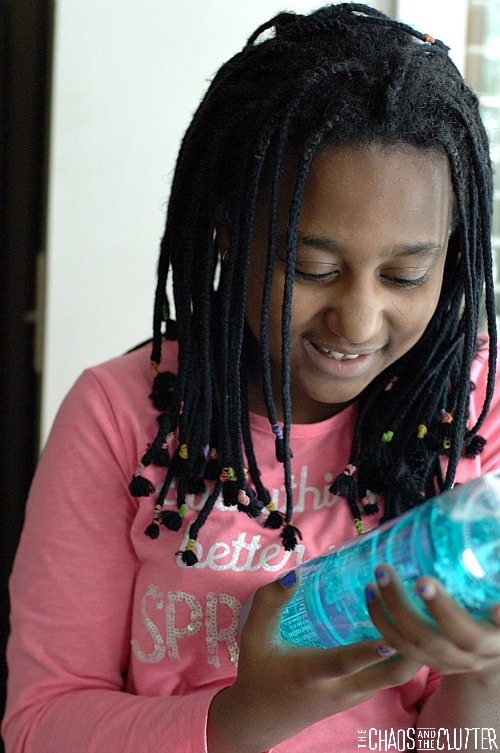
Of the sensory bottle we’ve made, for some reason, our daughter Dancing Queen found this one the most fascinating.

snowflake sensory bottle and simple science lesson

She was mesmerized by the movement and spent a lot of time playing with it. Our other kids enjoyed it too but she was the most thrilled by it.

snowflake discovery bottle and simple science lesson

If you are looking for other sensory ideas, sign up for the 5 part email series Sensory Solutions and Activities and get our free Sensory System Behaviours Easy Reference Cards.

Filed Under: Christmas, Sensory, Simple Science Tagged With: sensory bottles, sensory play

Simple Science: Making “Groundwater”

By Sharla Kostelyk

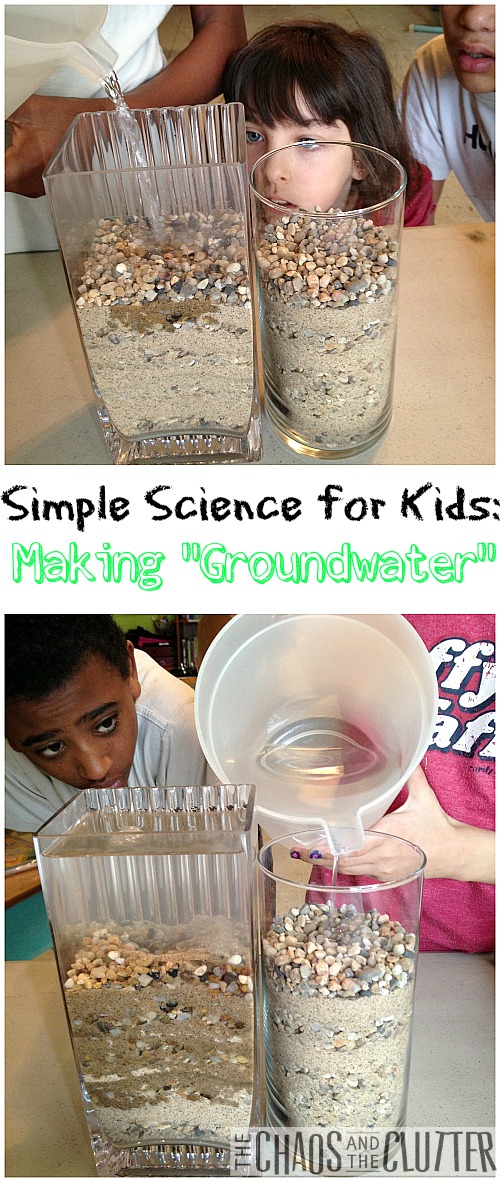
This year, we have been using the science curriculum CKE Earth & Space. We have studied the Earth’s layers (see our Layers of the Earth model here), tectonic plates, volcanoes, earthquakes (see our easy earthquake experiment here), rock types, oceans, and the water table. This was one of the book’s hands-on activities for demonstrating the concept of groundwater.

Simple Science for Kids: Making Groundwater

Materials needed:

2 large clear glasses or vases
sand
gravel (we used aquarium gravel that we had left over from our History Sensory Bin)
pitcher of water

In each of the glass containers, layer sand and gravel alternating between the two until they are about 3/4 of the way full. This will create an aquifer. An aquifer is the layers of rock, soil and sand that contain water.

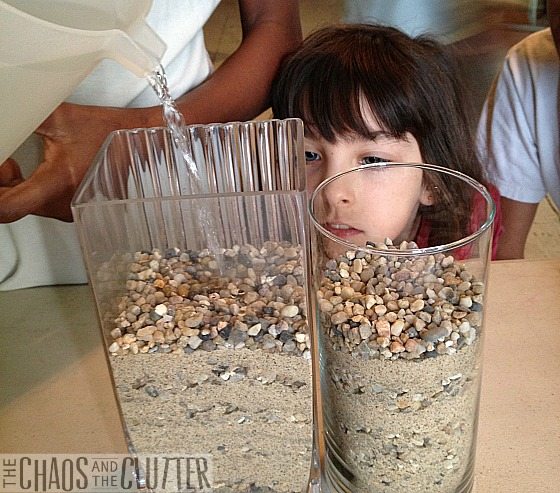
Slowly pour water into one of the containers, having your kids observe how the water is making its way through the small openings as it goes down.

In the first container, continue pouring until it is full (above the aquifer).

Science Groundwater Experiment

Next, slowly pour water into the second container, stopping about an inch BELOW the top of the aquifer. The level of the water in the second container is the water table. Below that, the aquifer is saturated. The glass of the container in this demonstration acts as impermeable rock.

Create what would happen if it were to rain by very slowly adding a bit more water to the second container. Have your kids observe and write down their observations. This demonstrates the recharging of the groundwater.

We kept our containers for a few weeks so that the kids could see that in the first one, there was never any room for more water, but in the second, as the ground soaked up more of the water and as time passed, we were able to add in a bit more water at a time as long as we never filled it above the top of the aquifer.

Vocabulary words that may be helpful in learning for this lesson:

groundwater, water table, aquifer, saturated, impermeable

If you are looking for other hands-on Science activities for learning about the Earth, you may be interested in following my CKE Earth & Space Pinterest board.

Follow Sharla Kostelyk’s board CKE Earth & Space on Pinterest.

Layers of the Earth Hands-On Science Activity

Gravity Defying Beads

10 Jello Science Experiments

Melting Ice Experiment

Filed Under: Homeschooling, Simple Science

Flower Petal Fingerpaint

By Sharla Kostelyk

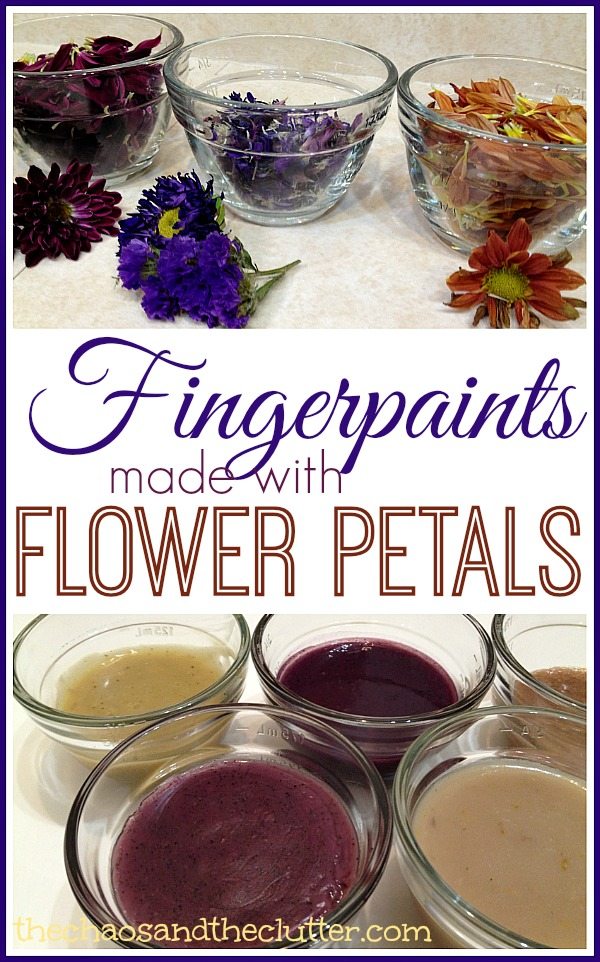
Making flower petal fingerpaint turned out to be an interesting science and art activity. We were surprised by what colours were made with the flowers and even by how the smells changed throughout the process.

Fingerpaints made with Flower PetalsMy neighbour had given me a beautiful fall bouquet of flowers and after a week or so, it had begun to look a bit on the sad side. The flowers were drooping and had started to wither but there were such gorgeous colours in the bouquet that it really seemed a shame to throw it away.
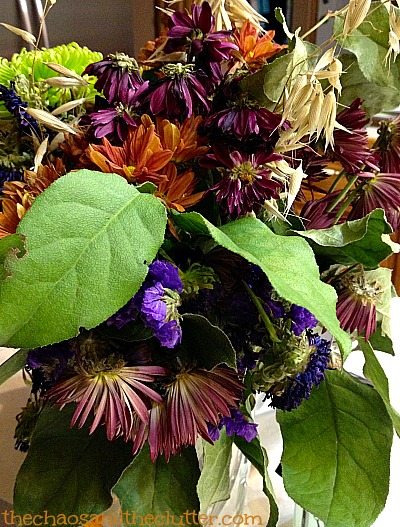
fall flower bouquetI was trying to think of a way to use the flowers and decided to make them into a hands-on history lesson to demonstrate to the kids how clothing and linens used to be dyed using flowers and other items found in nature.
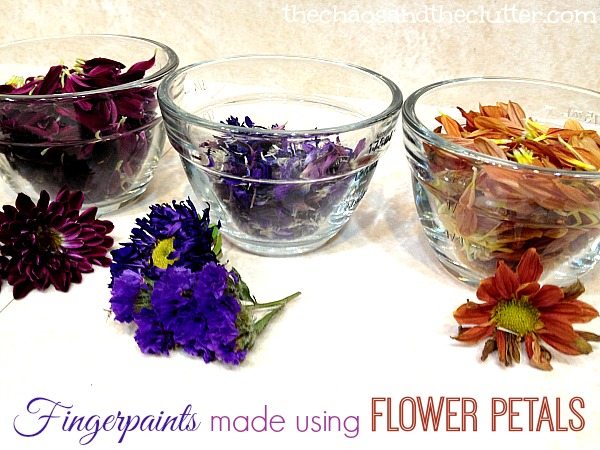
Once the colours were created though, I realized that I could turn them into paints and extend the activity to cover science, art and sensory elements.

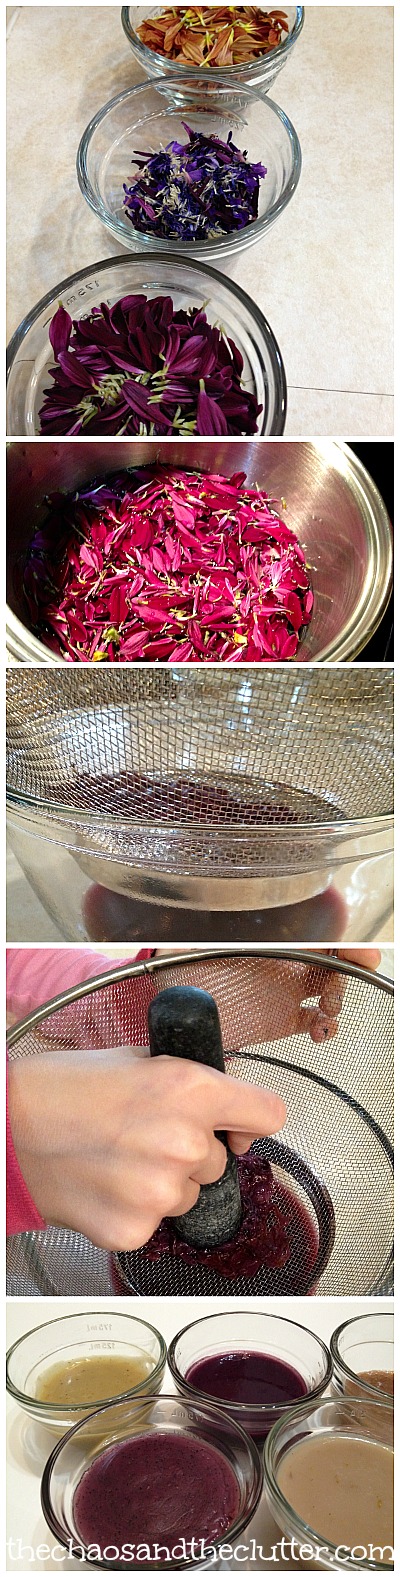
The kids and I started by pulling off the petals and grouping like colours together. We used small clear bowls that have measuring lines on the sides so that it was easy to measure how much of each colour we had collected.

Homemade Fingerpaints made with Flower PetalsWe added water and the petals to a pot and brought the mixture to a boil. Once it was at a rolling boil, we turned it down to simmer and let it simmer for half an hour. We stirred it from time to time and also used a pestle to press the petals to get more colour from them. The reason we let the mixture simmer for so long was so that some of the liquid could boil off and the colour could become more concentrated.
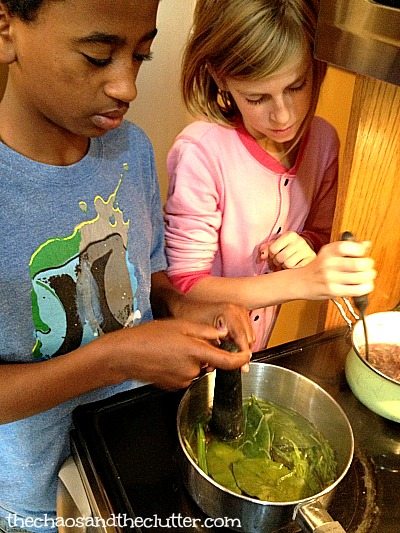
Snuggle Puppy came up with the idea to try to create green paint using the stems and leaves from the bouquet so he filled a pot with those and used the same process. The colour of that one created more of a yellowy colour than green and had a very earthy smell.

making paint from leaves and stemsOnce we had achieved a strong enough colour, we drained the liquid into a bowl placed beneath a strainer and pressed the petals with the pestle.

The liquid then went back into the pot and I whisked in a bit of flour and brought that to a boil, stirring the whole time. Once it was boiling, it only took a few minutes at most for the paint to reach the consistency I was looking for. I then took it off the heat, poured it into the small bowls we had used for the petals earlier and it was ready to paint with.

Flower Petal Fingerpaint Recipe:

3/4 – 1 cup of flower petals
1 1/2 – 2 cups of water
1 Tbsp. flour

Bring water and flower petals to a boil over medium-high heat in a pot. Turn heat to low. Simmer for half an hour.

Place a strainer over a bowl and drain the coloured water through the strainer. Press the petals to get maximum colour.

Put the water back into the pot and whisk in the flour. Bring it to a boil, stirring the whole time. Remove from heat.

steps to making fingerprint using flower petalsThe paints had different smells depending on the type of flowers used. The colours did not turn out the way we expected them to. The purple petals created an unattractive greenish-brown colour. The red flowers created a burgundy-purplish colour. The leaves and stems made a yellowish colour. The orange petals created a light brown.
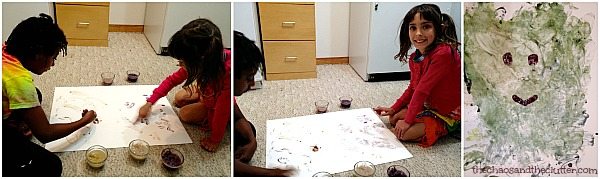
Before we made each colour, I had the kids hypothesize about what colour they thought would result. When other colours were the result, we discussed what factors may have contributed to that. It became a very interesting science lesson.  Honestly, one of the colours looked pretty gross so we had a bit of a laugh over that!

Miss Optimism wanted to know what would happen if she mixed several colours of flower petals together. The result was a purple with specks of a darker shade.

After we had made five colours of flower petal fingerpaint, I let the kids start painting. Granola Girl and Dancing Queen painted a cute looking monster on a large poster paper. This had both sensory (touch, sight and smell) and art elements. I love it when one activity can encompass so many different things!

fingerpainting with flower petal paint

Shaving Cream Painting

Condensed Milk Painting

Pumpkin Puffy Paint

If you are looking for other fun activities to do with your kids, you may want to join our free 5 part email series Sensory Solutions and Activities and get our Sensory System Behaviours Easy Reference Cards.

Filed Under: Crafts and Activities, Homeschooling, Sensory, Simple Science Tagged With: sensory play

10 Jello Science Experiments

10 Jello Science Experiments

By Sharla Kostelyk

This week, we’ve been exploring through jello science. This started as a practical way for me to use all the extra jello I bought when attempting to make fingerpaint that flopped, but it ended with some really fun science experiments and more than a few giggles!

The coolest jello science experiments ever.

Fizzing and Colour Mixing Jello Experiment:

The first science experiment we did was a slightly different take on the usual baking soda and vinegar chemical reactions eruption. This one has a colour mixing sensory twist.

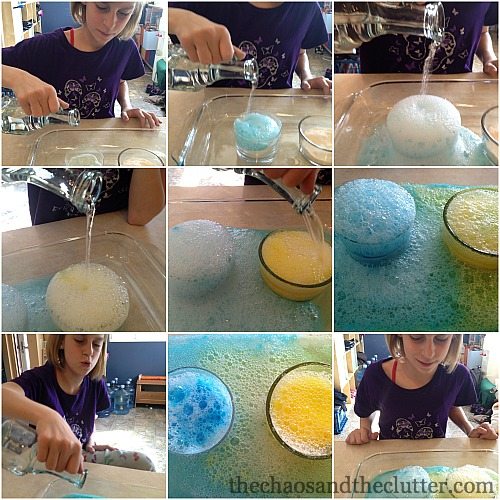
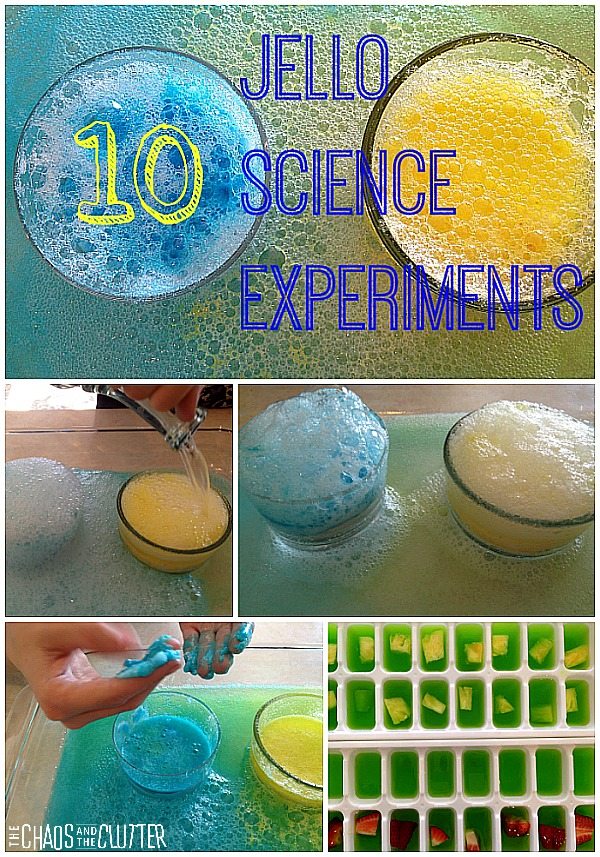
We started with vinegar, baking soda, blue jello, and yellow jello. I set out a clear baking dish and set two smaller dishes inside it. Into each of those dishes, I added baking soda and about half a packet of the jello and stirred them. Then I had Miss Optimism pour vinegar into the dishes and we watched it erupt.

jello science eruption experiment

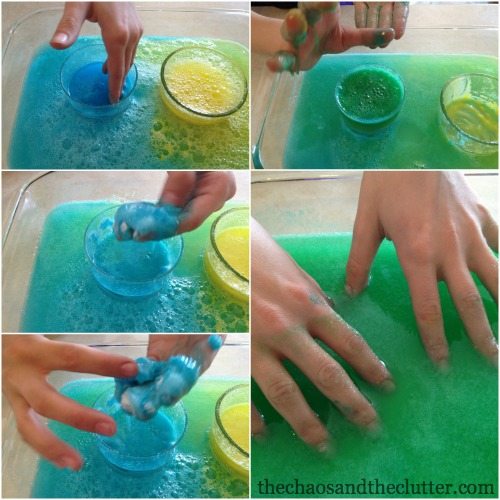
Since we used two primary colours, we had hypothesized that they would create a third colour once they mixed and sure enough, the blue and yellow created green.

This jello science experiment soon turned into a sensory experience. As Miss Optimism put it, “it’s gooey, like wet sand”. She played for more than half an hour in the sensory goop, playing until the liquid was entirely green.

This hands-on learning activity is great for preschoolers up to elementary schoolers. It also makes a simple science fair project.

jello colour mixing experiment

This science experiment is one of many awesome activities that you can find in The Sensory Science Book Volume 1.  

Enzyme versus Protein Jello Experiment:

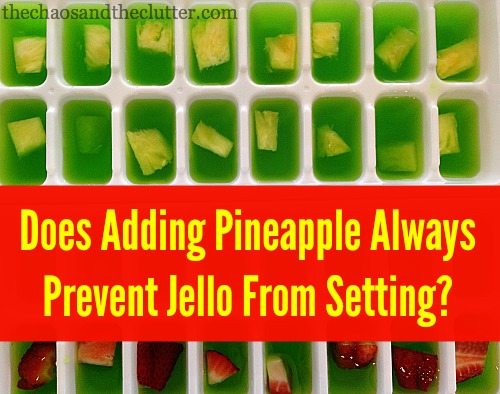
The next jello science experiment we did was to see if adding pineapple will always prevent jello from setting. Einstein had read on the box of jello that adding kiwi or pineapple will prevent jello from setting.

Does Adding Pineapple Always Prevent Jello from Setting?We began by adding pieces of fresh pineapple to one row in an ice cube tray. I then roasted pineapple and we added a row of cooked pineapple to the tray. We did this to see if cooking the pineapple would make a difference as opposed to using the fresh fruit. We mixed up jello according to the package directions and poured it in the tray.
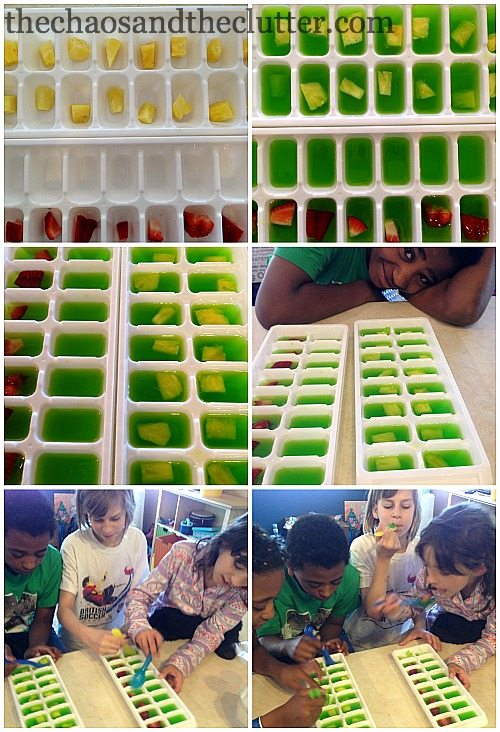
In another tray, we set out one row of strawberry pieces to see how the jello would react to that fruit and in the last row, added nothing so that we could use that row as our control. We added jello to that tray as well and put both trays in the fridge to set overnight.

jello setting science experimentIn the morning, we found that all the rows had set except the row with the fresh pineapple which was still green liquid. This activity was kitchen science at its best. The kids ate the results just to be sure they were accurate!
We read about how pineapple has an enzyme that breaks down protein and therefore prevents jello from setting. We deduced that cooking the pineapple had broken down the enzymes or caused them to be inactive which allowed the jello with the cooked pineapple to set.

Strawberries do not contain bromelain and do not affect the structure of jello.

With our one remaining Jello packet, the kids took all of our fun ice cube tray moulds (Titanic, Lego blocks and Lego mini fig) and made themselves some fun shaped jello to eat!

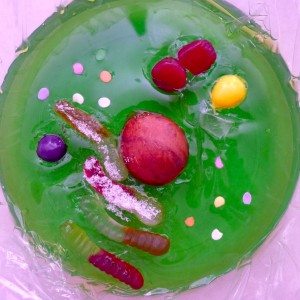
Edible Animal Cell:

This isn’t the first time we’ve explored science with the help of jello. A few years ago, we made this edible cell out of jello for one of the science units we were studying.

edible cell out of jelloOther Cool Jello Science Experiments:

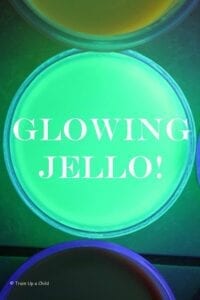
Learn Play Imagine has a super cool Glowing Jello Experiment.

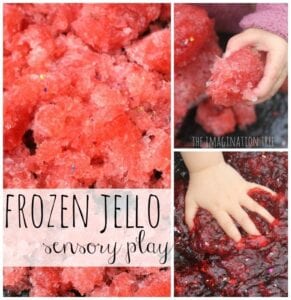
glowing jelloExperiment with changes in matter with frozen jello sensory play from The Imagination Tree.

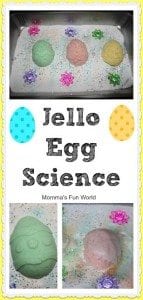
frozen jello science changes of matterMomma’s Fun World did a fun experiment with jello egg science.

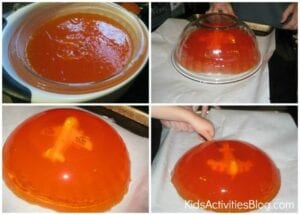
jello egg scienceKids Activities Blog offers a really great idea for teaching kids about turbulence on planes. This would be especially good for kids who either have a fear of flying or who have never been on an airplane. Science to conquer fears!

Turbulence on a Plane taught through jelloTeach Preschool offers a wonderful hands-on science experience with The Wonders of Bright and Colourful Gelatin.

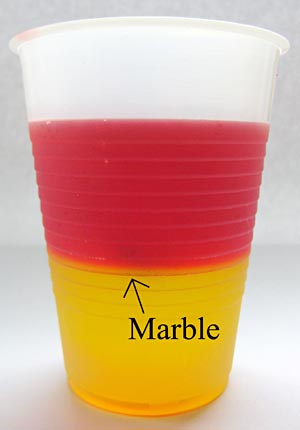
exploring gelatinScience Buddies has a really awesome centripetal force jello experiment. I actually wrote out the steps and considered doing this with the kids but it is a bit advanced for where my kids are at. It may be one we do in the future though.

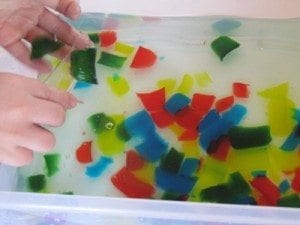
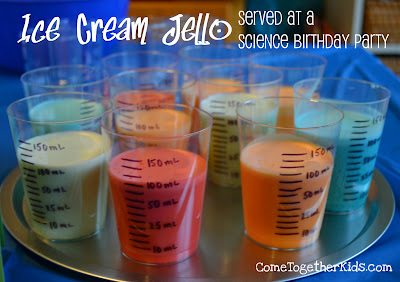
centripetal force jello experimentThis ice cream jello from Come Together Kids is so cute! I love the way she made the cups!

ice cream jelloIf you are looking for other fun and easy science experiments, check out The Sensory Science Book that will get kids excited about science!

Filed Under: Homeschooling, Simple Science

Easy Science for Kids – Gravity Defying Beads

By Sharla Kostelyk

Science can be fun and it doesn’t have to be complicated. This simple experiment allowed me to introduce several new science concepts to the kids.

Simple Science for Kids - Gravity Defying Beads

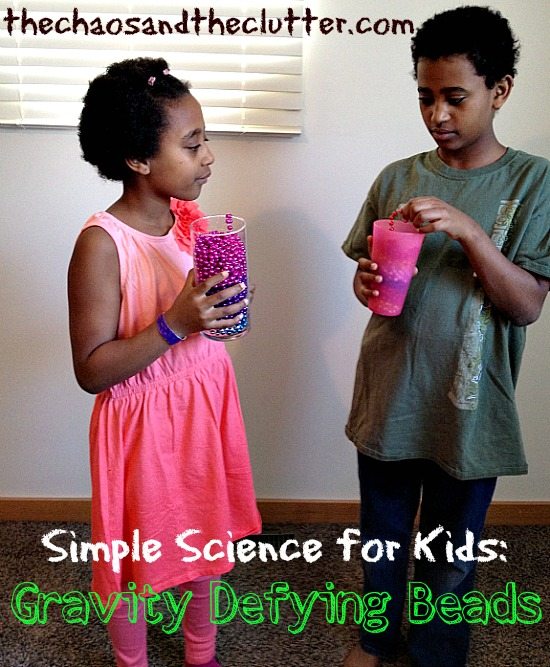
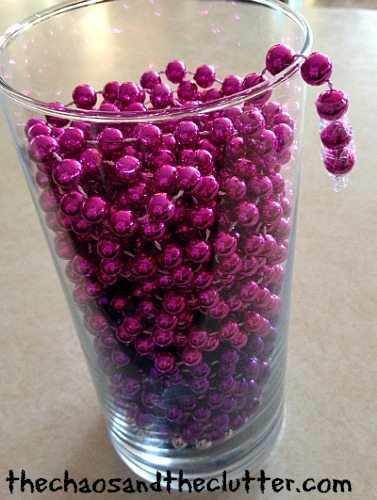
For this experiment, you only need 2 items: a container (we tried using a glass container and a tall plastic cup and we preferred the glass container as it made more noise which contributed to the fun factor!) and a long string of plastic beads or a beaded garland. You can achieve this by using beaded necklaces (I bought mine at the dollar store) and cutting them once to form a single strand and then tying them together to create a long strand.

Put a piece of tape on each end of your beads. I used clear packing tape but I’m sure that any type of tape would be fine.

gravity defying bead experiement

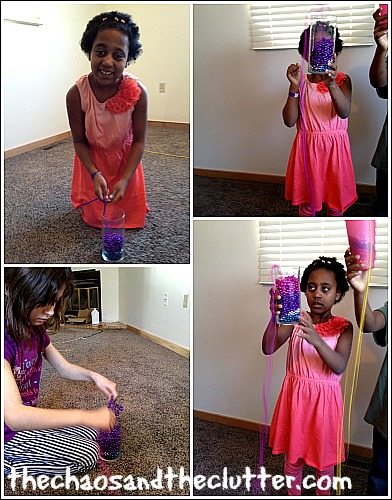
The experiment is so simple. Place the strand of beads into the container, ensuring that it doesn’t get tangled, hold it up and give the end of the strand a slight tug, causing the strand to begin falling. Before long, instead of falling straight down, you will see the beads begin to arch upwards. It is so cool!

Gravity Defying Beads

This experiment depicts Newton’s law of inertia (Newton’s first law) which is basically that objects at rest have a tendency to stay at rest while objects in motion have a tendency to stay in motion.

I also used this experiment to talk to my kids about momentum. To give a further demonstration of momentum, I had them begin running and then suddenly told them to stop so that they could see that their body continued to propel forward. They found this to be quite a fun demonstration as well!

This video shows our gravity defying bead experiment. First, Snuggle Puppy is holding the container and then Granola Girl (who has a really funny reaction to watching the beads go higher and higher!). I’ve also put Granola Girl’s in slow motion to better show how it works.

If you are interested in other easy hands-on science activities, you may want to follow my Simple Science board on Pinterest or check out our other simple science for kids ideas.

Filed Under: Homeschooling, Simple Science

  • « Go to Previous Page
  • Page 1
  • Page 2
  • Page 3
  • Page 4
  • Page 5
  • Go to Next Page »

Primary Sidebar

Categories

We are a participant in the Amazon Services LLC Associates Program, an affiliate advertising program designed to provide a means for us to earn fees by linking to Amazon.com and affiliated sites.

Copyright © 2026 • The Chaos and the Clutter • Site Design by Jeni @ The Blog Maven

Return to top of page

Copyright © 2026 · Chaos and the Clutter 2.0 on Genesis Framework · WordPress · Log in