The creative vision for this activity was inspired by Angela at TeachingMama. She made a Fall Sticky Tree for her boys a few months ago and I knew that my kids would really enjoy doing one so I went out and bought the main supplies and then time got away from me and before I knew it, it was no longer fall! Snow covered the ground and an autumn activity no longer seemed like it would fit in, so I improvised!
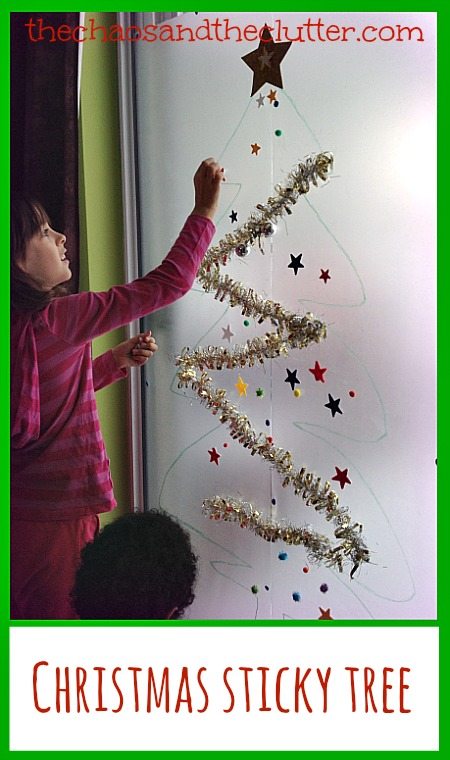
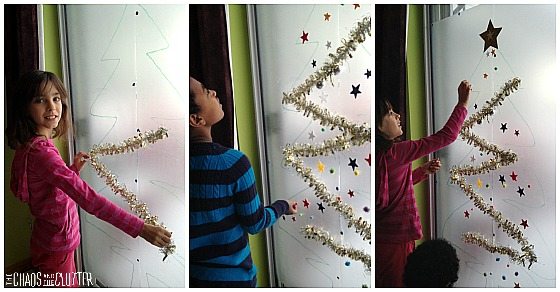
To make this, I used poster putty to attach clear contact paper to our patio window. (For those who are not familiar with it, contact paper is sticky on one side.) I used two sheets of contact paper side by side to create the width that I wanted. I kept the backing on the contact paper until it was stuck to the window and then peeled away the backing.
I used a green Sharpie (permanent marker) to draw the outline of a Christmas tree. I then provided the kids with a pile of things they could use to decorate the tree: tinsel garland, light Christmas balls, pompoms, metallic pompoms (note: the metallic pompoms didn’t stay on very well and most fell off after the first day), felt stars, large glittered foam star, beads, foam candy canes and foam ornaments.
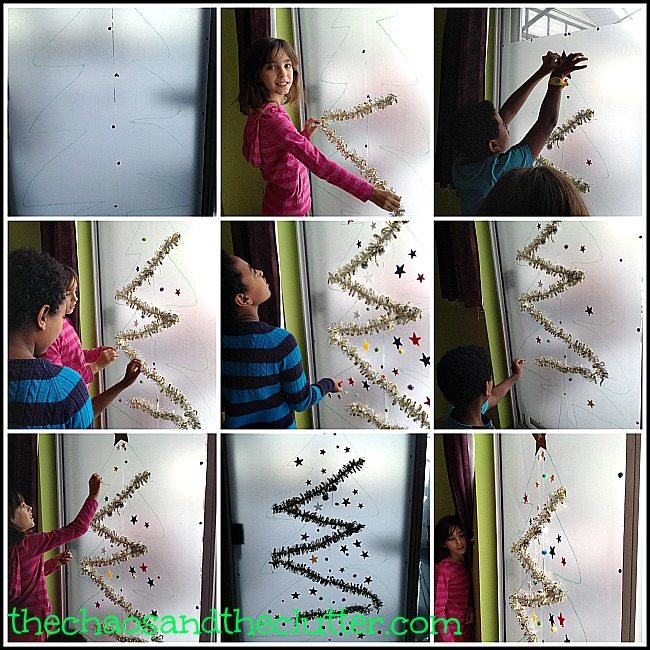 The kids really appreciated the creativity of being able to decorate this tree without any instruction or limitations. I would say that it held the attention of my girls a bit better than my boys and I’m not sure if that is because of the activity itself or just the moods on the day it took place. My boys generally enjoy craft activities as much as my girls do. It was a good holiday sensory activity for all the kids and involved both fine motor and to some extent, gross motor as well.
The activity was more of a success than I had anticipated in that now, several days later, when I pass by the tree, I see that even more has been added to it including paper ornaments that the kids have coloured on paper and cut out. It’s always nice to see an activity that expands and takes on a life of its own. Other than the metallic pompoms which did not stay on very well, everything else is still sticking to the tree and it’s been four days since we first made it.
 This was a hands-on and easy way to begin to decorate our homeschool classroom for the holidays!
If you would like to see other ideas for Christmas crafts and activities, you may want to follow my Christmas Crafts board on Pinterest.
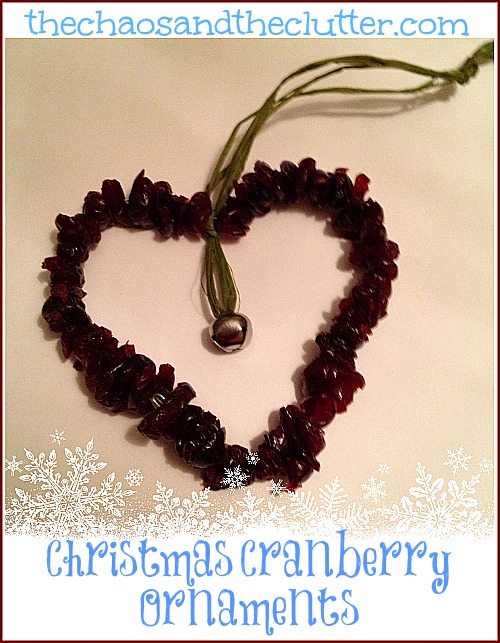
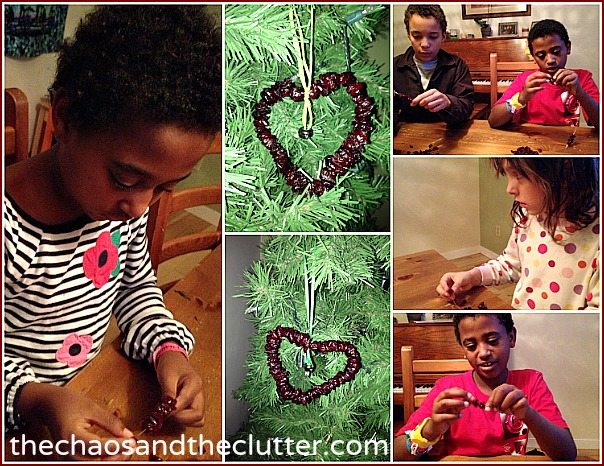
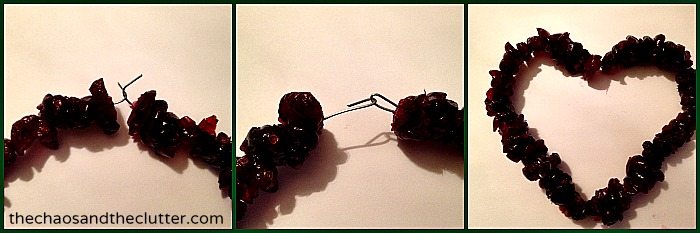 String a jingle bell onto a piece of ribbon or raffia and place a knot above a small loop. Place the knot beneath the wire at the dip in the heart and attach it to the ornament by knotting again just above the wire. Create a loop to hang the ornament with and put one last knot at the top.
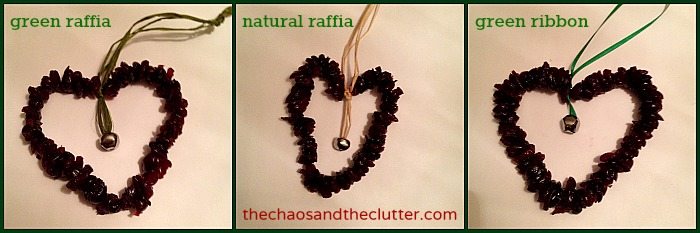
 If you are interested in more Christmas crafts or activities, you may be interested in following my
 It was very open-ended so they added leaves they made out of paper, string, foam stickers, and paper folding. They used bingo dabbers, crayons, pens, pencil crayons, and markers to add their personal touches.
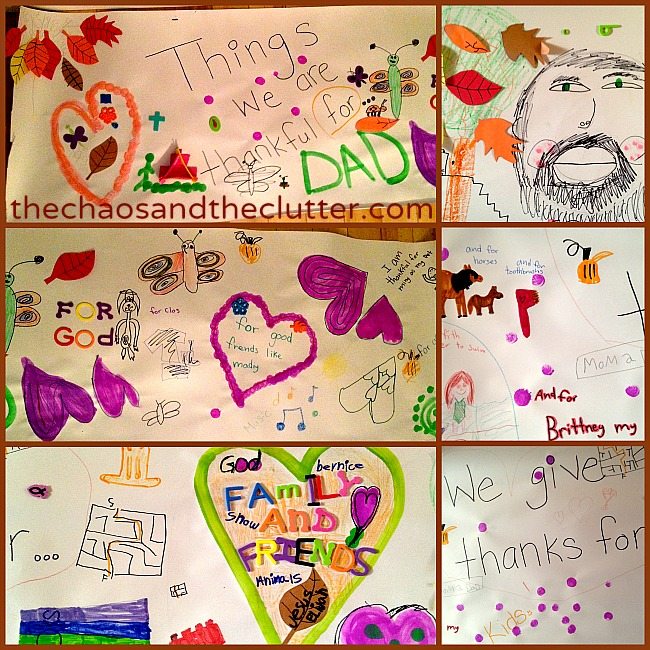
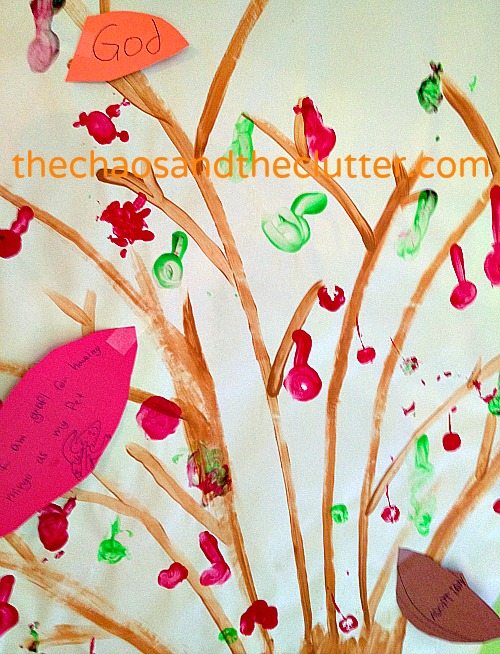 The last simple activity we made was to cut out things that the girls had coloured in from coloring books and attach them to paper using raised double sided tape. The kids then wrote on the paper what they were thankful for.
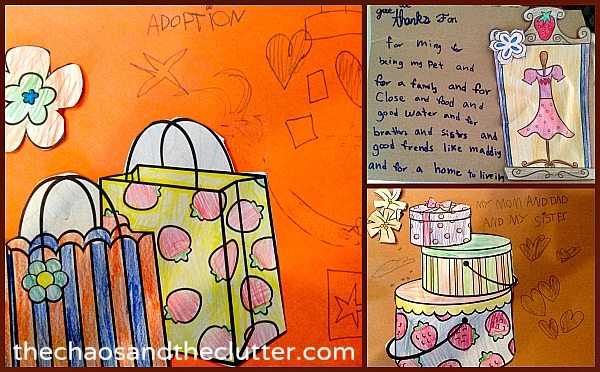
 I set up a simple backyard obstacle course for the kids using what we had around. I got the kids to rake leaves so that I could make a big pile of leaves for them to jump into at the end. I used branches to create a narrow pathway, set up chairs, a slide, hula hoops, a log and a longboard for them to hop over, two balls for them to kick, and I used what was already set up (the climbing wall and the merry-go-round) as part of the course as well.
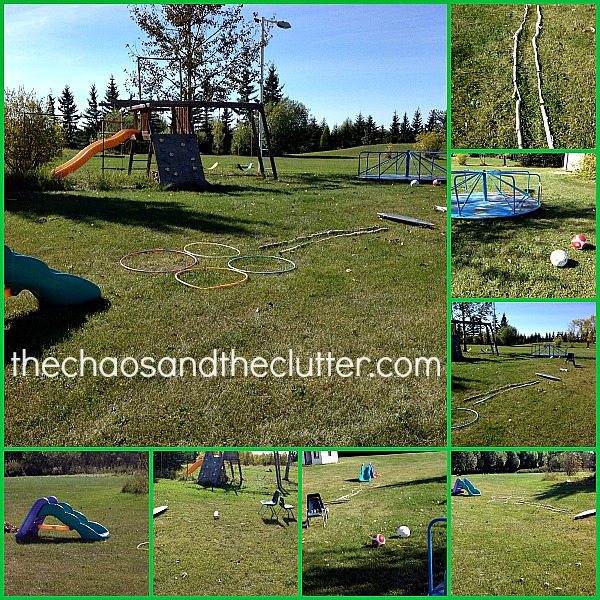 The kids had to go up the climbing wall and down the stairs on the other side, over to the merry-go-round where they had to go around 5 times, then kick one of the soccer balls, up and over the two back to back chairs, a two footed hop over the log and then over the longboard, through the narrow path between the laid out branches, one foot in each hula hoop to run through, up the slide, and jump off into the pile of leaves. They then had to retrieve the soccer ball and replace it for the next person. Jumping in the leaves was their favourite part!
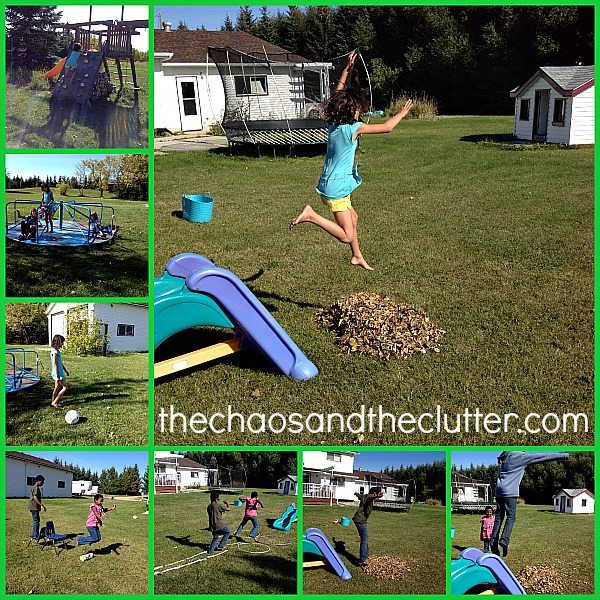
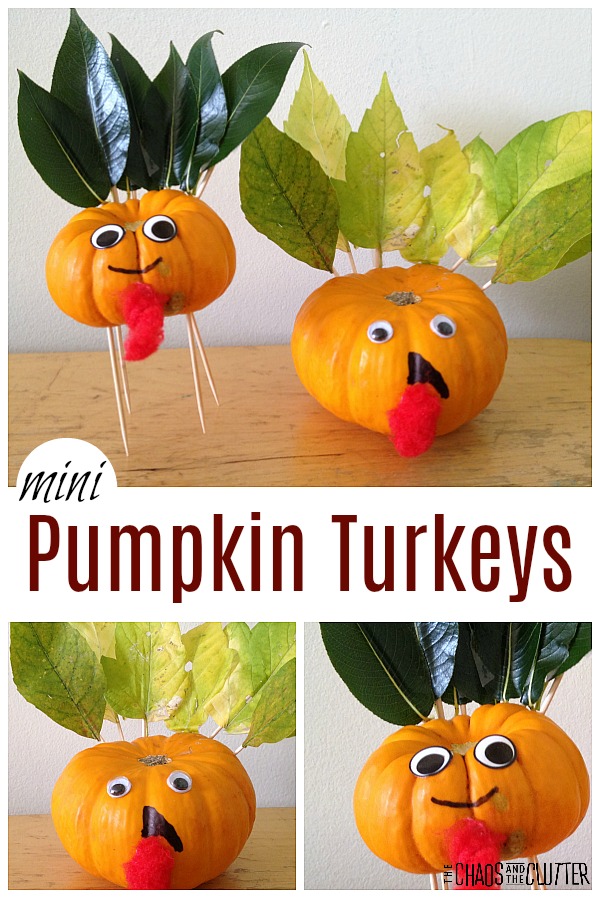 Supplies needed:
 The original plan was to make holes in the mini pumpkins and insert the leaves by their stems but that didn’t work at all! I considered gluing the leaves or taping them to the back of the pumpkins but none seemed like great solutions. I was still in the kitchen trying to work out a solution to the leaf attaching dilemma when I heard that Miss Optimism had solved the problem and was already at work attaching leaves to her pumpkin! I’m proud of my little problem solver!
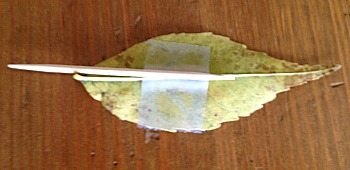 Once the turkey “feathers” were in place, the kids decorated their turkeys. For eyes, some of them used google eyes, some used sticker eyes and others drew them with permanent markers. For the turkey’s wattle, we cut red pompoms in half and glued those on. You could also use felt pieces or thick paper. The kids drew on other features with permanent marker.
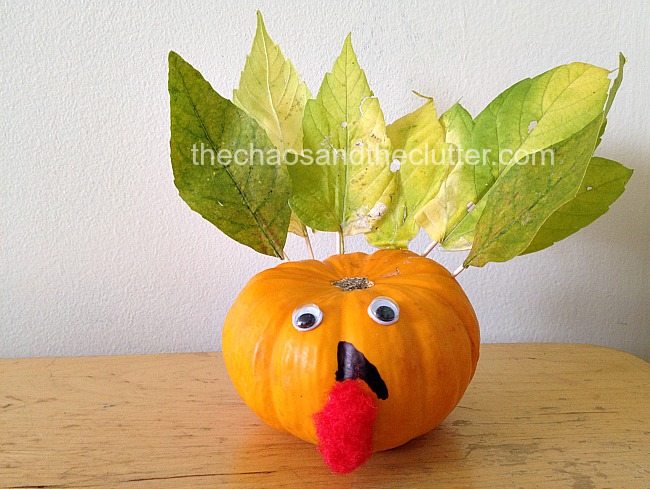 You could also add names using permanent marker and use these mini pumpkin turkeys as place cards at your Thanksgiving dinner table.