• Skip to primary navigation
  • Skip to main content
  • Skip to primary sidebar
  • Home
  • About
  • Contact
  • Privacy + Terms
  • Affiliates

The Chaos and the Clutter

  • Facebook
  • Twitter
  • Pinterest
  • Google Plus
  • RSS
  • Email
  • School at Home
  • Sensory
    • Sensory Processing Disorder
    • Awesome Sensory Play Activities
      • Sensory Bins
      • Sensory Bottles
      • Sensory Bags
  • Family Games
    • Minute to Win It Games
  • Special Needs Parenting
    • Childhood Anxiety
    • Reactive Attachment Disorder
    • Sensory Processing Disorder
  • Store
  • Course Login

Crafts and Activities

Cotton Ball Painting

By Sharla Kostelyk

This cotton ball painting activity was fairly easy to set up and was very popular. All of my kids loved it and the neighbour’s two kids who were over at the time also thought it was pretty awesome, so this will be one that we will do again!

Cotton Ball Throw Painting is a great gross motor art activity for kidsCotton Ball Painting Instructions:

Materials needed:

  • large sheets of paper
  • tape (I used clear packing tape)
  • cotton balls
  • paint
  • paper plates or pie plates

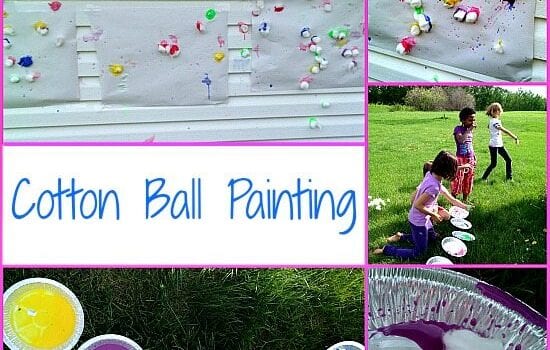
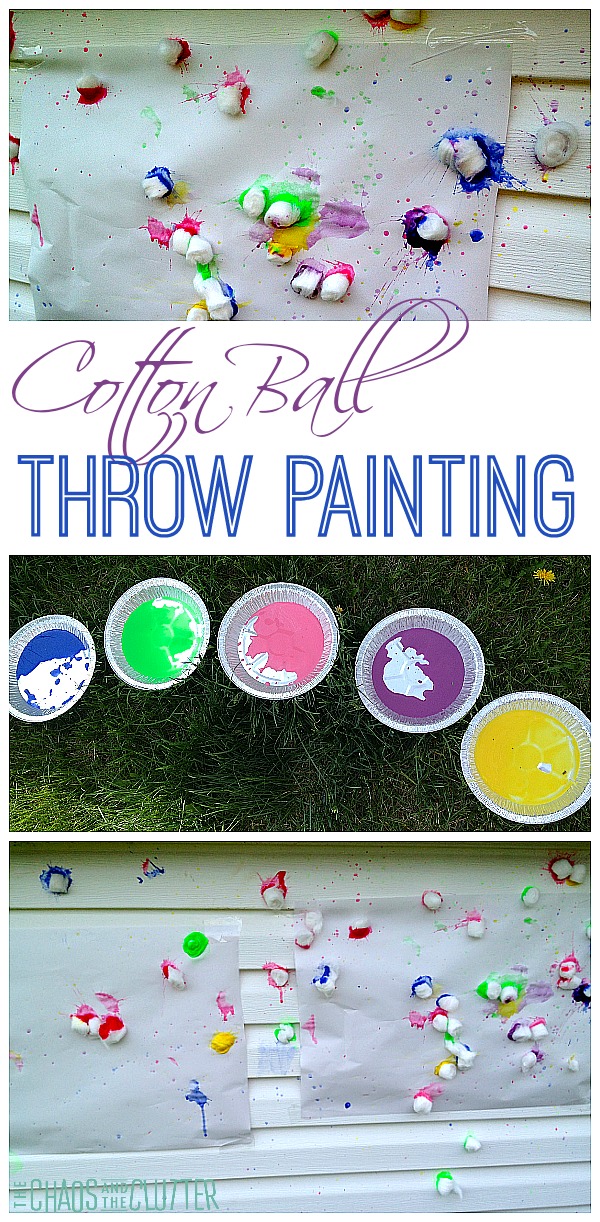
I taped pieces of white paper onto our playhouse. Taping the paper onto a fence would work really well and that is what I would have done if we had a fence!

I mixed paint with water (about equal parts of each) in tin pie plates. Be sure to use washable tempera paint because unless your kids have great aim, the fence is likely to get some paint on it. A rainfall should get rid of any paint residue.

Cotton Ball Throw Painting
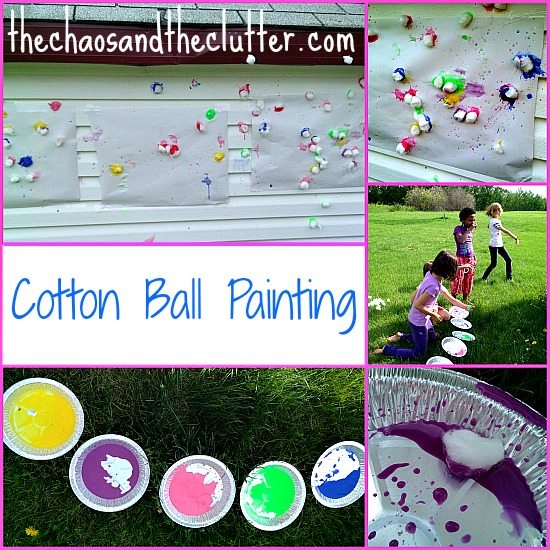
All the kids had to do was to dip a cotton ball in paint and throw the cotton ball at the paper. This activity combined all kinds of sensory between the softness of the cotton balls and squishiness of them once they get dipped in paint and the large flinging motion the kids get to experience when they throw them and the sound of them hitting the paper.

It also has elements of fine motor (pinching) and gross motor (throwing), making it a great game for preschoolers or older kids.

Some of the paint got onto the playhouse, so the next day, we did a pretend play sensory activity where basically the kids “painted” the playhouse with water to wash off the extra paint.

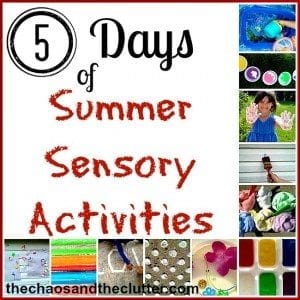
Both activities are ones that I am sharing as part of this week’s fun series of Summer Sensory Activities. I will be sharing two activities a day all week.

Summer Sensory Activities Series

Join me for a free 5 part email series Sensory Solutions and Activities and get your Sensory System Behaviours Easy Reference Cards.

Filed Under: Crafts and Activities, Sensory, Summer Sensory Activities Tagged With: sensory play

Family Fun Night- Just for Laughs

By Sharla Kostelyk

Family Fun Night for Laughs - the Bag Game, the Flour Game and a very creative way to eat spaghetti!

Our family fun nights are such a huge hit with the kids! They are great for encouraging bonding and for creating lasting memories. We’ve had quite a number of Family Fun Nights over the years and I never thought any I could create would ever top our Minute to Win It Family Fun Night, but I was wrong! This one was even more fun and got us all laughing. It also was about half the work to prepare!

Most of this fun night can be put together with things you already have around the house. There are a few extras that I bought that added to the goofiness factor, but the activities could be done without spending any money.

Decorations. I used a bright plastic tablecloth that I could easily wrap all the garbage in and throw out at the end of the night. I knew that the activities were messy and it was worth it to buy the tablecloth to avoid the clean-up!

For the centerpiece, I used a clown hat and a whoopee cushion. They both got a fair amount of use later in the evening and in the days to come!

fun party table

I also set lip pops and goofy glasses at each place setting and set out a trick drink for everyone (I explain how to make those below).

fun party place setting

For The Husband, I set out a really funny pair of glasses with wind-up moving eyebrows and moustache. We also gave The Husband stick-on sideburns! The funniest part was that his hair is so light so the black sideburns looked really out of place!

funny husband

Food. I made trick drinks by filling clear plastic cups with red jello and inserting a bendy straw into each before the jello set. They look just like juice ready to drink and they fooled almost everyone! They tried awfully hard to suck up their juice.

trick drinks

I made coloured popcorn for a snack but it was a flop. I followed the recipe but it was a soggy ball of yuck!

For supper, I made spaghetti because I needed a messy meal to pull off the next activity…

Activities. I put all of these utensils in a bag:

IMG_1045

I then wrote silly names on index cards like “the Forkinator”, “Whirlwind”, “Double Trouble” that pertained to each one. When I read the names, people chose the one they wanted and I reached into the bag and handed them the utensil they had to eat supper with! In other words, there were no forks at dinner. Everyone had to eat their spaghetti with their utensil.

creative spaghetti eating

The Flour Game. This game is perfect for playing with a group with wide age ranges. Toddlers could play and so could grandparents, so it would be great for family reunions or holiday parties.

All you need for this is flour, a bowl, a lifesaver or coin and knife.

Pack a bowl with flour. Stick a plate on top of the bowl and carefully tip it upside-down so that you create a mound of flour. Put a lifesaver (or coin) on the top. Everyone takes a turn cutting the flour until the lifesaver falls. The person that knocks the lifesaver off has to retrieve it with their mouth.

The Flour Game

The Bag Game. My neighbour Christie taught us this fun game. This time we played it with a bit of a variation though. For the bag game, all you need is a large brown paper bag (or you can use an empty cereal box) and a willingness to play.

Standing on one foot, you must retrieve the bag with your mouth. You then have to tear off the bit of the bag that your mouth touched so that slowly, the bag gets lower and lower to the ground. Since we have a variety of ages in our family, we gave the littlest ones three strikes per turn and the rest of us had three strikes that carried through from round to round. After a long and hilarious competition, Einstein came out victorious!

The Bag Game

Extras. I had made some videos on JibJab starring members of our family and we sat down and watched the videos and laughed as comedic versions of ourselves danced, skied, sung, and rollerskated on the screen! I gave everyone funny glasses (with attached noses) to watch the videos with. After we tucked the younger kids into bed, we played a card game (Canasta) with The Ferrari and Fred and had some more laughs.

If you are looking for other ideas of things to do to create those lasting memories, here are some of our other family fun nights:

Red Carpet Premiere
Titanic Dinner
Minute to Win It

Filed Under: Crafts and Activities

Super Easy Earth Day Craft

By Sharla Kostelyk

Earth Day is on April 22 this year. We usually try to do something to reflect on our gratitude for this lovely planet we live on. This year, we will be going on a field trip to a greenhouse which I’m sure will be a good way to naturally bring up topics related to Earth Day. A few years ago, we made this Earth Day craft.

This craft is a super easy introduction to the concept of Earth Day. I love crafts that can be done with very few supplies and it’s even better if they are things that you already have around. For this Earth Day craft, all you need is four items that you probably already have on hand.

Easiest Earth Day Craft Ever but it does help encourage kids to think of ways they can help take care of their planet.Materials needed:

  • paper plate
  • markers or pencil crayons
  • blue and green paint
  • paintbrushes

First, I had the kids brainstorm ideas of how we can take care of the earth and write their ideas with markers on the inside of their paper plate. This step is a good way to get to kids to think of ways that they can help take care of their planet. My kids came up with ideas such as “ride your bike to the store”, “plant a tree”, “make a garden”, and “don’t litter”.

Once they had written their ideas on the inside of the plate, each of them painted the earth on the back of the plates using blue and green paints. Easiest Earth Day Craft ever!

Earth Day Craft
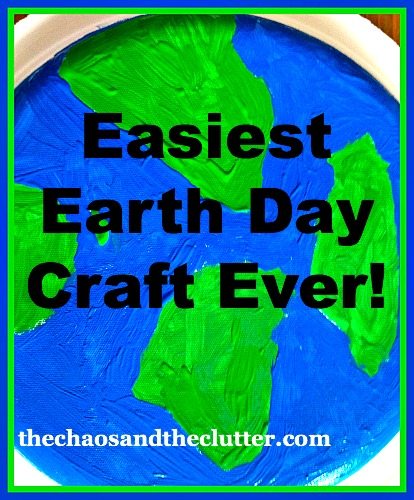
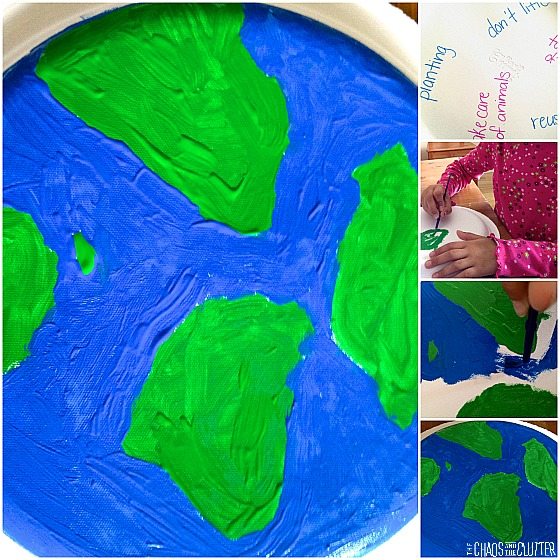
Do you do anything to celebrate Earth Day? If you’re looking for ideas, be sure to check out my Earth Day Pinterest board or follow me on Pinterest.

Filed Under: Crafts and Activities

Winter Theme Unit

By Sharla Kostelyk

In our homeschool last week, we did a winter theme unit. The weather certainly cooperated in this as there was deep snow in the yard. No imagination about winter was needed!

The kids were able to get a lot of outdoor fun in including snowmobiling, making snowmen, digging, searching for animals by following their tracks, and just generally playing and having a great time!

Winter themed muffin tin lunch:

  • banana snowman (three slices on a toothpick)
  • snow (coconut)
  • snowballs (mini marshmallow)
  • pine tree (cucumber)
  • snowman (sandwich with cucumber peel scarf, raisin buttons and face drawn with edible markers)
  • candy hockey stick and puck (date)

Chalk snowman:

On blue construction paper, draw a snowman in chalk. Use your finger to smudge the chalk to even out the look.

Then put glue along the bottom of the picture and in snowflake shapes here and there. Sprinkle coconut over the picture. Glue on buttons. You can also use smaller buttons for the eyes. For the snowman’s mouth, use dried black beans.

Winter theme sensory bin:

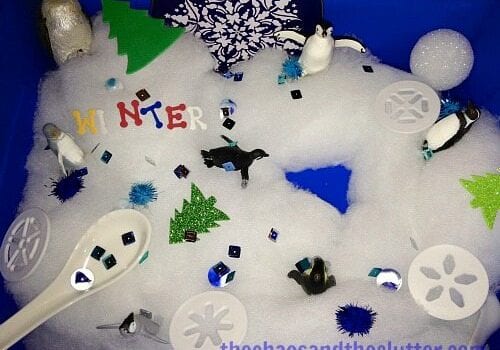
For this sensory bin, I used cotton batting, the lid off a Christmas tin, a styrofoam ball, sequins (which the kids pretended were snow), foam trees and letters to spell out “winter”, penguins, pom poms, white spoons for scooping, marbles, and snowflake shapes from my cookie dough press. It was made entirely out of things I already had.

Good old fashioned snow flakes: 

My kids love making snow flakes and this week was no exception. They spent hours using just white paper and scissors to create shapes. Here is just one pile of their snowflakes. As Einstein reminded me, no two snowflakes are alike!

Painting on Snow:

I filled spray bottles with water and food colouring and let the kids paint on the snow. Before you do this with your kids, learn from my mistakes! There are two things I should have done differently:

  1. I should have explained to the kids that the “paint” was for snow only, not for windows (grrr…)
  2. I apparently should not have used bottles that had formerly contained cleaning products because my kids decided to taste the different colours (ugh!)

Snow Ice Cream Recipe:

Stir together:

  • 8 cups of snow (be sure to tell your snow gatherers to avoid the yellow stuff!)
  • one can of sweetened condensed milk
  • half to one teaspoon of vanilla (do not add more)

This was so easy to make and it was a huge hit with the kids! (The Husband enjoyed a bowlful too!)

Hot Chocolate Sensory Craft:

When we made these, I made sure to take advantage of how sensory rich this activity was. I had the kids smell the hot chocolate mix and sugar and touch them before adding them. To make this craft, I printed off the sheets here. Then I had the kids colour the mugs, cut them out, cut out the marshmallows, add glue and sprinkle first with hot chocolate mix and then white sugar. After tapping the excess off, they glued some cotton batting to the top of the mug and glued the paper marshmallows on.

Printables and activity sheets:

Winter Fun Coloring from 1+1+1=1

Snow and Ice from 2 Teaching Mommies

Snowman Preschool Pack from Living Life Intentionally

Snow Day from Homeschool Creations

Snow Theme Word Sort from This Reading Mama

If you are looking for information on making sensory bins, you may be interested in my book. The Ultimate Guide to Sensory Bins

Filed Under: Crafts and Activities, Homeschooling, Sensory Bins

Easy Christmas Ornaments

By Sharla Kostelyk

Easy Sequin Christmas OrnamentThe kids have been making these beautiful ornaments for their grandparents and a few other special people. They catch the light nicely on the Christmas tree and are so easy to make!

Materials Needed:

  • sequins (we used a pack with shades of blue and silver)
  • sequin pins
  • foam ball
  • ribbon

Push a sequin pin through the sequin into the foam ball and repeat this until the entire ball is covered in sequins. When done, add a ribbon on top using a pin and hang on the tree.

A few of my kids made mosaics with their sequins in patterns that created fish or faces or other shapes. You could also vary the look of them by using different sizes of foam balls or by using foam eggs.

*of course, since this craft uses actual pins, adult supervision should be used with younger children.

Filed Under: Christmas, Crafts and Activities

Shaving Cream Painting

By Sharla Kostelyk

Since I had oodles of free shaving cream from back in my couponing days, I had been wanting to try shaving cream painting for awhile. I wish that we had done it back in our Color Week because it was a great exercise in color mixing. It was also a great sensory activity. I used the lemon-lime scented shaving cream to add to the sensory experience.

I used muffin tins and it worked really well. Just add drops of food coloring to the shaving cream and stir. I let some of the kids help in this step and they had fun mixing different colors to see what the outcome would be as far as making a purple that was more on the blue side or making pink by only adding a few drops of red.

Next, they got painting…


Or I should say that the girls got painting! First, they experimented with different brushes and foam and then they got in there with their hands. Meanwhile, the boys had disappeared into the bathroom and were using their paint in a different way…


They were practising shaving using the foam brushes! Pretty soon, the girls had painted their own faces with shaving cream and all the kids had loaded their hands up with as much as they could carry and gone outside to paint the trees!

While my kids didn’t use the shaving cream paint in the way that I expected they would, they had an awful lot of fun!

FYI: On my paler kids, the shaving cream did stain their faces for a few hours so you may not want to do this prior to any public outings or family portrait sessions!

Filed Under: Crafts and Activities, Homeschooling, Sensory Tagged With: sensory play

  • « Go to Previous Page
  • Page 1
  • Interim pages omitted …
  • Page 28
  • Page 29
  • Page 30
  • Page 31
  • Page 32
  • Interim pages omitted …
  • Page 35
  • Go to Next Page »

Primary Sidebar

Categories

We are a participant in the Amazon Services LLC Associates Program, an affiliate advertising program designed to provide a means for us to earn fees by linking to Amazon.com and affiliated sites.

Copyright © 2026 • The Chaos and the Clutter • Site Design by Jeni @ The Blog Maven

Return to top of page

Copyright © 2026 · Chaos and the Clutter 2.0 on Genesis Framework · WordPress · Log in