• Skip to primary navigation
  • Skip to main content
  • Skip to primary sidebar
  • Home
  • About
  • Contact
  • Privacy + Terms
  • Affiliates

The Chaos and the Clutter

  • Facebook
  • Twitter
  • Pinterest
  • Google Plus
  • RSS
  • Email
  • School at Home
  • Sensory
    • Sensory Processing Disorder
    • Awesome Sensory Play Activities
      • Sensory Bins
      • Sensory Bottles
      • Sensory Bags
  • Family Games
    • Minute to Win It Games
  • Special Needs Parenting
    • Childhood Anxiety
    • Reactive Attachment Disorder
    • Sensory Processing Disorder
  • Store
  • Course Login

sensory play

Jungle Sensory Bin with Printable Feelings Cards

matching two cards of a cartoon sad giraffe

By Sharla Kostelyk

Sensory bins are a fun way to get your kids engaged in imaginative play. And while they’re perfect for encouraging your child to play independently, you can also use these learning tools to help reinforce important concepts, like emotions. With this fun jungle sensory bin, your preschooler can have fun playing with cute jungle animals while also practicing emotional identification.hands hold up card with animals on them above a bin of dry split peasThis activity is great for preschools, Kindergarten classrooms, or home. You can easily adapt the questions you ask for older and younger kids. Learning opportunities:

  • early reading
  • matching
  • jungle animals
  • emotions
  • sensory play

How to Make a Jungle Sensory Bin

Materials Needed:

  • Large bin or dish
  • Split peas or other green filler (see suggestions below)
  • Toy jungle animals
  • Printable jungle animal feelings cards (you can download those here)
  • Scissors
  • Laminator (optional)

Instructions:

  1. Fill the bin with your filler material.
  2. Add the jungle animal toys.
  3. Print out the jungle animal feelings cards and cut them out. Laminate for durability, if desired.
  4. Place the cards inside the bin with the toys.

process of cutting out jungle animal cards and putting them in a sensory bin

How Do You Play with this Feelings in the Jungle Sensory Bin?

After you put your jungle themed bin together with the filler, toys, and printable cards, it’s time for your kids to have some fun! Let your child explore the items in the bin independently first. Then, you can encourage them to identify the different feelings they see on the animal cards.

These simple prompts are a great way to get your kids thinking about the jungle themed animals inside their sensory bin:

  • Point at the sad lion.
  • Show me the angry zebra.
  • Find the happy giraffe.
  • Which animal is angry?
  • How is the zebra feeling?
  • Can you find the sad giraffe?
  • Why do you think the lion is crying?
  • Is the zebra excited?

matching two cards of a cartoon sad giraffe

Since this printable activity features a variety of feelings and emotions on each set of cards, your kid can have tons of fun playing with their favorite jungle animals and learning about feelings at the same time. The cards feature three different popular jungle animals: giraffes, lions, and zebras. And each animal displays 10 different emotions:

  • Happy
  • Sad
  • Angry
  • Disgusted
  • Shy
  • Confused
  • Scared
  • Shocked
  • Crying
  • Excited

cartoon jungle animals such as a lion and zebra

Jungle Sensory Bin Variations

  • Use different filler materials, like Easter grass, Spanish moss, small rocks, sand, water beads, or colored rice
  • Add other jungle themed toys, like small trees, sticks, flowers, or leaves
  • Provide fine motor toys, like tweezers or scoops, to add to the jungle fun
  • Use the cards outside of the box by helping your child match the different animal’s emotions

boy's hand plays with a toy animal in a bin of dry green lentils

Activities to Expand Your Jungle Sensory Bin Lesson

  • Read books about jungle animals or emotions
  • Identify your own emotions as they occur throughout the day
  • Discuss how different situations make you or your child feel as they’re happening
  • Draw or paint pictures of different jungle animals or emotions

cards of jungle animals in a bin of green split peas

Sign up with your email address to receive the free printable emotion matching cards.

You may also be interested in:

  • Teaching Emotions Toolkit
  • Unicorn Emotion Cards
  • Frog Emotion Cards
  • Emotions Scenarios
  • Draw & Write Emotions

Filed Under: Sensory, Sensory Bins Tagged With: sensory bin, sensory play

Pudding Playdough

pink circle cookie cutter next to yellow playdough covered in candy sprinkles

By Sharla Kostelyk

Having taste safe sensory play recipes creates a wonderful opportunity for toddlers and preschoolers to create. With just 3 ingredients, this pudding playdough is easy to make and it’s completely edible.yellow play dough topped with multicolored sprinklesKids can mould and shape to their heart’s content. It’s such a fun activity.

We love creating taste safe sensory play recipes like our Edible Shark Fluffy Slime, Condensed Milk Edible Paint, or Edible Freezie Painting.

Pudding Playdough Recipe:

Supplies needed:

  • ¼ cup vanilla flavored instant pudding mix (note: if you purchase the 3.4 oz. box, you will have some left over to make a second batch)
  • 1 cup cornstarch
  • â…“ cup warm water
  • mixing bowl
  • mixing spoon
  • candy sprinkles (optional)
  • cookie cutters (optional)

Instructions:

  1. Add the pudding mix to the mixing bowl.
  2. Add half of the corn starch to the bowl.
  3. Pour in the water.
  4. Stir to mix the dough.
  5. Add in the other half of the corn starch.
  6. Mix well.
  7. Finish by kneading the dough with your hands until you get the desired consistency. The dough should feel soft to the touch when you start mixing and should not be sticky.
  8. If you find that your dough is sticky, add more corn starch.

If you want, you can add the candy sprinkles to the dough.collage of photos of making playdough out of vanilla pudding

Your child can play with the playdough on the table or on a plastic play mat for easy cleanup.

You can set out cookie cutters to add a fine motor element to the playdough station.

When done playing, store any leftover dough in an airtight container in the fridge.

pink circle cookie cutter next to yellow playdough covered in candy sprinkles

Sensory Benefits:

The dough naturally smells of vanilla because of the vanilla pudding mix, so there are many sensory elements to this playdough. It gives tactile (touch), olfactory (smell), proprioceptive from the squeezing and squishing of the dough, and gustatory (taste) sensory input. 

Why use taste safe playdough?

The high salt content in regular playdough can be dangerous when eaten. For young children who are at that age and stage of putting everything in their mouths or for older kids who have a hard time understanding not to eat the dough, taste safe dough provides a wonderful alternative.collage of photos of yellow playdough topped with edible sprinklesThe ingredients are ones that you may already have in your pantry which is another benefit to choosing to make this edible pudding play dough.

Variations on this pudding playdough recipe:

  • Use lemon pudding mix, chocolate pudding mix, or butterscotch pudding mix to change the flavour and the colour.

Looking for more awesome sensory play recipes for kids? You can grab a free sample chapter of our Sensory Play Recipes eBook here.

Check out some of our other taste-safe play recipes:

Condensed Milk Paintice cube tray with paint while a hand paints a rainbow with a yellow brush

Shark Fluffy Slime

Filed Under: Crafts and Activities Tagged With: playdough stations, sensory play

Pretend Cotton Candy for Sensory Play

fluffy yarn in pastel colours

By Sharla Kostelyk

Pretend play meets sensory play with this DIY play cotton candy. It’s easy to make, so, so soft, and offers hours of fun. You only need two items to make this!

My girls discovered this a few years ago. Once they stumbled upon how to make it, they made it in multiple colours and it was perfect for all kinds of play opportunities.

fluffy yarn in pastel colours on a black backgroundHow to make fake cotton candy for sensory play:

Materials needed:

  • yarn in pastel colours
  • pet brush with wire bristles

Instructions:

  1. Comb out the yarn with the dog brush until it becomes fluffy and very soft.
  2. Play!

Yes, it’s really that simple.

Making it themselves is part of the fun, so be sure to allow your child the chance to comb the yarn themselves. Adult supervision is recommended for this and all other sensory play. The wire bristles are sharp so use your best judgment when it comes to your child’s age and skill level.

This fake cotton candy looks like the real thing. It is so soft. I wish you could reach through the screen and give it a feel. It has a silky feeling that kids love.

Cotton candy is sometimes also called fairy floss.

It’s perfect for using in sensory bins or pretend play. You could also include it in a play kitchen.This sensory cotton candy would be so cute in a carnival or circus themed sensory bin!

It would also make a unique party favour or cute decoration for a circus or carnival themed birthday or party. 

fluffy yarn in pastel colours

Pretend Cotton Candy Variations:

  • Use different colour combinations.
  • Wind some of the “fairy floss” around a paper straw to give it the look of cotton candy on a stick.
  • Place a ball of the cotton candy in a paper cone.
  • Make a large amount and attach it to clothing and a hat to create a cotton candy costume. 

Sign up for your free Sensory Play Recipes sample and receive our Sensory Solutions and Activities emails.

Check out some of our other sensory play ideas:

  • The Best Homemade Playdough
  • DIY Squishies
  • How to Dye Noodles for Sensory Play
  • Mermaid Stress Balls
  • Rainbow Soap Foam

Filed Under: Crafts and Activities, Sensory Tagged With: sensory play

Kitchen Play with Oobleck

hand scoops up blue goo as it drips from the fingers

By Sharla Kostelyk

Easily set up hours of fun for your child using common household items and a few pantry supplies with this kitchen oobleck. You’ll likely have everything you need to create this play experience already in your home.

little hand playing with blue gooOf all the sensory play recipes, oobleck is the absolute easiest. Chocolate oobleck makes a great pretend mud for play use. We also have made Easter oobleck, Candy Cane oobleck, and lemonade oobleck. Our kids have had so much fun with all of them and I loved how easy they were to make.

Kitchen Oobleck:

Supplies needed:

  • 4 cups cornstarch
  • 2 cups water
  • food colouring
  • plastic bin
  • kitchen tools

Directions:

  1. In a large bowl, stir some food colouring into the water. Mix in the cornstarch to create the oobleck. 
  2. Pour the oobleck into a sensory bin (plastic bin) and set the bin on the floor.
  3. Add in some kitchen tools for exploration through play.
  4. Invite your child to discover and learn with the oobleck and kitchen tools.

collage of photos of child's hands playing with blue slimey goo


What kitchen tools should I use?

Really, there is no right or wrong answer here. Use your imagination and invite your child to choose tools as well.

Here are some household items we found worked well:

  • potato masher
  • slotted spoon
  • small strainer
  • funnel
  • fork
  • spoon
  • spatula
  • garlic press
  • tongs
  • egg separater
  • meat tenderizer

blue goo with spoons and scoops in it

Cleanup tips:

We love, love, love messy play, but you can set out a shower curtain or dollar store plastic tablecloth underneath the bin to contain the mess in you want.

Never put oobleck down the drain as it will clog. 

Clean the kitchen tools as you normally would since the ingredients in the oobleck are edible.

How the Science of Oobleck Works:

Oobleck is not only a great sensory activity, it is also a learning one. Oobleck is what’s known as a non-Newtonian fluid or a suspension. That means it can mimic qualities of both a solid and a liquid.


hand scoops up blue goo as it drips from the fingers

It’s made of only two ingredients, but it’s the combination of those ingredients that creates the unique properties that can be both a liquid or a solid. When pressure is applied, the cornstarch molecules bond together to create a solid state. 

As your child explores through play, they can discover the changes in state that happen as this goes from liquid to solid. 

Looking for more great sensory play recipes? Join thousands of others who are loving the five day email series, Sensory Activities and Solutions and you’ll get a free sample of our Sensory Play Recipes eBook.

Filed Under: Crafts and Activities Tagged With: sensory play

Fluffy Fish Slime

blue slime with a yellow toy fish and a green and red toy fish in it

By Sharla Kostelyk

Pretend you’re playing underwater with this fluffy fish slime. The consistency of this fluffy slime lends itself well to imaginary play and the fish add another adorable element.blue blob with three bright coloured toy fish in it. Text reads "Fish Fluffy Slime"Slime is pretty popular in our house and fluffy slime is the favourite. Everyone loves the texture that the shaving cream gives to it. Plus, it’s got that really nice stretch to it.

Fluffy Fish Slime Recipe:

Supplies needed:

  • â…” cup white Elmer’s School Glue
  • 1 1/2 Tbsp. contact solution containing boric acid and sodium borate
  • ¼ cup water
  • ½ tsp. baking soda
  • 3 cups foaming shaving cream
  • 10 drops neon blue food colouring
  • mixing bowl
  • mixing spoon
  • fish toys
  • baby oil (optional)

blue slime with a yellow toy fish and a green and red toy fish in itDirections:

  1. Pour the glue into a large mixing bowl.
  2. Add in the water and mix well with a spoon (we find that a wooden spoon works well).
  3. Drop in the baking soda. Mix.
  4. Spoon in the shaving cream. Fold into the mixture and mix.
  5. Add the blue food colouring drops. Stir well until the slime is blue all over.
  6. Slowly add in the contact solution and stir.
  7. Continue to stir to get a fluffy slime consistency.
  8. Finish by kneading the slime with your hands. The slime is going to feel sticky at first. But don’t give up. Keep kneading! If you like, you can use a small amount of baby oil on your hands to keep the slime from sticking to you.
  9. After kneading for several minutes, the slime should be nice and fluffy!
  10. Add the fish toys and fold them into the slime.

collage of four photos of fluffy blue slime with toy fish in itAdult supervision should be used with this and all other sensory play activities. 

This engages the visual, proprioceptive, and tactile sensory systems, making it a great sensory play idea. You can find more easy ideas in our Sensory Play Recipes eBook.

blue slime stretching up a bit with two toy fish in itBe sure to check out some of our other fluffy slime recipes. These ones are our favourites:

Unicorn Fluffy Slime

Edible Shark Fluffy Slime

Heart Fluffy Slime

Filed Under: Crafts and Activities Tagged With: sensory play, slime

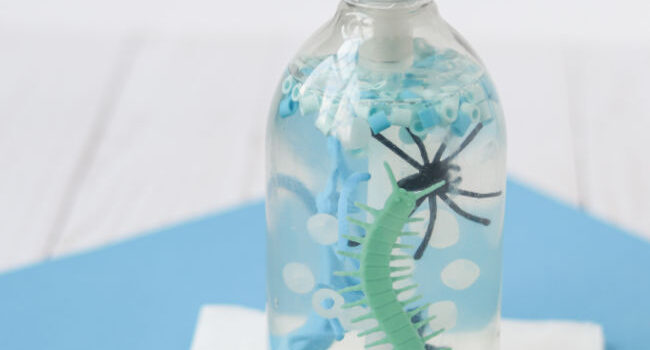
Simple Bugs Fun Hand Soap for Kids

soap dispenser with clear soap and blue and green plastic bugs in it

By Sharla Kostelyk

By now, we all know how important hand washing is for our health. But getting your kids to wash their hands often is sometimes easier said than done. Instead of constantly reminding your kids to wash their hands, why not make handwashing fun? This fun bugs hand soap for kids will keep your kids engaged as they wash, ensuring they never forget to wash their hands again.clear dispenser with plastic toy bugs in it and clear hand soapIf your kids are struggling with some of the pandemic protocols such as wearing masks and frequent hand washing, this fun soap can make it a bit easier for them (and for you).
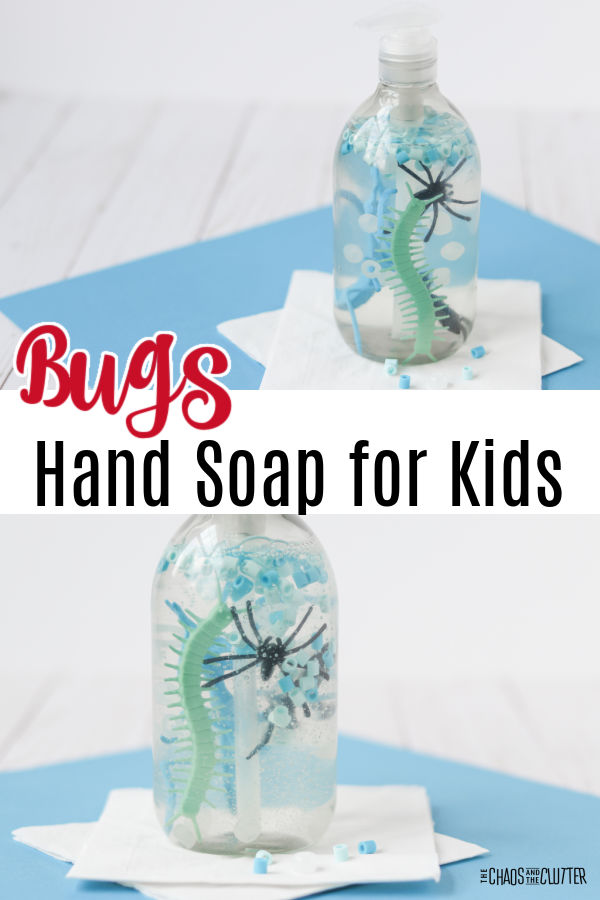
Bugs Hand Soap for Kids

Supplies needed:

  • clear container with push dispenser
  • clear liquid hand soap
  • plastic bugs
  • small blue and white beads

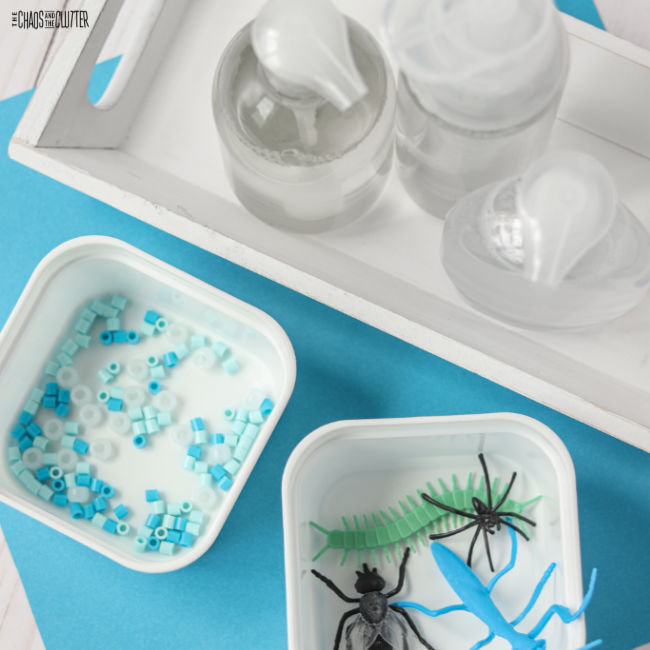
blue beads, hand soap dispensers, and plastic bugs

Instructions:

  1. Fill the clear container with hand soap, leaving around one inch of space at the top of the bottle to make room for the bugs and beads.
  2. Push the bugs into the bottle, then add the beads to the top.
  3. Place the lid on the bottle and tighten it to keep the soap from leaking out. Turn the bottle upside down to mix up the beads and bugs inside.
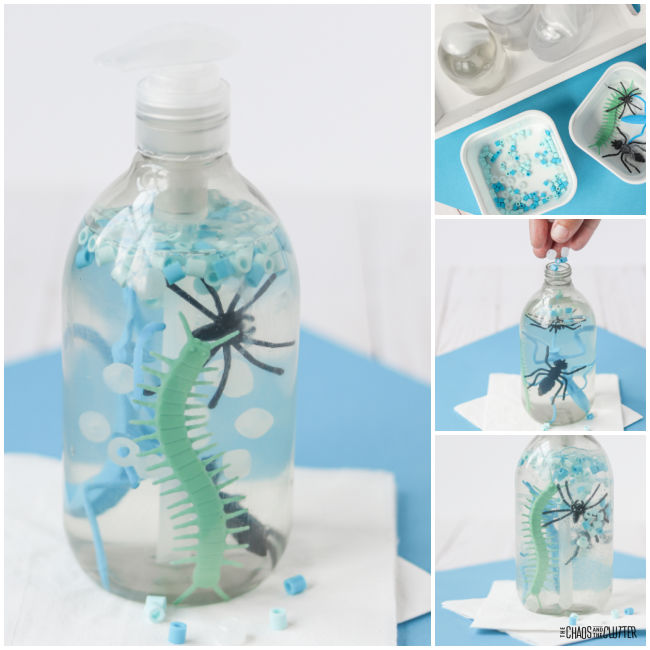
collage of photos showing putting plastic bugs in hand soap dispenser

Handwashing Tips

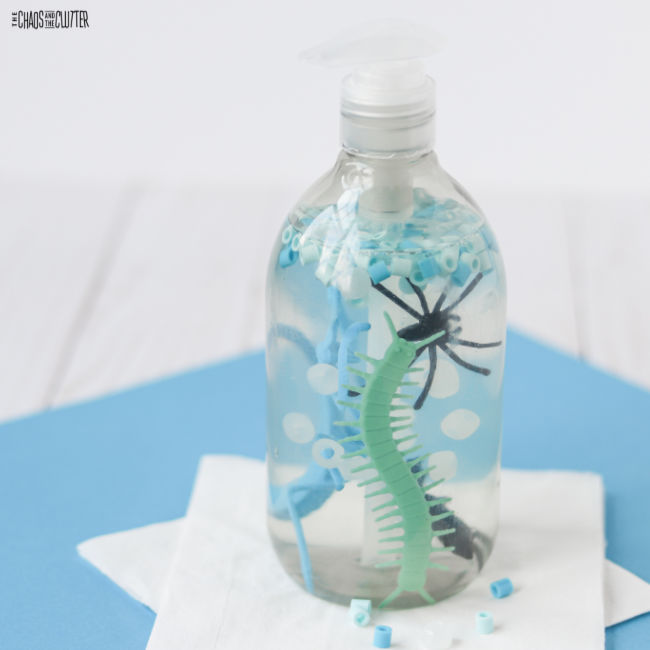
Placing this fun soap for kids near the bathroom sink is a great way to remind your kids to wash their hands more frequently. They’ll have a blast squirting bug soap on their hands!soap dispenser with clear soap and blue and green plastic bugs in it
And since we know how important having clean hands is to our health, it’s always a good idea to remind your kids about proper hand washing techniques. After you make your bugs soap, give your kids a quick lesson in hand washing so they wash their hands the right way every time:

Follow five simple steps. Start by teaching your kids the five steps, then demonstrate the best method for getting their hands clean. There are five basic steps for handwashing:

  1. Wet
  2. Lather
  3. Scrub
  4. Rinse
  5. Dry

Wash for 20 seconds. They key to killing germs is to wash your hands for at least 20 seconds. One fun way to count down the time while scrubbing is to sing a song. Singing Happy Birthday twice is a simple tune your kids are sure to know. Or you can make up your own hand washing song.

Scrub everywhere. Another important lesson to teach your kids is to scrub all over as they wash, including between each finger, along the top and bottom of the hand, and under the fingernails.

When should kids wash their hands? After learning how to wash their hands, your kids may be wondering when they should take the time to use their bug soap. The best answer is simply whenever their hands feel dirty. But if they’re still unsure, remind your kids that it’s always important to wash their hands:

  • after using the bathroom
  • before and after eating
  • after touching a pet
  • after coughing, sneezing, or wiping their nose

You might also like these fun bug sensory activities:
  • Bugs Sensory Bottle
  • Bugs Sensory Bin
  • Bug Action Cards for Kids

Filed Under: Crafts and Activities Tagged With: sensory play

  • « Go to Previous Page
  • Page 1
  • Page 2
  • Page 3
  • Page 4
  • Interim pages omitted …
  • Page 42
  • Go to Next Page »

Primary Sidebar

Categories

We are a participant in the Amazon Services LLC Associates Program, an affiliate advertising program designed to provide a means for us to earn fees by linking to Amazon.com and affiliated sites.

Copyright © 2025 • The Chaos and the Clutter • Site Design by Jeni @ The Blog Maven

Return to top of page

Copyright © 2025 · Chaos and the Clutter 2.0 on Genesis Framework · WordPress · Log in

Enter your email to receive this set of Sensory System Behaviours Easy Reference Cards!