• Skip to primary navigation
  • Skip to main content
  • Skip to primary sidebar
  • Home
  • About
  • Contact
  • Privacy + Terms
  • Affiliates

The Chaos and the Clutter

  • Facebook
  • Twitter
  • Pinterest
  • Google Plus
  • RSS
  • Email
  • School at Home
  • Sensory
    • Sensory Processing Disorder
    • Awesome Sensory Play Activities
      • Sensory Bins
      • Sensory Bottles
      • Sensory Bags
  • Family Games
    • Minute to Win It Games
  • Special Needs Parenting
    • Childhood Anxiety
    • Reactive Attachment Disorder
    • Sensory Processing Disorder
  • Store
  • Course Login

sensory play

Cool Camo Fluffy Slime

By Sharla Kostelyk

  • Total3
  • Facebook0
  • Twitter1
  • Pinterest2
  • Mix
  • Yummly0

One of my daughters loves camo anything. She wears it, doodles it, dreams it. So I thought it would be fun to make this cool camo fluffy slime with her. toy soldier in army green slime pile. Text reads "Fluffy Camo Slime"There are so many fun play options with this camo fluffy slime recipe. It also makes a great party favour for birthday parties too. When my middle son was younger, he had an army theme birthday party and I wish I’d had this recipe back then.

Camo Fluffy Slime Recipe:

Supplies needed:

  • 2 cups white school glue (I find that Elmer’s school glue works the best for slime recipes.)
  • 2 cups foaming hand wash
  • 2 cups shaving cream
  • 2 tsp. lotion
  • 2 tsp. cornstarch
  • green paint
  • darker green paint
  • tan paint
  • black paint
  • 2 tsp. baking soda
  • 4 Tbsp. contact solution
  • optional: toy soldiers

Directions:

  1. Pour 2 cups of white glue in a large bowl.
  2. Add 2 cups of foaming hand wash.
  3. Scoop in 2 cups of shaving cream. 
  4. Mix with a spatula until smooth.
  5. Divide this mixture into 4 smaller bowls.
  6. Into each of the bowls, add ½ tsp. each of lotion and cornstarch. Mix.
  7. Using the paint, tint each bowl a different colour. You will end up with a green, dark green, tan and black.
  8. Add ½ tsp. baking soda to each of the bowls and stir.
  9. Lastly, add 1 Tbsp. of contact solution to each and stir until it pulls away from the side of the bowl. It is best to do this full step on each bowl before moving on to the next.
  10. Knead the slimes until they are no longer sticky.
  11. Once all of the slimes are kneaded, stretch your slimes out and then combine them into one blob. 
  12. If you want to, you can add in some plastic toy soldiers.
  13. Play.

At first, the slime will have that marbled camouflage look but of course, eventually with play, the colours will combine. When this happens, your slime should turn an army green which is also a lot of fun.

By kneading and stretching, pulling, pinching, and squishing, kids will engage their proprioceptive sensory system with this slime. It also involves their visual and tactile sensory systems.

Looking for more easy sensory play recipes? Join us for a free five day email series on Sensory Activities and Solutions and get a free of our Sensory Play Recipes eBook.

Check out some of our most popular slime recipes:

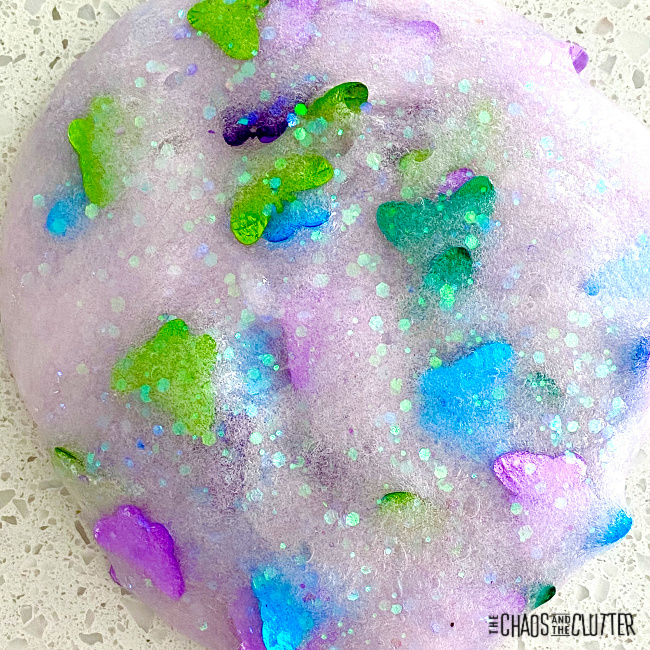
Unicorn Fluffy Slime

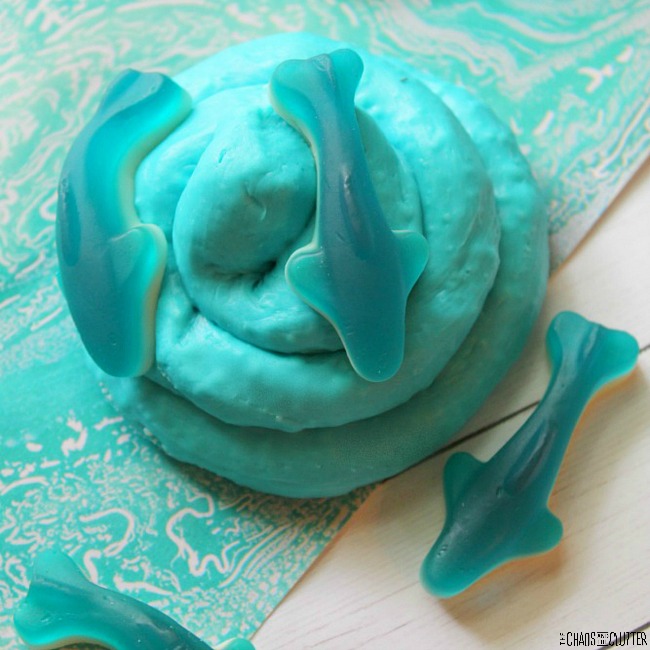
Shark Edible Slime

Textured Butter Slime

  • Total3
  • Facebook0
  • Twitter1
  • Pinterest2
  • Mix
  • Yummly0

Filed Under: Crafts and Activities Tagged With: sensory play, slime

Sensory Lego Letters Preschool Activity

By Sharla Kostelyk

  • Total28
  • Facebook0
  • Twitter2
  • Pinterest26
  • Mix
  • Yummly0

This is one of those easy to set up activities that packs in a lot of learning. Lego Letters playdough activity combines fine motor, sensory, and letter recognition practise into one simple preschool activity.purple dough with a little hand pressing a Lego piece in to create an A. Text reads "Lego Letters alphabet and fine motor"

Sensory Lego Alphabet Activity: 

Supplies needed:

  • Lego bricks in a variety of lengths
  • playdough (store bought or you can use homemade playdough)
  • rolling pin, toy rolling pin, or can to roll the dough with
  • Scrabble tiles or magnetic alphabet shapes

Directions:

  1. Make the playdough into a ball and roll it out.
  2. Set out a selection of Lego bricks.
  3. Select several letters to practice.
  4. Choose one letter to start. Encourage your child to say the letter, then stamp the shape of the letter using Legos. 
  5. After your child completes one letter, have them roll the playdough smoothly again and try to recreate another letter.

It can be helpful to start this activity with letters your child is most familiar with such as the letter their first name starts with. 

With curved letters, it can be best to use smaller Lego pieces.Be sure to allow your child to come up with their own way to stamp the letter in the playdough. As long as they get the basic shape of the letter, there is no “right” or “wrong” way to create it. It can be tempting to step in and show them and you may need to show them how to do one as an example, but once they get the idea, step back and allow them to create. 

Ways to expand this activity:

  1. Talk to the child about what the sound of that letter is and have them see if they can think of words that have that letter as their beginning sound.
  2. Numbers or shapes can be stamped into the playdough.
  3. Sing the alphabet song.
  4. Set out books about the alphabet.

Chicka Chicka Boom BoomChicka Chicka Boom BoomChicka Chicka Boom BoomDr. Seuss's ABCDr. Seuss’s ABCDr. Seuss's ABCAnimalia (MY PERSONAL FAVOURITE!)Animalia (MY PERSONAL FAVOURITE!)Animalia (MY PERSONAL FAVOURITE!)Touch and Trace ABC Board BookTouch and Trace ABC Board BookTouch and Trace ABC Board BookA is for Apple (Kids Trace-and-Flip)A is for Apple (Kids Trace-and-Flip)A is for Apple (Kids Trace-and-Flip)The Handmade AlphabetThe Handmade AlphabetThe Handmade AlphabetEating the AlphabetEating the AlphabetEating the AlphabetM Is For Maple: A Canadian AlphabetM Is For Maple: A Canadian AlphabetM Is For Maple: A Canadian Alphabet


You may be interested in some of our other preschool learning ideas:

Alphabet Sensory Bin

Thankfulness Bingo Style Game

Rainbow Playdough Counting and Colours Game

  • Total28
  • Facebook0
  • Twitter2
  • Pinterest26
  • Mix
  • Yummly0

Filed Under: Crafts and Activities Tagged With: sensory play

Peter Rabbit Sensory Bin

By Sharla Kostelyk

  • Total105
  • Facebook0
  • Twitter0
  • Pinterest105
  • Mix
  • Yummly0

I’ve long been a fan of the Peter Rabbit books. Then they came out with a pretty cute movie and a sequel. Now the world has met these cute bunny characters. This Peter Rabbit Sensory Bin is a cute way to expand the books or the movie. beans and green rice with toy vegetables and bunny figurines. Text reads "Peter Rabbit Sensory Bin"Preschoolers can engage in imaginative play with some of the most beloved characters in this adorable Peter Rabbit Sensory Bin. We later used some of these same items in our Peter Rabbit Invitation to Play.

Peter Rabbit Sensory Bin:

Supplies needed:

  • plastic tub
  • rice dyed green (get full instructions on how to easily colour rice yourself)
  • dry beans
  • Peter Rabbit figurines
  • fruits and vegetables Toob
  • carrot cookie cutter
  • scoops and tongs

Directions:

  1. Dye rice green using these instructions. 
  2. Once it is dry, place it at the bottom of a plastic bin to cover about half.
  3. Place dry beans in the other half.
  4. Put the figurines and the other items in the bin.
  5. Invite your child to play.

The Peter Rabbit Classic CollectionThe Peter Rabbit Classic CollectionThe Peter Rabbit Classic CollectionPeter Rabbit MoviePeter Rabbit MoviePeter Rabbit MovieGUND Classic Beatrix Potter Peter Rabbit Stuffed AnimalGUND Classic Beatrix Potter Peter Rabbit Stuffed AnimalGUND Classic Beatrix Potter Peter Rabbit Stuffed AnimalPeter Rabbit FiguresPeter Rabbit FiguresPeter Rabbit FiguresA Rabbit's Tale Felt Figures for Flannelboard StoriesA Rabbit’s Tale Felt Figures for Flannelboard StoriesA Rabbit's Tale Felt Figures for Flannelboard StoriesFruits & Vegetables ToobFruits & Vegetables ToobFruits & Vegetables ToobSet of Carrot, Bunny & Bird Cookie CuttersSet of Carrot, Bunny & Bird Cookie CuttersSet of Carrot, Bunny & Bird Cookie Cutters


This hands-on sensory bin provides the opportunity for kids to engage their visual, tactile, and proprioceptive sensory systems. 

Because of the bunnies, this sensory bin could also be set out at Easter time. Or it could correlate with a literature study or nutrition unit.

Ways to expand this activity:

  1. Read one of the Peter Rabbit books aloud to your child while they are playing in the bin. 
  2. Watch one of the movies together.
  3. Create a Peter Rabbit Playdough Invitation to Play.
  4. Set out real fruits and vegetables for your child to snack on while they play.
  5. Suggest that your child recreate a scene from the books or movies in their play. 
  6. For older kids, you can create an entire Peter Rabbit unit study and use these free printable worksheets to go along with it. 
  7. Play a Peter Rabbit I Spy game.

Some other sensory activities that may interest you:

Peter Rabbit Playdough Center

Bath Time Theme Sensory Bin

Stretchy Butterfly Slime

  • Total105
  • Facebook0
  • Twitter0
  • Pinterest105
  • Mix
  • Yummly0

Filed Under: Sensory Bins Tagged With: sensory play

Alphabet Sensory Bin for Preschool Letter Recognition

By Sharla Kostelyk

  • Total9
  • Facebook0
  • Twitter0
  • Pinterest9
  • Mix
  • Yummly0

Provide a fun hands-on way for your child or student to learn letter sounds with this Alphabet Sensory Bin. Learning the letters of the alphabet is an important early childhood skill. It is a precursor for both reading and writing. By giving children the opportunity to feel the shape of the letters and explore through their senses, you can help cement this skill for them in a fun and engaging way. 
multi coloured rice with bright pink letter cookie cutters. Text reads "Alphabet Sensory Bin"

Setting up a sensory bin for this purpose is a great hands-on addition to your home or preschool or Kindergarten classroom. It’s easy to set up sensory bins that kids will love. They provide visual, tactile, and proprioceptive sensory input. In addition, they increase a child’s interest and curiosity in learning. 

Alphabet Sensory Bin:

Supplies needed:

  • plastic bin
  • coloured rice
  • letters (we used alphabet cookie cutters, wooden ABCs, small alphabet beads, and foil die cut letters)
  • optional: scoops or funnels

Directions:

  1. Dye rice in an assortment of colours. Read our full instructions on how to easily dye rice. You can also used coloured rice left over from other sensory play.
  2. Toss the rice in a plastic bin. 
  3. Add letters. You can use anything shaped as letters. Suggestions include magnetic letters, cookie cutters, wooden letters, foam stickers with the backing left on, Scrabble tiles, foam bath letters, or alphabet beads.
  4. Invite your child to play.

A note about adding multiple types of letters: if your child struggles with the alphabet, it can be best to only include one set of letters to reduce sensory overload and simplify things.

Ways to expand this alphabet learning activity:

  1. Play a version of seek and find. Call out the names of letters and have your child find that letter in the rice. A more advanced variation on this is to display or write the lower case version of a letter and have the child find and identify the upper case match to it in the sensory bin.
  2. When the child pulls out a letter, have them name something that starts with that letter to help them learn about beginning sounds. 
  3. Put a paper and crayons nearby so that kids can trace the letters or copy their shape on the paper.
  4. Use alphabet playdough mats to provide another rich tactile sensory activity opportunity.
  5. Set out alphabet books such as Chicka Chicka Boom Boom for kids to explore and compare the letters in the bin to. 

Books to correspond with your ABC Sensory Bin:

Chicka Chicka Boom BoomChicka Chicka Boom BoomChicka Chicka Boom BoomDr. Seuss's ABCDr. Seuss’s ABCDr. Seuss's ABCAnimalia (MY PERSONAL FAVOURITE!)Animalia (MY PERSONAL FAVOURITE!)Animalia (MY PERSONAL FAVOURITE!)Touch and Trace ABC Board BookTouch and Trace ABC Board BookTouch and Trace ABC Board BookA is for Apple (Kids Trace-and-Flip)A is for Apple (Kids Trace-and-Flip)A is for Apple (Kids Trace-and-Flip)The Handmade AlphabetThe Handmade AlphabetThe Handmade AlphabetEating the AlphabetEating the AlphabetEating the AlphabetM Is For Maple: A Canadian AlphabetM Is For Maple: A Canadian AlphabetM Is For Maple: A Canadian Alphabet


Looking for more easy sensory play ideas for hands-on learning? Join us for a free five day email series on Sensory Activities and Solutions and get a free sample of our Sensory Play Recipes eBook.

Sensory Play Resources:

How to Dye Rice for Sensory Play

Huge List of Sensory Bin Fillers and Tools

Over 100 Sensory Bin Themes

What’s the Point of Sensory Bins, Bottles, and Bags?Have you ever wondered "What's the point of sensory bins, sensory bottles and sensory bags?"

  • Total9
  • Facebook0
  • Twitter0
  • Pinterest9
  • Mix
  • Yummly0

Filed Under: Sensory Bins Tagged With: sensory play

How to Dye Rice for Sensory Play

seven metal trays each with a different colour of rice on it

By Sharla Kostelyk

  • Total800
  • Facebook1
  • Twitter1
  • Pinterest798
  • Mix
  • Yummly0

You can easily make your own colourful rice for sensory play at home or in your preschool or classroom. This recipe for dying rice doesn’t use rubbing alcohol, making it safer in case you have kids who put things in their mouth. Simply follow our instructions for how to dye rice. metal trays with purple, green, pink, blue, yellow, and orange rice. Text reads "How to Dye Rice for sensory play"Rice is one of my favourite sensory bin fillers. I always make extra of the green because I find that it looks like grass which makes it versatile for all kinds of sensory bins, bottles, and bags.

How to Dye Rice:

Supplies needed:

  • 1 cup white rice per colour
  • 1/2 tsp. vinegar per colour
  • coloured food gel or food colouring
  • optional: essential oils*

Wilton Food GelWilton Food GelWilton Food GelWhite VinegarWhite VinegarWhite VinegarWhite RiceWhite RiceWhite Rice


Directions:

  1. Put 1 cup of rice in a resealable plastic bag. 
  2. Add 1/2 tsp. of vinegar and a bit of the icing gel or food colouring. You won’t get colours that are as vibrant if you use food colouring as opposed to the gel. If you want to add essential oil, add a few drops at this point.
  3. Seal the bag and shake well.
  4. Spread the coloured rice out on a baking tray to dry overnight. 
  5. Repeat with other colours.
  6. Use in sensory play.

*A note about the essential oils:

Adding essential oil to the rice will create an extra sensory element as it creates olfactory (scent) input. There are some scents that are calming such as lavender, jasmine, or rose. Other scents are alerting such as lemon, peppermint, or cinnamon. 

You will want to choose the essential oil based on what you are trying to achieve. In a setting where you want your child to be learning, you may want to choose an alerting scent. If you are wanting to create more calming sensory play opportunities, then you’ll want to choose a calming scent for the rice. When not in use, be sure to store your coloured rice in a sealed plastic bag or an airtight container. You can reuse it over and over again as long as it’s properly stored.

Ways to use coloured rice in sensory play:

Coloured rice can be used in a variety of sensory play activities. If you use more than one colour at a time, the colours will obviously combine through play and create a different look altogether. That’s not a bad thing, but if you have a child prone to getting upset by things not looking the way they think they should, this is something you should warn them about before they begin to engage with their sensory play. 

Here are some ideas:

  • Use coloured rice in a sensory bottle along with some small buttons or toys to create a Seek and Find Discovery Bottle. 
  • Create a rainbow effect by lining up different colours in a sensory tub. Add some scoops and funnels for kids to explore and work on their fine motor skills by scooping and pouring.
  • Use green rice to look like grass for insect, butterfly, Spring, or other outdoor themed sensory bins.
  • Fill a resealable bag about halfway full with coloured rice and then add some small toys or alphabet letters to create an I-Spy type sensory bag.
  • Layer different colours in a jar or bottle.
  • Fill a plastic bottle with some of the rice and leave some space at the top to create a music shaker. 

Other helpful information about sensory play:

  • The Mega List of Sensory Bin Fillers and Tools
  • How to Create Sensory Bins Your Child Will Love
  • Sensory Play Clean Up Tips
  • Non-Food Sensory Bin Fillers
  • How to Host a Sensory Bin Swap
  • Sensory Strewing

Looking for more easy sensory play recipes to use with your kids? Join us for a free five day email series on Sensory Activities and Solutions and get a free sample of our Sensory Play Recipes eBook.

  • Total800
  • Facebook1
  • Twitter1
  • Pinterest798
  • Mix
  • Yummly0

Filed Under: Crafts and Activities, Sensory Bins Tagged With: sensory play

Ocean Sensory Bag

By Sharla Kostelyk

  • Total133
  • Facebook10
  • Twitter0
  • Pinterest123
  • Mix
  • Yummly0

When you can’t go to the ocean, bring it to you! That’s the sentiment behind this ocean sensory bag. It brings the feeling of the sea right into your home. thumbs squish a bag with blue gel with a toy shark inside. Text reads "Ocean Sensory Bag"

Ocean Sensory Bag:

Supplies needed:

  • small or medium resealable plastic bag
  • hand sanitizer or hair gel
  • blue food gel
  • glue glitter (optional)
  • Good Luck minis ocean pack
  • optional: duct tape (blue or mermaid duct tape look nice)

Directions:

  1. Fill a small or medium sized resealable plastic bag less than halfway with hand sanitizer or hair gel. 
  2. Add some blue food gel. If you don’t have any, you can substitute drops of food colouring.
  3. Sprinkle in some blue glitter.
  4. Add the mini figures from the ocean pack.
  5. Seal.
  6. Squish to combine and especially to mix the colour in. 
  7. Open the bag again to remove any excess air and seal again.
  8. If you want, you can fold duct tape over all four edges of the bag to secure. 
  9. Hand the bag to your child to play with.

Whether or not you secure the bag with duct tape, adult supervision should be used as this contains small parts that could present a choking hazard.

This ocean sensory bag pairs well with an ocean unit study. It’s a nice hands-on activity for kids who are interested in learning about sea life creatures. They can explore and discover through finding each of the aquatic animals.

If you want to expand this activity, you can write down the names of each of the items in the bag and have your child find each one and call out its name. They will delight in discovering the sea turtle, starfish, stingray, dolphin, shark, and fish.

Children get tactile, visual, and proprioceptive sensory input while playing with their sensory bag. 

Looking for more easy sensory play recipes to cultivate fun? Join us for a free five day email series on Sensory Activities and Solutions and get a free of our Sensory Play Recipes eBook.

Try out some of these other ocean themed sensory activities:

Seaside Sensory Bin

Squishy Shark Sensory Bag

Ocean Sensory Bottle

  • Total133
  • Facebook10
  • Twitter0
  • Pinterest123
  • Mix
  • Yummly0

Filed Under: Crafts and Activities Tagged With: sensory bags, sensory play

  • « Go to Previous Page
  • Go to page 1
  • Go to page 2
  • Go to page 3
  • Go to page 4
  • Go to page 5
  • Interim pages omitted …
  • Go to page 39
  • Go to Next Page »

Primary Sidebar

Categories

We are a participant in the Amazon Services LLC Associates Program, an affiliate advertising program designed to provide a means for us to earn fees by linking to Amazon.com and affiliated sites.

Copyright © 2021 • The Chaos and the Clutter • Site Design by Jeni @ The Blog Maven

Return to top of page

Copyright © 2021 · Chaos and the Clutter 2.0 on Genesis Framework · WordPress · Log in