Building a sensory bin around a book is a genius idea. Reading aloud is so incredibly valuable for our children. Not only will The Day the Crayons Quit Sensory Bin encourage you and your children to read aloud together, it will also provide positive sensory input. Plus, your kids will be working on fine motor skills, hand-eye coordination, gross motor skills, observation, and color theory.
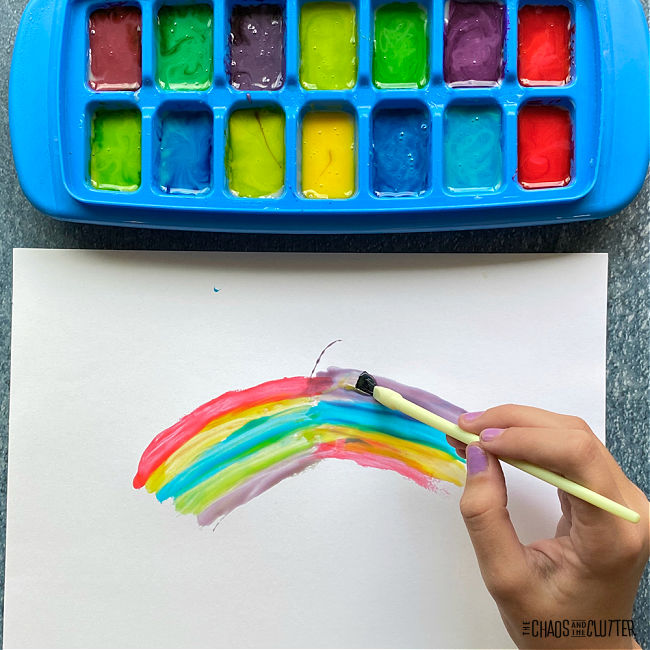
 Bright and engaging colors, a variety of interesting textures, and a story to tell, retell, and imagine will make this a sensory bin your kids won’t want to leave. The value of sensory input for children cannot be overstated. The same can be said for literacy. This activity encourages both.
About The Day the Crayons Quit
A delightful book, The Day the Crayons Quit by Drew Daywalt and Marichelle Daywalt, tells the story of a time when all the crayons were dissatisfied with their lot in life. Each of the crayons leaves behind a letter to explain their plight and a dissappointed young man must convince them to take up their posts again so that he can color. The book covers themes like communication, feelings, empathy, and respect.
Why Connect a Sensory Bin to a Picture Book
The beauty of reading picture books to children is that the pictures help to bring stories to life for children and help them engage with the story even as they work separately on the skill of picturing a story as they read. Reading out loud to your children has immense value because they can hear and understand far more than they can read on their own. So by reading, you are providing an enriched literary experience they will come to crave for themselves.
When you add a sensory bin to the picture book experience, you are extending the magic. You keep the story alive in their minds and give them one more way to explore the concepts introduced by the book. As they play, they replay or continue the story in their heads or outloud with each other. This gives kids practice using vocabulary, communicating with each other, using imagination, and exploring the world.
The connection between the sensory bin and the book strengthens neural pathways in the brain and improves comprehension through play. It’s a new way to process and work through new information.
How to Make a “The Day the Crayons Quit” Sensory Bin
Supplies Needed
- Rainbow Rice – Make your own dyed rice.
- Rainbow Pom Poms
- Number Mini Erasers
- Child Friendly Tongs
- Magnifying Glass
- Foam Dice
- Small Bowl
- Book: The Day the Crayons Quit

Step-By-Step Instructions
- Fill the sensory bin with rainbow rice.
- Add rainbow pom poms and number mini erasers.
- Add small bowl, tongs, magnifying glass, and dice.
- Set the book next to the bin.
Suggested Activities to Go with The Day the Crayons Quit Sensory Bin
- Read the book.
- Roll the dice and find a matching number mini eraser with the magnifying glass.
- Roll the dice and use the tongs to place the correct number of pom poms in the bowl.
- Use the magnifying glass to take a closer look at the book.
- Locate a color in the book and find the matching colored pom poms.
How to Play with A Sensory Bin
- Sort and organize. This is such a valuable activity for kids. You can sort items in the bin by color, type, or size.
- Encourage your children to enjoy free play in the bin and see how they approach the experience. Let them run their hands through the rice, scoop and pour it, and play for as long as they like.
- Compare and contrast. Talk about how the textures, colors, shapes, and sizes of each object compares to the others. Use descriptive words like smooth, soft, fluffy, or bright to describe the objects and compare them.
- Gather and distribute. Move all of the pom poms to the bowl. Then dump the pom poms and move all the number erasers to the bowl. Use tongs, tweezers, or thumb and index fingers to work on fine motor skills a variety of different ways.

Sensory Bin Variations
You do not have to use rainbow rice. You could use rainbow pasta, rainbow beans, or a different sensory bin filler in primary colors.
Be creative! You can find mini crayon erasers and all kinds of things to use in your sensory bin if you have the room in your budget, but you can also pick things up at yard sales, at thrift shops, and from around your home. For this sensory bin focus on primary colors or rainbow colors to go with the theme of the book.
Add funnels, scoops, tweezers, measuring cups, spoons, and other tools to help your child experience the different materials in the bin.
Learning Extension Activities for The Day the Crayons Quit
Create Your Own Follow-Up Story: The Day the Crayons Were Happy

 This sensory experience inspired by the unique world of Beetlejuice would also be a great addition to your classroom or party. It’s made with simple items that can often be purchased at a dollar store such as the Dollar Tree.


 This activity is great for preschools, Kindergarten classrooms, or home. You can easily adapt the questions you ask for older and younger kids. Learning opportunities:
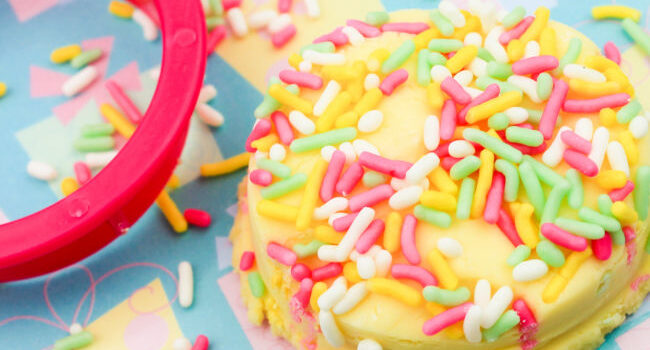
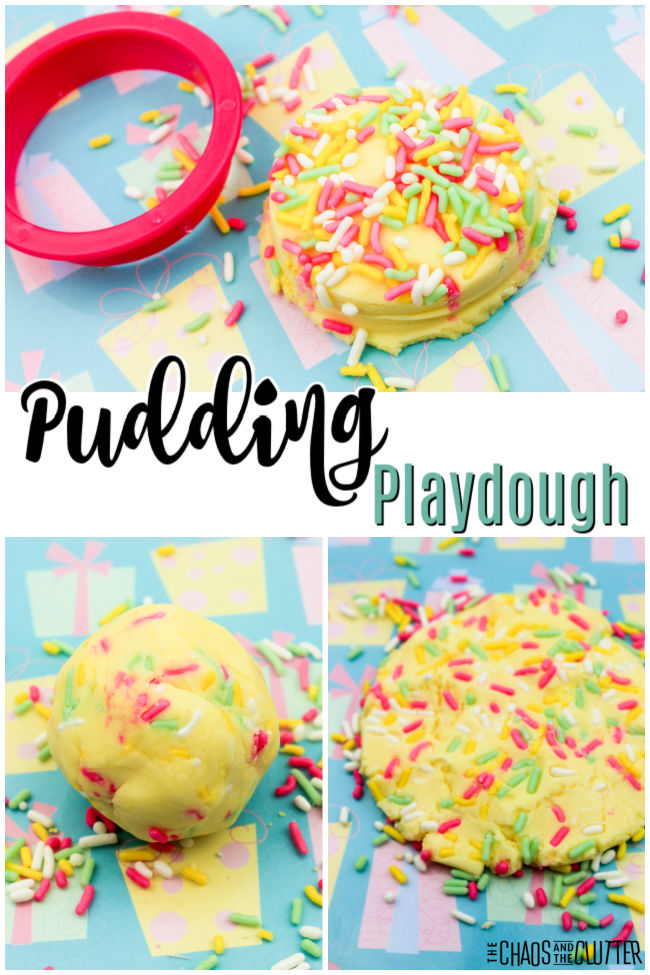 Kids can mould and shape to their heart’s content. It’s such a fun activity.
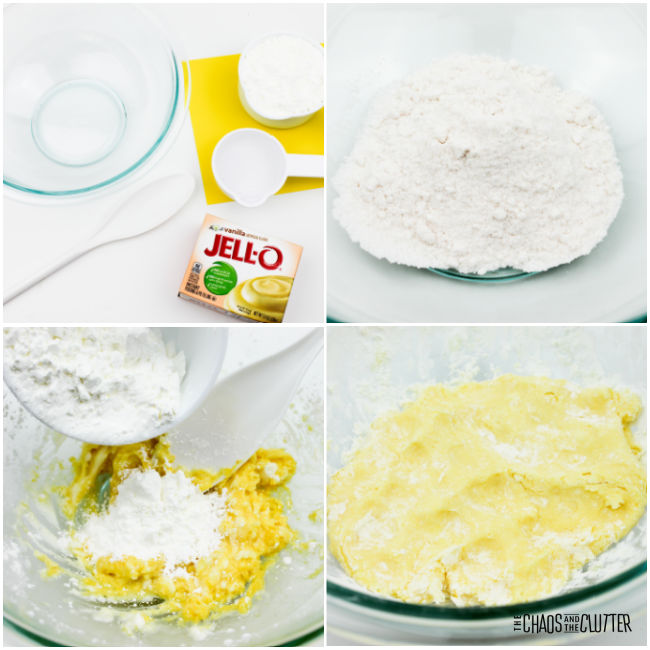
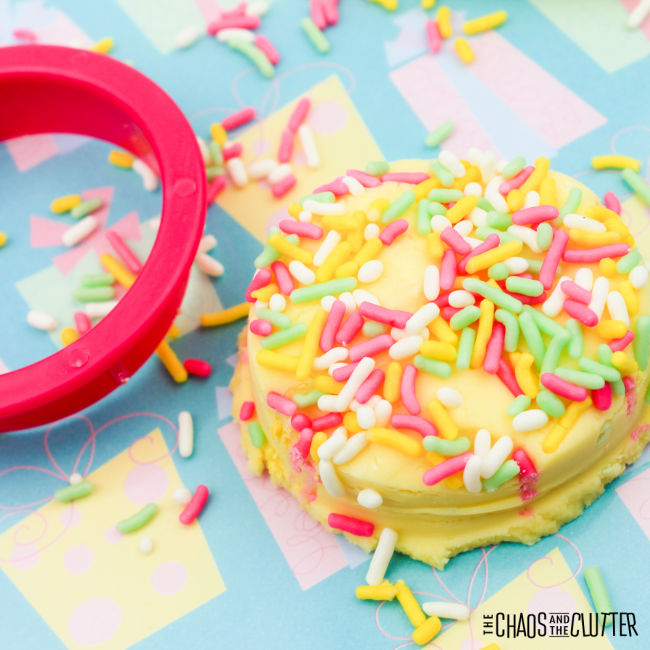
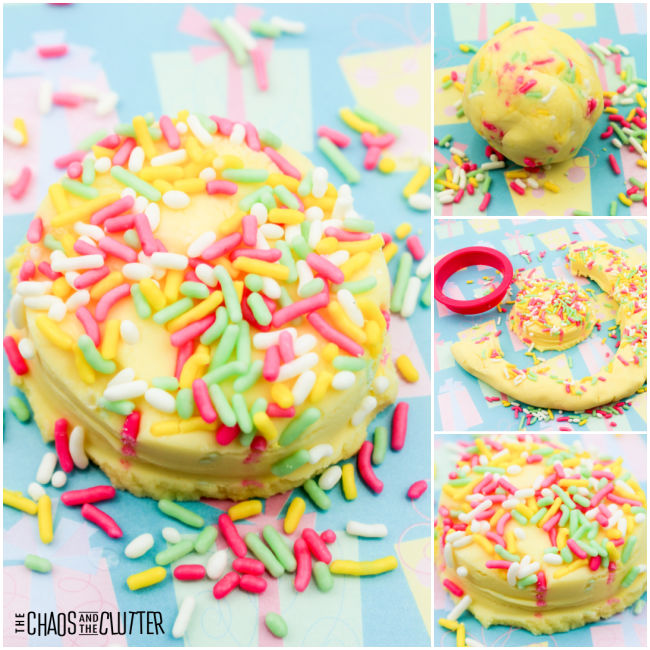 The ingredients are ones that you may already have in your pantry which is another benefit to choosing to make this edible pudding play dough.