When I was growing up, pudding pops were a memorable summer treat. I of course wanted to pass on the tradition and make them for my own kids. They are so easy to make and there are a lot of ways to make them even more fun!
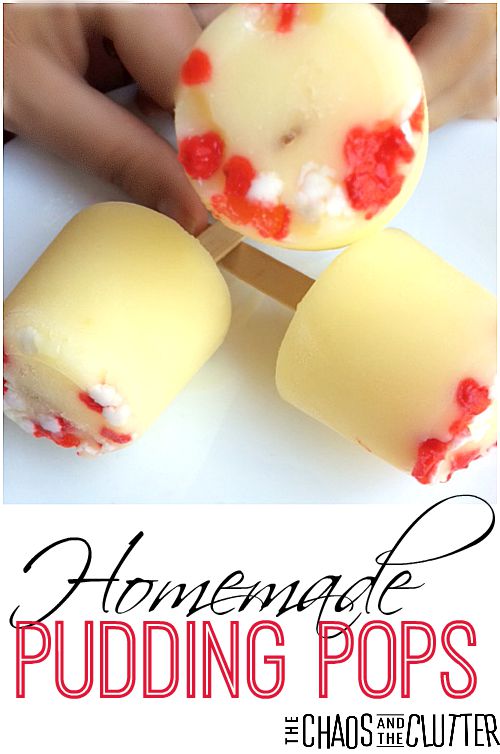 Instead of using popsicle holders, I made mine in Dixie cups. I put sprinkles in the bottom of each cup. Since I was making them for our Canada Day BBQ, I used red and white maple leaf sprinkles. You can use whatever sprinkles match the theme of the event or party you are making them for.
After adding sprinkles to the cups, I poured in pudding batter and let them set for a few minutes on the counter. Once they had begun to set, I added a popsicle stick to each of them. I then set the cups inside a muffin tin tray and put the tray in the freezer for them to freeze.
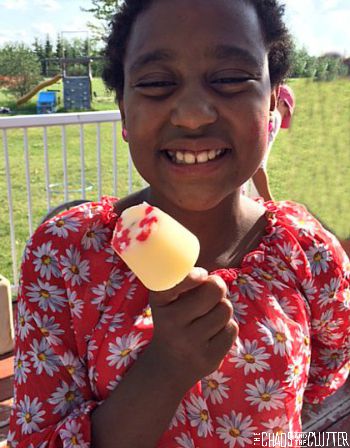 I assume that like most appliances, freezing times may vary, but it took about six hours for our pudding pops to freeze. When they are ready, you only need to peel the Dixie cup off them and eat!
Homemade Pudding Pops Recipe:
- sprinkles (optional)
- 2 packages of instant vanilla oatmeal (4 servings size)
- milk (amount according to package directions)
- 12 Dixie cups (give or take depending on how high you fill them)
- 12 wooden popsicle sticks
Put sprinkles into the bottoms of Dixie cups. Make pudding according to package directions. Pour pudding mixture into cups, filling about 3/4 of the way full. Let set for around 2 minutes and then insert a popsicle stick into each cup.
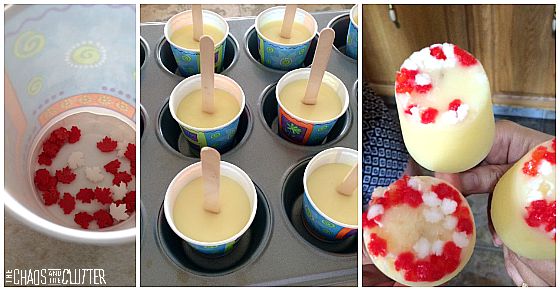 Set the cups onto a cookie tray with a rim or in a muffin tin tray and put in the freezer until completely frozen. Peel off the Dixie cup. Enjoy!
Other easy cooking for/with kids recipes:
- sprinkles optional
- 2 packages of instant vanilla oatmeal 4 servings size
- milk amount according to package directions
- 12 Dixie cups give or take depending on how high you fill them
- 12 wooden popsicle sticks
-
Put sprinkles into the bottoms of Dixie cups.
-
Make pudding according to package directions.
-
Pour pudding mixture into cups, filling about 3/4 of the way full.
-
Let set for around 2 minutes and then insert a popsicle stick into each cup.
-
Set the cups onto a cookie tray with a rim or in a muffin tin tray and put in the freezer until completely frozen.
-
Peel off the Dixie cup.
-
Enjoy!
You can follow my Cooking with Kids board on Pinterest for lots of easy and fun ideas or subscribe to my email newsletters where I share family friendly recipes, tips and activities.
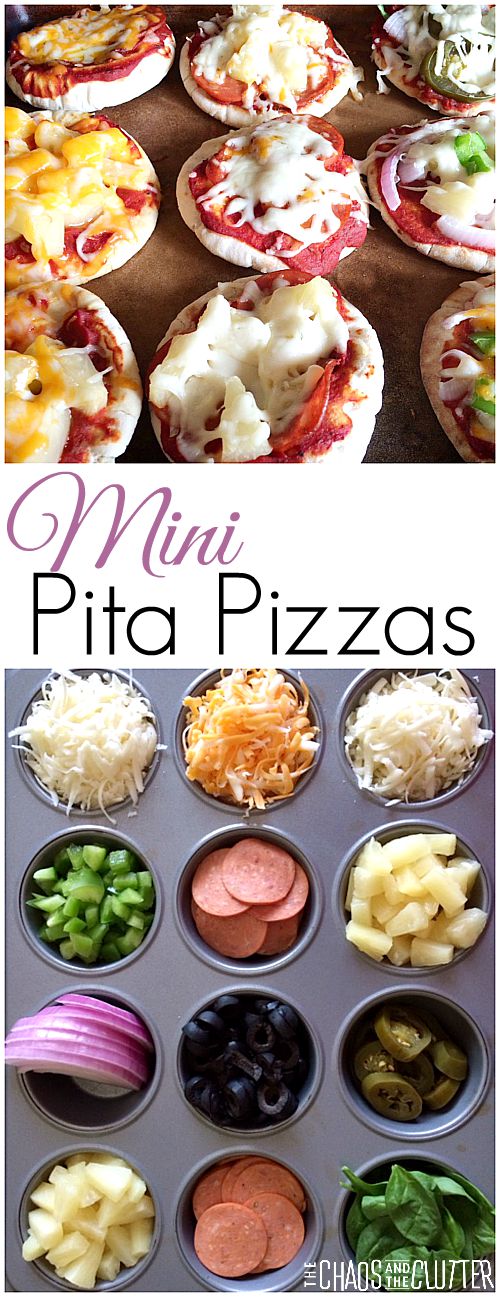 I use a
 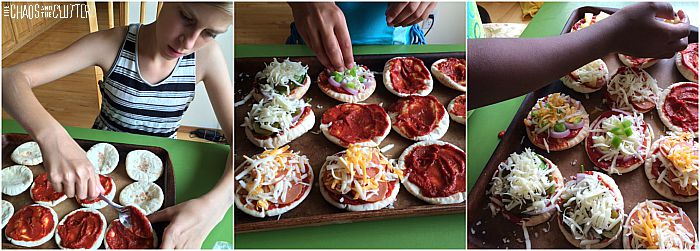 For our son who is gluten free, I use corn tortillas or frozen gluten free pizza crusts as the base.
 The other great thing about putting the toppings in a muffin tin tray is that it’s portable. On the day these pictures were taken, I actually filled the tray at home and brought it over to my neighbour’s where our kids enjoyed making the pizzas and we enjoyed visiting!
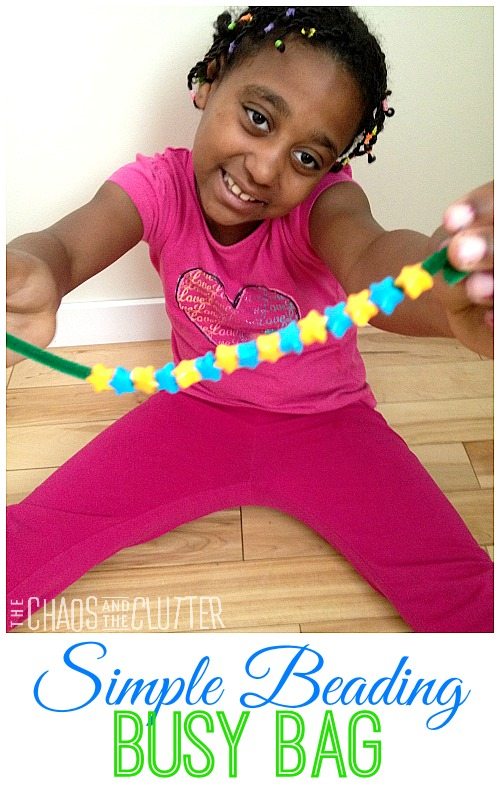 Materials needed:
 At first, our daughter found it too overwhelming to create patterns with many colours included. I had originally included five bead colours in the bag but took out two colours until she mastered patterning with those and then I put those colours back in.
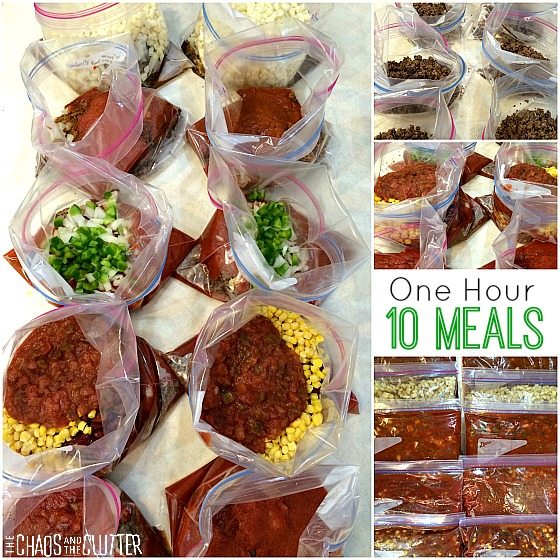
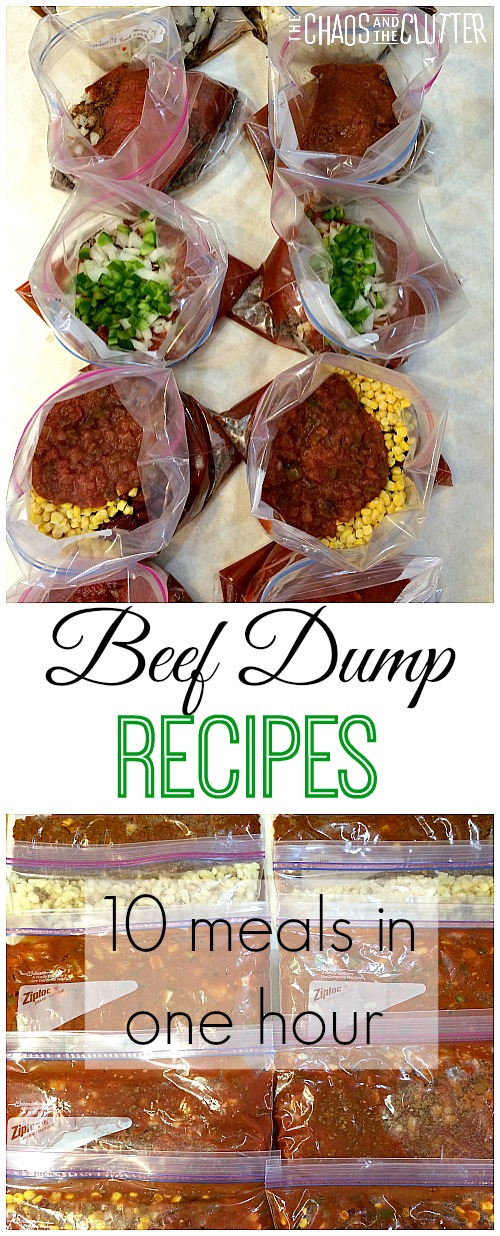 These beef dump recipes are easy to throw together and perfect for freezing. Freezer meals make a lovely gift for friends who are going through an illness or loss or adding to their family through birth or adoption. By doubling these recipes, you are able to assemble ten meals in just one hour! (note that this does not include the time to brown the beef)
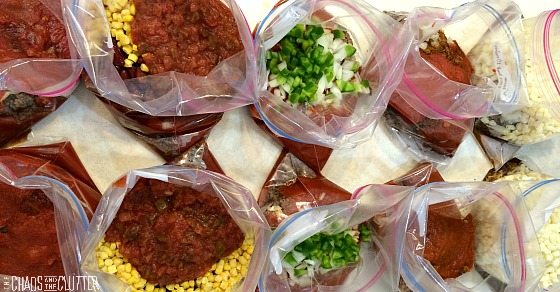 Below is a sample meal plan which uses ground beef for all of the recipes. Don’t forget to brown the beef before you start assembling. You can find the shopping list, labels, and other meal plans including those using other cuts of beef in the


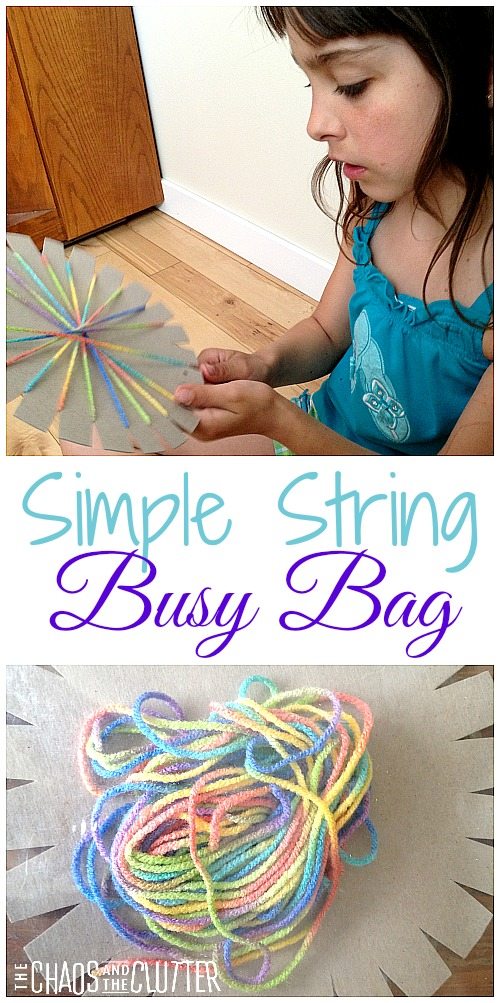 Materials needed:
 Using the cardboard cutout, your child can create patterns or shapes with the string. They can also use the cardboard to create a bit of a weaving wheel.
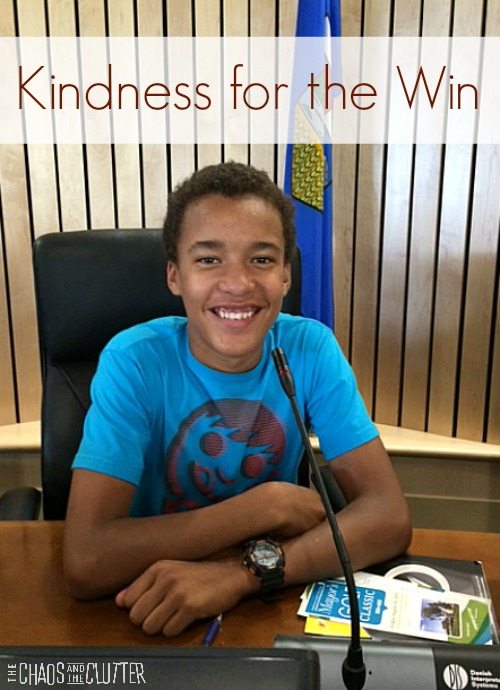 Mothers and fathers responded by saying that what happened inspired them to have an honest discussion with their kids about racism. For many, it was the first time they had spoken about this topic to their kids. Some of them read what I wrote to their kids directly and talked about how racism is never okay and even addressed what to do if you see it happening to someone. That meant so much to us.
 I would like to say “thank you” to all those who have reached out to show my son that people care. Your words whether through private messages or public comments or emails or phone calls mean a lot to us.