Busy bags are a great tool for moms to use to occupy younger kids while they are doing an activity or schoolwork with older kids. They also work well for waiting rooms and road trips.
There are all sorts that you can make but if you’ve read our other busy bag ideas, you may have noticed that I like to keep my ideas simple and cost effective. The only reason I am able to have two boxes filled with busy bags for Dancing Queen to play with is that I was able to make them quickly and easily.
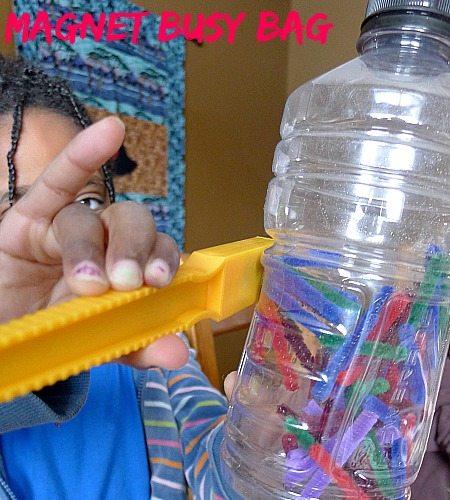
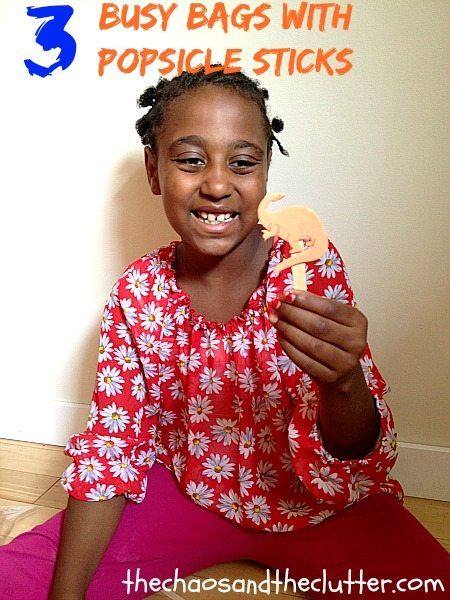 These popsicle stick activity bags can be made in a matter of minutes and require very little in the sense of supplies. You may very well already have everything you need to create these for your little one. One of these activities has small parts so wouldn’t be appropriate for very young children and like all activities, children should be somewhat supervised. (in other words, I am not liable if you make these and you or your toddler swallow a magnet!)
Magnetic Shape Sticks
Materials needed:
- popsicle sticks (I used bright coloured ones but plain would work)
- adhesive magnet stip, cut into smaller pieces
- mini cookie sheet or the lid from a tin container
- large resealable bag
- optional: glue to further secure the magnets
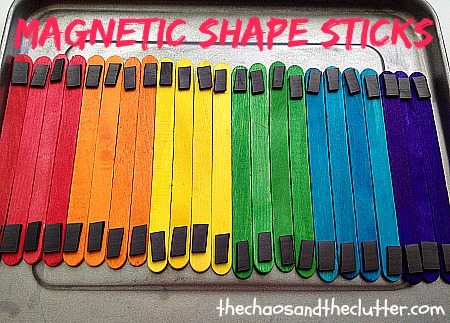 To prepare this busy bag, attach magnet pieces to each end of the popsicle sticks. I used the adhesive kind of magnet strip but I still needed to glue them in place as the adhesive didn’t hold well enough. Place the now magnetic sticks in a large resealable bag with a mini baking tray or the lid from a tin container. The sticks can then be used to create shapes and patterns.
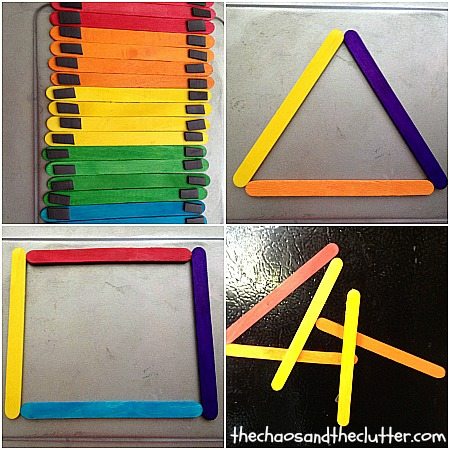 Your child can also use the sticks to play on the fridge or any other magnetic surface such as a white board or outside door.
Popsicle Stick Puzzles
Materials needed:
- photos, emotion cards or pictures from magazines
- glue
- exacto knife or scissors
- wide popsicle sticks
- resealable bag
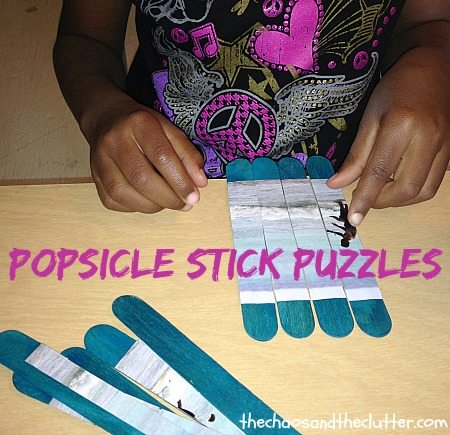 Kids love these because they can be personalized. They get especially excited when they include pictures of people they love or treasured family memories. On most of ours, I used pictures from past family vacations. This way the kids can relive those memories while they put together their puzzles. They can also put the puzzles in chronological order.
Another great thing you can do when creating these is to make them with emotion cards or large faces clipped from magazine. These can become a great tool for kids with autism or kids who need extra help in learning to identify emotions.
To make these busy bags, lay wide popsicle sticks side by side and glue a photo, emotion card or picture from a magazine on top. Allow the glue to dry. Using an exacto blade or scissors, cut the popsicle sticks apart. Put them into a resealable bag and kids can piece the puzzles together.
Foam Sticker Puppets
Materials needed:
- popsicle sticks
- foam stickers
- resealable bag
- optional: permanent markers
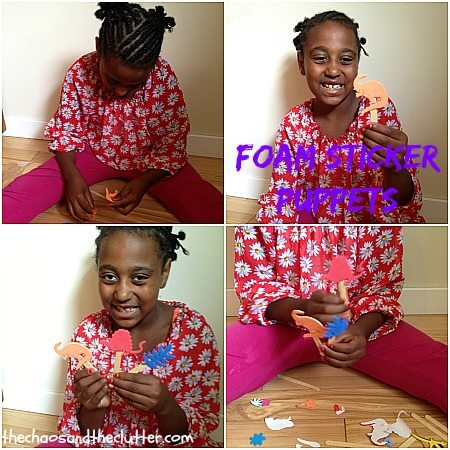 The great thing about this busy bag is that it lends itself to all kinds of creativity. All you have to do to prepare this activity bag is to place popsicle sticks and foam stickers in a resealable bag. This is a great way to use up all the extras from other foam sticker activities or you can choose to use ones of a particular theme.
Your child can then make puppets using the foam stickers and do all kinds of creative play using their puppets. For older kids, you can also include some fine-tip permanent markers in the bag for them to add details to their puppets.
Some of our other busy bags:
7 Busy Bags for Learning Colours
7 Busy Bags Made Using Paint Chips
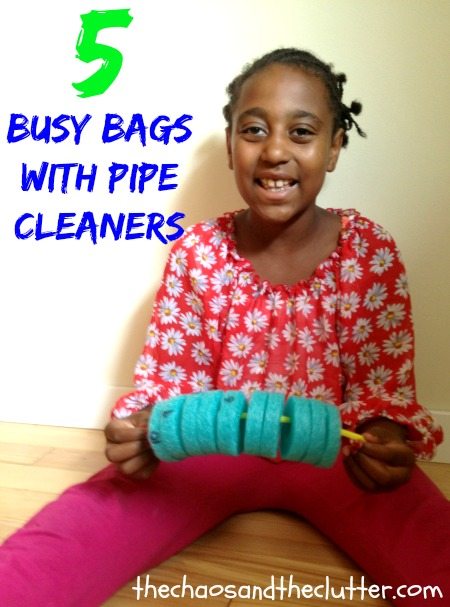
5 Busy Bags with Pipe Cleaners
If you are looking for more busy bag ideas, you may want to follow my Activity Bags board on Pinterest or if you are just looking for some great ideas for kids, you may want to follow my most popular Pinterest board, For Kids.


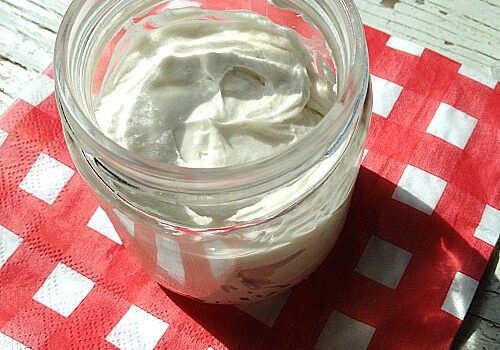
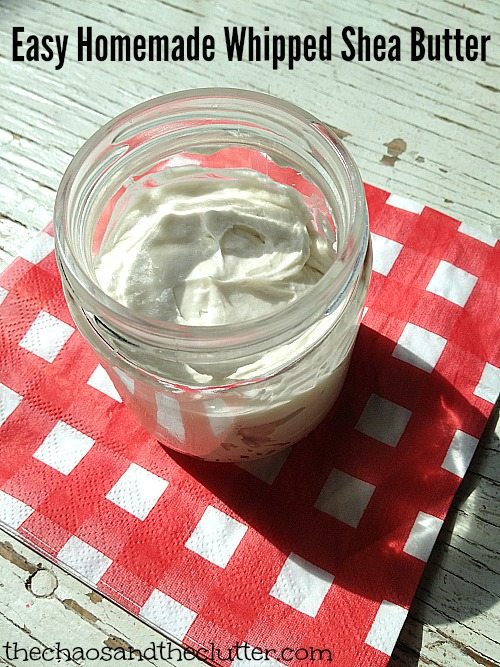 When I first started looking at recipes to make my own shea butter cream, I was scared off by how complicated it sounded. Most of the recipes for whipped shea butter included steps for heating/melting and then cooling, while whipping in between. They called for the use of candy thermometers and I knew that there was no way I could add something time consuming and complicated into my already too busy schedule.
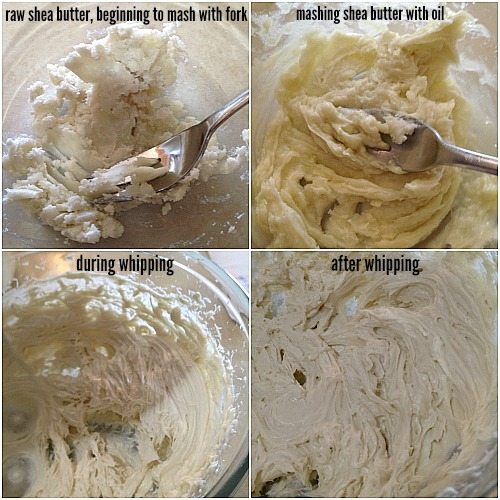 I feel much better about my kids using a product that is all natural, where I know what went into it. Making my own shea butter products also saves me money.

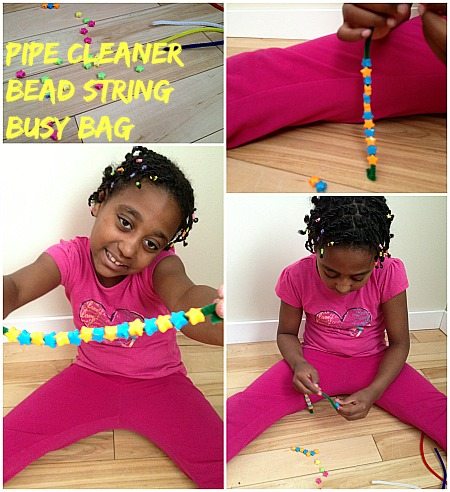 This couldn’t be simpler to make. Place some pipe cleaners and beads into a resealable bag and this busy bag is ready to go! Kids can enjoy making bracelets or doll necklaces or bookmarks while they practise their fine motor skills.
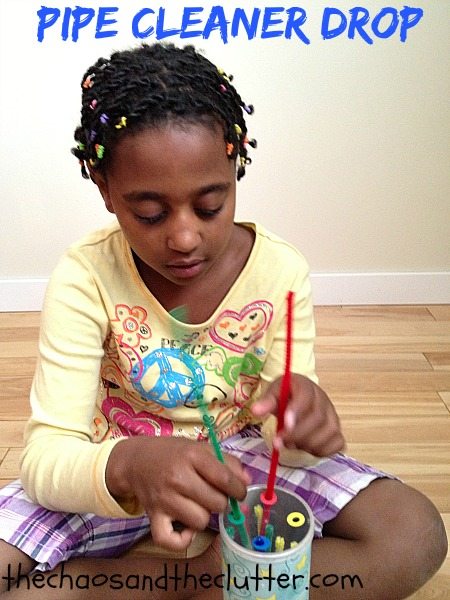 Punch holes in the lid of an empty potato chip can (I used a Pringles can). Add a
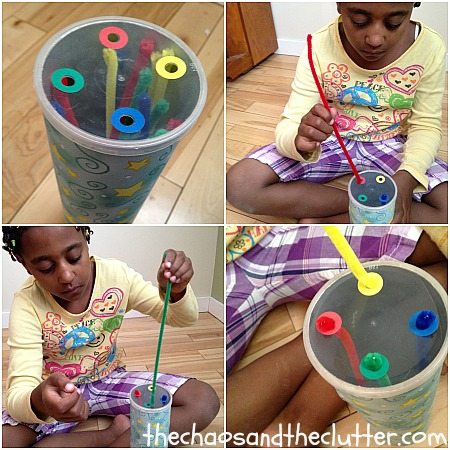
 To create this fun activity, cut pipe cleaners into pieces and put them into an empty plastic bottle. Your child can then use the
 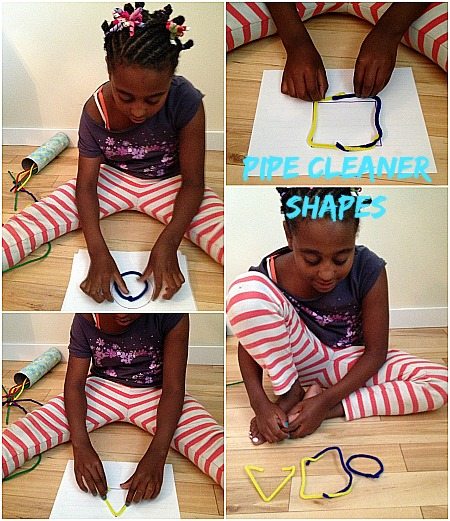 Busy bags don’t have to be complicated. You could create or use some fancy shape cards for this or you can do what I did and just draw simple shapes on paper. Your child can then try to replicate these shapes using one pipe cleaner or by combining several pipe cleaners. Store the pipe cleaners and shape papers in a resealable bag.
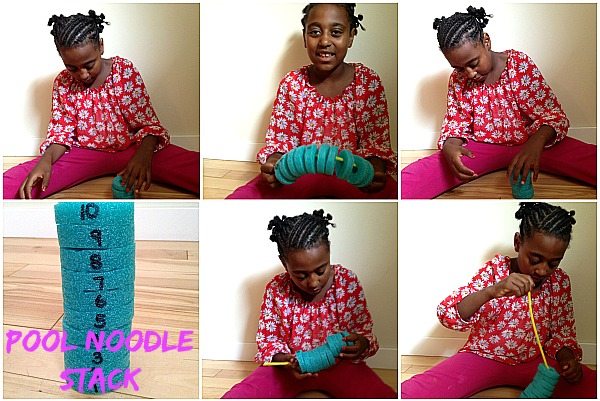 To create this busy bag, cut up a pool noodle and number the pieces with a permanent marker. Put them into a resealable bag with some pipe cleaners. Kids can either stack the pieces and work on their counting and number recognition or they can thread the pool noodles onto the pipe cleaners.
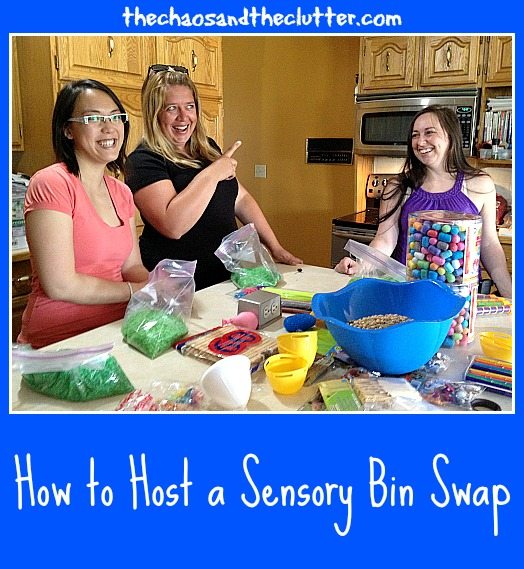 Doing a sensory bin exchange is a great way to get new ideas too and share what works well with your kids and learn what is working well for others.
 At our sensory bin exchange, we each ended up with the makings of four bins.
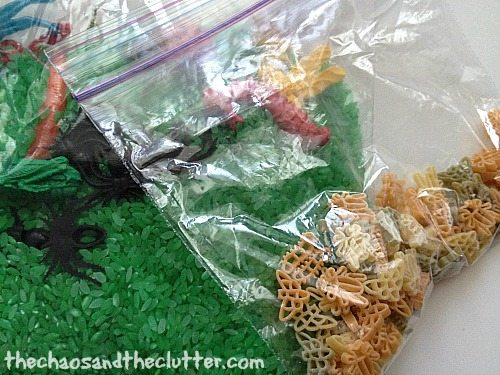
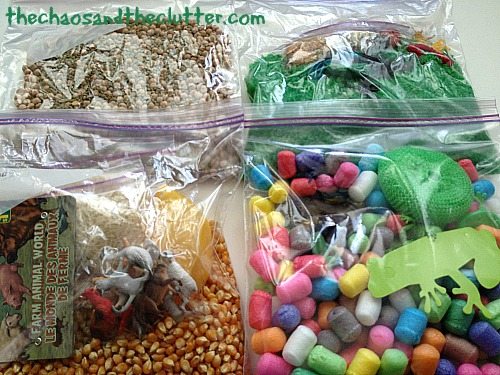
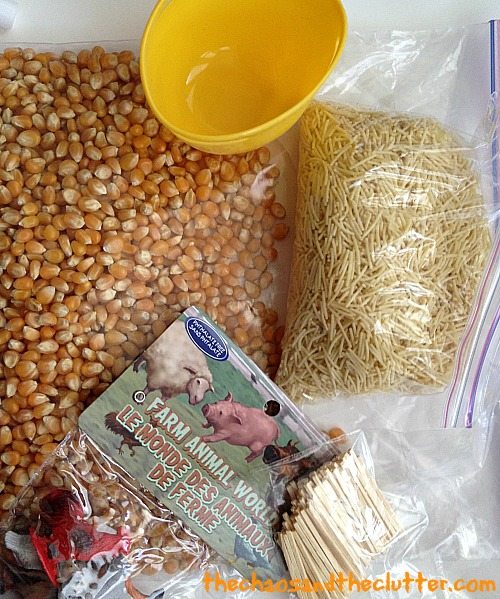 The kids and I made our farm bag into a bin later in the day. I added a few of our toy animals and the bin was ready for play. I also added a funnel and a small container and lid for pouring and scooping. Granola Girl liked scooping the popcorn seeds into the container, putting the lid on and shaking it to hear the sound it made.
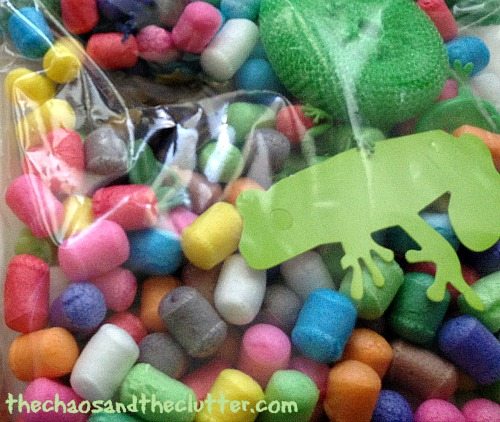
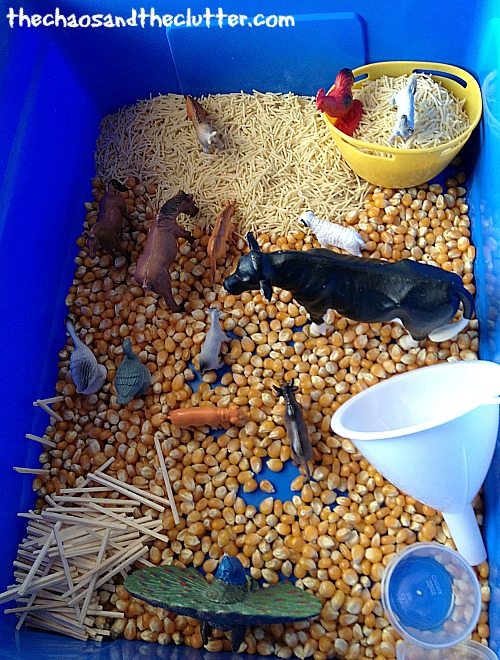 This sensory bin wasn’t originally a frog bin, but I had bought a pack of jump frogs and a pack of kitchen sponges from the dollar store and when I commented that the sponges would make good lily pads, a frog bin was born! We included