• Skip to primary navigation
  • Skip to main content
  • Skip to primary sidebar
  • Home
  • About
  • Contact
  • Privacy + Terms
  • Affiliates

The Chaos and the Clutter

  • Facebook
  • Twitter
  • Pinterest
  • Google Plus
  • RSS
  • Email
  • School at Home
  • Sensory
    • Sensory Processing Disorder
    • Awesome Sensory Play Activities
      • Sensory Bins
      • Sensory Bottles
      • Sensory Bags
  • Family Games
    • Minute to Win It Games
  • Special Needs Parenting
    • Childhood Anxiety
    • Reactive Attachment Disorder
    • Sensory Processing Disorder
  • Store
  • Course Login

Sharla Kostelyk

Frozen Inspired Elsa Slime

By Sharla Kostelyk

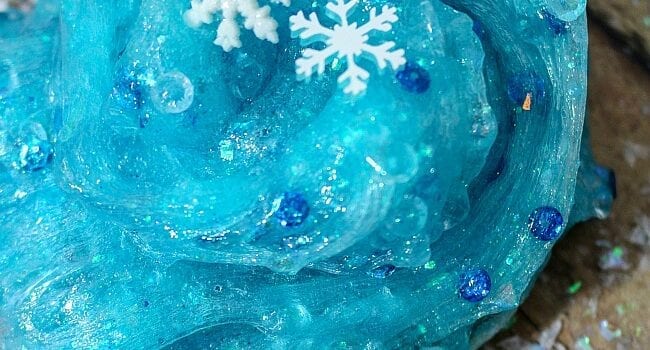
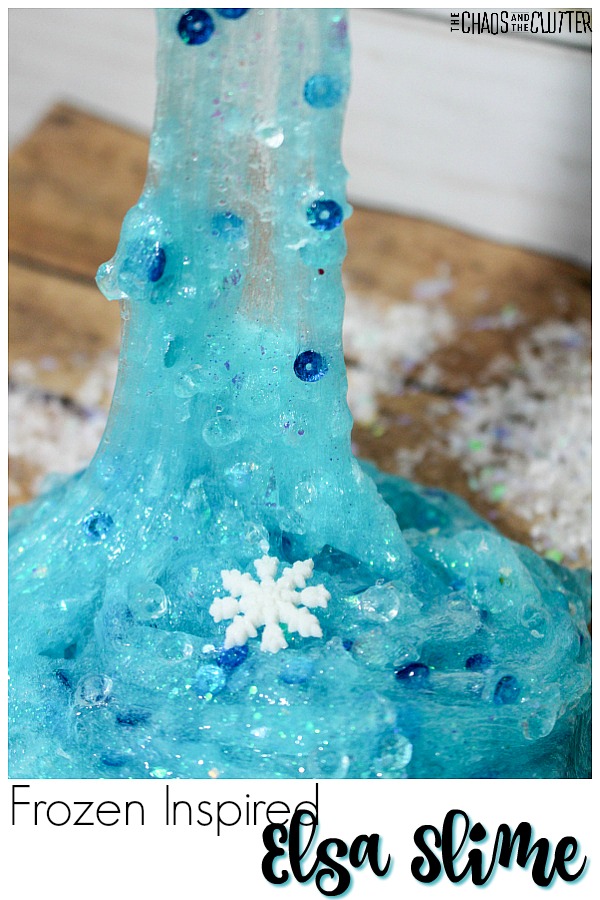
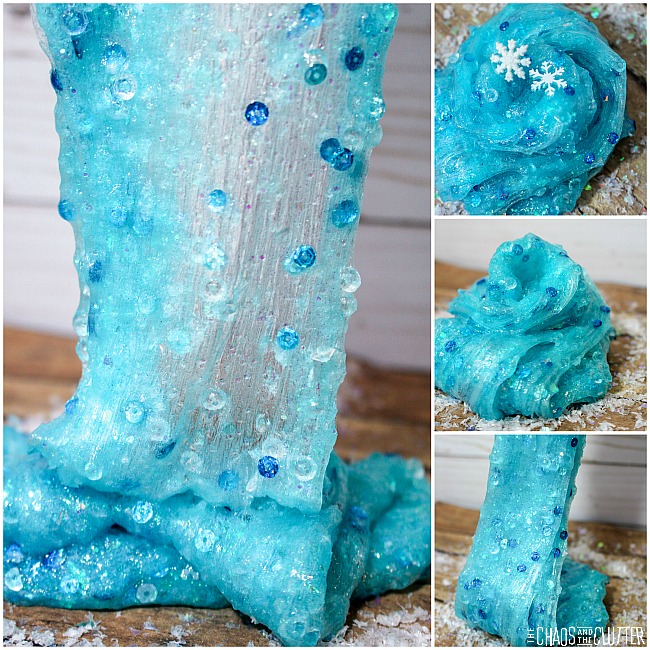
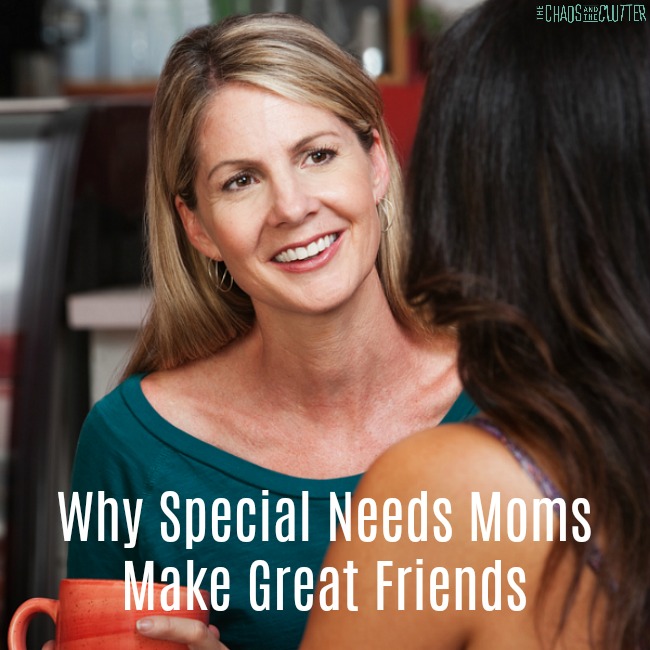
This Frozen Inspired Elsa Slime is an interesting slime because of the textures and colours. With the addition of all the add-ins, it becomes a crunchy slime. This is particularly good for kids who are sensory seekers. 

Frozen Inspired Elsa Slime #slime #slimerecipes #sensoryplay #frozenWhen you think about the movie Frozen, a certain song may come to mind. If you want to give the full Elsa effect, you can sing the song while you make this slime.

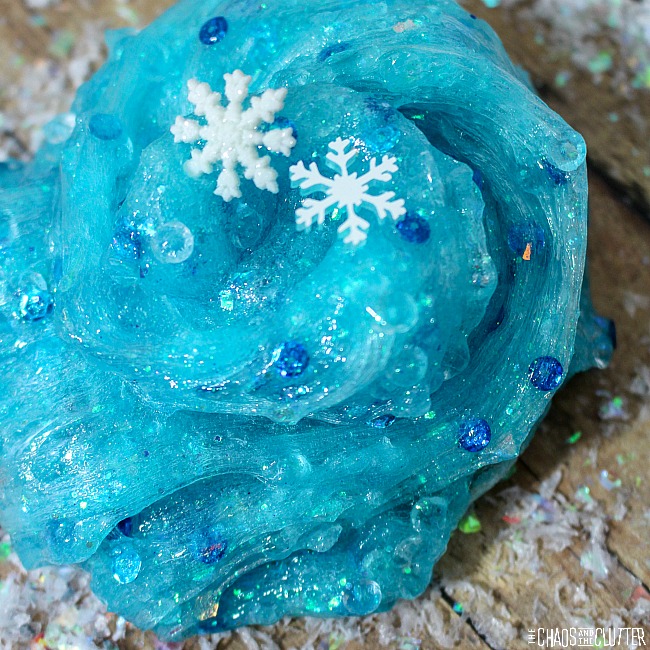
Frozen Inspired Elsa Slime Recipe:

Supplies:

  • 5 oz. of Elmers school clear glue
  • 1/2 cup water
  • blue colorant (you can also use food colouring, paint or pigment)
  • blue glitter
  • blue sequins
  • faux snow (confetti)
  • beads
  • ‘diamond’ beads
  • snowflake charms 
  • 1/2 tsp. baking soda
  • 1 Tbsp. contact solution
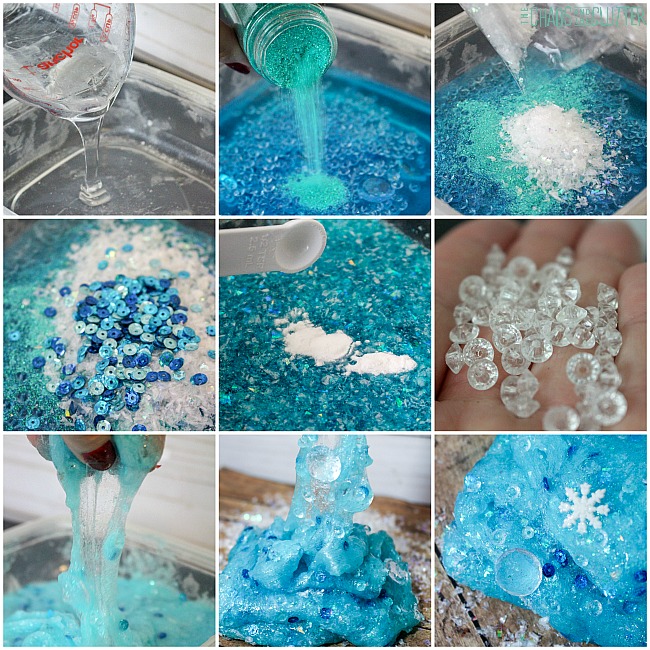
Directions:

  1. In a bowl, pour 5 oz. clear glue.
  2. Add 1/2 cup water.  Mix until the glue has broken up and is incorporated into the water.
  3. Add a few drops of blue colorant, mixing until you get the perfect blue.
  4. Sprinkle in your glitter. Stir.
  5. Add in all of your mix-ins (snow, snowflakes, sequins, etc.).
  6. Mix in 1/2 cup baking soda. Baking soda will help determine your slime’s thickness.
  7. Add 1 Tbsp. of contact solution. Mix in. The slime will be ready to knead when the slime pulls away from the sides of the bowl.  
  8. Knead the slime. It will be sticky at first, but as you continue to knead it, it should become more the consistency that you’re looking for. If it’s still too sticky, you can add a drop or two more of the contact solution, but be careful not to over activate.
  9. Store in an airtight container when not in use. 

Sensory play:

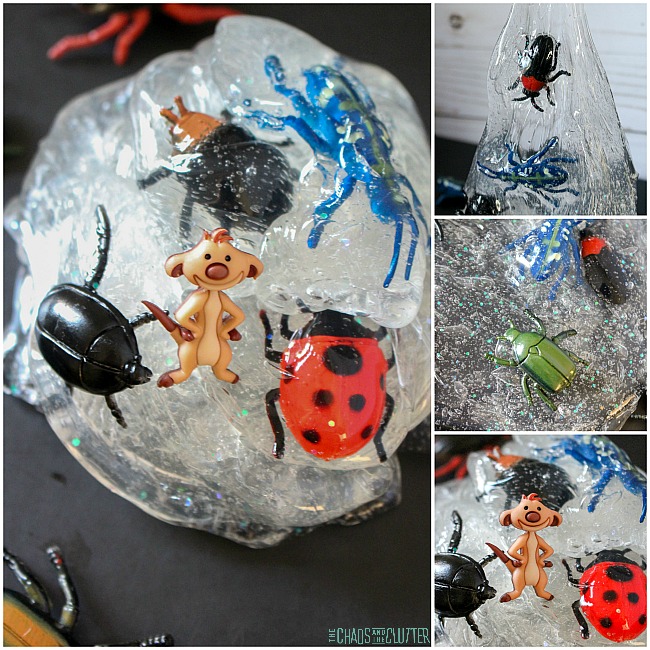
This slime provides visual, tactile, and proprioceptive feedback. Because of all the textures and crunch incorporated in this, it has more tactile input than most slimes. By stretching, pushing, kneading, pulling, and pressing, kids will get proprioceptive feedback as well.
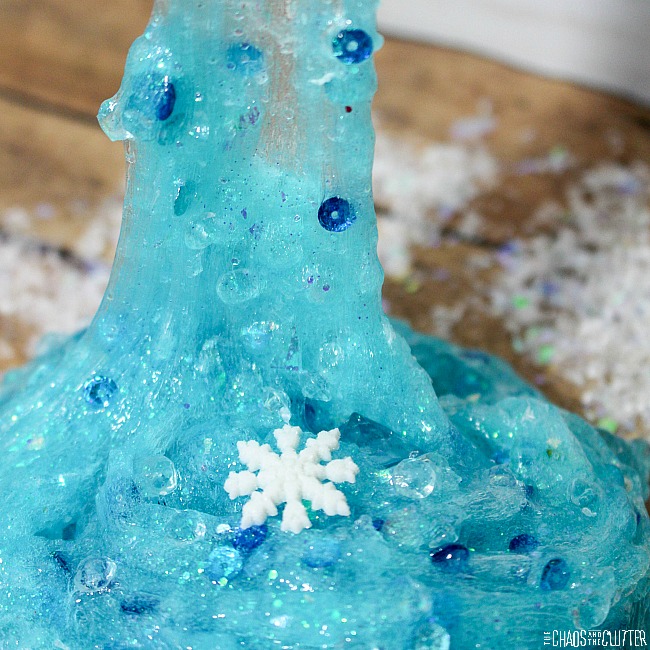
You can expand the sensory play value of this by adding in Frozen mini figurines. This allows kids to use their imagination and create different storylines. You could also make a Frozen Inspired Sensory Bin. Frozen Inspired Sensory Bin

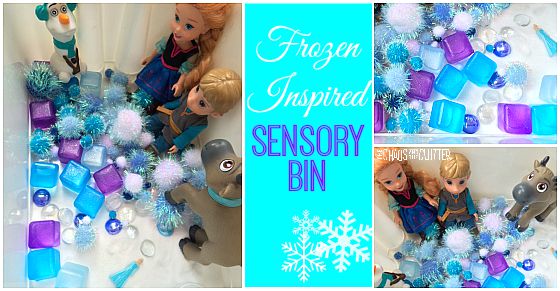
Check out our other slime recipes:

Unicorn Fluffy Slime
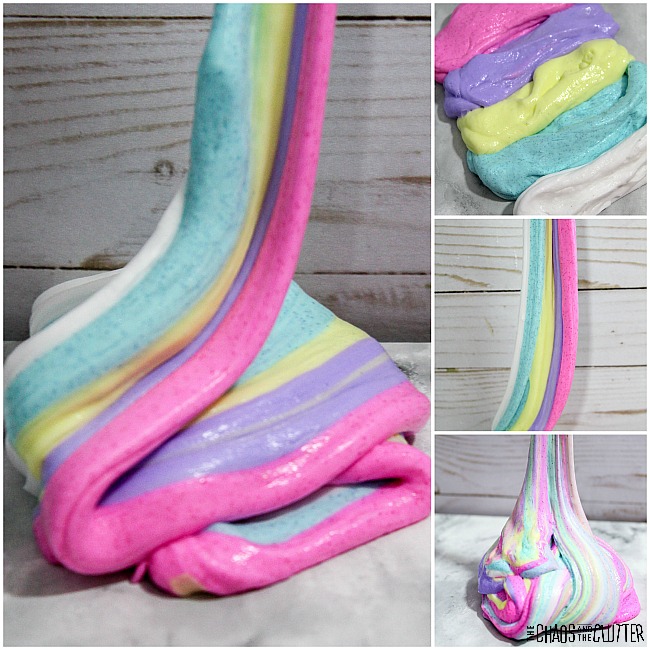
 Minnie Mouse Slime Lion King Slime

Filed Under: Sensory Tagged With: sensory play, slime

14 Things Your Special Needs Teen Needs to Hear You Say

By Sharla Kostelyk

Parenting a teen through the teen years can be challenging. Our responsibility as their parent is to encourage them as much as possible. Every child needs to hear they are special as much as possible. However, your special needs teen needs to hear you say positive things more often than anyone else. a mother and daughter both with long brown hair are forehead to forehead as the sun streams in behind them. The text reads "14 Things Your Special Needs Teen Needs to Hear You Say"

As a mom of special needs teens, it’s HARD to always be upbeat enough to want to say something positive. I’m tired. Sometimes quite frankly, it’s hard to find positive things to say.

But our teens are depending on us to help them build their confidence and self worth. It’s amazing the power a few short words can hold. While all teens need to hear these words, teens facing additional challenges need to hear them even more.

What to Say to Your Special Needs Teen

#1. You inspire me.

If your child inspires you, then you need to let them know. Your special needs teen is inspiring and it’s time that they know that! Maybe it’s the way they face the challenges they have or what they have overcome. Maybe it’s their determination or their fighting spirit. Whatever it is that inspires you about them, tell them.

#2. It’s okay to have bad days.

Some teenagers don’t realize that their parents have bad days. Talk to your teenager and let them know that everyone has bad days, even you. Hearing this from you will help them in more ways than you can even imagine.

#3. You are brave.

Getting up every day is hard. Getting up every day when you are facing additional challenges is even harder. Let your special needs teenager know that they are brave. They are so brave and they inspire you!

#4. The world is a better place because you’re in it.

What does your child bring to the world? Your special needs teenager needs to know that they make the world a better place.

#5. You are valued.

When someone tells you that you are valued, it makes you shine inside. Your special needs teen needs to know that they are valued! They need to know that what they bring to the table is so important.

#6. I love you, but I also really like you.

Who doesn’t want to be not only loved, but also liked? Liking our children is important and believe it or not, they need to know they are liked.

Liking our children isn’t always easy because kids can be a challenge. Your kiddo may have challenging behaviours or teenage mood swings. However, our kids need to know that their parents love and like them unconditionally.

#7. You are wanted.

In a world that tells a lot of children that they aren’t wanted, I want my kids to know that they are wanted. If you’re the parent of a special needs teen, then they need to know they are wanted. This simple statement can go so far.

A few weeks ago, I took my middle daughter out on a mommy-daughter date and I was telling her about the day we got the phone call she had been born and how deeply she was wanted. As I recounted details like how one of her grandmas came to our house 4 times before she arrived “is she here yet?” and other moments from that special day, she was just beaming.

#8. Our family is better for having you in it.

A family is only a family because of who is in it. Your special needs teen needs to hear that your family is BETTER for having them in it. It wouldn’t be the same without them.

#9. I love the way you look at the world.

Your special needs teenager has a unique way of looking at the world. Let them know that you see it and appreciate it!

#10. I believe in you.

Everyone wants someone to believe in them. Tell your special needs teen that you do believe in them. You believe in who they are and what they can achieve.

#11. I really like how you helped your brother or sister.

Even a teen who is non-verbal or who has limited mobility can help siblings with their smile. It can be easy to look past how helpful a child with special needs can be.

#12. You did a great job with that!

Parents are their child’s biggest cheerleader. When you see your special needs teen doing a good job, tell them how wonderful they are doing.

#13. Can I give you a hug?

Your special needs teen may need a hug, but not know how to tell you. They may feel that they are too old to ask for physical affection, but still want it. Always tell them you are up for a hug anytime!

For kids who are sensory sensitive, you can change this to a high five.

#14. I’m so proud of the young lady or young man you are growing into.

Every teenager is going to grow up, whether we choose to believe it or not. If a teen is going to grow up and be successful, then they need to have all the support they can get. Be sure they know how proud you are of who they are becoming.

Join me for a free 5 part email series, Little Hearts, Big Worries offering resources and hope for parents.

You may also be interested in reading:

The Waves of Grief in Special Needs Parenting

What That Special Needs Mom Needs from You12 Ways to Support a Special Needs Mom

Why Special Needs Moms Make Great Friends

Filed Under: Special Needs Parenting

Rainbow Playdough Fine Motor Activity

By Sharla Kostelyk

Playdough is such a versatile sensory play material. This Rainbow Playdough Fine Motor Activity is great for helping little hands practise their dexterity. balls of coloured playdough are lined up to create a rainbow and a cloud with a small hand holding one of the blue balls of dough. The text reads "Rainbow Playdough fine motor activity"
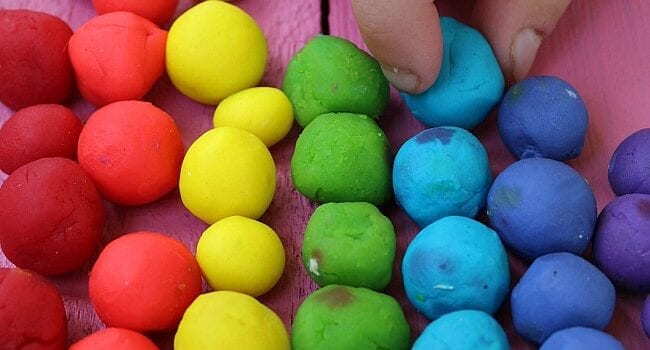
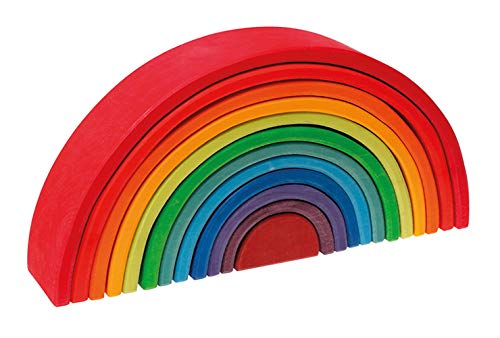
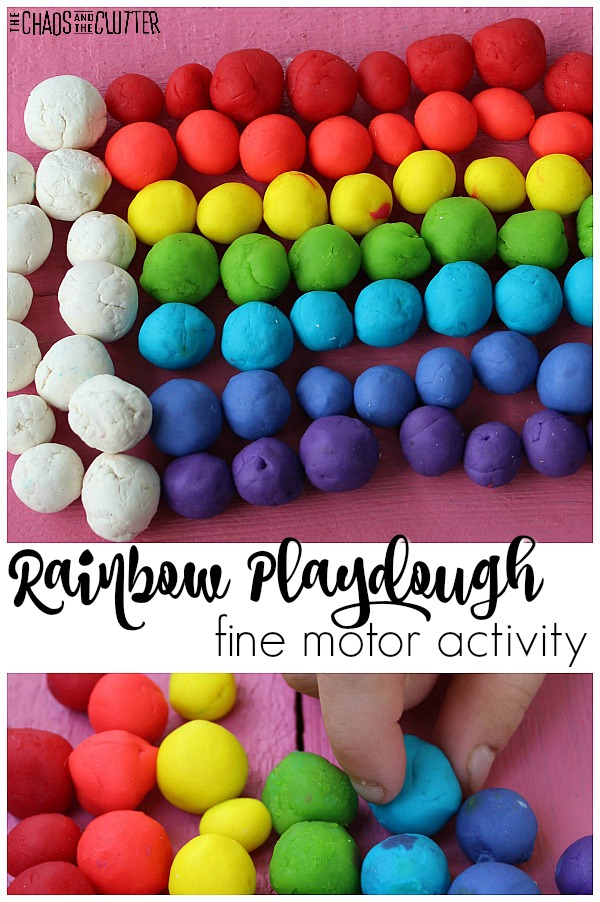
While at first glance, this activity may seem very simple, it has layers of learning within it. This play allows children the opportunity to learn or reenforce their knowledge of the order of the colours in the rainbow while practising their fine motor skills.

Rainbow Playdough Fine Motor Activity:

Supplies:

  • Playdough in red, orange, yellow, green, blue 2 shades of purple and white*

*you can either purchase Play Doh in those colours or make your own

Directions:

Invite your child to roll each colour of the playdough into small balls. If they have never done this before, show them how to pinch off a section, place it in the palm of one hand and roll it using the palm of the other hand.

After this is accomplished, invite your child to arrange the balls in the pattern of a rainbow. 
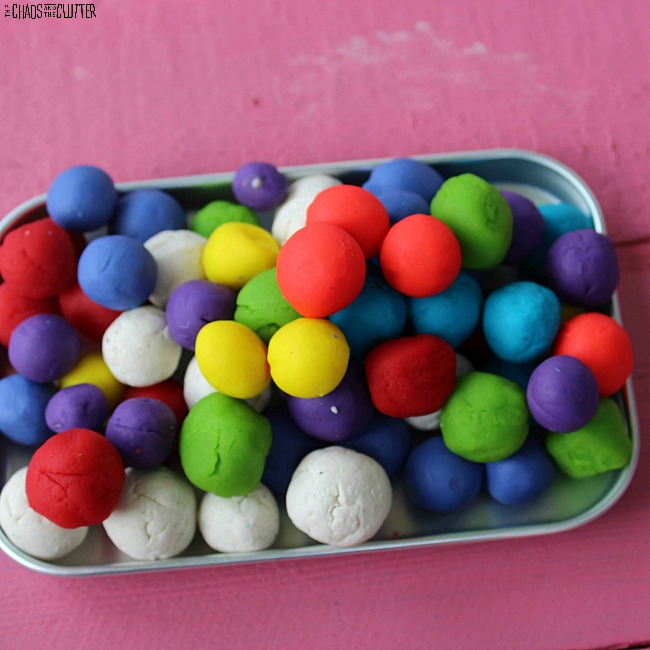
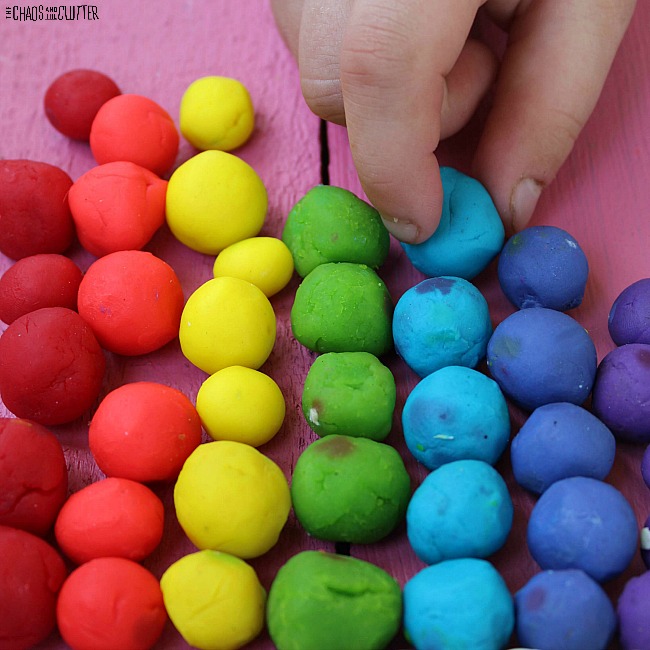
You can remind them what the order of the colours is either in words or by setting out pieces of paper in those colours or with the words of each colour written on them or by displaying a picture of a rainbow for them to compare to.

Sensory and Learning Opportunities:

Children will receive visual, tactile, and proprioceptive sensory input while participating in this activity. 
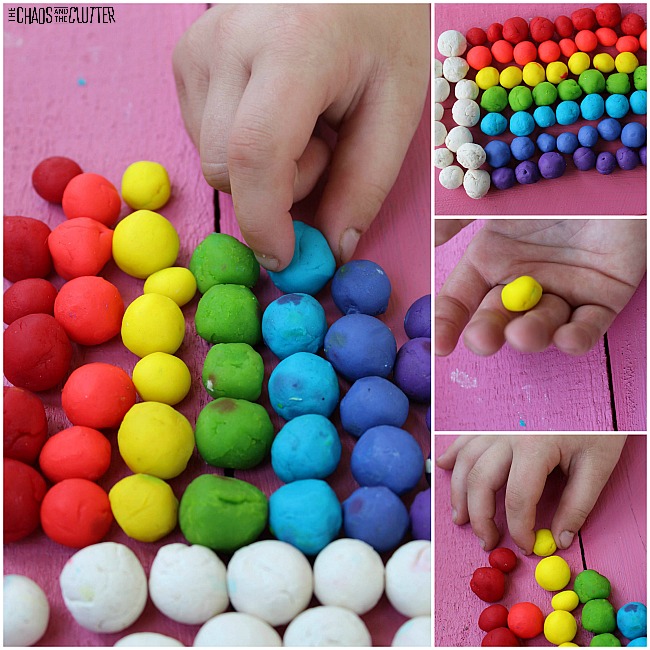
Expand the learning about rainbows. You can create an entire unit study on rainbows in your preschool or homeschool.

Set out books. Invite your child to draw, colour, or paint a rainbow. Watch videos about the science behind a rainbow.

Light: Shadows, Mirrors, and RainbowsLight: Shadows, Mirrors, and RainbowsLight: Shadows, Mirrors, and RainbowsChasing RainbowsChasing RainbowsChasing RainbowsRainbow In My Room Night Light ProjectorRainbow In My Room Night Light ProjectorRainbow In My Room Night Light ProjectorGrimm's Rainbow Wooden Nesting PuzzleGrimm’s Rainbow Wooden Nesting PuzzleGrimm's Rainbow Wooden Nesting PuzzleRainbowRainbowRainbowHow the Crayons Saved the RainbowHow the Crayons Saved the RainbowHow the Crayons Saved the Rainbow

Incorporate other rainbow activities such as these:

Erupting Rainbow Rocks – STEAM Powered Family

Rainbow in a Bag – Powerful Mothering

Math with a Rainbow Abacus – 123 Homeschool 4 Me

Sticky Rainbow Wall – Crafty Morning

Rainbow Salt Tray – Natural Beach Living

You may be interested in some of these activities:

Bath Time Sensory Bin

Seashell Fossils in Playdough

Filed Under: Crafts and Activities Tagged With: sensory play

Fall Leaves Slime

By Sharla Kostelyk

Fall happens to be my favourite season. The colours, the crisp cool air, and the feeling of change and new beginnings are what I love most. This fall leaves slime enables me to bring a bit of that feeling inside.a thumb and pointer finger grab at an orange leaf in a glittery white slime filled with orange and yellow leaves with text that reads "fall leaves slime"
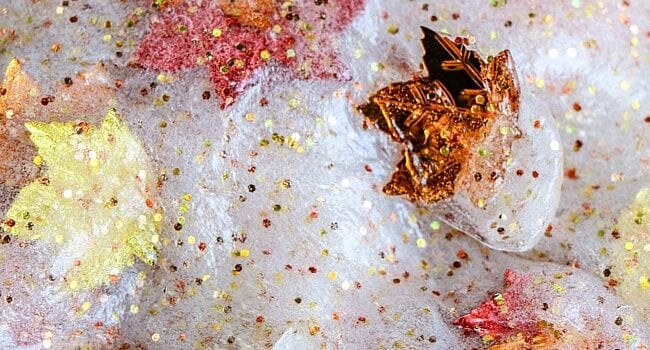
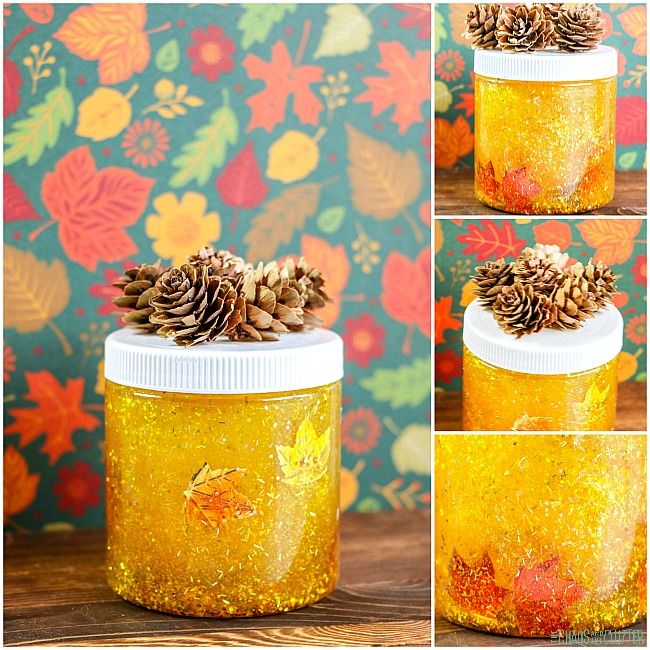
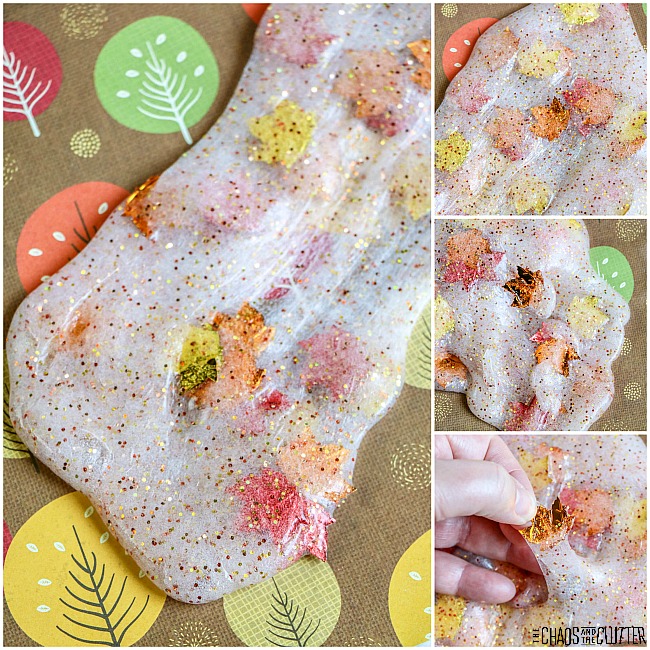
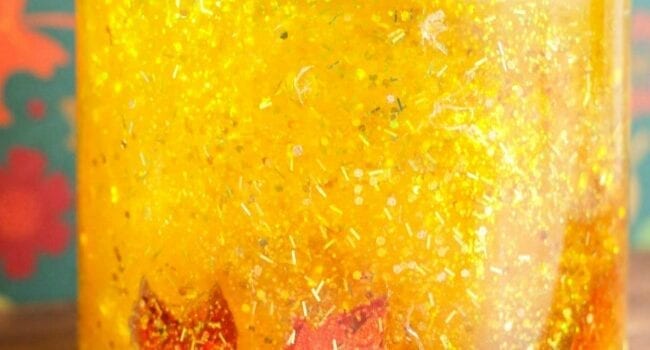
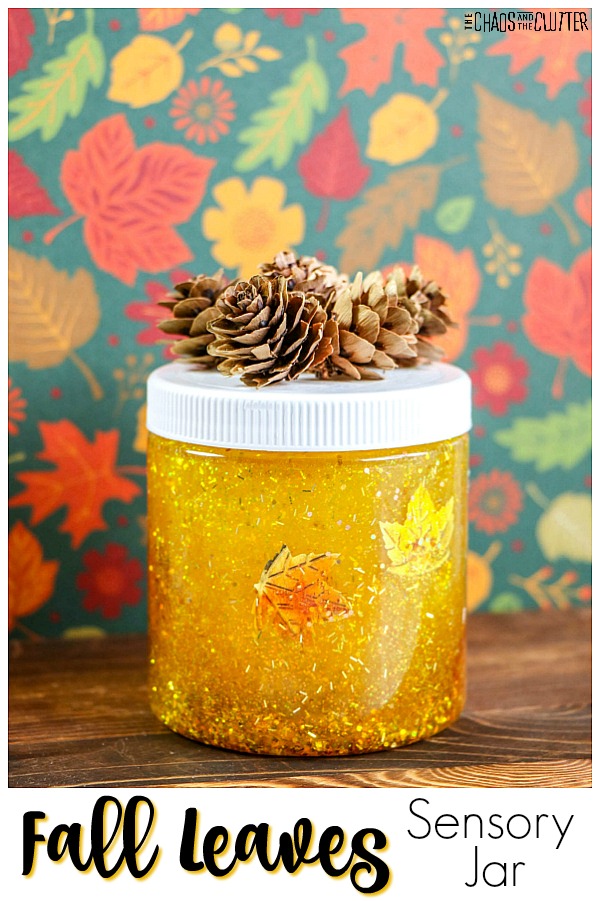
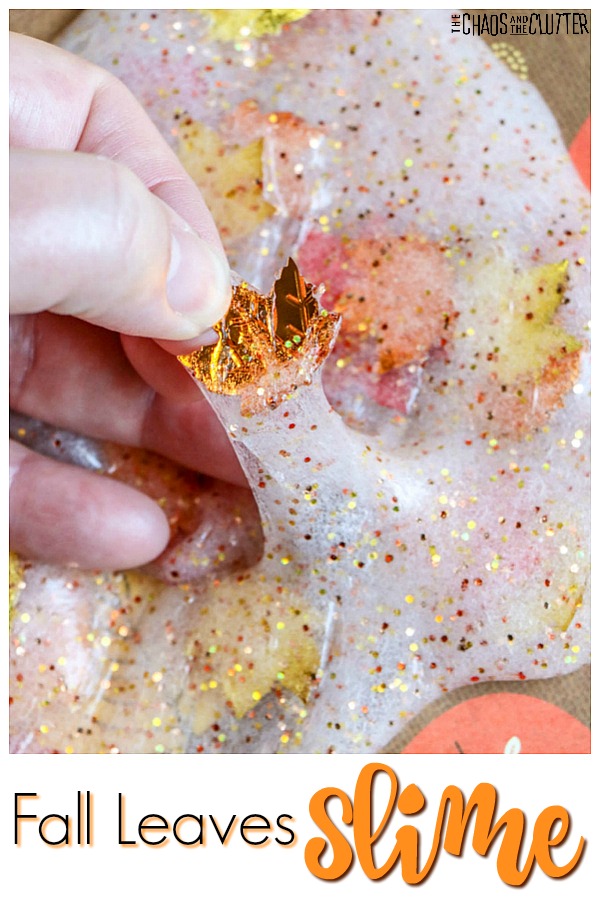
For this slime, I used maple leaf confetti that was leftover from the Fall Leaves Sensory Jar I made. By making both, I was able to get maximum use out of purchasing the confetti.

Slime is great for sensory input. It provides visual and tactile input and with the kneading and stretching, it also gives good proprioceptive feedback. These are an important part of your child’s day and slime provides a fun way to get them in.

Fall Leaves Slime

Supplies:

  • 6 oz. bottle clear Elmer’s Glue
  • approximately ¼ cup warm water
  • ½ tsp. baking soda
  • 1½ Tbsp. contact lens solution (be sure that it contains boric acid)
  • maple leaf foil confetti
  • optional: 1 ½ tablespoon glitter in copper, gold, and red

Directions:

  1. Empty the glue into a large bowl.
  2. Fill the empty glue bottle about ⅓ full with warm water (this will be about ¼ cup) and seal with the lid. Shake well to combine the remaining glue and water. Pour this mixture into the bowl with glue and stir to combine.
  3. Add the baking soda to the glue and mix thoroughly.
  4. If you are adding glitter, stir the glitter into the glue mixture in this step.
  5. Add the contact lens solution to the glue mixture and stir well. Add the contact lens solution slowly, mixing between additions. Only add enough to bring the glue together into a soft ball.
  6. Remove the slime from the bowl allowing any excess liquid to remain in the bowl. The slime will be sticky. Begin to play with the slime, kneading it as you would bread dough to bring the slime together. The slime is ready when it is no longer sticky.
  7. Set the maple leaf foil confetti on top of the slime and knead it in, stretching and pulling until everything is well combined.
  8. Store in an airtight container in the refrigerator when the slime isn’t being played with.

For a different look, you could also make this slime with glitter glue in place of the regular glue. This will create an entirely new look.

You may also be interested in these fall slimes and sensory activities:

Fall Leaves Sensory Jar

Simple Hallowe’en Glitter Slime

Pumpkin Scented Puffy Paint

Easy Fall Sensory Bottle

Filed Under: Sensory Tagged With: sensory play, slime

Fall Leaves Sensory Jar

By Sharla Kostelyk

This fall leaves sensory jar can be for sensory exploration or as an autumn decoration or both. Bring the colour and feel of the season inside.a jar is filled with a glittery yellow mixture with foil leaves visible in it. The lid is white with pine cones on top with a background of leaves in multiple colours with text that reads "Fall Leaves Sensory Jar"
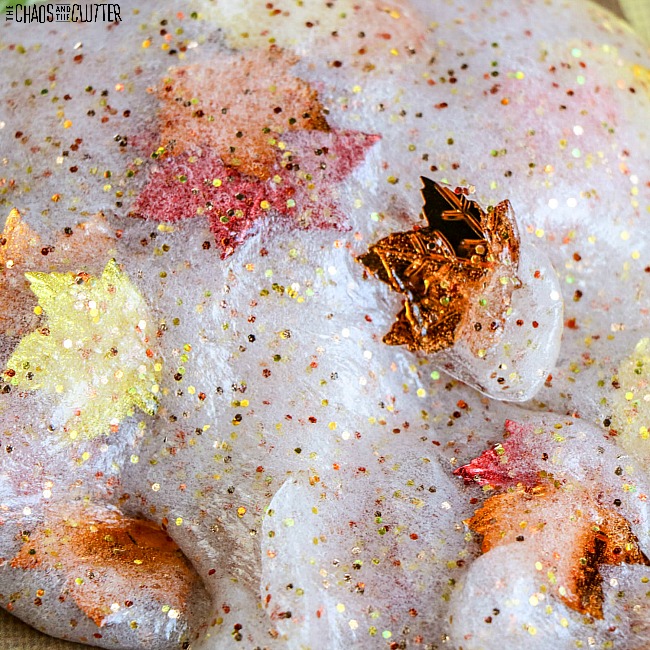
While we normally make sensory bottles in all kinds of themes, I thought a sensory jar might be a nice change. The size allows it to sit nicely on a mantle or counter as a decoration when it’s not being used as a sensory toy.

Fall Leaves Sensory Jar

Supplies:

  • 8 oz. plastic storage jar
  • 6 oz. bottle Elmer’s yellow glitter glue
  • approximately ½ cup warm water
  • 1 Tbsp. maple leaf foil confetti
  • optional: seasonal cupcake liner, washi tape, duct tape, or pine cones for decoration

Directions:

  1. Empty the yellow glitter glue into the jar.
  2. Fill the empty glue bottle about half full with warm water (about ¼ cup) and seal with the lid. Shake well to combine the remaining glue with the water. Pour into jar with the glue and stir to combine.
  3. Add the maple leaf confetti.
  4. Seal the jar and shake well. If the glitter or confetti don’t move easily, you can add more warm water. If the glitter or confetti move too quickly, you can add additional glue.
  5. When you’ve got things looking the way you want them to, seal the jar and glue the lid closed to avoid spills.
  6. If you want to, you can cover the lid with a cupcake liner, washi tape, seasonal duct tape, or other decoration. If you want to achieve the look of ours, use a hot glue gun to attach pine cones to the lid.

Note that supervision should be used when giving this jar to children as they will be able to get the lid off and that could make quite a mess! You also don’t want kids eating the contents of this jar so be sure to keep an eye on them with it.

You may be interested in some of other Fall themed sensory play activities:

Easy Fall Sensory Bag

Pumpkin Pie Scented Cloud Doughin a red plastic bin, light almost white cloud dough is sprinkled with fall coloured plastic leaves and small metallic leaf shaped confetti. There is also a metal scoop in the corner.

Fall Leaves Slime

Filed Under: Sensory Tagged With: sensory bottles, sensory play

How to Work Through Emotions with Your Toddler

there is a white couch with a pink pillow in the background. A blonde mom kneels in front holding her young son on her lap with her arms around him. The text reads "How to Work Through Emotions with Your Toddler"

By Sharla Kostelyk

Have you ever thought about how emotional your toddler can be? Toddlers are some of the most emotional creatures out there. Working through emotions with your toddler takes patience. It can help to remember that toddlers are new to this whole emotion thing and they don’t always know how to navigate those feelings, especially the big ones.there is a white couch with a pink pillow in the background. A blonde mom kneels in front holding her young son on her lap with her arms around him. The text reads "How to Work Through Emotions with Your Toddler"

Understanding Toddlers & Their Emotions

Having emotions is a part of being human. We may not always like the emotions that are coming out of our toddler or how they are being expressed, but that doesn’t make their emotions less important. Teaching a toddler to work through their emotions is one of the best parenting moves we can make. Here is how to work through emotions with your toddler:

Acknowledge How Your Toddler Feels

As an adult, you can define your feelings. Toddlers cannot always do that. When your toddler is sad, happy, mad, or upset – help them to acknowledge those feelings. When they can start understanding how they feel, this is a big deal! Don’t try and talk them out of how they feel. Help give them the vocabulary to be able to begin to express their emotions.

Give Your Toddler Tools to Work Through Emotions

Helping your toddler through their emotions can seem like a never ending task. However, they are looking to you to help them through this time period.

You’ll need to guide them through this. For example, if your toddler is mad, give them the tools to help them express their “madness.” Let them draw or even go outside and run around. Toddlers are often too young to be able to use words effectively to express themselves, so using their bodies in ways such as dancing, miming, marching, crawling, painting, or using sensory play.

Another tool that can be helpful with young children is to use puppets, dolls, or stuffed animals to act out different scenarios and the simple emotions and responses that would go along with those emotions.

It’s vital that we give our children tools to help them express their emotions and work through them.

Talk to Your Toddler About Their Emotions

Reassure your child that it is normal and healthy to have feelings. If a toddler is feeling happy or mad, talk to them about these emotions. When someone is happy, they are usually laughing, smiling, and carefree. When a person is mad, they may have a “frownie face” and they aren’t always easy to cheer up.

By talking to your child about their emotions, they start to recognize their own emotions and they will start saying “I am so happy.” “I am sad today.” It’s an amazing feeling to watch a toddler start to understand their emotions. You can use a chart to help them identify the emotion they are feeling at that time.

Practice Patience as You Help Your Toddler with Their Emotions

Sometimes when our toddler hits someone or has a tantrum, it can invoke anger in us. As parents, it’s vital that we don’t let our toddler’s emotions become our emotions. Parenting calmly and patiently is going to teach your child more an angry reaction ever will. That’s easier said than done, but so critical.

As parents, we are the people our children will learn from the most. If we’re struggling with our own emotions, we can’t effectively help them. If you find yourself struggling with anger, frustration, or negative behaviours in response to your emotions, it’s wise to seek counselling before you try and coach your toddler with their emotions.

How Do I Help a Toddler Through Their Emotions?

Now that you have some tips for helping a toddler through their emotions, you may need a few practical ideas you can apply to the situation.

  • Encourage your child.
  • Give your child praise.
  • Get your child on a good routine with mealtimes and bedtimes.
  • Help your child know what to do when they have emotions.
  • Let your toddler know that it is going to be okay.

How Can I Help My Child Express Their Feelings?

Expressing emotions is important and toddlers need to know how to express theirs. Here are some tips for helping your toddler express their emotions.

  • Listen to them as they talk.
  • Let them talk about their feelings.
  • Help them find a way to express those emotions (painting, a sport, dancing, breathing).
  • Talk about different feelings and words to describe those feelings.

Working through emotions with your toddler won’t stop when they’re 2, 3, or 4. You’ll need to help your child through different emotions at different ages. However, being a toddler is difficult because they don’t always have the right words or maturity to work through emotions.

What tips do you have for helping toddlers work through their emotions?

Join thousands of other people who have found help in our free 5 part email series, Little Hearts, Big Worries offering resources and hope for parents.

You may also be interested in reading these articles:

5 Things to Say to Your Anxious Toddler

Calming Your Child’s Fight, Flight, or Freeze Response

Filed Under: Parenting in the Chaos

  • « Go to Previous Page
  • Page 1
  • Interim pages omitted …
  • Page 33
  • Page 34
  • Page 35
  • Page 36
  • Page 37
  • Interim pages omitted …
  • Page 128
  • Go to Next Page »

Primary Sidebar

Categories

We are a participant in the Amazon Services LLC Associates Program, an affiliate advertising program designed to provide a means for us to earn fees by linking to Amazon.com and affiliated sites.

Copyright © 2026 • The Chaos and the Clutter • Site Design by Jeni @ The Blog Maven

Return to top of page

Copyright © 2026 · Chaos and the Clutter 2.0 on Genesis Framework · WordPress · Log in