• Skip to primary navigation
  • Skip to main content
  • Skip to primary sidebar
  • Home
  • About
  • Contact
  • Privacy + Terms
  • Affiliates

The Chaos and the Clutter

  • Facebook
  • Twitter
  • Pinterest
  • Google Plus
  • RSS
  • Email
  • School at Home
  • Sensory
    • Sensory Processing Disorder
    • Awesome Sensory Play Activities
      • Sensory Bins
      • Sensory Bottles
      • Sensory Bags
  • Family Games
    • Minute to Win It Games
  • Special Needs Parenting
    • Childhood Anxiety
    • Reactive Attachment Disorder
    • Sensory Processing Disorder
  • Store
  • Course Login

sensory bottles

Thanksgiving Sensory Bottle

By Sharla Kostelyk

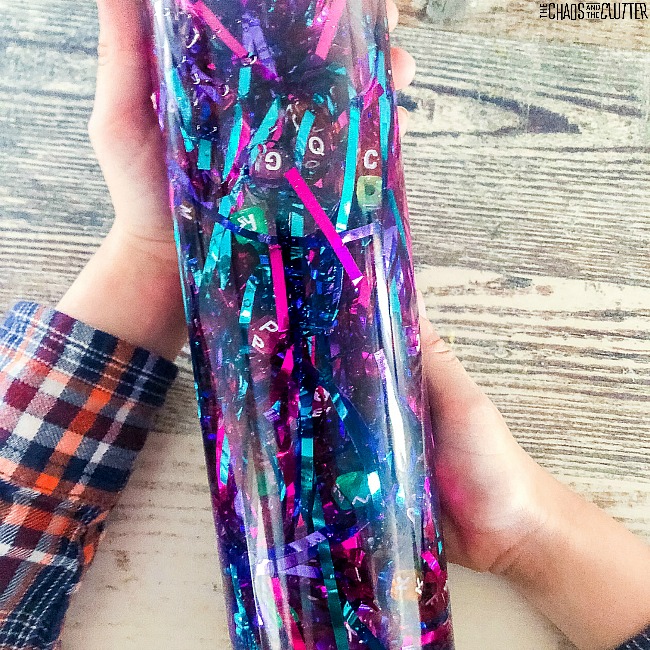
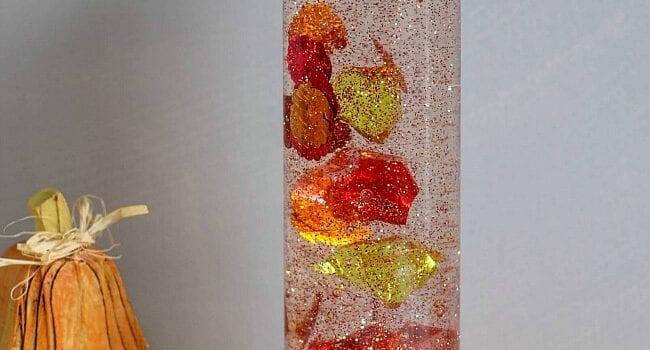
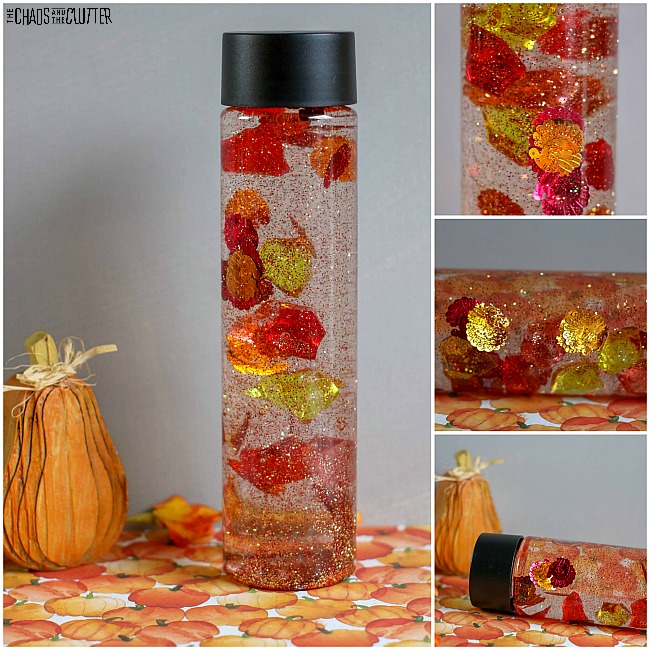
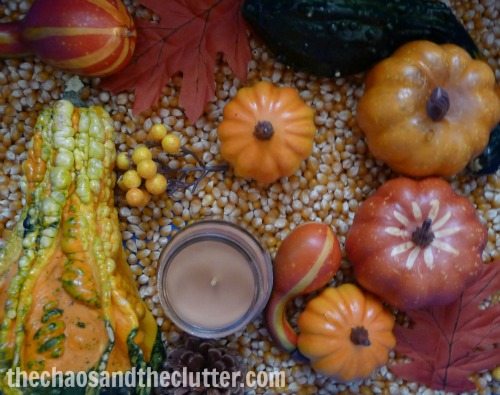
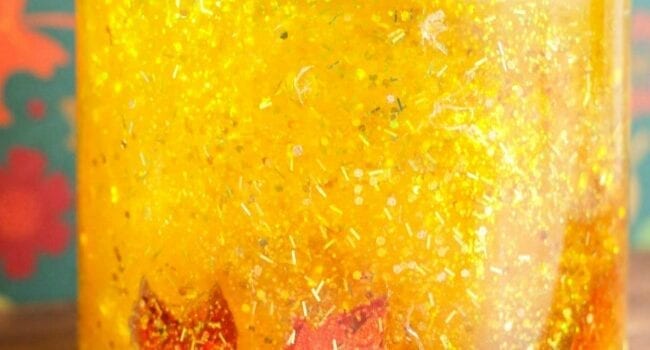
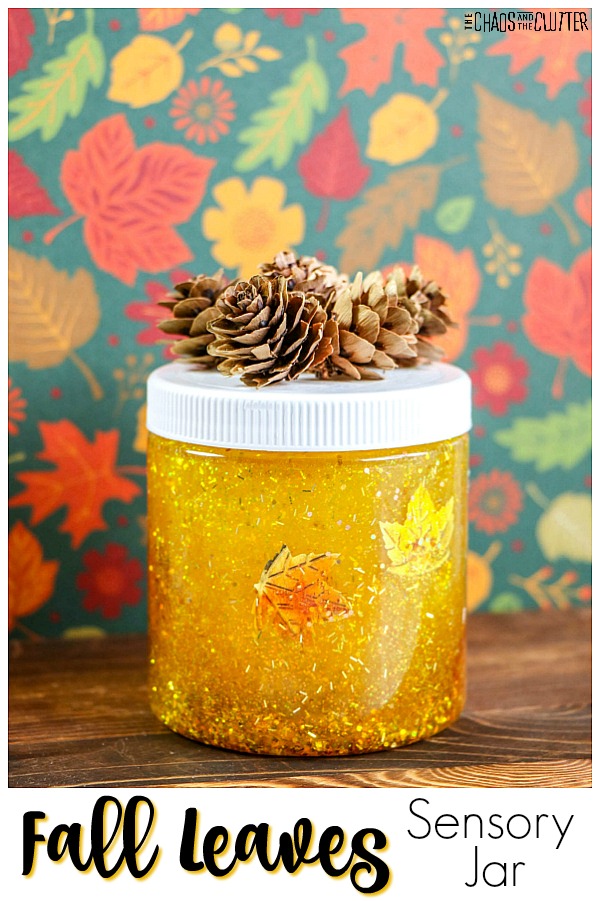
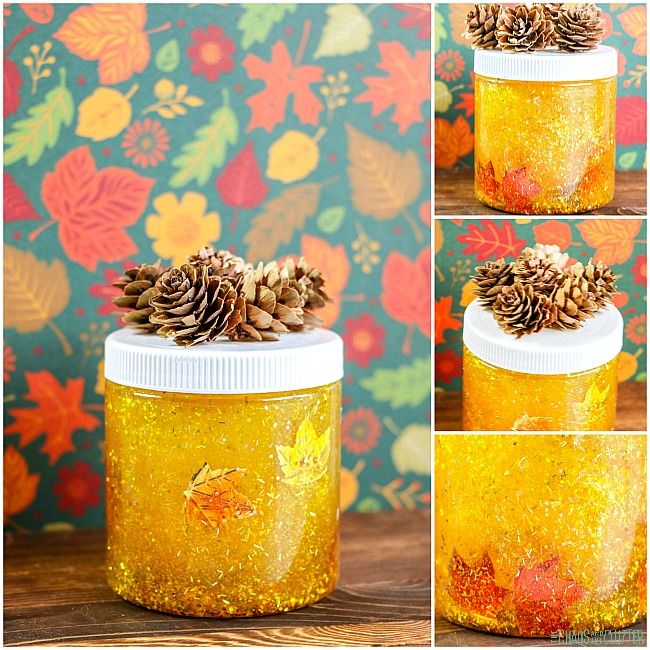
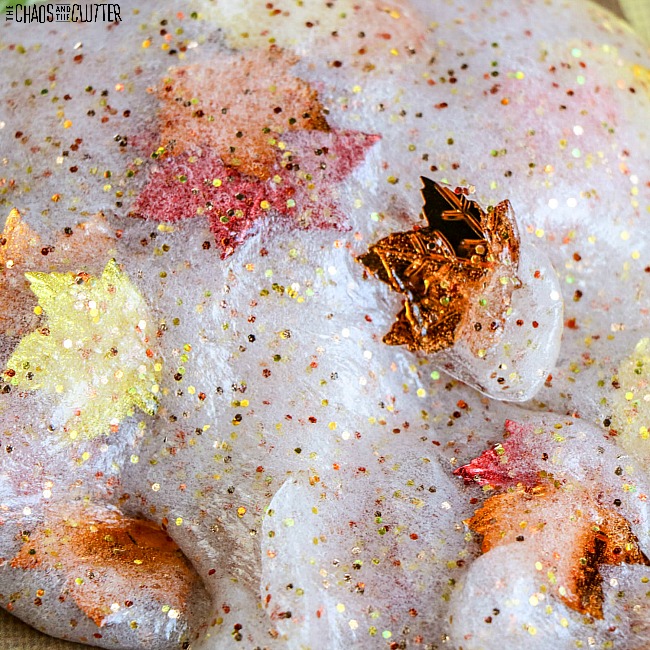
It’s easy to create a Thanksgiving sensory bottle for your child. You’ll capture the holiday as well as the fall season all in one bottle. I love the colours at this time of year. I think that’s one of the reasons that I find this bottle so pretty.

bottle filled with clear liquid and red, orange and yellow glitter turkeys next to an orange gourd with text that reads "Thanksgiving Sensory Bottle"
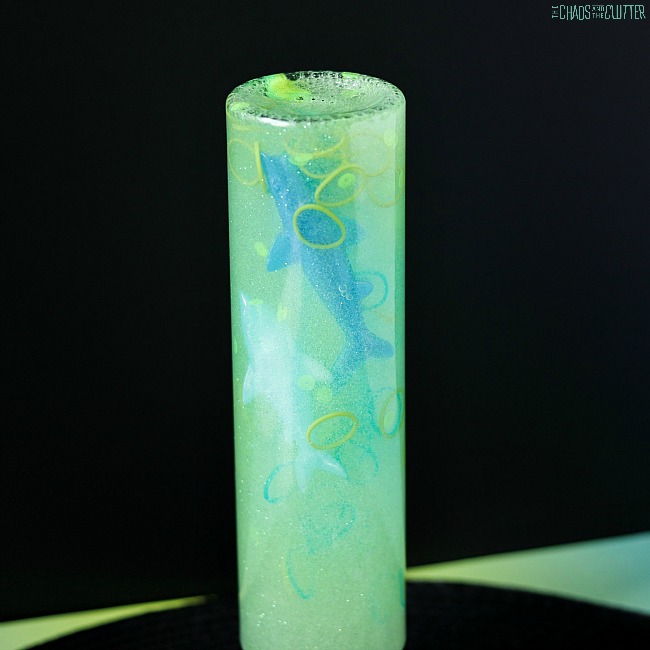
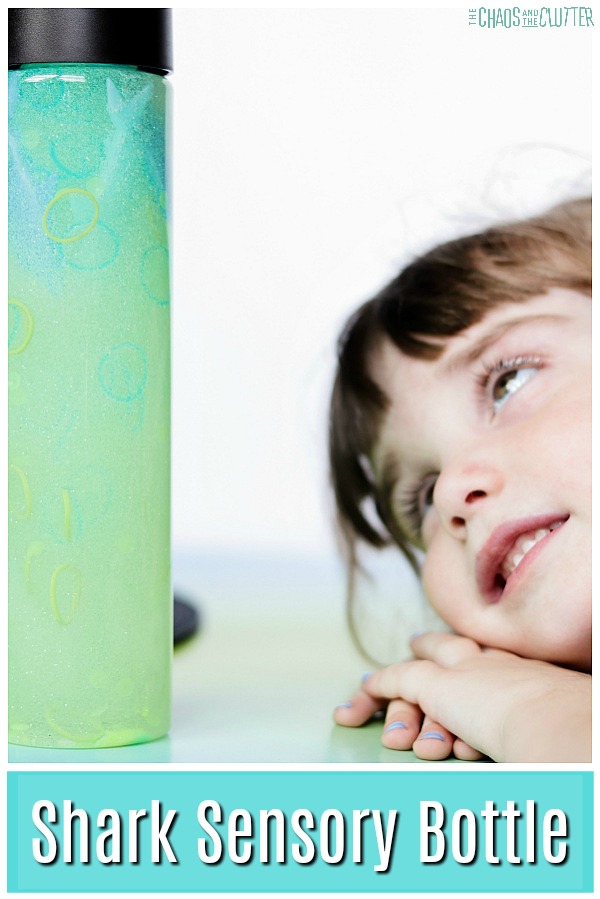
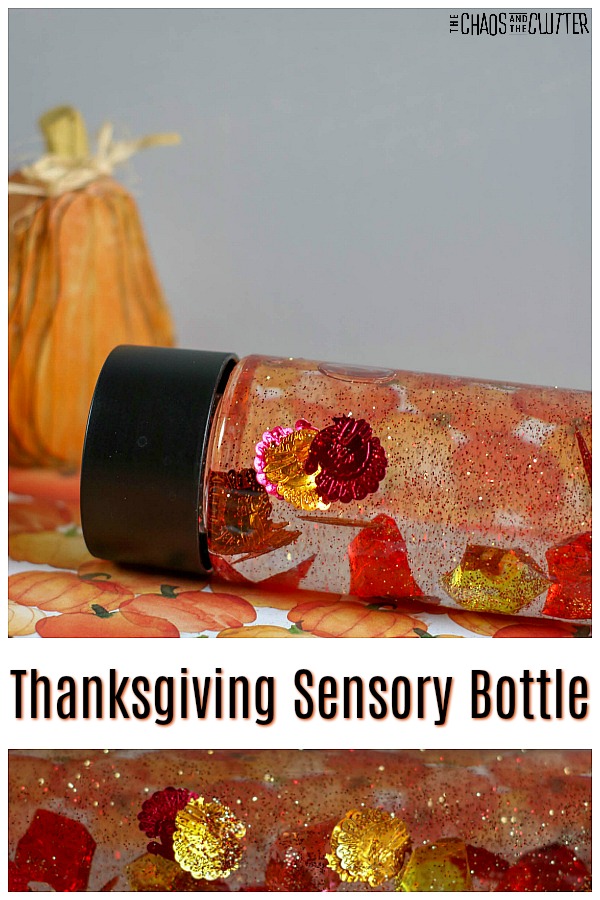
A sensory bottle can help kids self-regulate. The calm down type are particularly effective and this is one of those. Kids can watch the glitter and confetti slowly drop and as they focus on that, their breathing begins to regulate. It’s like magic!

Thanksgiving Sensory Bottle:

Supplies needed:

  • plastic bottle or empty plastic water bottle
  • 5 oz. bottle of Elmer’s clear school Glue
  • warm water
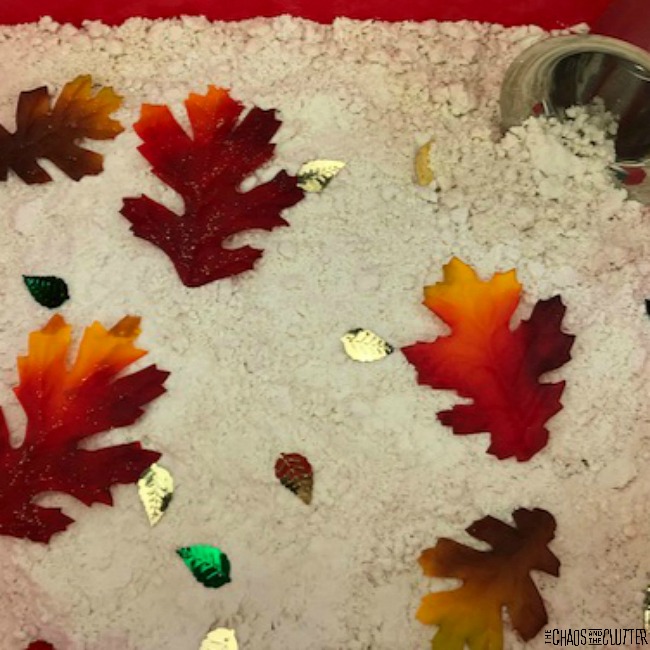
  • approximately 1 Tbsp. glitter and Thanksgiving confetti
  • optional: glass beads in clear, yellow, or orange
  • optional: hot glue

Directions:

  1. Empty the bottle of glue into bottle.
  2. Fill the empty glue bottle about half full with warm water and reseal with the lid. Shake well to combine the remaining glue with the water. Pour into the bottle with glue and shake to combine.
  3. Add the glitter and Thanksgiving confetti into the glue mixture.
  4. Drop in a few glass beads if you want.
  5. Seal the jar and shake well. If the glitter or confetti do not move easily, add more warm water. If the glitter and confetti moves too quickly, add additional glue. You’ll achieve more of a calm down bottle effect if there is more glue.
  6. When the contents of the bottle move according to your preference, seal the bottle.
  7. Hot glue the lid closed to avoid spills.

As with all sensory activities, adult supervision should be used at all times.

I like to add the glass beads myself. I like the way they create an auditory component. Because they are heavier, they drop to the bottom right away and create a “plunk” sound. 
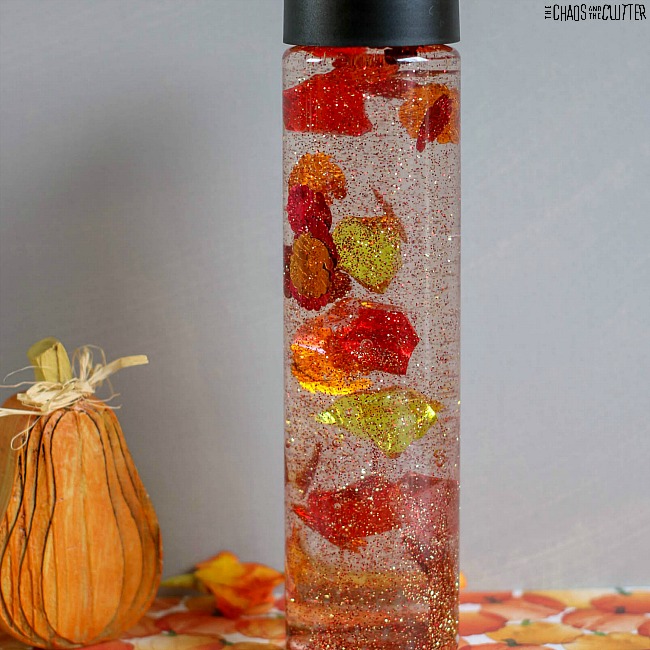
This activity provides visual, tactile, and proprioceptive sensory input and if using the glass beads, auditory sensory input as well.

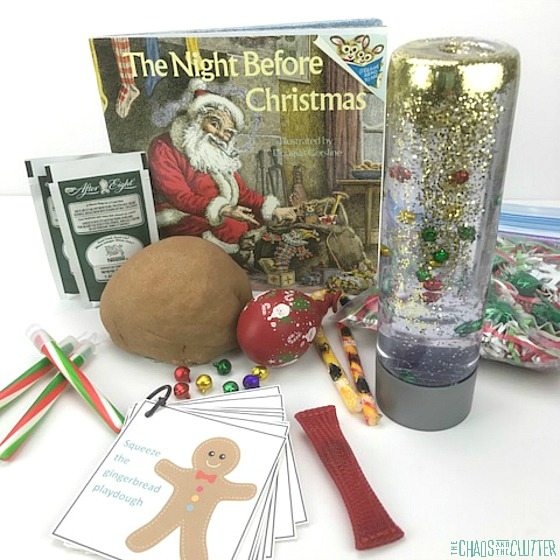
Looking for more great sensory ideas? Join for a five day email series on Sensory Activities and Solutions and get a free sample of our Sensory Play Recipes eBook.

You might also like these Thanksgiving activities:

Thanksgiving Sensory Bin

Filed Under: Sensory Tagged With: sensory bottles, sensory play

Christmas Tree Sensory Bottle

By Sharla Kostelyk

The holidays can be a challenging time for kids. They are off schedule and the excitement can be too much for some kids. Enter the simple calm down bottle. This easy Christmas tree sensory bottle can be an effective calm down tool for kids.

bottle filled with clear liquid and floating red and green tree confetti and glitter with green pine near and text that reads "Christmas Tree Sensory Bottle"
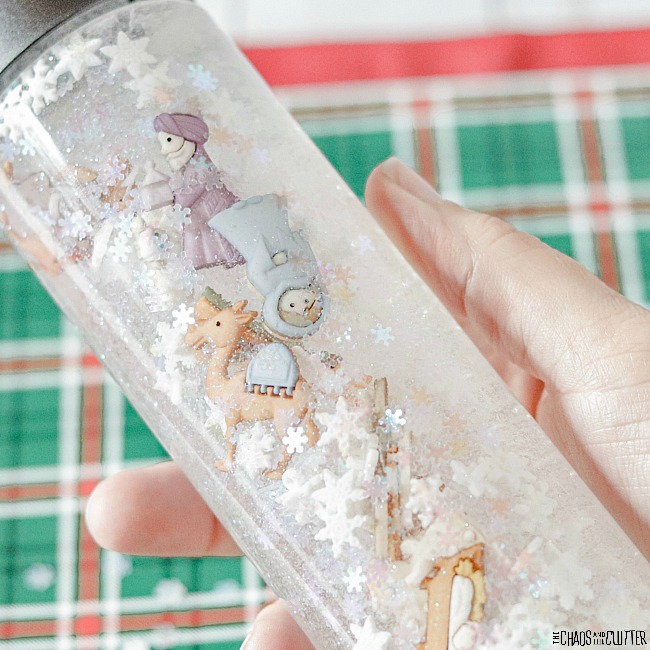
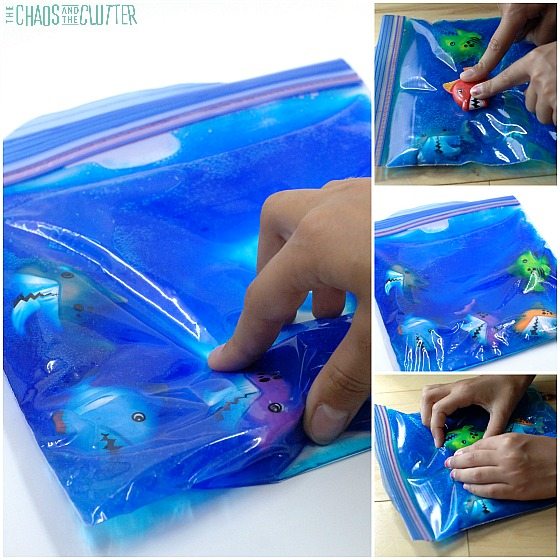
You can include this sensory bottle in your child’s Christmas Calm Down Kit. As the glitter and confetti fall slowly through the bottle, watching it creates a calming effect. Adding more glue slows the rate at which it falls.

Christmas Tree Sensory Bottle:

Supplies needed:

  • plastic sensory bottle or empty water bottle
  • 5 oz. bottle clear Elmer’s school glue (or more if you want the glitter and confetti to fall more slowly)
  • warm water
  • 1 Tbsp. glitter and Christmas tree confetti
  • optional: hot glue and/or holiday duct tape

Directions:

  1. Empty the bottle of glue into the plastic bottle.
  2. Fill the empty glue bottle about half full with warm water and place the lid back on. Shake well to combine the remaining glue with the water.
  3. Pour into the sensory bottle, place the lid on that and shake to combine.
  4. Add the glitter in the colour of your choice and holiday confetti into the glue mixture.
  5. Reseal the jar and shake well. If the glitter or confetti does not move easily, add more warm water. If the glitter or confetti moves through the liquid too quickly, add additional glue. To create a calm down effect, you’ll want it to move slowly through the bottle.
  6. If younger kids will be playing with it, secure the lid with hot glue.
  7. If desired, cover the lid with seasonal duct tape.

Adult supervision should be used with this or any other sensory play activity.

You will also be interested in checking these out:

Christmas Calm Down Kit for Kids

Nativity Sensory Bottle

Melted Snowman Sensory Bottle

I-Spy Christmas Sensory Bag

Filed Under: Christmas, Sensory Tagged With: sensory bottles, sensory play

Fall Leaves Sensory Jar

By Sharla Kostelyk

This fall leaves sensory jar can be for sensory exploration or as an autumn decoration or both. Bring the colour and feel of the season inside.a jar is filled with a glittery yellow mixture with foil leaves visible in it. The lid is white with pine cones on top with a background of leaves in multiple colours with text that reads "Fall Leaves Sensory Jar"
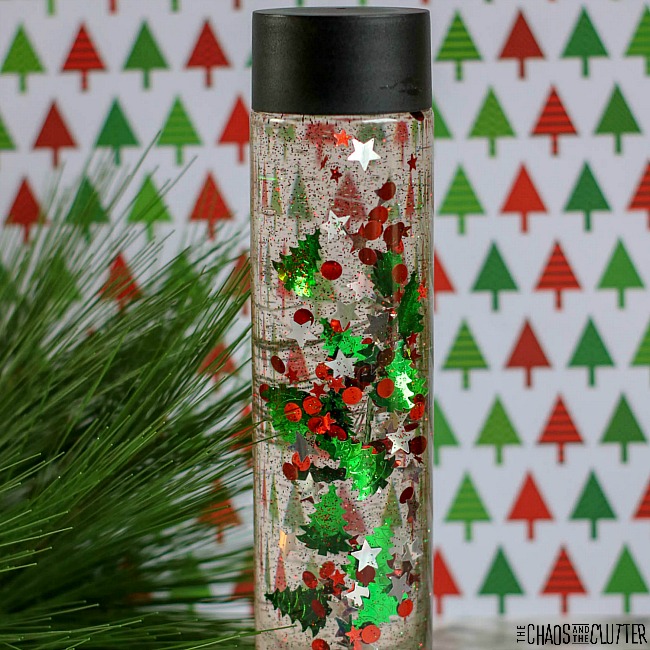
While we normally make sensory bottles in all kinds of themes, I thought a sensory jar might be a nice change. The size allows it to sit nicely on a mantle or counter as a decoration when it’s not being used as a sensory toy.

Fall Leaves Sensory Jar

Supplies:

  • 8 oz. plastic storage jar
  • 6 oz. bottle Elmer’s yellow glitter glue
  • approximately ½ cup warm water
  • 1 Tbsp. maple leaf foil confetti
  • optional: seasonal cupcake liner, washi tape, duct tape, or pine cones for decoration

Directions:

  1. Empty the yellow glitter glue into the jar.
  2. Fill the empty glue bottle about half full with warm water (about ¼ cup) and seal with the lid. Shake well to combine the remaining glue with the water. Pour into jar with the glue and stir to combine.
  3. Add the maple leaf confetti.
  4. Seal the jar and shake well. If the glitter or confetti don’t move easily, you can add more warm water. If the glitter or confetti move too quickly, you can add additional glue.
  5. When you’ve got things looking the way you want them to, seal the jar and glue the lid closed to avoid spills.
  6. If you want to, you can cover the lid with a cupcake liner, washi tape, seasonal duct tape, or other decoration. If you want to achieve the look of ours, use a hot glue gun to attach pine cones to the lid.

Note that supervision should be used when giving this jar to children as they will be able to get the lid off and that could make quite a mess! You also don’t want kids eating the contents of this jar so be sure to keep an eye on them with it.

You may be interested in some of other Fall themed sensory play activities:

Easy Fall Sensory Bag

Pumpkin Pie Scented Cloud Doughin a red plastic bin, light almost white cloud dough is sprinkled with fall coloured plastic leaves and small metallic leaf shaped confetti. There is also a metal scoop in the corner.

Fall Leaves Slime

Filed Under: Sensory Tagged With: sensory bottles, sensory play

At the Beach Nature Sensory Bottle

By Sharla Kostelyk

It’s so easy to create this At the Beach Nature Sensory Bottle. It makes a great memento of a tropical or beach vacation too. You can gather the items while on holiday and bring the bottle home with you to remember the trip by. a bottle half filled with white sand, seashells, green seaweed, and a seagull feather sits on a distressed paint table with a few larger seashells. The text reads "At the Beach Nature Sensory Bottle"

I love that this discovery bottle uses things found in nature. Just like our Seashell Fossils in Playdough activity, this allows kids to explore using their senses and items they found themselves.

At the Beach Nature Sensory Bottle:

Supplies:

  • empty water bottle (I like the look of Voss bottles, but you can also purchase these empty sensory bottles)
  • seashells
  • sand
  • seagull feathers
  • seaweed
  • optional: super glue to seal the bottle cap

Directions:

  1. Take a walk on the beach to collect the items you want to include in the sensory bottle.
  2. Wash the items (other than the sand) and lay them out on paper towels to dry. Be sure they are fully dry before adding them.
  3. Pour sand into the bottle until it is 1/4 to 1/3 of the way full. You can use a funnel to make this easier.*
  4. Drop in small seashells, small sand dollars, seaweed, and feathers. You could also add small driftwood or rocks found on your walk.

*If you are on vacation and don’t have a funnel with you (because who brings a funnel on vacation?!), you can roll up a piece of paper into a funnel and pour the sand through that.

You can keep your creation as a keepsake from your vacation. You can use a permanent marker to write the location and year on the bottle and display it in your home.

Sensory and Learning Opportunities:

Sensory: This sensory play activity begins with the walk along the beach. The feel of the sand under their feet, the wind on their skin, the sound of the waves, the smell of the sea all engage the senses.

The experience continues with adding the collected items to the bottle. This beach sensory bottle involves the visual and tactile sensory systems and during the walk, the olfactory and auditory systems. 
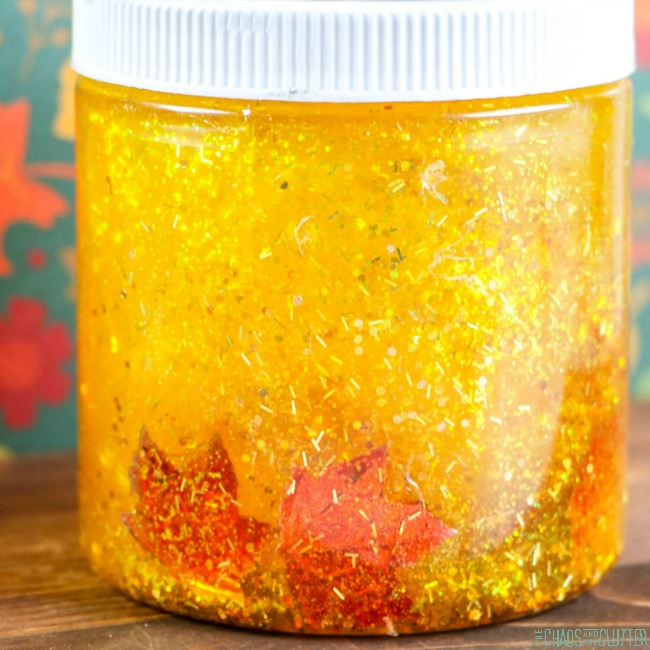
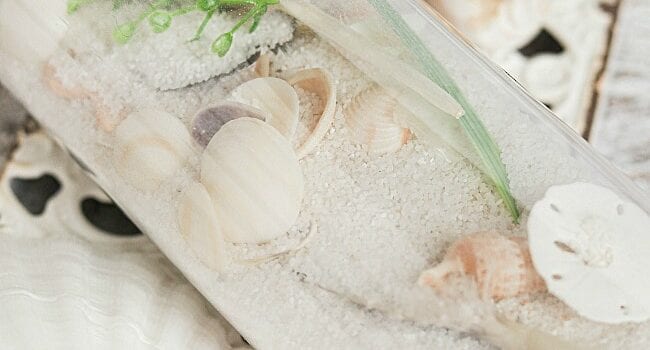
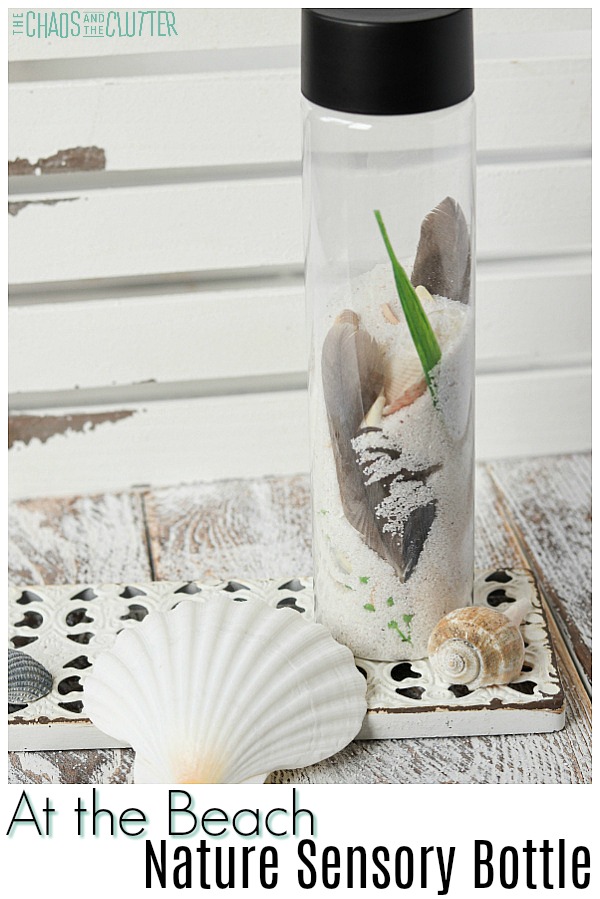
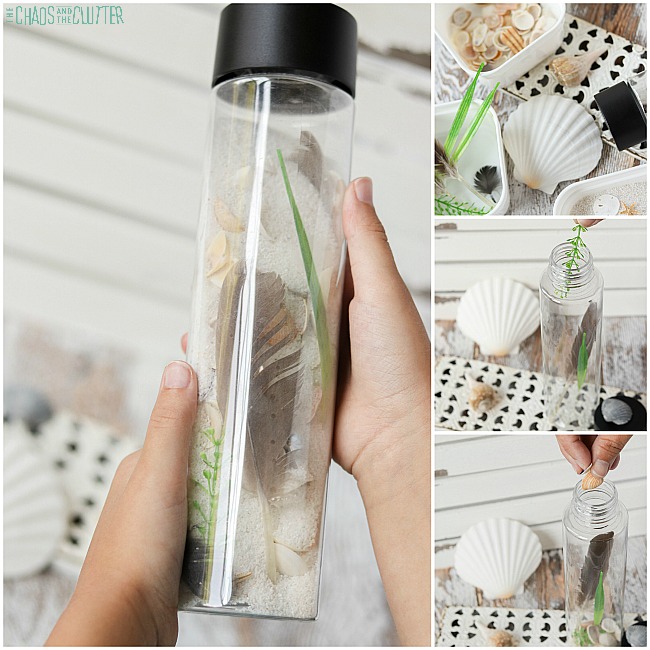
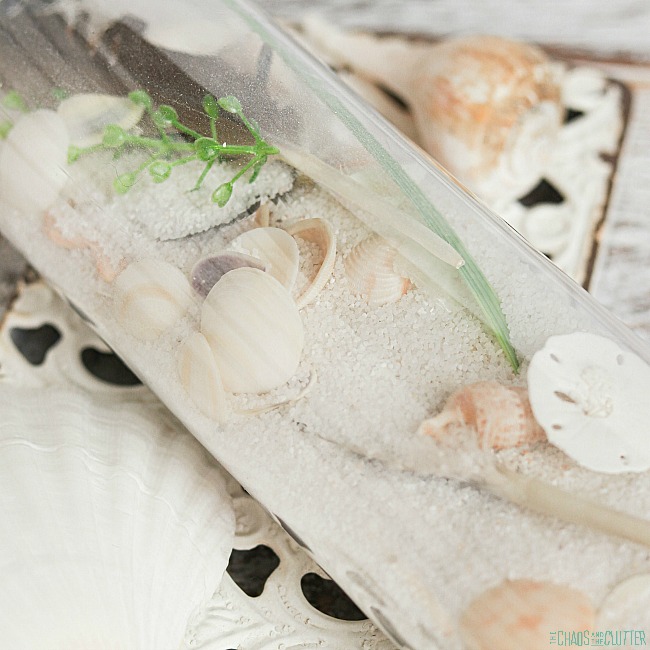
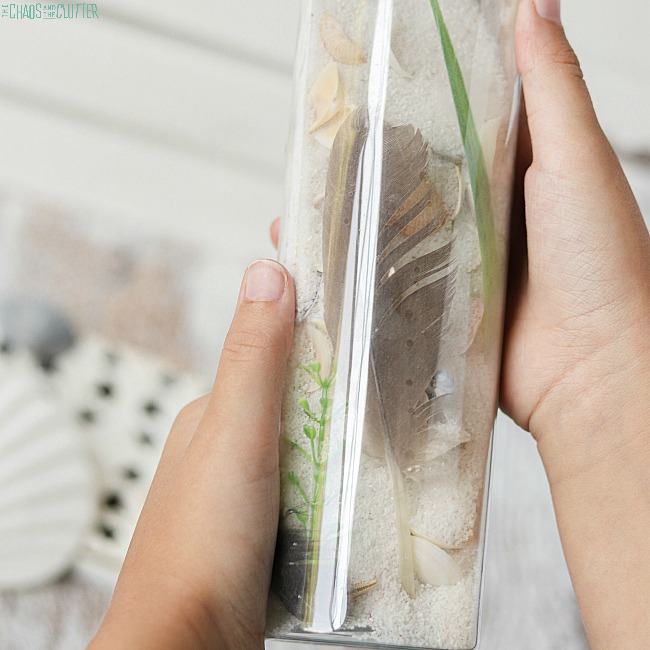
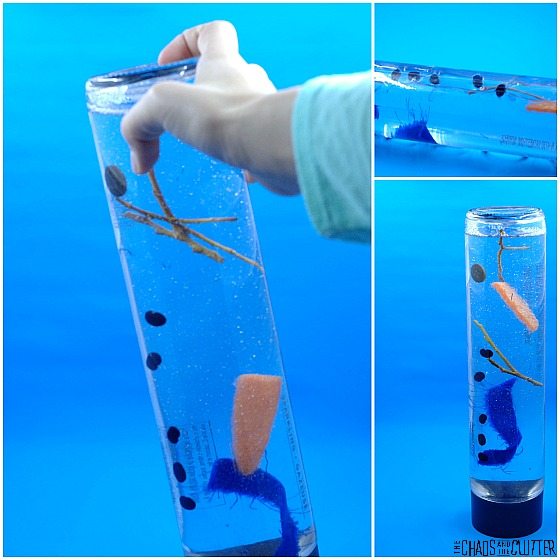
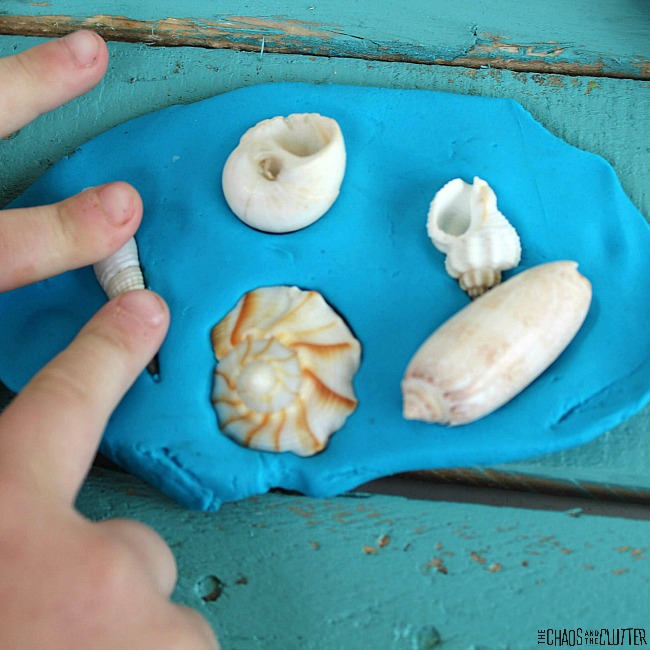
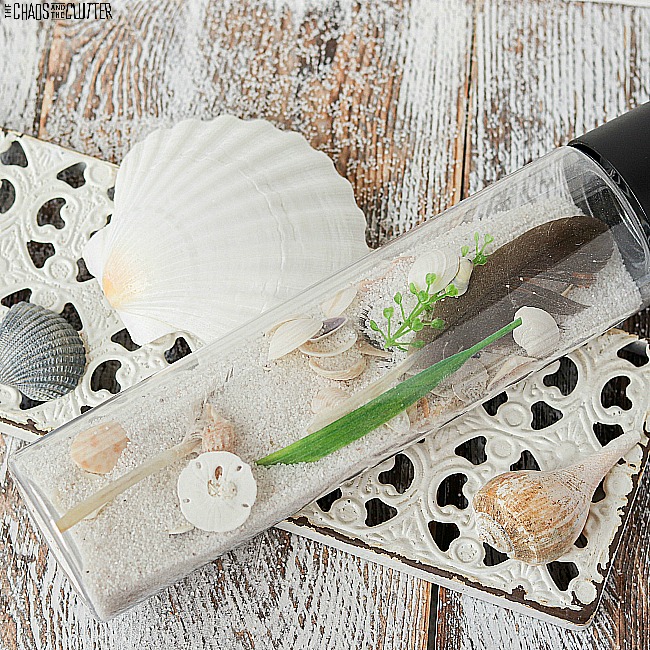
Science: This activity encourages children to explore the world as they get up close to the beach. You can expand on what they learn by providing books about sea life and seashells so that they can discover what animals lived in the shells at one time.

Children can use the books or the internet as a reference for reading about how sand is made, the benefits of eating seaweed, or any other questions they have about the beach or the ocean. Here are some books that would fit well:

The Beachcomber's CompanionThe Beachcomber’s CompanionThe Beachcomber's CompanionSeashells, Crabs and Sea StarsSeashells, Crabs and Sea StarsSeashells, Crabs and Sea StarsShells HandbookShells HandbookShells Handbook

Communication: Kids can expand their vocabulary as they learn about the ocean, sea life, and the beach on their walk. They can further that discussion when filling the bottle and exploring it afterwards. This gives them the opportunity to ask questions and to talk about their discoveries.

Other sensory play ideas using things found in nature:

Seashell Fossils in Playdough

Nature Sensory Bottle

Outdoor Sensory Scavenger Hunt

Nature Weavingnature weaving step by step


Filed Under: Sensory Tagged With: sensory bottles, sensory play

Shark Week Sensory Bottle

By Sharla Kostelyk

Celebrate Shark Week with this Shark Week Sensory Bottle. Kids are fascinated by sharks. They will enjoy the discovery using this sensory activity.

a bottle filled with aqua green liquid, plastic blue sharks, elastics, and glitter is on a black background. The text reads "Shark Sensory Bottle"

We have made several shark sensory play opportunities over the years including our shark sensory bag and edible shark slime.

What is Shark Week?

Shark Week has become so much more than TV shows on Discovery Channel. It originally began on July 17, 1988 and has grown increasingly in popularity since. It is designed to expand knowledge about sharks and therefore, lead to conservation efforts.

Shark Week is now celebrated through TV specials and activities. It has become so popular in fact that a hospital in Cincinnati began dressing its newborns in Baby Shark onesies in honour of Shark Week!

There are worksheets, crafts, themed camps, parties, recipes, and sensory activities. It seems that many countries have embraced the opportunity to learn about this animal. We decided to get in on this ourselves with this sensory bottle.

When is Shark Week?

Shark Week generally starts on a Sunday and takes place at the end of July or beginning of August. This year, it begins on July 28, 2019.

Shark Week Sensory Bottle:

Supplies:

  • empty water bottle (I like the look of Voss bottles, but you can also purchase these empty sensory bottles)
  • clear dish soap (I prefer Dawn or LemiShine because they are very thick)
  • shark figurines (these ones are from Dollar Tree and are stretchy)
  • green and yellow glitter
  • yellow sequins
  • green and teal small elastics (use those leftover rainbow loom ones!)
  • optional: super glue to seal the bottle cap

Directions:

  1. Pour clear dish soap into the container until it’s about 2/3 full.
  2. Add beads, sequins, glitter, mini elastic bands, and shark figurines.
  3. Fill the remaining space with water.
  4. If you’re going to be using this sensory bottle with small children, I suggest that you secure the lid by using Super Glue and allowing it to dry before allowing a child to play with it.

Small parts are contained in this bottle, so even if you secure the lid with glue, use adult supervision at all times.

Sensory and Learning Opportunities:

This sensory bottle is a great way for kids to become interested in learning more about sharks. They can watch the sharks “swim” and observe the different characteristics that they have.

Set out books about sharks for kids to further their interest. This will enable them to learn and ask questions.

Super Shark Encyclopedia: And Other Creatures of the DeepSuper Shark Encyclopedia: And Other Creatures of the DeepSuper Shark Encyclopedia: And Other Creatures of the DeepThe Ultimate Book of Sharks (National Geographic Kids)The Ultimate Book of Sharks (National Geographic Kids)The Ultimate Book of Sharks (National Geographic Kids)How to Draw Incredible Sharks and Other Ocean GiantsHow to Draw Incredible Sharks and Other Ocean GiantsHow to Draw Incredible Sharks and Other Ocean Giants

This would correspond well with a shark or ocean themed unit in your classroom or homeschool.

Visual sensory input occurs while your child uses their eyes to explore what is in the bottle and the way that it moves. They also engage their tactile sensory system in holding the bottle, shaking it, and tipping it upside down.

Check out these other shark sensory activities!

Squishy Shark Sensory Bag

Taste Safe Shark Fluffy Slime

Filed Under: Sensory Tagged With: sensory bottles, sensory play

Bugs Sensory Bottle

By Sharla Kostelyk

This bugs sensory bottle is almost too beautiful to play with! The colours are very inviting. Kids are generally fascinated with insects. This is a great vehicle for that.

the top image shows a bottle filled with green and blue. In the bottom image, a magnifying glass shows a black plastic spider inside the bottle. The words "Insect sensory bottle" are in text. An arrow points to the bottle with the words "kids can discover and explore".

Bugs Sensory Bottle:

Supplies needed:

  • Voss style empty water bottle
  • clear dish soap*
  • small plastic bugs
  • spider ring
  • yellow and green glitter
  • various types of yellow, white, and blue beads
  • green mini rubber bands
  • super glue
  • magnifying glass

*any dish soap will do, but I like the thickness of Dawn

Instructions:

  1. Pour clear dish soap into the bottle until it’s about 2/3 of the way full.
  2. Add in the plastic bugs and the spider ring.
  3. Sprinkle the beads in.
  4. Next, drop the small rubber bands in. This is a great way to make use of all those leftover rainbow loom elastics that are floating around your house!
  5. Pour the glitter into the bottle.
  6. Fill any remaining space with water.
  7. Super glue the lid in place and allow to dry before handing it over to your child to play with.
  8. Set out a magnifying glass so that kids can explore all the different insects in the bottle.

This sensory bottle contains small parts. Even though the lid is glued in place, kids are determined little creatures and they may be able to find a way to get it open. As with all sensory activities, adult supervision is required at all times.

Learning and sensory benefits:

Unit study – This discovery bottle can be used in a bug/insect unit study. Students can jot down their observations of the different bugs such as number of legs, antennae, and other visual characteristics.

Sensory – This activity provides visual and proprioceptive sensory input. The use of the magnifying glass adds more of a visual element. The complimentary colours are pleasant to look at and will encourage kids to explore what they can find. 
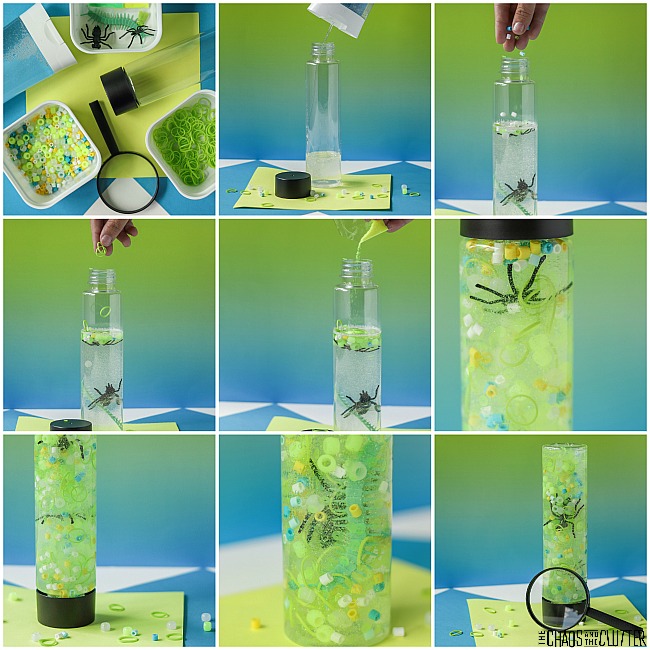
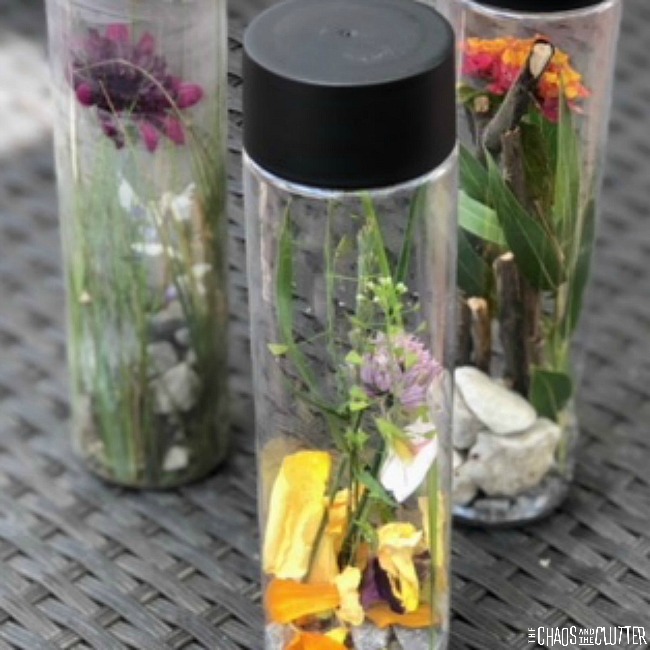
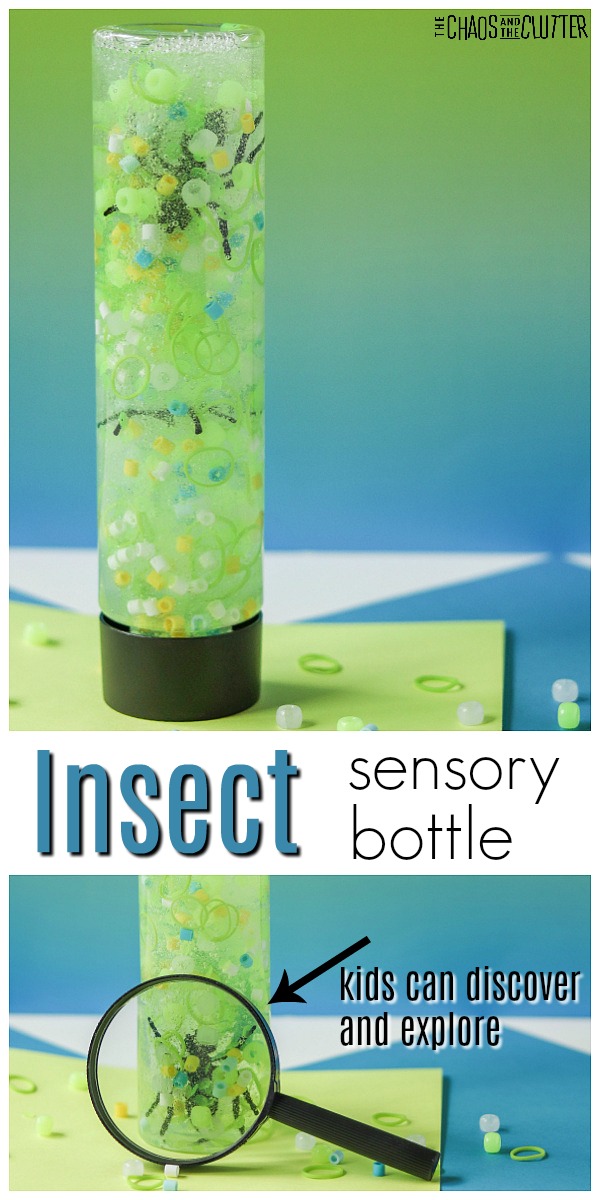
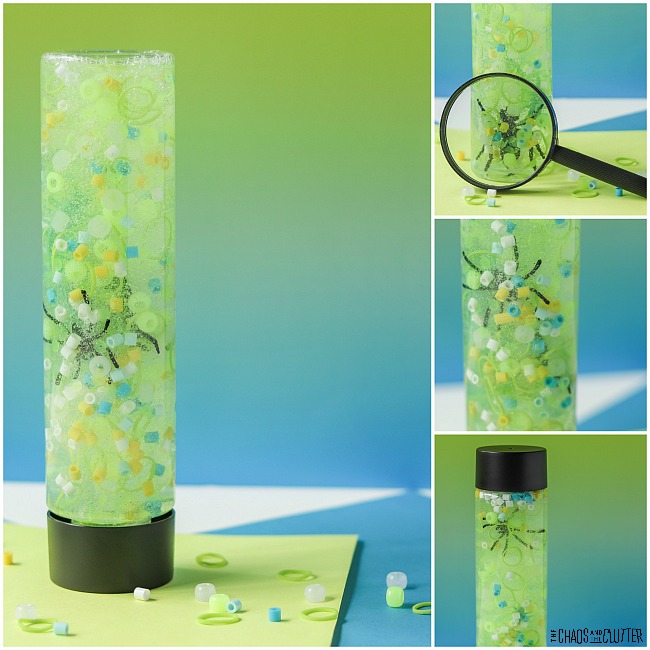
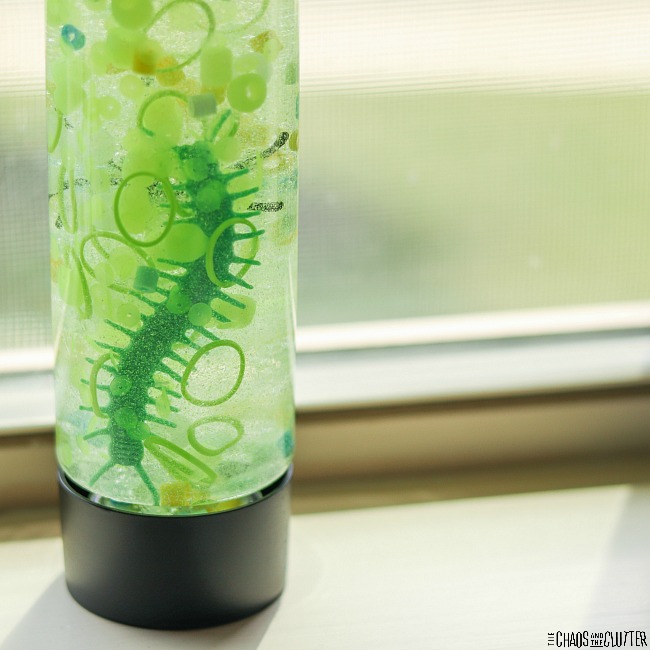
Math – Your child can count how many of a certain coloured bead there are or how many bugs are in the bottle. They can also guess if there are more green beads or blue beads etc.

Science – You can set out books about bugs to encourage children to do their own research and learning.

Bugs GaloreBugs GaloreBugs GaloreThe Bug BookThe Bug BookThe Bug BookSome BugsSome BugsSome BugsThe Very Hungry CaterpillarThe Very Hungry CaterpillarThe Very Hungry CaterpillarThe Big Bug Book: A Pop-up CelebrationThe Big Bug Book: A Pop-up CelebrationThe Big Bug Book: A Pop-up CelebrationThe Ants Go Marching: A Count-and-Sing BookThe Ants Go Marching: A Count-and-Sing BookThe Ants Go Marching: A Count-and-Sing Book

Communication – Vocabulary and communication skills are encouraged by kids asking questions and talking about their observations. They can talk about how quickly the glitter falls, what they feel and see, what types of bugs are included, what colours they observe, and any other things they notice.

Check out these other sensory bottles:

ABC I Spy Sensory Bottle

At the Beach Sensory Bottle

Filed Under: Sensory Tagged With: sensory bottles, sensory play

  • « Go to Previous Page
  • Page 1
  • Interim pages omitted …
  • Page 3
  • Page 4
  • Page 5
  • Page 6
  • Page 7
  • Interim pages omitted …
  • Page 10
  • Go to Next Page »

Primary Sidebar

Categories

We are a participant in the Amazon Services LLC Associates Program, an affiliate advertising program designed to provide a means for us to earn fees by linking to Amazon.com and affiliated sites.

Copyright © 2026 • The Chaos and the Clutter • Site Design by Jeni @ The Blog Maven

Return to top of page

Copyright © 2026 · Chaos and the Clutter 2.0 on Genesis Framework · WordPress · Log in