• Skip to primary navigation
  • Skip to main content
  • Skip to primary sidebar
  • Home
  • About
  • Contact
  • Privacy + Terms
  • Affiliates

The Chaos and the Clutter

  • Facebook
  • Twitter
  • Pinterest
  • Google Plus
  • RSS
  • Email
  • School at Home
  • Sensory
    • Sensory Processing Disorder
    • Awesome Sensory Play Activities
      • Sensory Bins
      • Sensory Bottles
      • Sensory Bags
  • Family Games
    • Minute to Win It Games
  • Special Needs Parenting
    • Childhood Anxiety
    • Reactive Attachment Disorder
    • Sensory Processing Disorder
  • Store
  • Course Login

Sharla Kostelyk

How to Use Visual Schedules with Your Special Needs Child

By Sharla Kostelyk

Does this sound familiar? You are trying to get your child out the door to school or for an appointment and they can’t seem to accomplish the smallest tasks. They are easily distracted and moving as slow as molasses. You give reminder after reminder, but they seem to go in one ear and out the other. It’s the same scene every morning. You are becoming more and more agitated until finally, you explode. Learn how to use visual schedules to ease transitions, reduce meltdowns, create independence in daily life, and make mornings more peaceful. #specialneedsparenting #sensory #visualscheduleYou feel guilty as your child leaves for school once again feeling deflated.

Your child can’t move from one activity to another or one location to another without having a meltdown. You try to remember to give them a “five minute warning”, but sometimes there just isn’t time. Sometimes, even with the warning, they still don’t seem to be able to make the transition.

You find yourself once again dealing with a meltdown.

The teacher calls again. Your child came out of the bathroom at school with their pants down around their ankles. Again. At home, they always forget to flush the toilet or leave the water running after they wash their hands…when they remember to wash their hands at all. You know that your child is doing their best.

You wish you could help them gain more independence.

Why use visual schedules?

Visual schedules carry many benefits, particularly for children who have special needs. Visual schedules:

  • break down tasks into easy-to-complete steps
  • simplify
  • provide structure
  • create predictability
  • teach independence
  • improve focus and attention
  • help with time management
  • instill consistency
  • form healthy habits
  • reduce cognitive load
  • maintain daily routines
  • establish a schedule that works
  • ease transitions
  • prevent meltdowns
  • promote positive choices
  • decrease problem behaviours
  • provide helpful reminders

Visual schedules are especially beneficial for children on the autism spectrum, children with FASD, ADHD, sensory issues or SPD, RAD, or other special needs. They can be an invaluable tool. Many parents report that they have been a “game changer” in their household.

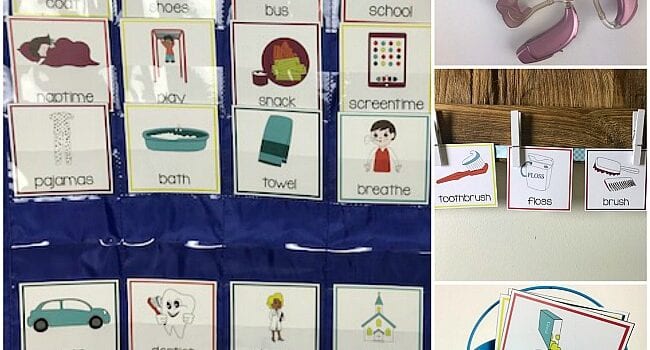
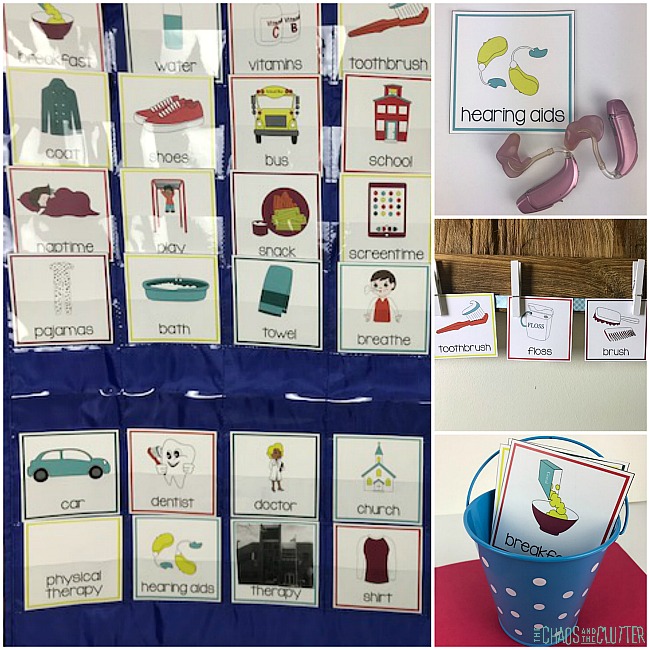
I created the Printable Visual Schedule for Special Needs because I couldn’t find a visual schedule that included what I was looking for to use with my own kids. 
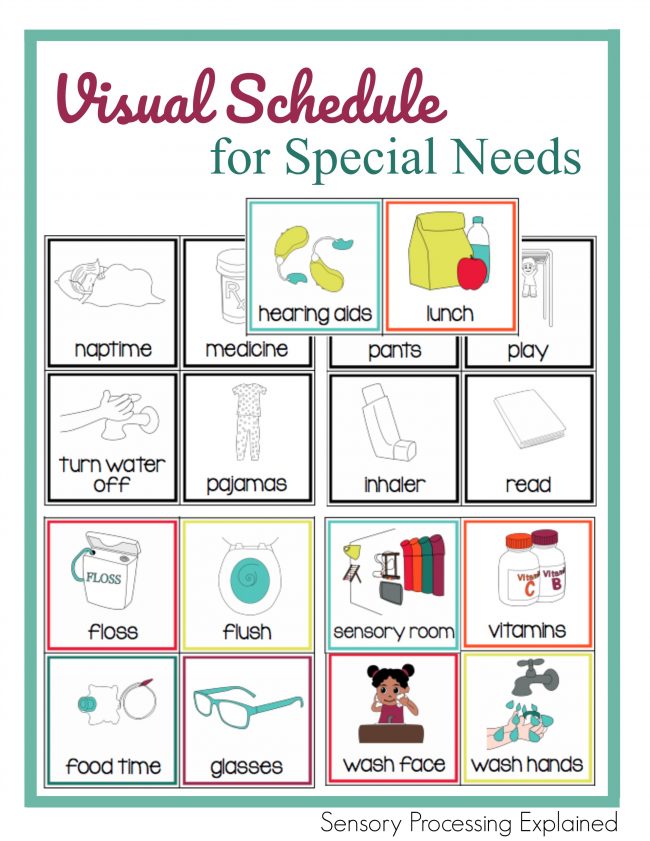
I wanted something that parents could use with visual and written prompts that kids could easily understand. It is in both colour and black and white. The black and white cards are great for having kids colour themselves. This gives them another reenforcement and reminder.

How to use visual schedules:

The best way to use visual schedules to benefit your child depends on your child and on what you are hoping to accomplish.

If your child is experiencing a lot of meltdowns during transition times, you will want to start with cards that help them predict upcoming changes throughout their day to help them predict what’s coming next.

If your child is struggling to get out the door in the morning, you’ll want to start with cementing a morning routine that works for them.

Or if your child is struggling most with breaking things down into smaller tasks, that will be where you want to start.

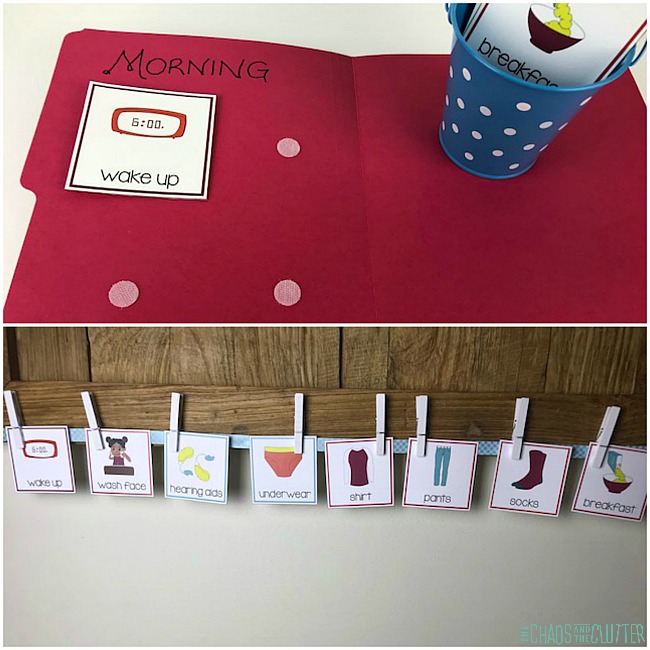
Create a morning routine chart.

You can do this in many ways. Choose which of the methods below you feel would work best for your child. You can always try multiple methods to find the best fit.

  1. Place velcro dots on a poster board and hang the poster in their bedroom. Attach an open envelope to the bottom of the poster. Place velcro dots on the back of the visual schedule cards and place them on the poster in the order your child should complete their morning routine. As they complete the tasks, they can add the card into the envelope.
  2. Hole punch the cards that your child needs to complete each morning. Place them on a binder ring and give it to your child as a visual reminder they can carry with them as they complete each step.
  3. Affix magnets to the back of the cards. This works best if the cards are laminated. Set up an area on the side of the fridge or on a magnetic white board in the kitchen where your child can see their cues and move them down as they complete each one.
  4. Give your child a folder or binder that contains the cards needed for their morning routine. These can be glued down on a page in the binder with the heading “Morning” or you can add velcro dots to the page and to the backs of the cards and glue an envelope to the inside of the binder for easy storage of the cards.
  5. Hang a ribbon or string in your child’s room. Use clothespins to attach their visual prompts in the order they need to be completed. Provide a small bucket or envelope that your child can put the cards into once they’ve finished each one. 

Create a daily schedule.

  1. Make a poster for your child that displays their daily schedule. See the method for making the poster above.
  2. Create a visual representation of your child’s day on the side of the fridge using magnets on the back of the cards.
  3. Make your child a binder separated into Morning, Afternoon and Evening to further simplify things.
  4. Another way of creating a daily schedule is by using a pocket chart. You can add the cards needed for that day at the top of the chart in the order they will happen and store the rest of the cards either at the bottom or in a separate envelope that you can staple near the bottom of the pocket chart.

For some children, the chart can be very general, including only the highlights of the day, whereas for others, you will need to break down each thing into smaller tasks.

I don’t recommend using binder rings for an entire daily schedule as it can be too overwhelming for a child.

Break down tasks.

Some of the cards break tasks down for kids to enable them to complete them step by step. These cards work well in these ways:

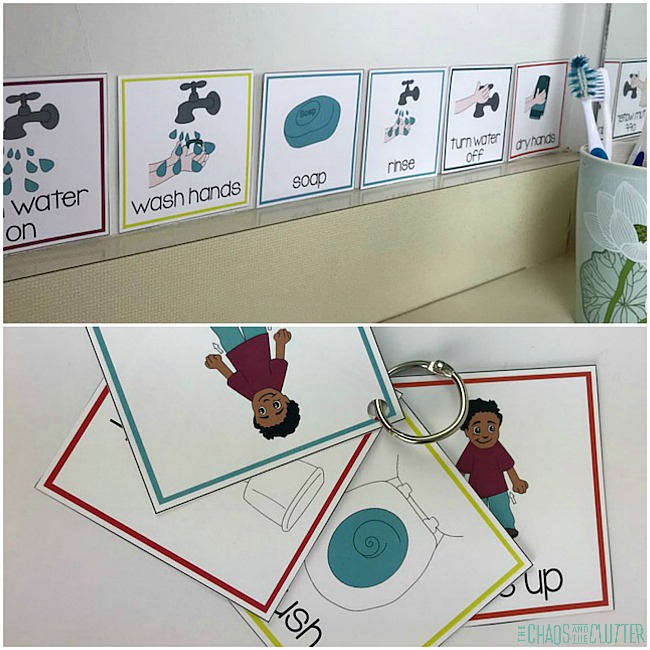
  1. Hole punch the cards and attach them to a binder ring. This way, the child can carry it with them. This is particularly good for the bathroom prompts. They can flip through the cards as they complete each step.
  2. Use poster putty or teacher’s tape to attach cards to the bathroom wall or mirror for the bathroom cards and the step by step instructions for hand washing.
  3. Attach the cards to the back of your child’s bedroom door or the wall in the entryway for reminders such as putting on their shoes and coat or taking their lunch. 

For school and appointments:

  1. When I created this visual schedule, I purposely left some of the cards such as those for Speech, Occupational Therapist, Therapist, etc. without an image. This was so that the child or parents could add a picture of the building or actual therapist to the card. For some children, especially those with autism, it helps to have things as concrete and specific as possible. Seeing the actual building or person they have an appointment with helps create security and aids in the transition.
  2. Children can use the pocket chart, binder, or binder ring method to use their visual schedule as their prompts while at school.

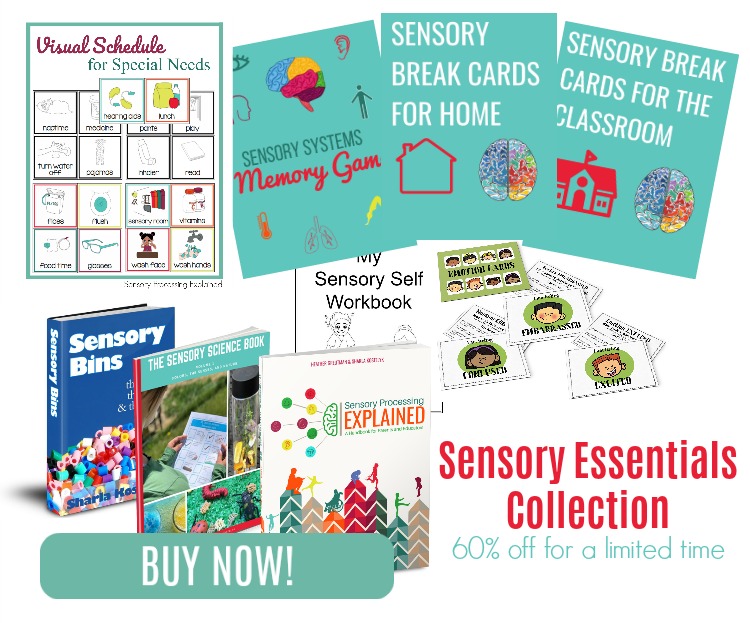
For a short time only, the Visual Schedule for Special Needs is included in the Sensory Essentials Collection which included many other resources for helping kids thrive.

Filed Under: Sensory, Special Needs Parenting

The Ultimate List of Family Game Night Ideas

The image contains a collage of 5 photos and the words "the best family game night ideas". The pictures include a boy with his nose and mouth covered in flour sitting over a plate of flour, a boy with a stack of Oreo type cookies stacked on his forehead, a girl wearing a light green shirt with a pair of panty hose on her head with a tennis ball in the end of each as she swings her head from side to side trying to knock over red cups on the floor, a smiling blue eyed girl holding a paper bag between her teeth, and a curly haired boy with an Oreo on one of his eyes.

By Sharla Kostelyk

Our Family Fun Nights are memorable events.  We love playing family games and these evenings give us a chance to build memories together. I wanted to share some of our favourite family game night ideas. The Best Family Game Night Ideas #familyfun #gamenight #familyfunnight #gamenight
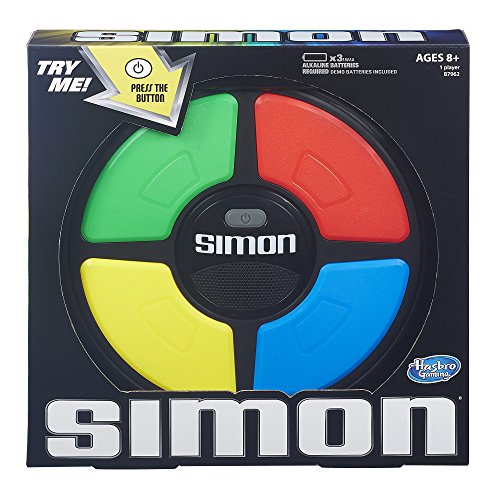
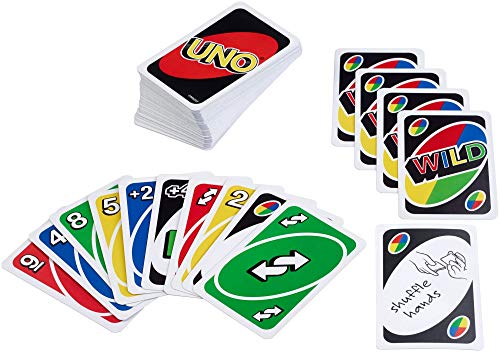
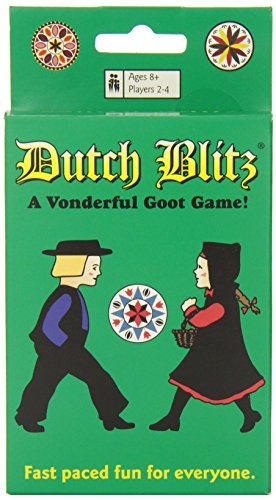
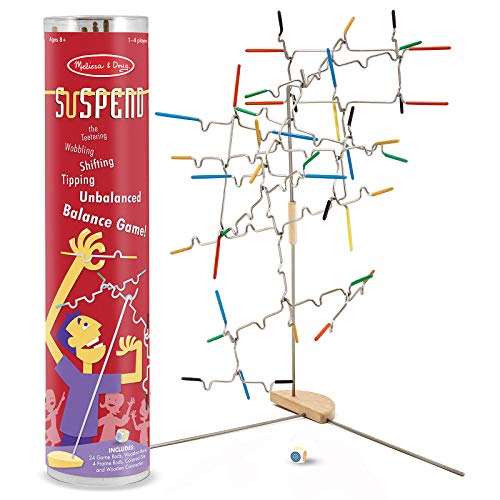
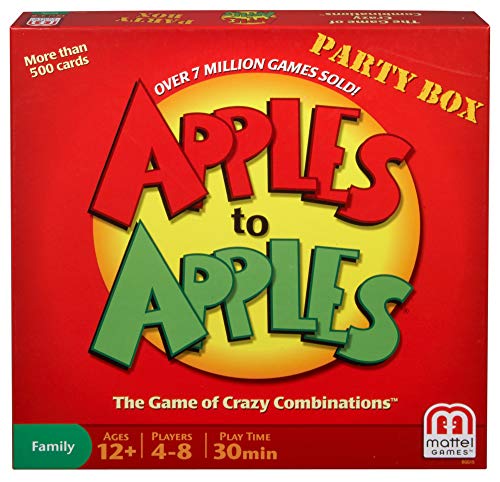
Family game night creates lasting memories because they foster a sense of belonging. In the busy hubbub of life, it is so nice to have tech-free, face to face time with your kids. Quality time can be created right at home.

Creating a family game night tradition won’t be something you’ll regret. The years you have with your kids at home go by in a flash. Laughing together strengthens the bonds.

If you were to invite your kids to an evening of talking with their parents and tell them there were no phones allowed, you wouldn’t likely get a very positive response. But once you start regular a family game night, your kids will be asking you when the next one is!

Ideas For The Best Family Game Night

1. Minute To Win It Games

One of our most memorable Family Fun Nights was our original Minute to Win It party.  We played Face the Cookie, Stack Attack, Movin’ on Up, Junk in the Trunk, Suck it Up, Penny Hose, Keep it Up, and Yank Me.

There was a lot of laughter. I challenge anyone to play the Junk in the Trunk Game with a straight face!

We had so much fun on our first Minute to Win it game night that we decided to create another one.  That time, we chose a Dollar Store Minute to Win It theme.   We played Puddle Jumper, Chocolate Unicorn, Ponginator, Hanky Panky, Ball Drop, Breakfast Scramble, and Elephant March.

These family game ideas are funny and everyone can play. The supplies were so inexpensive and didn’t take long to set up. It was another memorable evening.

Click here for all our awesome Minute To Win It Games:

  • Minute To Win It Games Printable
  • Christmas Minute To Win It Games
  • Dollar Store Minute To Win It Games

2.  The Flour Game

We also get a kick out of The Flour Game. This hilarious game requires only two items and one of them is probably already in your kitchen. This one is just plain old good clean fun. Well, clean may not be the best way to describe it! The messy faces are worth it though.

It’s a great time for all ages. If you’ve never tried it, this is a good one to start with. It’s easy to set up. The rules are easy to understand. And a face full of flour is universally funny!

3.  What’s In The Bag Game

Another classic game at our house is What’s In The Bag Game.  For this one, you only need one item. In this game, the kids often have the advantage. That’s a good equalizer. On other family game nights when the older ones may have an easier time with whatever the activity is, this game evens those odds.

Our neighbour taught us this game. We have played it at everything from just a Sunday afternoon at home to my daughter’s Sweet 16 with over 25 people. It is always a hit.

4.  20 Questions Game

I love this personalized version of the game 20 questions from Teach Mama. It gives a Headbands type of spin to it and allows you to use pictures of people you know or are familiar with. It would be easy to create themed versions of this game such as a Disney theme or famous families theme.

5.  Lego Game Night Ideas

Invite your family members to a Lego Build Challenge Minute to Win It Style. The ideas are easy. Chances are, you’ve got some lego pieces hanging around the house. Why not put them to good use?!

mother and daughter's hands play with building blocks

6. Nerf Gun Family Game Night

My kids would go crazy over this Nerf Target Prize Game from Frugal Fun for Boys and Girls! You could mix it up by changing up the prizes.

7.  Twister

How about making your own holiday themed twister game? You can find everything you need at Pint-Sized Treasures to make a Valentine’s Conversation Hearts Twister, a Snowman Twister, or a Pumpkin Twister for Thanksgiving, Hallowe’en or Fall.

8.  Board Games For Family Game Night

Family game night ideas don’t have to be complicated. You can create lasting memories sitting around the kitchen table with a bowl of popcorn and a board game or puzzle.

I love how our family has a culture of playing board games together. Sunday afternoons, you can usually find us sitting at the table playing Settlers of Catan, Splendor, Sequence, Ticket to Ride, card games, or some of our other favourites.

Family Board Games:

Watch Ya Mouth Family EditionWatch Ya Mouth Family EditionWatch Ya Mouth Family EditionHasbro Pie FaceHasbro Pie FaceHasbro Pie FaceGoogly Eyes GameGoogly Eyes GameGoogly Eyes GameQwirkleQwirkleQwirkleKer PlunkKer PlunkKer PlunkBlokusBlokusBlokusJenga Classic GameJenga Classic GameJenga Classic GameTroubleTroubleTroubleHedBanzHedBanzHedBanz5 Second Rule5 Second Rule5 Second RuleSimonSimonSimonUNO Card GameUNO Card GameUNO Card GameDutch BlitzDutch BlitzDutch BlitzSuspend Family GameSuspend Family GameSuspend Family GameApples to ApplesApples to ApplesApples to Apples

9. Fun for the Whole Family

Done is better than perfect! Instead of waiting for the perfect time and circumstance, plan something simple that both the younger kids and older kids can enjoy. Here are some simple ideas that can be thrown together at the last minute.

  • Scavenger Hunts (Our kids’ favourite is the Put Away Scavenger Hunt. I like it too because it only uses household items so there’s no extra cost, it’s easy, and has no clean-up!)
  • Bingo
  • Christmas Movie Bingo
  •  Charades (instructions and free printable charade cards)
  • Make an easy treasure hunt with clues. Have the first person read a clue and all work together to find the prize so that everyone is a winner.

10. Play Family Trivia.

Invent your own questions about your family and family culture. Examples would be things like:

  • When is grandma’s birthday?
  • Where did we go on our last vacation?
  • Where did your parents meet?
  • What was your mom’s maiden name?
  • What does our last name mean?

Then have the first person to draw a question answer. If they don’t know the answer, allow the next person to take a guess.

Track points on a sheet of paper. You can even offer bonus points for funny or creative answers.

What is one of your family’s favourite games to play?

Looking for more ideas for family fun or resources to help you connect with your child? Join our free Parenting Wins email series. 

Filed Under: Crafts and Activities, Family Games

The Day Her Hair Fell Out – Reflections from the Mom of a Daughter with Alopecia

By Sharla Kostelyk

Mother’s Day is the one day of the year that I kind of expect that I’ll get to sleep in. It doesn’t always work out, but now that the kids are older, I thought that for sure this year it would happen. That morning, I woke up to the sound of “mommy”. There was a catch in her voice, that little signal that as a mom, lets you know that something is wrong.

I sat up. I knew that there would be no sleeping in this Mother’s Day or going back to sleep. My sixteen year old daughter was standing by my bed. She looked uncertain. How Parents Can Help a Child Through Alopecia #alopecia #specialneedsparenting #parentingtips“Mom, I don’t know what’s happening. I woke up and half of my top eyelashes are just gone.”

I looked at her. Sure enough, from the middle out on both sides, her eyelashes were missing. It was like they had been stolen in the night.

“Alopecia.” The word was immediately in my head. I didn’t dare say it out loud.

This was my daughter who had already overcome so many obstacles in her life, who had faced challenges before she was even born, who had battled lung disease, who had spent years in and out of the hospital, who had watched as her siblings played outside while she had to stay in, who had painful medical procedures and still goes for regular injections. How could this be happening to her?

My brain went into “it’s not fair” mode pretty quickly. I know that it’s just hair, but she’s a teenage girl and that’s hard enough without something that sets you apart. Part of me wanted to scream. I didn’t say any of these things to her.

I told her that everything would be okay. Next, I asked if she had used different mascara recently. I advised her to stop wearing makeup until we could figure out what was happening. An appointment was made with the doctor. But I knew.

Over the next few days, her eyebrows began to thin out. Within a week, she had lost the top and bottom eyelashes on both eyes. It was no surprise when the doctor confirmed what I had suspected. She had Alopecia.

He told us that in some people, they will just lose their eyelashes or eyebrows and not their head hair, so we were hopeful for that.

13 days after that Mother’s Day morning, my daughter was once again standing at my bedside. This time, tears were streaming down her face. She had woken up to a pillow covered in hair. About a third of her hair had fallen out.

She climbed into bed with us and we all cried together. I was rocking her while she cried with her head on my shoulder. When she pulled away, there was a thick patch of hair where her head had been. We all looked at it. I wasn’t sure if I should keep the hair or throw it in the garbage. At first, we started to cry harder until we burst into laughter.  There’s no protocol for this one in the parenting books!

I’m so proud of my girl. An hour after we cried in my bedroom, I dropped her off at her swim instructor practicum. Even though she was embarrassed about her lopsided, strange looking hair, she knew she had a commitment to keep.

Here’s where the hard mom stuff comes in though. Part of me wanted to tell her that it was okay to call in sick that day, to stay home, to hide away while she adjusted to the idea. I was hurting for her. I worried that she would encounter stares and harsh words. As a mom, I wanted to protect her from it.

But I knew that it would only get harder if she didn’t face it right away. I knew that I could only help build up her confidence and arm her with what to say if people asked questions. It was an obstacle I couldn’t climb for her, one that I could only help guide her through.

She is, of course beautiful with or without hair, but losing your hair and your eyelashes when you’re sixteen is just plain hard.

We went to a wig shop a few days after she started to lose her hair. The ladies there were all bald as well. It was wonderful for my daughter to be able to talk to others who understood. They were so kind to us.

In the end, she decided to hold off on getting a wig for now, but did get a special hat because we discovered that you get very cold at night when you don’t have hair on your head.

Each day, she lost more hair in clumps. Bald patches began to join each other to form larger bald patches. That Friday, we sat in my kitchen while my dear childhood friend who’s a hairdresser shaved off the small bit of hair remaining. It was emotional. Again, I know it’s just hair. I have close friends who’ve lost their hair from cancer treatments and Alopecia is not life threatening.

I have perspective and my daughter does too. She knows that there are worse things that she could have lost. After all, her youngest sister lost her hearing a few years ago.

Last year, her best friend lost her mom.

We remind ourselves about these type of things to keep our perspective. We have also allowed for the natural grieving because keeping perspective doesn’t mean that we can’t still acknowledge the hard.

But it’s still hard. There have been lots of hard moments. Her first time being around her friends without a hat. Being on a youth group outing and having to decide if she was brave enough to take her scarf off so she could waterski. Learning to apply eyeliner in a certain way so that no one can tell that she doesn’t have eyelashes. Attending a wedding. Feeling ugly. Wanting to be like the other girls her age.

I’m incredibly proud of how she has handled it. Overall, she has been optimistic and kept a sense of humour. She has been an example to me and to her siblings of courage and grace.

I asked her if she was okay with me sharing this story here on the internet for everyone to see and she agreed immediately. It understandably took her a few extra minutes to agree to having the pictures shared.

She hopes that in sharing what this journey through Alopecia has been like, I might be able to help other moms better support their kids through it.

With that in mind, my daughter asked me to share the things that I did that she found helpful. She wants other moms to know what to do if this happens to their child.

Helpful tips for parents of kids with Alopecia:

  • give your child the freedom to grieve
  • give yourself permission to grieve
  • acknowledge the loss, but offer perspective
  • help them process and express their emotions
  • help them with accessories (scarves, special hats, wigs)
  • push them out of of their comfort zone (through encouragement, not force)
  • practise with them what to say when people ask questions
  • use the lessons you learn to help others (serving helps give purpose and perspective)
  • find others they can talk to who have Alopecia (there’s a local support group near us)
  • point out others who have Alopecia and are successful (like Kevin Bull on American Ninja Warrior)
  • research the condition (knowledge is power)
  • don’t fall for quick fixes and expensive treatments that don’t work

My daughter’s hair grew back, but a few months later, her eyelashes started to fall out again. We know that it will likely be something she battles throughout her life. She had an easier time the second time because she knew that she had new coping skills for facing it again.

If you or your child are facing Alopecia, know that you are not alone. You will get through this.

Filed Under: Special Needs Parenting

How To Make Kinetic Sand At Home

a white bin filled with kinetic sand also contains 3 small construction vehicle toys that are yellow and black in colour.

By Sharla Kostelyk

Kinetic sand is such a neat sensory experience for kids. It is fun to play with, sparks creativity, and offers great sensory input. I don’t know if you’ve noticed or not, but the kinetic sand in stores is expensive.

Once your kids play with the kinetic sand for a while (particularly if it’s in a classroom or day care and multiple children have their hands in it), it can get dirty. That means it needs to be thrown out. Which means you need to buy more. That’s why homemade kinetic sand is such a great option. You won’t believe how easy this recipe is to make!

Homemade Kinetic Sand #sensoryplay #sensoryplayrecipes #kineticsand

What is Kinetic Sand?

Kinetic sand is sand that has had ingredients added to it so that it becomes mouldable like clay. It continues to have the grainy properties of sand, creating an interesting texture experience.

Yet it sticks to itself, much like wet sand at the beach. When you are on the shore making sand castles or sand sculptures, you need to add water to keep the structures from becoming too dry and crumbling. This is essentially the idea behind kinetic sand.

DIY Kinetic Sand Recipe

Ingredients:

  • 4 cups sand
  • 2 1/2 cups flour
  • 3/4 cup vegetable oil

How To Make Kinetic Sand:

  1. Measure out the sand and flour and add to a large bowl.
  2. Mix the sand and flour together.
  3. Stir in the oil. Combine well.

Now you have your own homemade kinetic sand to play with!

This recipe is included in our Sensory Play Recipes eBook. It includes more than 25 easy to make recipes for awesome sensory activity options. If you’d like a sample that includes 5 recipes from the book, just pop your email into the box below.

Does Kinetic Sand Dry Out?

If the sand begins to dry out after a few weeks, you can mix in a few drops more of vegetable oil and give it a good stir.   

Homemade kinetic sand is wonderful for playing with and such an easy recipe to make. You can buy enough sand to make large quantities of your own kinetic sand for the same cost as one pack of store bought variety.

You can also purchase sand in cool colours. This allows you to make coloured kinetic sand.

I put the kinetic sand in a sensory bin and added some small construction vehicles and a scoop. This created a sensory bin that encouraged imaginative play. Even my teens enjoyed playing with this one. They especially liked packing it into small cups and creating mounds and then pushing them over with the toy steamroller.

One of my sons couldn’t seem to get enough of squishing this in his fists and then releasing it to feel it fall through his fingers.

how to make your own kinetic sand

Other Play Ideas

You could also use this play material to create a beach sensory bin with seashells, small sand toys, glass beads, and rocks.

Or you could simply dump it in a kinetic sand tray and let your child’s imagination lead the way. They can stamp in this sensory play material with cookie cutters or stamps. Kids can experiment with creating shapes. They can add small toys to create a small world. There are so many options.

For therapists, this is an interesting material to use in sand trays. The proprioceptive sensory feedback kids receive from squishing and squeezing the sand can create a calming effect. You can still have the child add toys and play out scenes.

Once you know how to make kinetic sand at home and realize how easy it is, you’ll never need to buy it again!

Click here for more easy sensory play ideas:

Snow Playdough

Milky Slime Recipe

Unique Types of Slime

The Mega List of Sensory Bottles 

Filed Under: Sensory Tagged With: sensory bin, sensory play

Pumpkin Pie Scented Moon Dough

in a red plastic bin, light almost white cloud dough is sprinkled with fall coloured plastic leaves and small metallic leaf shaped confetti. There is also a metal scoop in the corner.

By Sharla Kostelyk

This pumpkin pie scented moon dough is the perfect Fall sensory bin filler. Create a sensory experience that involves both the olfactory and tactile sensory systems.

To me, the smell of Fall is encapsulated in pumpkin pie spice. The scent reminds me of my grandma’s pumpkin muffins and takes me back to my childhood. Pumpkin Pie Scented Cloud Dough #olfactory #sensoryplay #clouddough

Pumpkin Pie Scented Moon Dough Recipe:

Supplies:

  • 4 cups flour
  • 2 tsp. pumpkin pie spice
  • 1/2 cup vegetable oil

Directions:

  1. In a bowl, mix the flour together with the pumpkin pie spice.
  2. Pour in the vegetable oil.
  3. Stir well and then knead by hand.

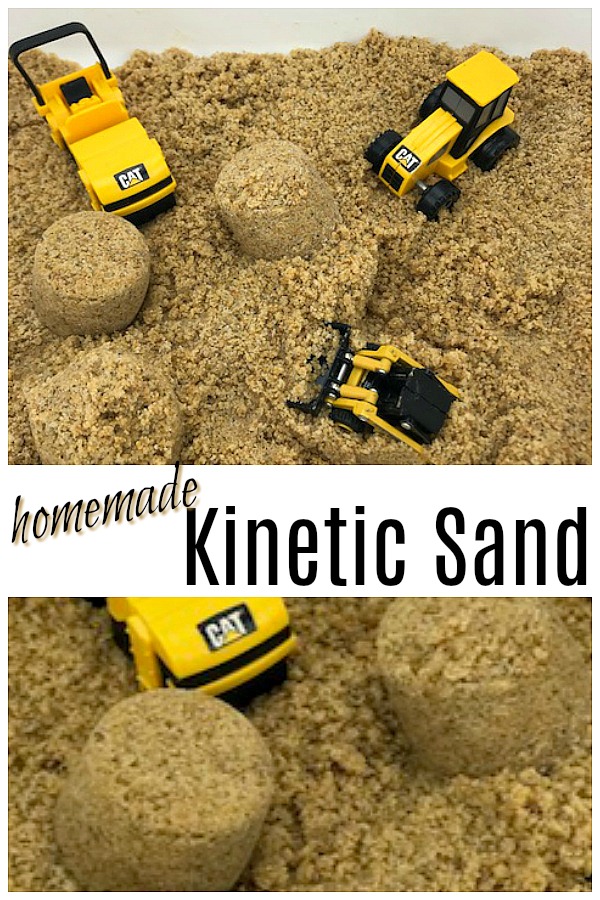
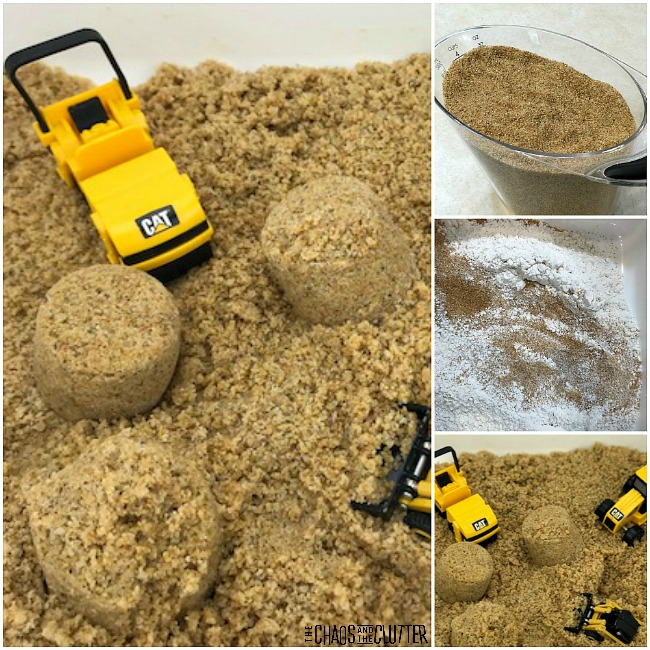
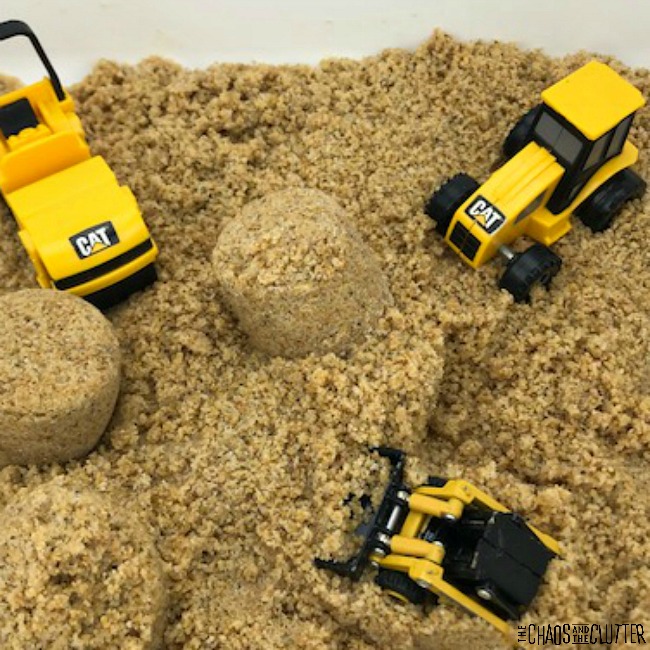
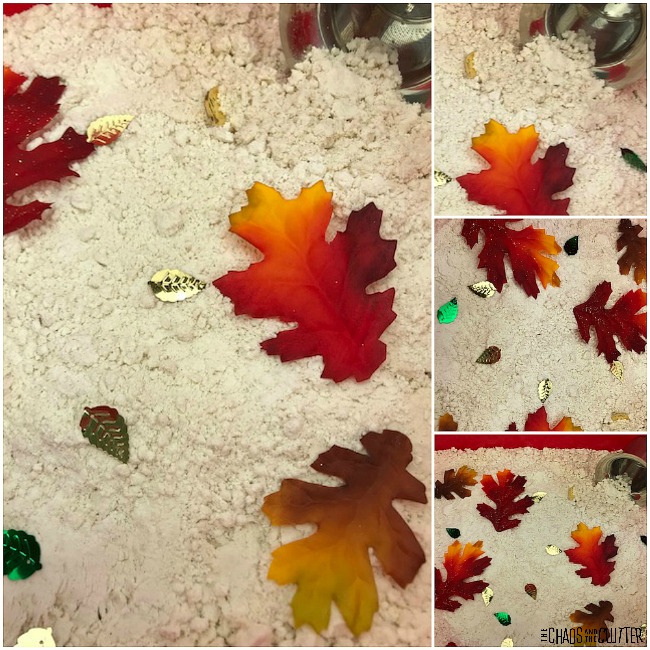
Since everything in this play recipe is edible, this moon dough is taste safe. This makes it a good sensory play option to use with babies and toddlers. Of course, adult supervision should always be used.

Dump the scented moon dough in a plastic bin. If you want, you can add some Fall themed items. I added silk fall leaves, leaf confetti, and a small scoop in our bin. If using this bin with babies, skip the addition of the leaves and confetti.

This recipe is included in our Sensory Play Recipes eBook. It includes more than 25 easy to make recipes for awesome sensory activity options. You can get a sample of 5 of the recipes in the book by filling in your email below:

This dough is soft and mouldable. It forms shapes in your hand but can still revert to its powered state. The addition of the pumpkin pie spice provides the scent and also a slight hint of brown in the dough, adding to the Fall feel of the experience.
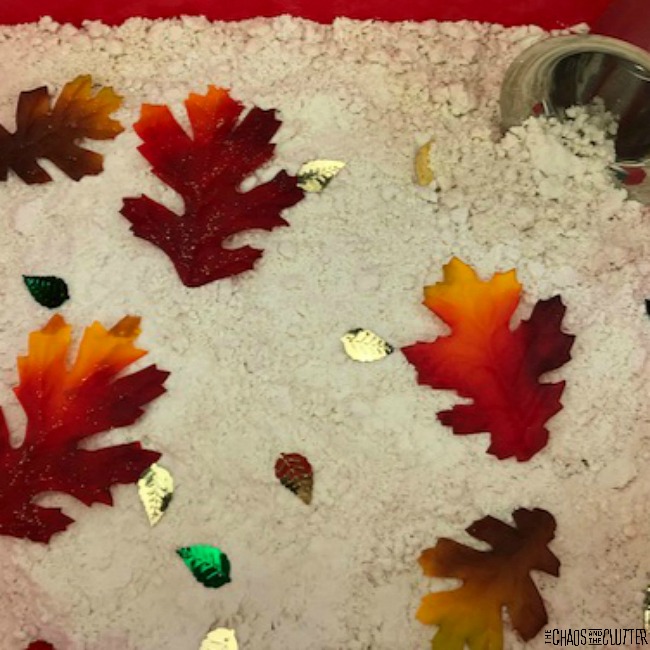
Moon dough can be messy. Messy play is great for kids, but not always as fun for parents!

It works well to put an old sheet or tablecloth underneath the area you are playing in. You can also use a shower curtain purchased from the dollar store. This contains the mess. When the kids are done playing, you can gather up the corners and shake it outside.

You may be interested in some of our other sensory experiences:

Pumpkin Scented Puffy Paint

How to Colour Moon Dough

Rainbow Soap Foam

Filed Under: Sensory Tagged With: sensory bin, sensory play

Halloween Slime Recipes for Spooky Sensory Fun

The image contains a collage of 6 different types of Halloween themed slime including orange and black glitter striped slime, pumpkin slime in a jar, candy cane slime, green slime with eyeballs, and spider web slime. The words "Spooky Sensory Fun Halloween Slime Recipes" are near the middle of the image.

By Sharla Kostelyk

These Halloween slime recipes for spooky sensory fun are sure to provide hours of squishy, stretchy awesomeness. I’ve purposely chosen some that are scarier than others. Spooky Sensory Fun Halloween Slime Recipes #sensoryplay #halloween
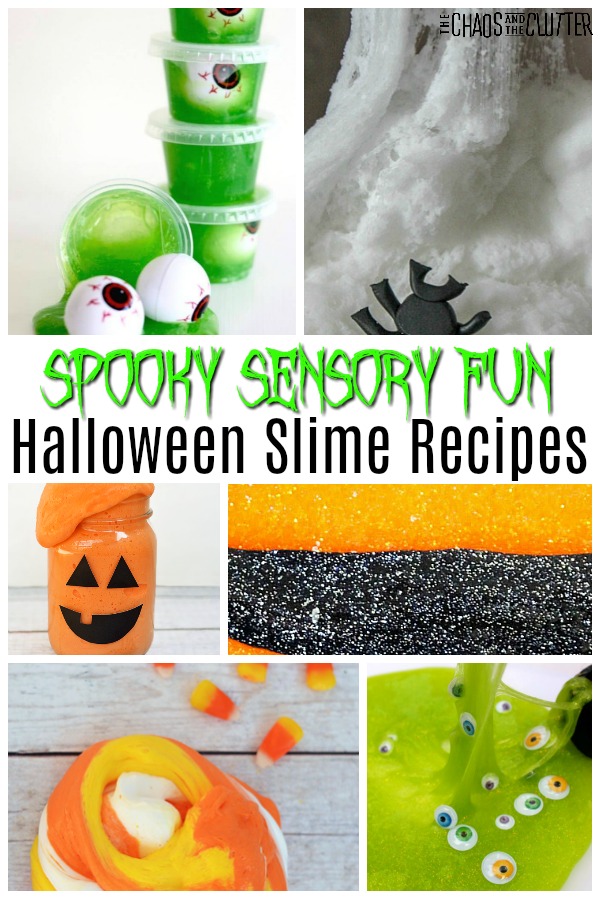
I know that big kids generally like to go with the spooky or gross out factor, so I’ve found some great ideas for that. For younger kids, I wanted to be sure to offer some Halloween slime recipes that were less scary.

Halloween Slime Recipes:

Spooky Spider Web Slime – The addition of an unexpected ingredient makes this slime look like a spider web.

Glow in the Dark Slime – This glows without a black light. Great for creepy Halloween fun!

Simple Halloween Slime with Glitter – This is a great beginner slime recipe.

DIY Halloween Slime Kit from Fun with Mama – Isn’t this the cutest idea ever?!

Halloween Slime Recipe from Frogs and Snails and Puppy Dog Tail – This one has some good ideas for mix-ins.

Edible Halloween Candy Slime at The Soccer Mom Blog – Now you know what to do with all that leftover Halloween candy!

Eyeball Slime Party Favors from Little Bins with Little Hands – These are great for handing out at the door or giving as a party gift.

Harry Potter Inspired Slime from STEAM Powered Family – Perfect for your Harry Potter fans!

Fluffy Pumpkin Slime from I Heart Arts and Crafts – This is such a cute one.

Purple Monster Floam from Childhood 101

Jack o Lantern Slime from Left Brain Craft Brain – This encourages creative play.

Zombie Slime over at Mom Dot

Witches’ Brew Slime from Midget Momma

Halloween Slime with Water Beads from Craftulate

Fluffy Candy Corn Slime from I Heart Arts and Crafts – I’ve always liked candy corn. It makes me think of my childhood.

Frankenslime on Parenting Chaos

Here’s a Halloween sensory activity that you can do with any slime. It is a wonderful game for a Halloween class or home party. 

Filed Under: Sensory

  • « Go to Previous Page
  • Page 1
  • Interim pages omitted …
  • Page 46
  • Page 47
  • Page 48
  • Page 49
  • Page 50
  • Interim pages omitted …
  • Page 128
  • Go to Next Page »

Primary Sidebar

Categories

We are a participant in the Amazon Services LLC Associates Program, an affiliate advertising program designed to provide a means for us to earn fees by linking to Amazon.com and affiliated sites.

Copyright © 2026 • The Chaos and the Clutter • Site Design by Jeni @ The Blog Maven

Return to top of page

Copyright © 2026 · Chaos and the Clutter 2.0 on Genesis Framework · WordPress · Log in