• Skip to primary navigation
  • Skip to main content
  • Skip to primary sidebar
  • Home
  • About
  • Contact
  • Privacy + Terms
  • Affiliates

The Chaos and the Clutter

  • Facebook
  • Twitter
  • Pinterest
  • Google Plus
  • RSS
  • Email
  • School at Home
  • Sensory
    • Sensory Processing Disorder
    • Awesome Sensory Play Activities
      • Sensory Bins
      • Sensory Bottles
      • Sensory Bags
  • Family Games
    • Minute to Win It Games
  • Special Needs Parenting
    • Childhood Anxiety
    • Reactive Attachment Disorder
    • Sensory Processing Disorder
  • Store
  • Course Login

Sharla Kostelyk

St. Patrick’s Day Sensory Bottle

St. Patrick's Day Sensory Bottle

By Sharla Kostelyk

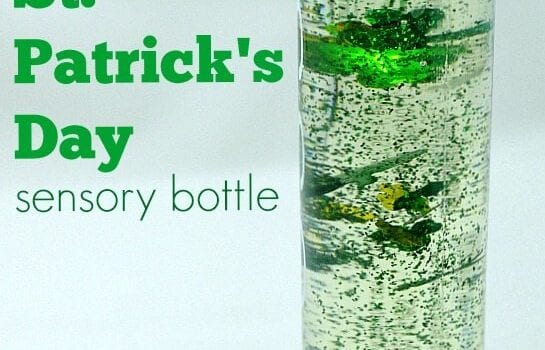
I’m on a mission to make a different sensory bottle every month this year and I thought it would be appropriate to make a St. Patrick’s Day Sensory Bottle for the month of March. I have to admit that this one is actually my second attempt because the items I planned to put in my first concept were too large to fit through the opening at the top of the bottle.

St. Patrick's Day Sensory Bottle
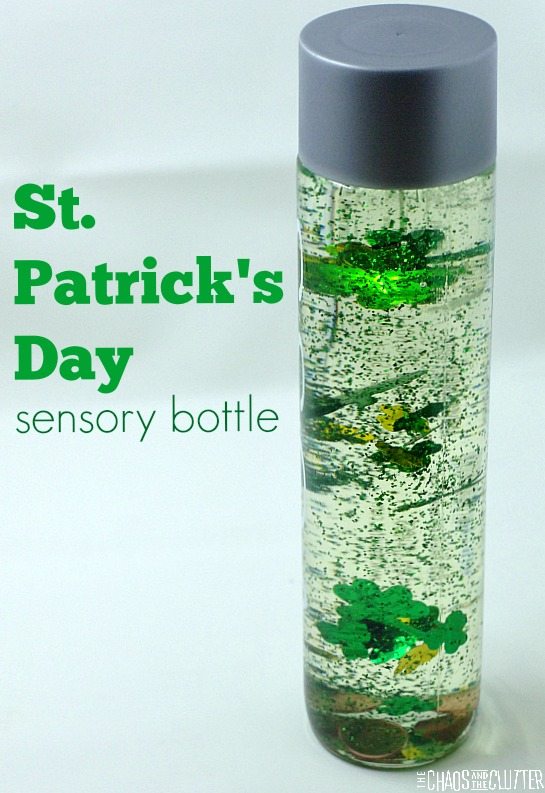
For this successful St. Patty’s Day discovery bottle, I added items that could fit through the opening in the water bottle. I also used a combination of glue and water so that the items move differently through the bottle.

Materials needed:

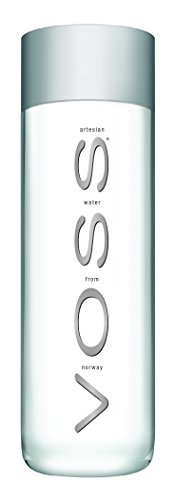
  • empty water bottle (I used a Voss water bottle because I like the look of the lid and the shape of the bottle)
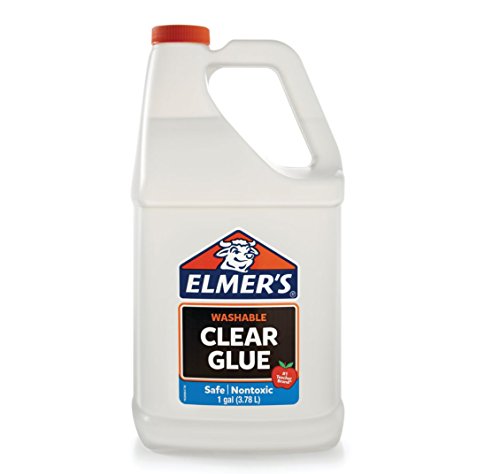
  • 147 mL (5 oz.) bottle clear school glue
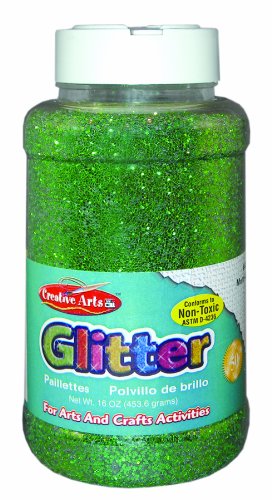
  • green glitter
  • hot water
  • shamrock confetti
  • pennies

St. Patrick's Day Sensory Bottle sq.
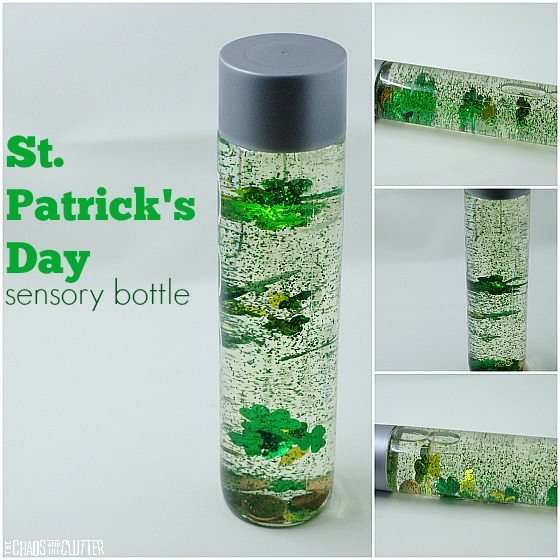
Adding the glue to this sensory bottle helps suspend the items as they travel more slowly through the liquid. In order to achieve this, start with adding the glue to the bottle and filling it almost the rest of the way full with hot water and shaking it to combine.

VOSS Water BottleVOSS Water BottleGreen GlitterGreen GlitterClear GlueClear Glue

Once the water and glue are combined, add the glitter, shamrocks and coins or pennies to the bottle. Replace the lid and give it a good shake.

St. Patrick's Day Discovery Bottle
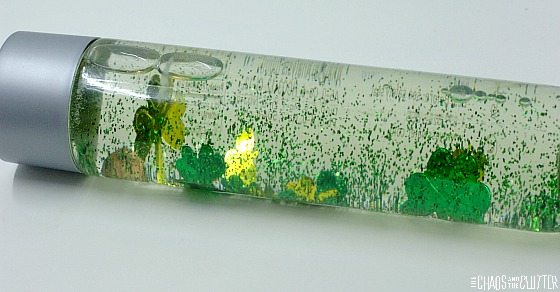
This St. Patrick’s Day sensory bottle does contain small parts, so if younger children are going to play with it, you may want to secure the lid by gluing it in place with a hot glue gun.

If you are looking for other sensory ideas, join me for a free 5 part email series Sensory Solutions and Activities (just pop your email into the box below) and get a printable list of 175 Great Sensory Ideas.

You can see all of our easy-to-make sensory bottles here.

Filed Under: Sensory Tagged With: sensory bottles, sensory play

Summer Pasta Salad with Pineapple Dressing

Summer Pasta Salad with pineapple dressing

By Sharla Kostelyk

Pasta salad is one of those things that you either like or you don’t and I happen to like it. I have a few standard pasta salad recipes that I make such as a mediterranean one and one that is loaded with veggies. This cold Summer Pasta Salad recipe is perfect for summer because the pineapple dressing makes it taste so fresh.

makes a nice side dish for Easter and is perfect to bring to summer picnics and potlucks. 
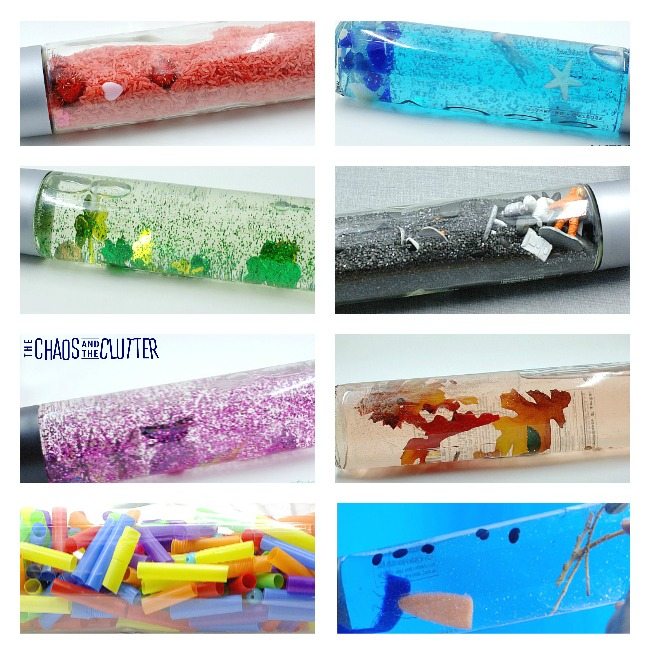
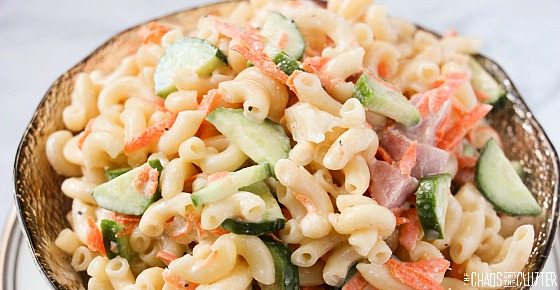
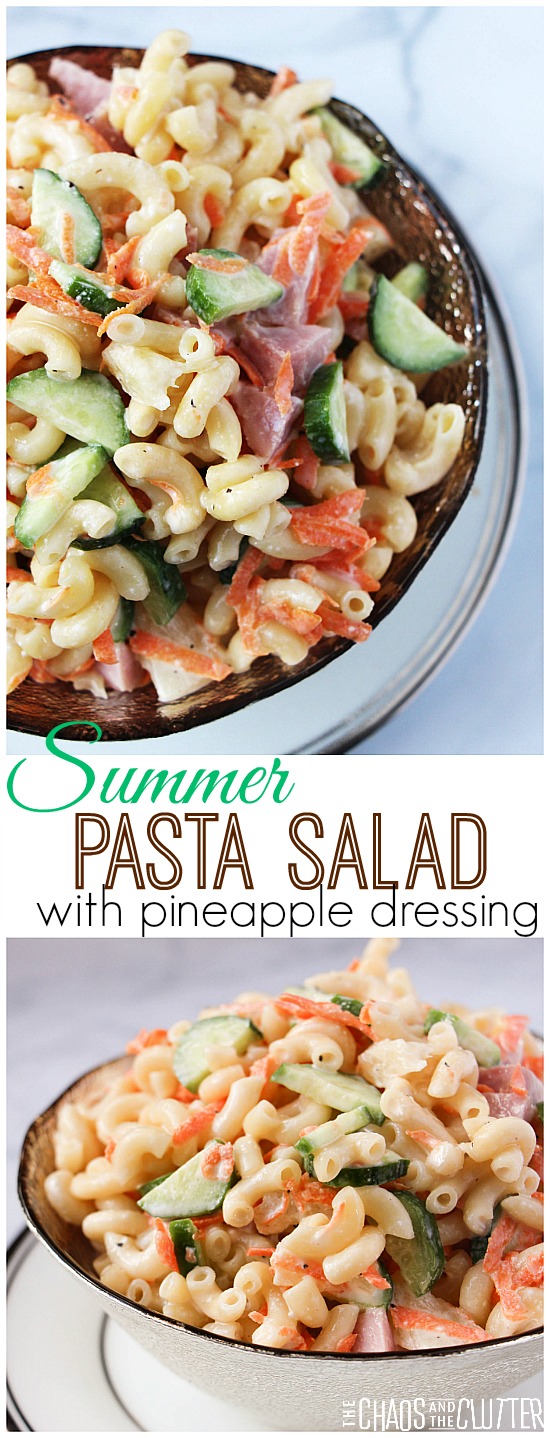
One of the nice things about this recipe is that you can change it by adding different vegetables or omitting the ham if you prefer. It makes a nice side dish for Easter and is perfect to bring to summer picnics and potlucks.

Summer Pasta Salad Recipe:

4 cups cooked pasta (I like using macaroni or bows)
1/2 cup pineapple chunks
1-2 cups cubed cooked ham
1 carrot, shredded
1/2 a cucumber, sliced and chopped in half
salt + pepper, to taste

Pineapple Dressing Recipe:

1/2 cup pineapple juice or liquid from can, optional
1/2 cup light mayonnaise
2 Tbsp. plain greek yogurt, optional
2 Tbsp. apple cider vinegar
1/2 – 1 Tbsp. sugar

  1. Cook pasta according to package directions and then run under cold water.
  2. In a large bowl, combine the pasta, pineapple, ham, carrots, and cucumber.
  3. In a small bowl or measuring cup, whisk together the mayonnaise, greek yogurt, cider vinegar, and sugar. Taste and make adjustments if needed.
  4. Pour the dressing over the pasta and stir to coat.
  5. Season with salt & pepper.

Summer Pasta Salad with pineapple dressing

Store in the fridge in an airtight container until ready to serve. Serve chilled. If you’re bringing this dish to a potluck or a picnic, be sure to remember to bring some serving spoons. If it’s going to be a large group, you can double the recipe as it doubles well.

Print
Summer Pasta Salad with Pineapple Dressing

This fresh tasting cold pasta salad is perfect for a summer potluck or picnic.

Ingredients
  • 4 cups cooked pasta I like using macaroni or bows
  • 1/2 cup pineapple chunks
  • 1-2 cups cubed cooked ham
  • 1 carrot shredded
  • 1/2 a cucumber sliced and chopped in half
  • salt + pepper to taste
Pineapple Dressing Recipe:
  • 1/2 cup pineapple juice or liquid from can optional
  • 1/2 cup light mayonnaise
  • 2 Tbsp.  plain greek yogurt optional
  • 2 Tbsp. apple cider vinegar
  • 1/2 - 1  Tbsp.  sugar
Instructions
  1. Cook pasta according to package directions and then run under cold water.
  2. In a large bowl, combine the pasta, pineapple, ham, carrots, and cucumber.
  3. In a small bowl or measuring cup, whisk together the mayonnaise, greek yogurt, cider vinegar, and sugar. Taste and make adjustments if needed.
  4. Pour the dressing over the pasta and stir to coat.
  5. Season with salt & pepper.
  6. Store in the fridge in an airtight container until ready to serve. Serve chilled.

Kids like the ham and pineapple aspect of this pasta salad. You can tell them it’s “Hawaiian Pasta Salad” if it helps them be willing to try it. And once they try it, chances are, they’ll be asking for seconds!

Summer Pasta Salad with pineapple dressing
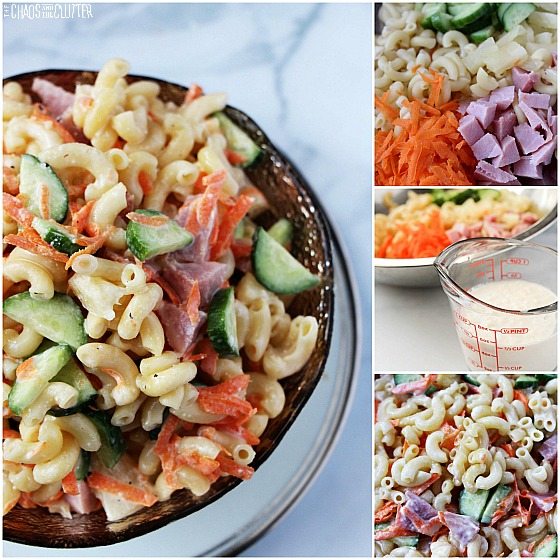
If you’re looking for other easy pot luck salad recipes, check out this bright summery Caprese Salad or our Thai Noodle Salad. Thai Noodle Salad

Filed Under: Cooking in the Chaos

Cheerios Self Portraits

Cheerios artwork

By Sharla Kostelyk

This Cheerios self portrait project was one of the best activities we have done in a long while. It held the kids’ attention for over an hour and a half which was a victory in itself, but there were so many other great things about this project as well. It allowed to kids to explore their creativity and express how they see themselves.

These Cheerios self portraits are such a unique way for kids to express who they are.

How to Make Cheerios Self Portraits

Materials needed:

  • one piece of cardboard per child
  • different types of Cheerios
  • pencils
  • white glue

Our Cheerios Self Portrait Project

For the background, we used pieces of cardboard that I had on hand from some packaging. If you don’t have any cardboard, the inside cardboard from a cereal box would work as well. For this project, I had bought a box of Chocolate Cheerios and a box of Multigrain Cheerios. I thought it was funny being at the grocery store and looking at the different shades of Cheerios and comparing them, trying to figure out if the Honey Nut Cheerios may have had a different hue than the ones in the box of Multigrain!

The kids each sketched a portrait of themselves on their cardboard with pencil. I set out a few bowls of different coloured Cheerios and let the kids glue away! We used regular white glue (commonly called school glue). This activity is excellent fine motor practise as well.

I talked to them a bit about using different colours for shading, but I let them be creative and choose their own colouring. Some of the kids chose to colour the background or add little details like earrings to their self portraits.

Cheerios Self Portrait
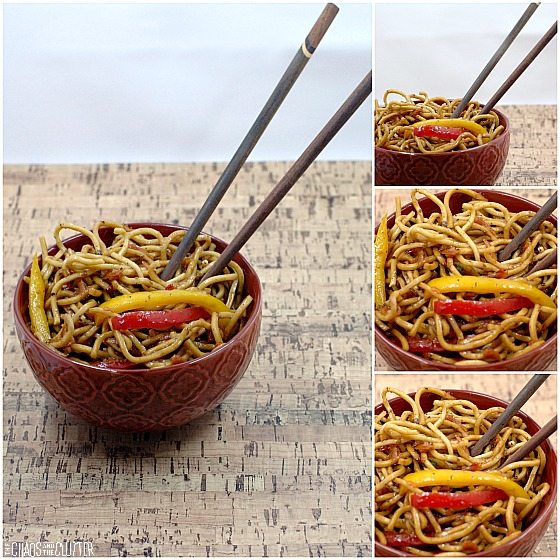
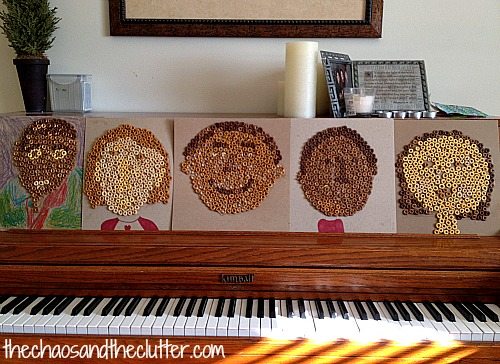
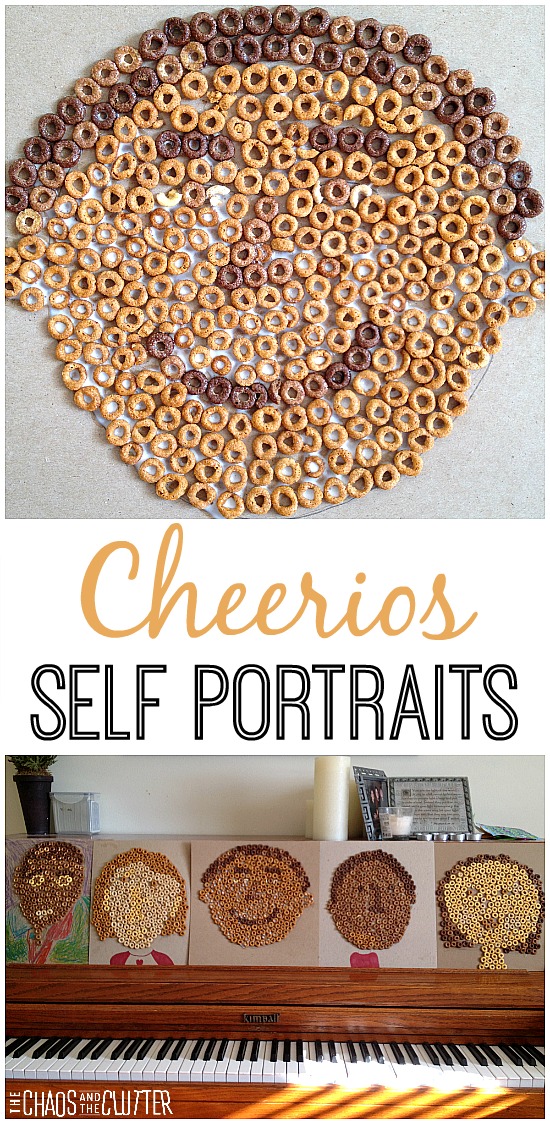
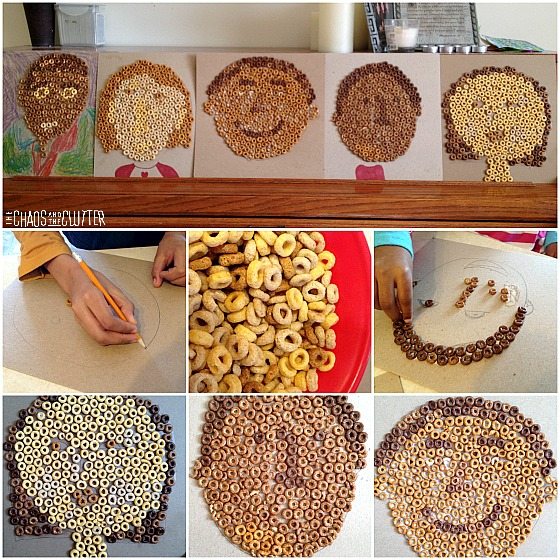
Another great thing about this project was that it gave us the opportunity to talk again about all the little things that make us unique and even talk more about different skin tones.

The finished artwork was so cool, especially because the portraits were each so unique. When The Husband came home, he was easily able to identify which portrait belonged to which child!

Cheerios art self portraitsFrom left to right in the picture above: Snuggle Puppy, Miss Optimism, Einstein, Dancing Queen, and Granola Girl. The kids loved their creations and were proud to show them off! We will definitely be doing more Cheerios art in the future!

This activity is a good one for self-esteem. Our Body Tracing Affirmation Exercise is another project that can improve self-esteem.

Filed Under: Crafts and Activities

Solar System Sensory Bin

By Sharla Kostelyk

We recently did a solar system unit in our homeschooling. It was a really fun unit with lots of easy ways to create hands-on science experiments and interest for the kids. I try to always think of at least one sensory element to go along with the unit studies that we do. For our solar system unit, I made a naturally weighted space sensory bottle and this solar system sensory bin.

Glow in the Dark Solar System sensory binI thought it would be fun to add some glow in the dark elements to this particular sensory bin so I added two different glow in the dark components. One worked better than the other.

For the base of this solar system sensory bin, I used a glitter gravel I picked up at the dollar store. I added two different sizes of decorative black rocks. I used some items from a Space Toob such as a rocket ship, satellite and lunar rover.  For the glow in the dark elements, I added 3D glow-in-the-dark planets which worked really well and sprinkled glow-in-the-dark glitter over some of the black rocks, which didn’t show up as well in the dark.

Solar System sensory bin glows in the dark
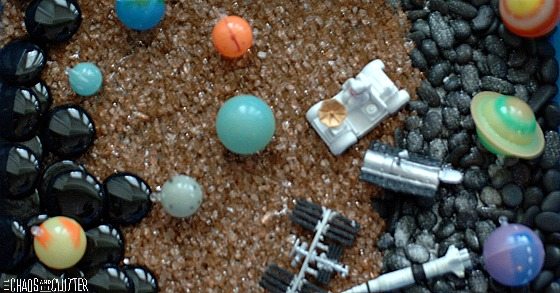
This sensory bin allowed a hands-on opportunity for the kids to explore the planets and learn some of their characteristics. They also enjoyed the glow in the dark effects.

For this particular science unit, I think it was beneficial to have two sensory activities, the sensory bin and the space sensory bottle because some of my kids preferred one while others preferred the other. I also brought both to our homeschool co-op and both were explored by all ages of kids.

Space Sensory BottleFor hundreds of other sensory bin ideas, you can also follow my Sensory Bins board on Pinterest.

Follow Sharla Kostelyk’s board Sensory Bins on Pinterest.

If you are looking for information on making sensory bins, you may be interested in my book. The Ultimate Guide to Sensory Bins

Join our free 5 part email series Sensory Solutions and Activities and get our Sensory System Behaviours Easy Reference Cards.

Filed Under: Sensory, Sensory Bins

Learning About the Earth Science Experiments

By Sharla Kostelyk

I have to say that I have found it much more interesting to teach science as a homeschooler than I did to learn science as a student. I want my kids to love learning and so in my quest to make science engaging, I look for hands-on activities that will help my kids to retain what they learn. When we were learning about the Earth, we found some awesome science experiments!

Doing these hands-on activities made learning about the Earth interesting and helped the kids to understand the concepts much better than if all of our unit had been reading out of a textbook.  Their favourite ones seemed to be the ones about natural disasters such as earthquakes, tornados and hurricanes. Personally, I found the groundwater one to be the most interesting as it was something I didn’t know before.

These science experiments make learning about the Earth interesting and fun.Layers of the Earth from here on The Chaos and The Clutter (pictured)

How to Make a Volcano with Kids from Happy Brown House (pictured)

Making Groundwater from here on The Chaos and The Clutter

Why is the Sky Blue? from Rookie Parenting (pictured)

How Fold Mountains are Made from here on The Chaos and The Clutter

This is a great hands-on science experiment to explain how fold mountains are formed.Graham Cracker Plate Tectonics from Playdough to Plato (pictured)

Landform Activities from Gift of Curiosity

Earthquake Experiment from here on The Chaos and The Clutter

Tornado made with Soda Bottles

Make a Hurricane from Inspiration Laboratories (pictured)

Hurricane in a Jar from One Time Through (pictured)

Water Cycle in a Bag from Playdough to Plato (pictured)

Make a Rock from Fantastic Fun and Learning (pictured)

These science experiments make learning about the Earth interesting and fun.
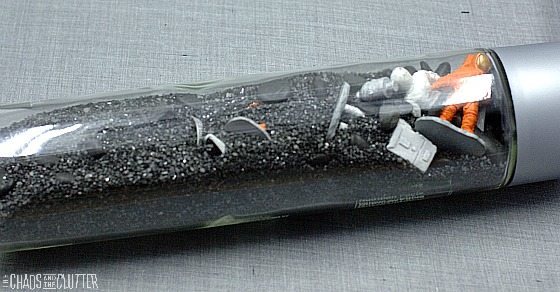
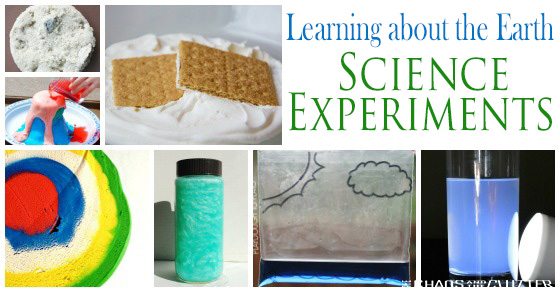
If you are looking for more fun science ideas, be sure to check out my Simple Science board on Pinterest where you will find tons of hands-on experiments and learning activities.

Follow Sharla Kostelyk’s board Simple Science on Pinterest.

Filed Under: Homeschooling, Simple Science

Hop on Pop Sight Words Game

By Sharla Kostelyk

I came up with this game for reinforcing sight words based on the popular Dr. Seuss book, Hop on Pop. It is a great gross motor activity that can also be adapted for rhyming words. It went along well with our Dr. Seuss unit but we have used it other times in our homeschool as well.

This Hop on Pop gross motor game is great for teaching sight words and rhyming.
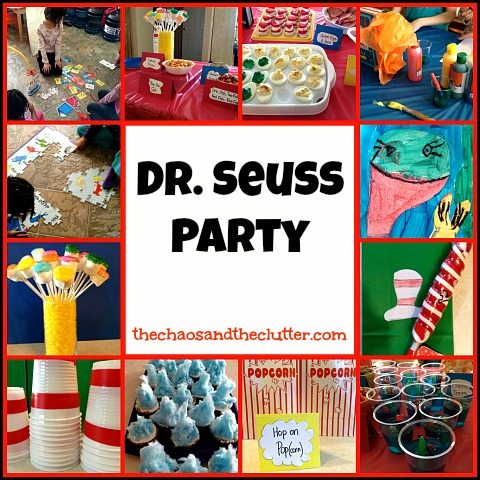
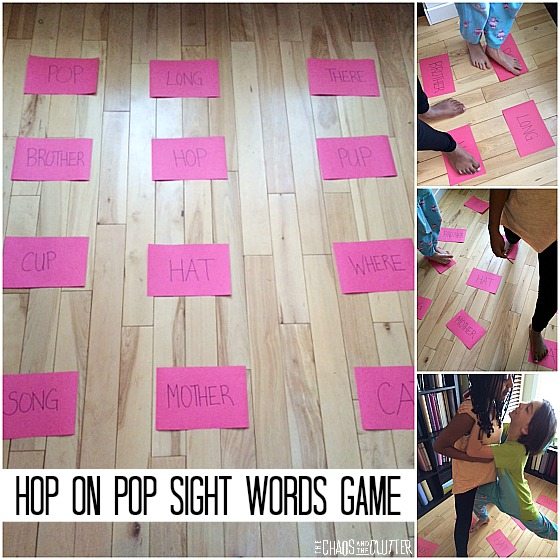
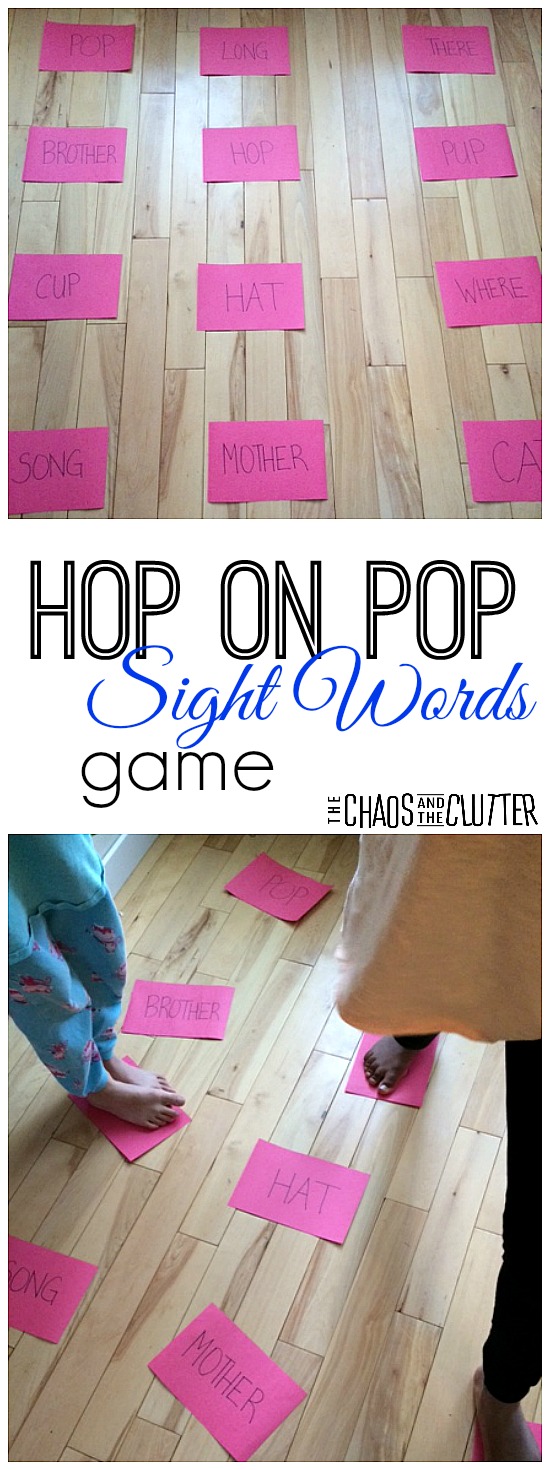
This Hop on Pop sight words game was so easy to make and the kids enjoyed it much more than I thought they did. All I did was write some of the words from the book “Hop on Pop” on pieces of paper and lay them out over the floor.

Then I called out “Einstein, hop on ‘three'” or “Snuggle Puppy, hop on ‘house'” and they would ‘hop’ onto the word. It became quite funny, almost like a game of Twister once all five of them were on the ‘board’ because trying to hop onto the words became a bit more challenging with their siblings in the way!

Hop on Pop Sight Words gross motor game

All the kids wanted a turn to “Hop on ‘Pop'” so it became a challenge for me to arrange everyone in such a way that the ‘pop’ word was empty and the child who hadn’t had their turn yet had easy enough access to it! They did all get a turn and in the meantime, we were able to reinforce sight word concepts.

As they have gotten older, we have played different versions of the game including one where I call out their name and one word such as “cat” and they then have to step one foot on “cat” and one foot on the word that rhymes with “cat”. This version works on sight words and rhyming words and because their feet are on two different words at one time, it becomes even more of a Twister-type scenario so we usually only play that version with two kids at a time.

Hop on Pop Sight Words Game
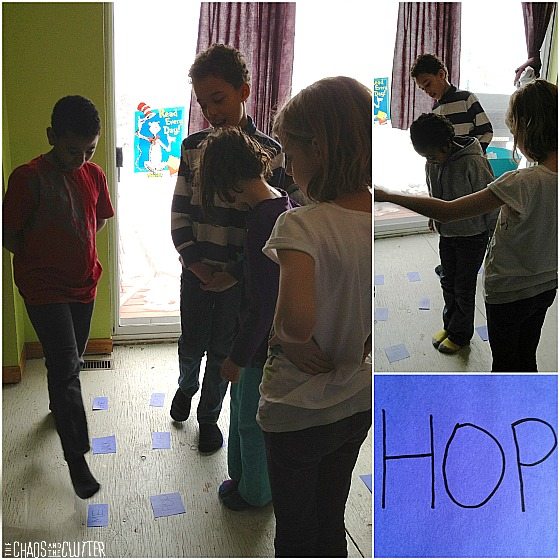
If you are planning some Dr. Seuss fun, you may want to check out our Dr. Seuss muffin tin meal and Dr. Seuss writing activity (which includes a free printable). You may also want to check out my Dr. Seuss Pinterest board.

We had the most fun at our Dr. Seuss party. We held it to celebrate Dr. Seuss’ birthday with some of our homeschool friends. It was such a great theme that it was as fun to plan as it was for those who attended.

Dr. Seuss Party

Filed Under: Homeschooling

  • « Go to Previous Page
  • Page 1
  • Interim pages omitted …
  • Page 72
  • Page 73
  • Page 74
  • Page 75
  • Page 76
  • Interim pages omitted …
  • Page 128
  • Go to Next Page »

Primary Sidebar

Categories

We are a participant in the Amazon Services LLC Associates Program, an affiliate advertising program designed to provide a means for us to earn fees by linking to Amazon.com and affiliated sites.

Copyright © 2026 • The Chaos and the Clutter • Site Design by Jeni @ The Blog Maven

Return to top of page

Copyright © 2026 · Chaos and the Clutter 2.0 on Genesis Framework · WordPress · Log in