• Skip to primary navigation
  • Skip to main content
  • Skip to primary sidebar
  • Home
  • About
  • Contact
  • Privacy + Terms
  • Affiliates

The Chaos and the Clutter

  • Facebook
  • Twitter
  • Pinterest
  • Google Plus
  • RSS
  • Email
  • School at Home
  • Sensory
    • Sensory Processing Disorder
    • Awesome Sensory Play Activities
      • Sensory Bins
      • Sensory Bottles
      • Sensory Bags
  • Family Games
    • Minute to Win It Games
  • Special Needs Parenting
    • Childhood Anxiety
    • Reactive Attachment Disorder
    • Sensory Processing Disorder
  • Store
  • Course Login

Sharla Kostelyk

The Two Words That Suck the Joy Out of Your Day

By Sharla Kostelyk

Words are a powerful thing. They can alter your mood, build bridges in relationships, encourage, breathe life, and transform. I’ve shared with you how two words transformed our family for the better. Those words are an example of what extraordinary power what you say and think has. Words also have the power to destroy, to tear down, to defeat nations, and to break bonds.

A few months ago, I noticed a general pattern in my moods. I was feeling less content with my life and with my circumstances. I was restless and negative. I was pretty darn unhappy to be frank. What especially scared me was that it seemed to be trending in a downward spiral. Each day, I felt worse than the one before.

Two Words you Need to Stop Saying Immediately if you want to be happyNothing in particular had changed about our circumstances. Our life has been challenging for at least the past ten years and I don’t expect that those challenges will lessen in the next five years or so but I had usually managed to maintain a mostly positive attitude despite life’s circumstances and ups and downs. I spent some time analyzing why it was that I was becoming such a negative person. I didn’t want to be the person I now saw staring back at me in the mirror. I wanted to be that person I had been, the one who could find the humour or at least the silver lining in every situation.

As I analyzed this state I was in, I could find only one difference between the me of present and the me of the past. I had allowed two seemingly innocuous words to creep into my vocabulary. The words were not a phrase that I was accustomed to using so at first, they felt strange fumbling around in my brain and even stranger when they escaped my lips.

As with most things, once I had said them out loud, they became easier and easier to say and they were in my brain, embedded like a persistent houseguest who outstays their welcome and becomes more and more at home in your dwelling.

What were these powerful words that could almost debilitate and discourage me even in a whisper?
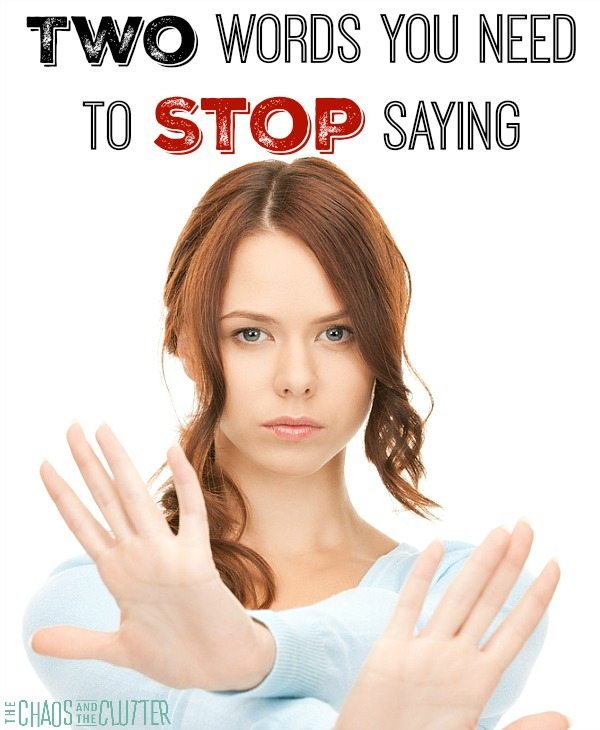
I deserve…

“I deserve a break.”

“I deserve things to go my way for once.”

“I deserve some peace.”

“I deserve for you kids to listen to me.”

“I deserve some chocolate and a glass of wine.”

“I deserve time alone.”

“I deserve a new dress.”

“I deserve to eat out.”

“I deserve more.”

I understand that an argument could be made that I work hard and that I deserve all of those things. An argument could also be made that everyone in the world (including those in abject poverty or in developing countries) deserve those things and are not likely to get them, so I shouldn’t think that I am more worthy of those things than others.

Whether or not I actually deserve those things isn’t the point. By speaking those words, even just in thinking them, I was significantly contributing to my own unhappiness. I was focusing on the negative rather than the positive.

Instead of feeling blessed because I got five minutes to myself, I lamented about why I didn’t get an hour. Instead of being grateful that I have a house to live in, I perseverated on the thought that I deserved more help with keeping it clean. Instead of choosing thankfulness, I chose to reserve a seat to my own daily pity party and was sitting longer and longer at that table.

Thinking about how you deserve more instead of looking for all the blessings in front of you is a recipe for unhappiness. It can lead to procrastination, divorce, weariness, anger, and dismay.

Two Words You Need to Stop Saying NowOne day, I said to my son who was being rude to me,”Try that again. I deserve respect.” I’m not debating that he should have been more respectful as I am his mom, but what came out of his mouth was, “I deserve to get anything I want.” Obviously, that’s laughable as none of us get whatever we want and certainly not when we are living in our parents’ home not paying rent, but the statement shocked me because I realized immediately that I had created that attitude in him. He had been hearing me talk for weeks about all the things I deserved and he had begun to let those two words seep into his brain and infect his thoughts.

The “I deserve” virus was in fact spreading throughout our whole home. It had become an epidemic, all these little people running around asking themselves what others could do for them instead of what they could do for others because you know, they deserved the best of everything and the easiest of chores or no chores at all for that matter! The only way to stop the spread of the virus was to immediately eliminate that toxic phrase from my vocabulary.

Those words had become a habit, so it wasn’t easy to get them out of our home, but as I have consciously grabbed hold of them when they come into my mind and reminded myself of what a lie they are and how dangerous that thinking is, I think them less and less. I hear them escape my lips even less often and I’m beginning to hear them less from everyone in the family.

I read somewhere once that deservedness is a currency of shame. The idea of deserving something positive also leads to thinking of deserving negative for not measuring up. Using the words “I deserve” sends the message to our children that they can be good enough or not good enough to have positive or negative results. This could translate into things or into love. When we remove the idea of deservedness from our minds, we can have things and love and attention whether or not we did anything that amounts to “enough”. This new framework allows for gratitude and for grace.

If you aren’t convinced at the negative impact these two little words have, I hope you will be willing to humour me with a bit of an experiment. Would you go with me on a one month journey to discover how much happier you feel when you eliminate these two toxic words from your life? Would you be willing to go a little further with me in this experiment and consider replacing those two toxic words with these transformative two words that will encourage and strengthen your family? Let me know what you find.

Two Words That Will Transform Your Family square

Filed Under: Parenting in the Chaos

Body Tracing Affirmation Exercise

By Sharla Kostelyk

Body tracing can be a great way to foster connection with your child. This particular body tracing activity is particularly beneficial for kids with trauma histories, difficulty connecting with their family or siblings and those with self-image issues. This body tracing therapy activity provides positive reinforcement and also allows kids the chance to practise encouraging others and see themselves more positively.

This body tracing therapy activity provides positive reinforcement and also allows kids the chance to practise encouraging others.
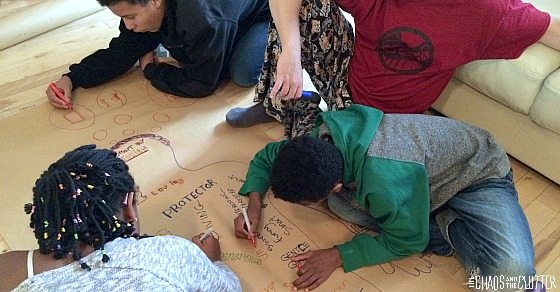
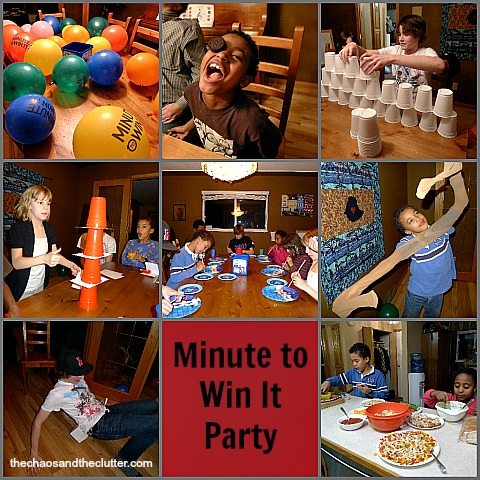
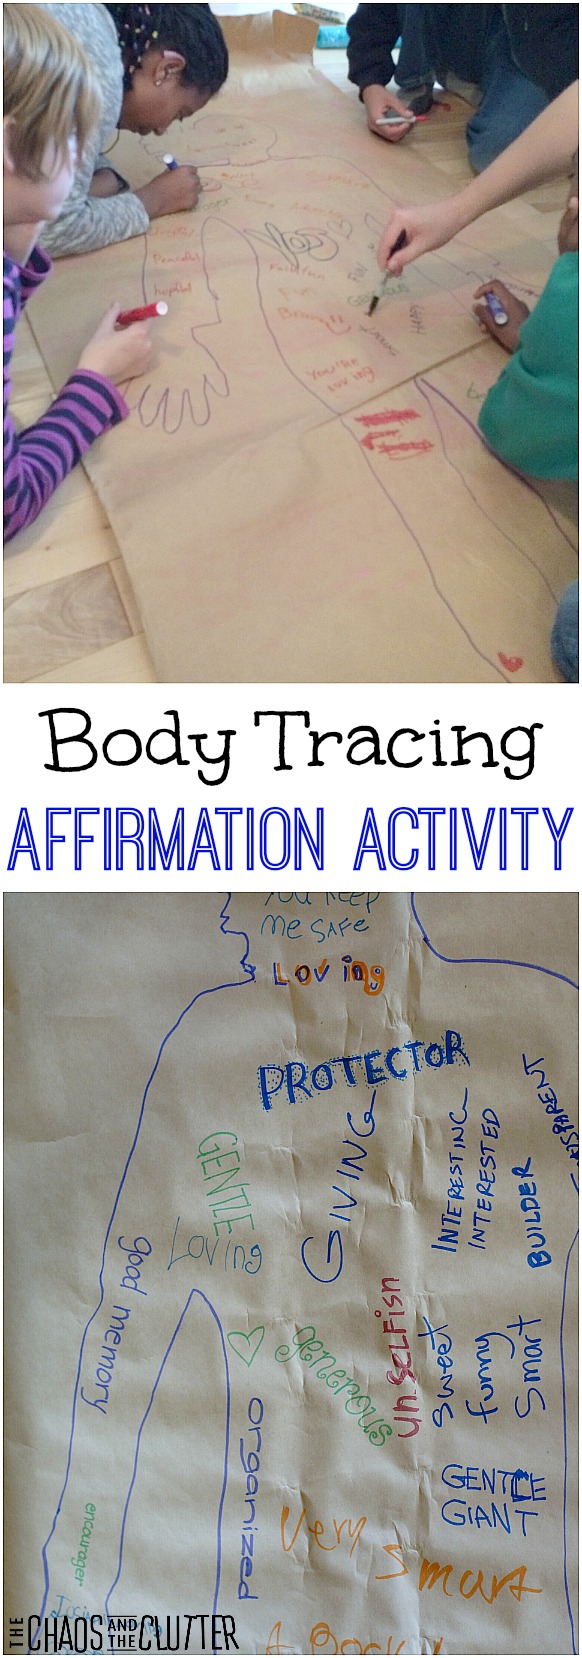
For kids with autism and attachment issues due to adoption, eye contact can feel threatening. This activity promotes eye contact and safe physical touch in a fun and relaxed way.

Materials needed:

  • butcher paper
  • markers (we used a pack of permanent markers)

We began this activity with a small talk with our kids about what would be an encouraging or positive word or phrase and gave them some examples. We wanted to decrease the chance that one brother may write something negative on another brother’s sheet!

To lower your child’s anxiety about this activity, it is usually best for you to be the one who lies on the butcher paper first. Your child can then use a marker to trace around your body. Once your body tracing is complete, get up off the paper and have everyone who is participating write positive words that describe you in the outline of your body. You also need to participate in this part and write positive words about yourself.

Writing positive words about yourself is one of the hardest things about this activity, but it’s important to model that for your child.

Next, it is your child’s turn to lie on the butcher paper. You know your child best. With some kids, you can joke light-heartedly while you are tracing them about their ticklish bits. However, for kids with abuse histories, you will probably want to trace more widely around them so that the marker doesn’t come into contact with any part of their bodies. While you are tracing them, be sure to look for opportunities to make eye contact and give them encouragement.

body tracing affirmation exercise square
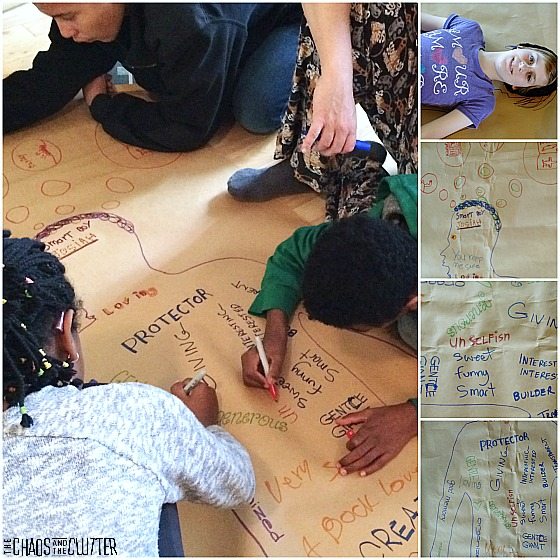
Now it is time for everyone present to write words about that child in their body tracing. That child also writes positive words about themselves on their paper. Writing something positive about themselves was hard for some of our kids to do, but once they were able to write one thing, the rest seemed to come more easily.

Lastly, we got someone present to read all the words for each child in the form of “so-and-so is intelligent and cheerful and likes trains and…”. The child whose paper was being read was always beaming by the end.

I was worried about how some of our kids would do with this activity because as siblings, they don’t always have the nicest things to say about each other or to each other but they really caught the spirit of this and they all did an amazing job of building each other up.

body tracing therapy activityWe intended this to be a therapy activity that would boost self-esteem but I feel like it did more than that. There was a feeling of family togetherness and peace when we completed this activity. Afterwards, I heard our kids being more encouraging of each other and I heard less negativity in general.

This body tracing encouragement activity could be used in families, group programs, teams, or schools. It requires no prep, very few items and creates a sense of unity and affirmation.

Join me for a free 5 part email series, Little Hearts, Big Worries offering resources and hope for parents.

Anti-Anxiety Kit squareCreate Your Own Anti-Anxiety Kit for Kids

Filed Under: Adoption, Crafts and Activities

The Flour Game

On the top, a rounded mound of flour sits on a white plate with a green lifesaver candy on the top in the middle. Below that are the words "The Flour Game" and below that, a teen boy with a grey hat on backwards gives the thumbs up sign while his nose and mouth area are full of flour and he sits in front of a white plate of flour.

By Sharla Kostelyk

The Flour Game is so much fun. It’s perfect for gatherings with a variety of different ages because it can be played by anyone from a preschooler up to great-grandparents. This makes it a great option for family reunions or Christmas or Thanksgiving get togethers. It would also be great for a youth group event.

This flour game would be perfect for large parties, youth group events or family reunions because you can play with a wide range of ages.
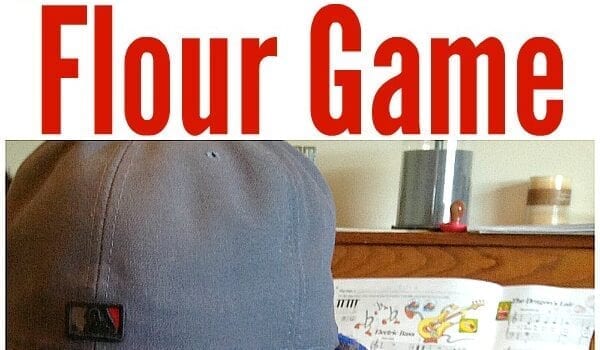
Another great thing about this game is that it takes very little prep and very few supplies. It can be played pretty much anywhere including outdoors so you could even play this when your family is camping.

Materials needed:

  • bowl
  • plate
  • knife
  • flour
  • LifeSavers or other small hard candies

Fill a bowl full of flour and pack it down. Continue to add flour until the bowl is full to the top and level it off. Place a plate over the bowl and carefully tip it upside-down and lift the bowl off, creating a mound of flour on the plate. Set a LifeSaver on top of the mound of flour.

The Flour Game square
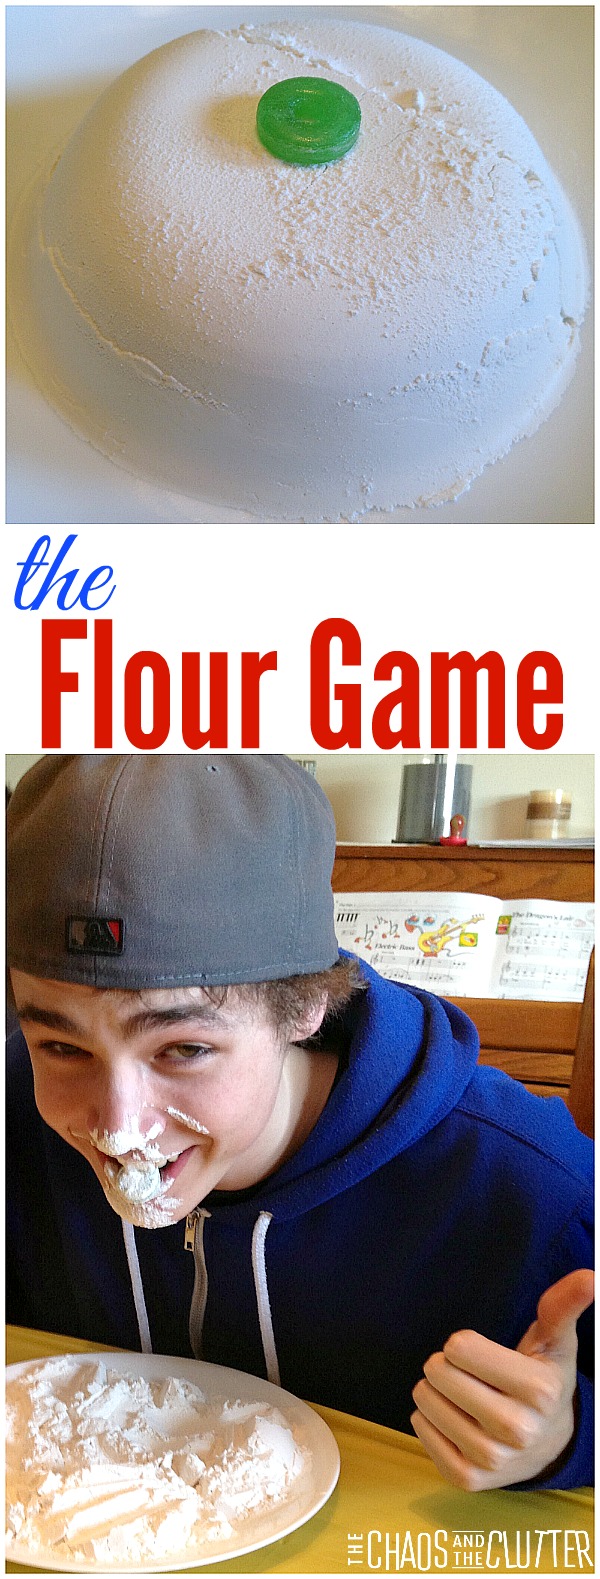
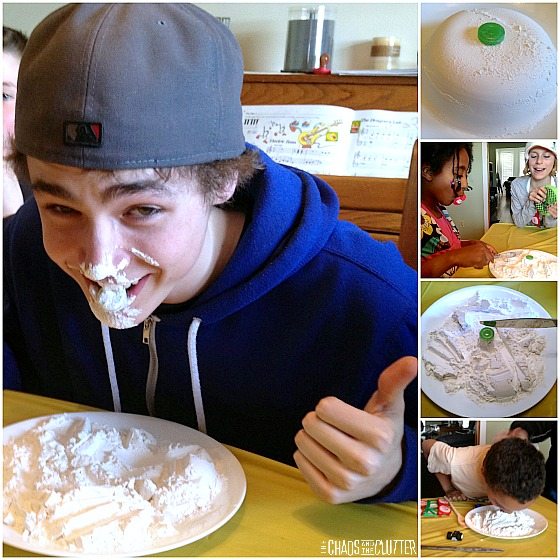
Each player takes a turn cutting the flour trying not to allow the LifeSaver to fall. Players continue to take turns cutting the flour until the candy falls. The person that cuts the flour which causes the LifeSaver to fall has to then retrieve it with his mouth.

The Flour Game FB
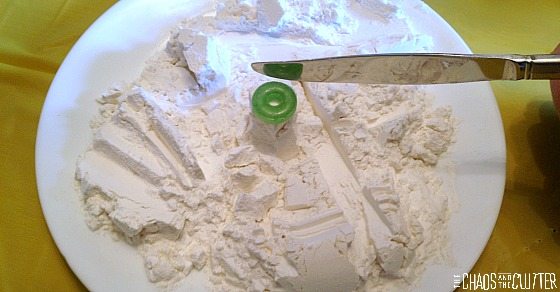
It’s impossible to retrieve the candy without getting a face full of flour making this part quite funny! It’s also funny to see the attempts to retrieve the candy with minimum flour-face-coverage.

We played The Flour Game during our Just for Laughs Family Fun Night. Mackenzie was the first the end up fishing out the LifeSaver with his mouth. He did well retrieving it and only managed to get flour on his nose, mouth and chin but the others that followed after him weren’t so lucky! Unfortunately, I didn’t get pictures of that because I was laughing too hard and too engrossed in the game.

Family Fun Night for LaughsJust for Laughs Family Fun Night

Looking for more ideas for family fun or resources to help you connect with your child? Join our free 5 Days to Better Family Connection email series.

You might also be interested in these activities: 

The Bag Game

Minute to Win It PartyMinute to Win It Family Fun Night

Filed Under: Crafts and Activities, Family Games

Spring Sensory Bottle

Spring Sensory Bottle with butterflies, flowers and bugs

By Sharla Kostelyk

I find inspiration for sensory activities at the strangest places. Looking through my cupboards, standing in line at the grocery store glancing at magazine covers, walking the aisles of the craft or dollar or hardware store, or even being outside can lead to an idea. They don’t always work out the way I envision they will, but this spring sensory bottle came together nicely.

Spring Sensory Bottle with butterflies, flowers and bugs
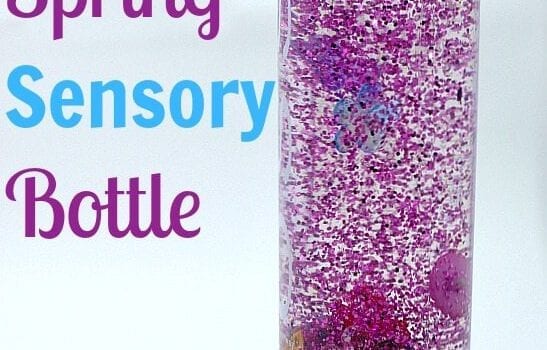
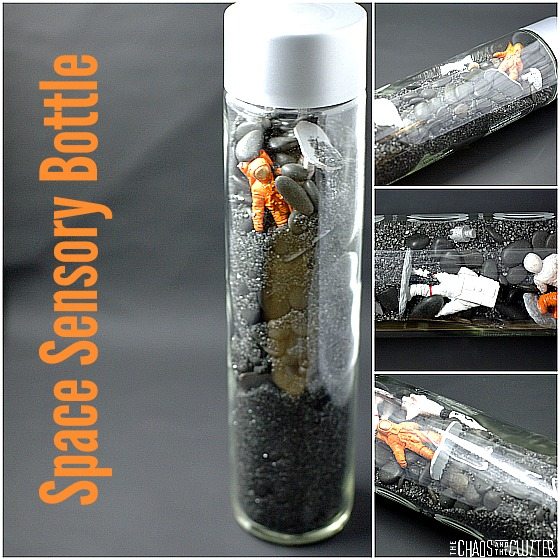
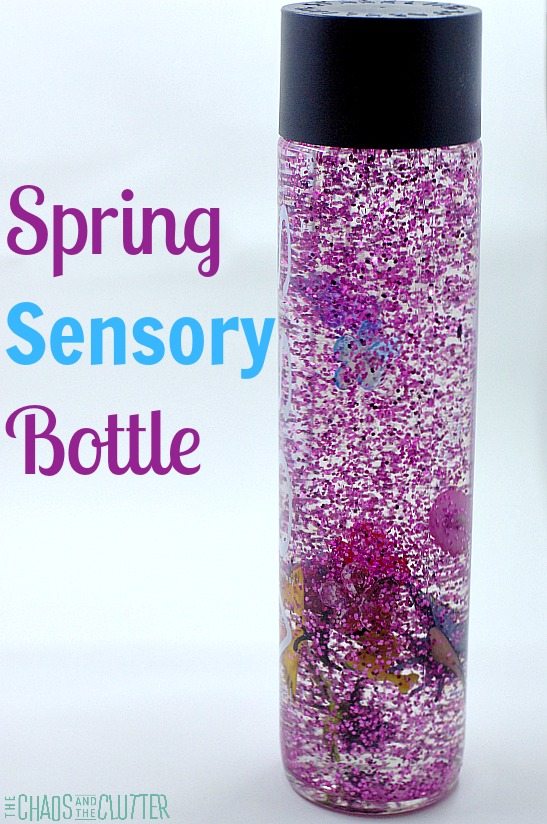
Spring Sensory Bottle:

I love the fresh colours of spring. That and a package of cute buttons were the inspiration behind this discovery bottle.

Materials needed:

  • water bottle (I used a small Voss bottle)
  • 147 mL (5 oz.) bottle clear school glue
  • pink glitter
  • small ladybug, caterpillar, butterfly, and flower buttons
  • small gel flowers
  • butterfly Toob

To make this spring sensory bottle, pour the bottle of glue into an empty water bottle. Add warm water to almost the top of the bottle, put the lid on and shake well to mix. I added a bottle and a half of glue but it was a bit too much glue and the glitter stuck together, so I would recommend using only one bottle of glue.

Safari Ltd Butterflies TOOBSafari Ltd Butterflies TOOBVOSS Water Plastic BottlesVOSS Water Plastic BottlesElmer's Clear GlueElmer’s Clear Glue

Spring Sensory bottle square
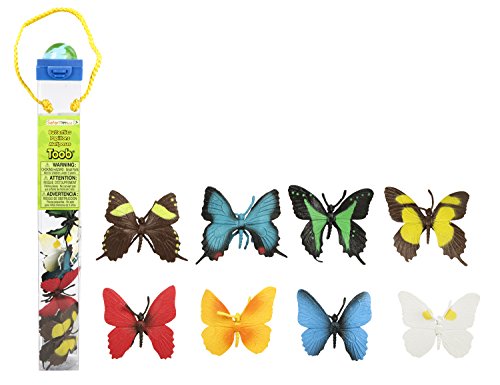
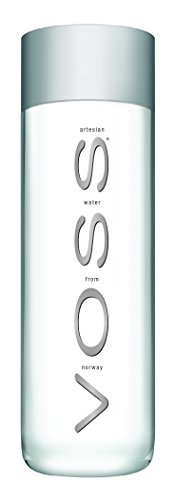
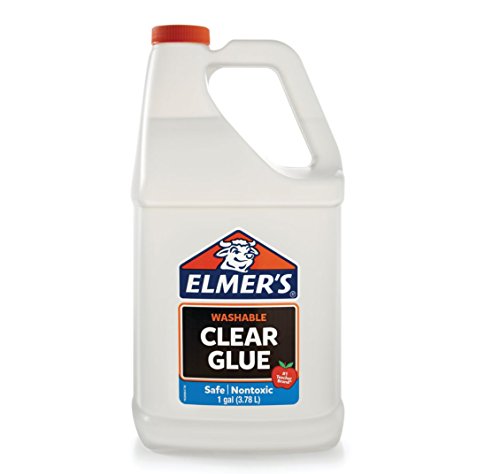
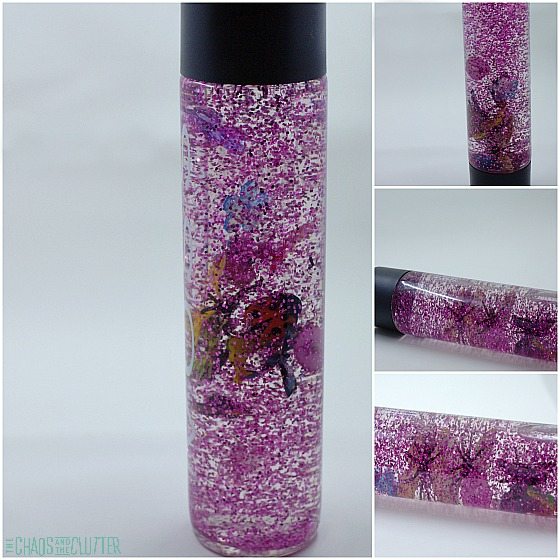
Once the water and glue are well mixed, take the lid off and add the glitter. Drop the small buttons and flowers into the bottle. The butterflies from the butterfly Toob are a bit too big to fit but if you bend the wings in, they go in easily and then their wings will open when they are past the smaller opening of the bottle.

Twist the lid back on and give the bottle a shake. The items and glitter will fall slowly because of the glue in the bottle which makes it a good calm down bottle.

Spring Discovery Bottle
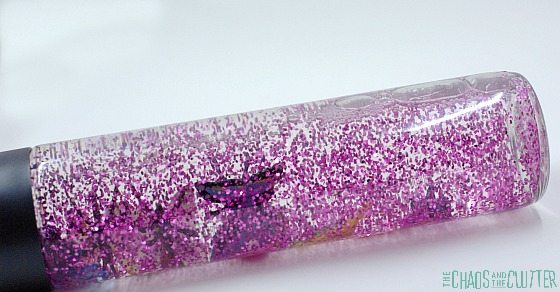
If you have little ones and are worried about the small parts being a choking hazard, you can secure the lid with a hot glue gun.

If you are looking for other sensory ideas, join me for a free 5 part email series Sensory Solutions and Activities (just pop your email into the box below) and get a printable list of 175 Great Sensory Ideas.

Ocean Sensory Bottle squareOcean Sensory Bottle

Rainbow Sensory Bottle squareRainbow Rainfall Sensory Bottle

Filed Under: Sensory Tagged With: sensory bottles, sensory play

Sugar Cookies with Maple Icing

By Sharla Kostelyk

The truth about these sugar cookies with maple icing is that the cookies are just an excuse to eat the icing. You may find yourself sampling the icing with a spoon before icing the cookies just to be sure that it passes the test. In my experience, this tasting may lead to you having to make a second batch of the icing!

Sugar Cookies with Maple Icing. The cookies are just an excuse to eat the icing without a spoon. It's that good!

Sugar Cookies with Maple Icing Recipe:

2 3/4 cups flour
1 tsp. baking soda
1/2 tsp. baking powder
1 cup softened butter
1 1/2 cups white sugar
1 egg
1 tsp. vanilla

Mix flour, baking soda and baking powder together in a medium sized bowl. In another bowl, cream together the butter and sugar. Beat in the egg and vanilla. Gradually blend in the dry ingredients. Make round balls of dough using about a teaspoon of the dough.

Bake in a preheated 375° oven for 8-10 minutes until the edges begin to brown slightly. Allow the sugar cookies to cool before icing.

Sugar Cookies Iced with Maple IcingFor the icing, put some icing sugar in a bowl. Start with about one cup. Pour a bit of real maple syrup into the icing sugar and begin to stir. When it becomes icing consistency, spread it onto the cookies. You can adjust the consistency by adding more icing sugar or more maple syrup as needed.

Note that it is important to use real maple syrup for this recipe. I’m not just saying that because I’m Canadian either!

Sugar Cookies with Maple Icing square
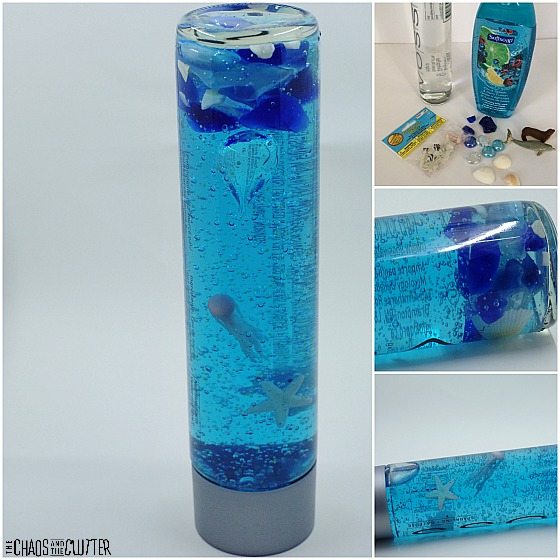
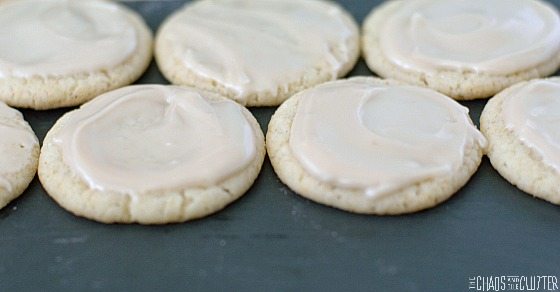
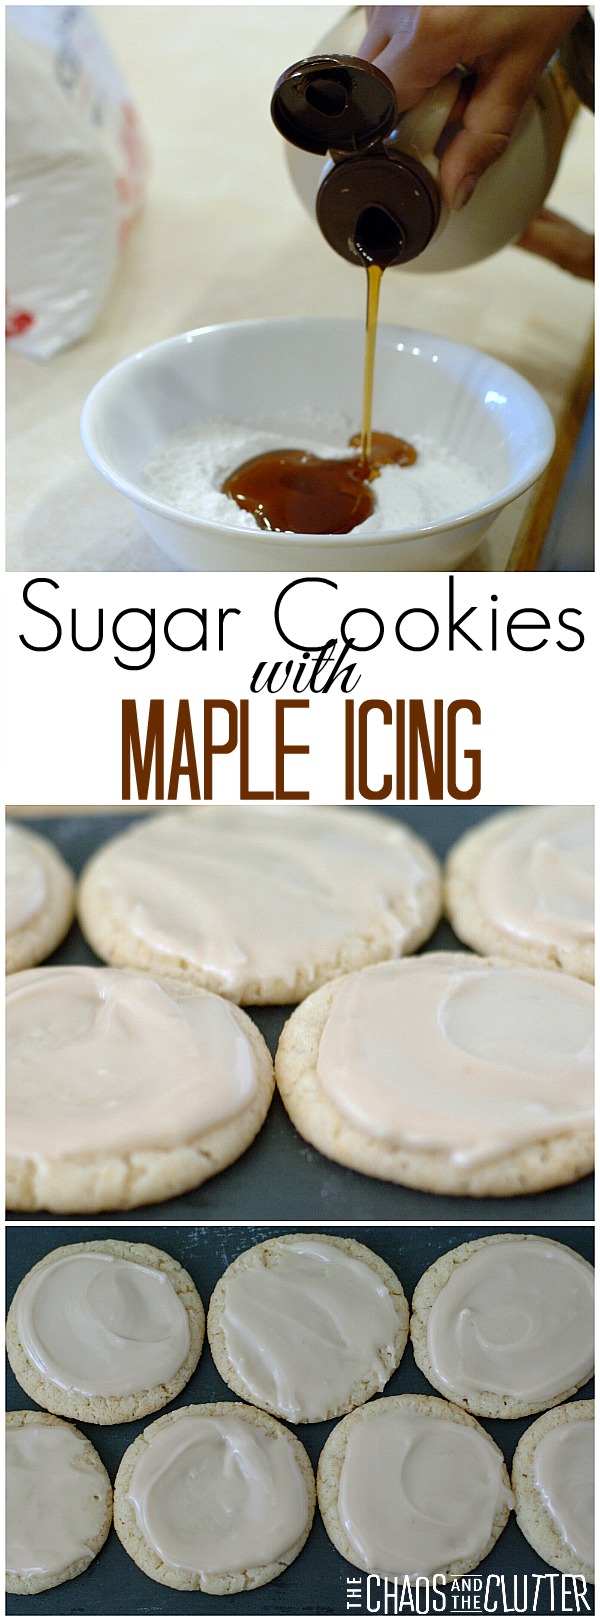
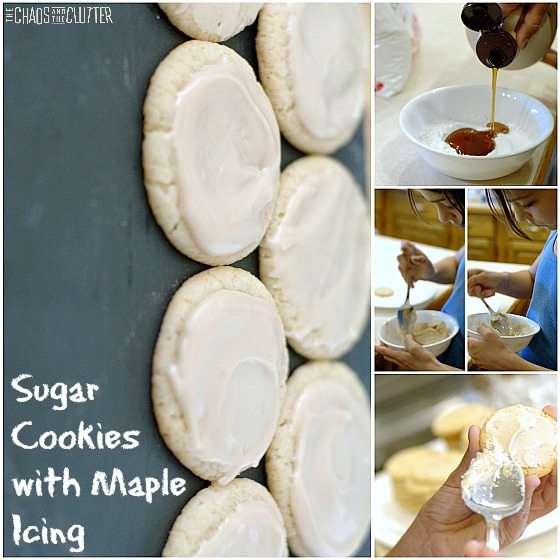
The simple two-ingredient maple icing can also be used on muffins (especially these pumpkin muffins), loaves or to top off ice cream. The icing is really the star of this show.

In the fall, I sometimes use leaf shaped cookie cutters and make rolled sugar cookies with maple icing. They look beautiful and taste like fall in the country.

Snickerdoodles Cookies

SnickerdoodlesEggnog Snickerdoodles

Eggnog Snickerdoodles

Print
Sugar Cookies with Maple Icing Recipe
The truth about these sugar cookies with maple icing is that the cookies are just an excuse to eat the icing. You may find yourself sampling the icing with a spoon before icing the cookies just to be sure that it passes the test. In my experience, this tasting may lead to you having to make a second batch of the icing!
Ingredients
  • 2 3/4 cups flour
  • 1 tsp. baking soda
  • 1/2 tsp. baking powder
  • 1 cup softened butter
  • 1 1/2 cups white sugar
  • 1 egg
  • 1 tsp. vanilla
Instructions
  1. Mix flour, baking soda and baking powder together in a medium sized bowl. In another bowl, cream together the butter and sugar. Beat in the egg and vanilla. Gradually blend in the dry ingredients. Make round balls of dough using about a teaspoon of the dough.
  2. Bake in a preheated 375° oven for 8-10 minutes until the edges begin to brown slightly. Allow the sugar cookies to cool before icing.
  3. For the icing, put some icing sugar in a bowl. Start with about one cup. Pour a bit of real maple syrup into the icing sugar and begin to stir. When it becomes icing consistency, spread it onto the cookies. You can adjust the consistency by adding more icing sugar or more maple syrup as needed.
Recipe Notes

Note that it is important to use real maple syrup for this recipe.

Filed Under: Cooking in the Chaos

Rainbow Rainfall Sensory Bottle

Rainbow Rainfall Sensory Bottle - This discovery bottle is easily made with straws and beads.

By Sharla Kostelyk

This Rainbow Rainfall Sensory Bottle costs very little to make and is so colourful. There is something cheerful about it. It also has an auditory sensory element to it with the beads falling in between the pieces of straw, creating a rainfall effect.

Rainbow Rainfall Sensory Bottle - This discovery bottle is easily made with straws and beads.
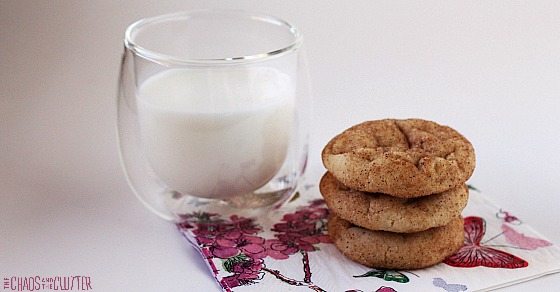
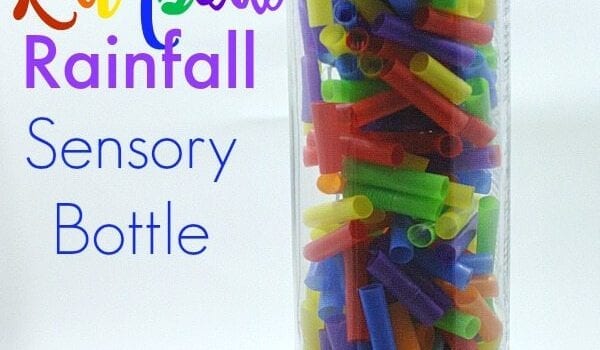
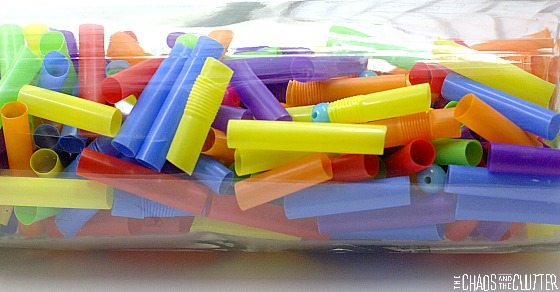
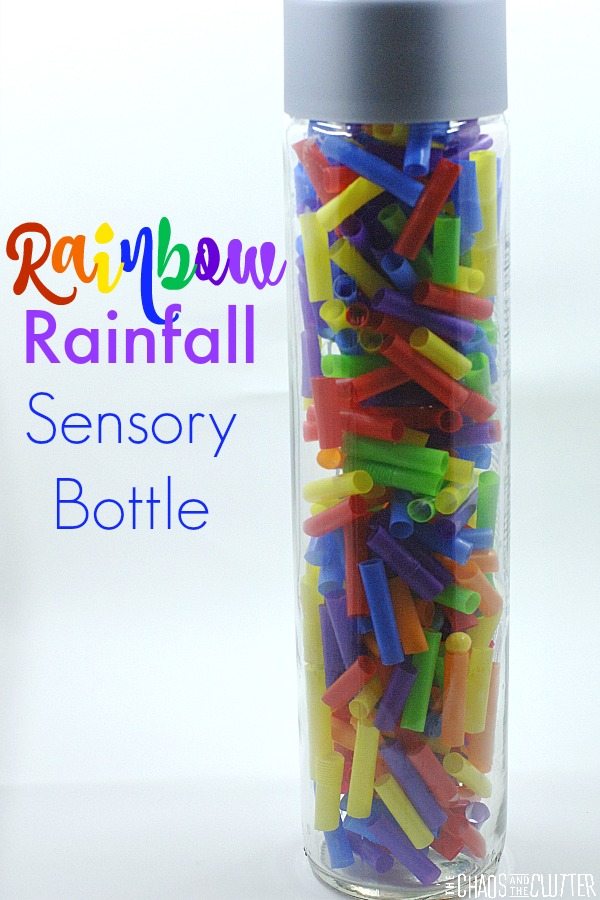
Rainbow Rainfall Sensory Bottle:

I was inspired to make this sensory bottle because of the cheerful colours of the plastic straws we had in the cupboard. All of the materials I used were ones we already had in the house which makes for a very inexpensive project.

Materials needed:

  • water bottle (I used a Voss bottle)
  • scissors
  • rainbow coloured plastic straws
  • small multi-coloured beads

VOSS Water BottleVOSS Water BottleAssorted Bright Colors StrawsAssorted Bright Colors StrawsPony Bead MulticolorPony Bead Multicolor

To create this rainbow rainfall discovery bottle, cut the coloured straws with scissors and add them into the empty water bottle haphazardly. Don’t add all of one colour and then all of another colour unless you want to create a layered look because once they are in there, they won’t mix very much.

Rainbow Sensory Bottle squareAbout halfway through adding your straw bits, you can add a few of the small beads and once your bottle is almost full of the straw pieces, you can add more of the beads and top with another few plastic straw pieces to finish off before putting the lid back on.

If you leave enough space at the top, the beads and straws will create a rainfall effect when the discovery bottle is tipped upside down.

Rainbow Rainfall Sensory BottlePlease note: The beads can create a choking hazard for young children, so supervision is recommended or you can use a hot glue gun to secure the lid in place.

If you are looking for other sensory ideas, sign up for our free 5 part email series Sensory Solutions and Activities (just pop your email into the box below) and get a printable list of 175 Great Sensory Ideas.

This Space sensory bottle is naturally weighted. Kids can also use it as an I-Spy activity.Weighted Space Sensory Bottle

Ocean Sensory Bottle squareOcean Sensory Bottle

Filed Under: Sensory Tagged With: sensory bottles, sensory play

  • « Go to Previous Page
  • Page 1
  • Interim pages omitted …
  • Page 70
  • Page 71
  • Page 72
  • Page 73
  • Page 74
  • Interim pages omitted …
  • Page 128
  • Go to Next Page »

Primary Sidebar

Categories

We are a participant in the Amazon Services LLC Associates Program, an affiliate advertising program designed to provide a means for us to earn fees by linking to Amazon.com and affiliated sites.

Copyright © 2026 • The Chaos and the Clutter • Site Design by Jeni @ The Blog Maven

Return to top of page

Copyright © 2026 · Chaos and the Clutter 2.0 on Genesis Framework · WordPress · Log in