• Skip to primary navigation
  • Skip to main content
  • Skip to primary sidebar
  • Home
  • About
  • Contact
  • Privacy + Terms
  • Affiliates

The Chaos and the Clutter

  • Facebook
  • Twitter
  • Pinterest
  • Google Plus
  • RSS
  • Email
  • School at Home
  • Sensory
    • Sensory Processing Disorder
    • Awesome Sensory Play Activities
      • Sensory Bins
      • Sensory Bottles
      • Sensory Bags
  • Family Games
    • Minute to Win It Games
  • Special Needs Parenting
    • Childhood Anxiety
    • Reactive Attachment Disorder
    • Sensory Processing Disorder
  • Store
  • Course Login

Sharla Kostelyk

February Emotions Printables for Kids

printed pages with sentences and hearts

By Sharla Kostelyk

February is a time for celebrating love. Not just romantic love, but friendship and family. Kids can however have mixed feelings about Valentine’s Day. They may feel jealous of those who receive more Valentine’s, indifferent, happy, or sad due to circumstances within their family or with friends.collage of printed pages of words and heart faces with emotions on them. Text reads "February Emotions printables"

These Valentine’s themed February emotions printables can help kids identify and talk about their feelings.

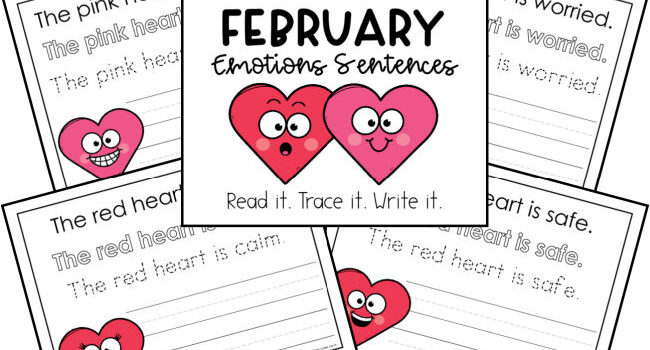
February Copywork Emotions Sentences:

I strongly believe that teaching emotions is more important than teaching academics. Children need to develop a firm understanding of emotions and learn how to effectively express their own. These February emotions printing practise worksheets allow kids to practise their printing while also normalizing talking about emotions.

These copywork pages allow students to explore emotion words and associate the images with the corresponding feeling. This expands their emotional vocabulary.
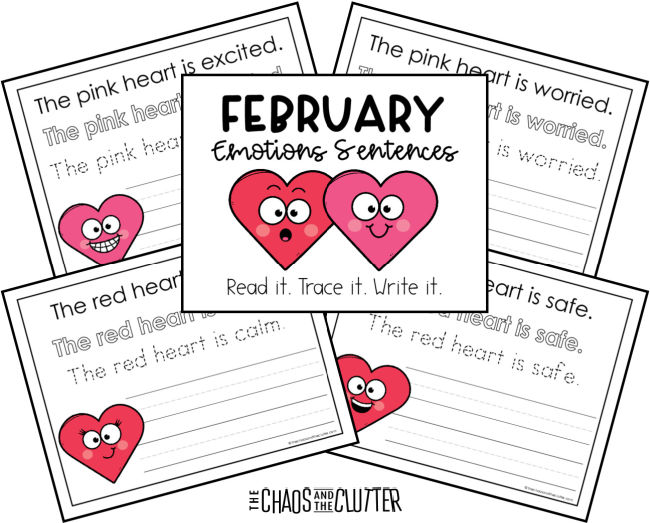
printed pages with sentences and hearts

Supplies needed:

  • February Emotions printables
  • pencil or pen OR
  • plastic sleeve AND dry erase marker

Download the printable pages. If you want them to be reusable, laminate the pages or slip them into a plastic page protector. Students can then use a dry erase marker to complete the tracing and writing.

For one time use, give the student a pencil, crayons, coloured pencils, or markers and the printed papers.printed page with sentences and a heart in a plastic sleeve with a dry erase marker on top

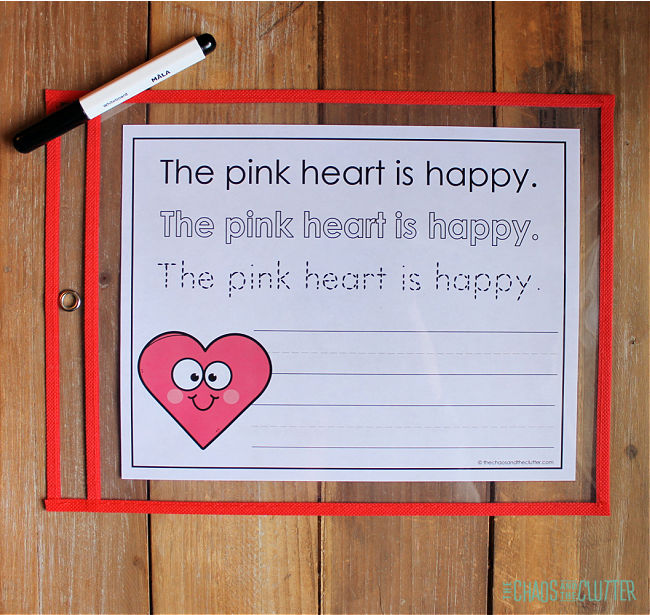
Instructions for the student:

  1. Read the sentence.
  2. Fill in the outline.
  3. Trace the dotted words.
  4. Write the sentence on the lines provided.
  5. Discuss the different emotions.

These worksheets can be the jumping off point for a discussion with the whole class or one-on-one talk about different emotions. They can be used by teachers, homeschoolers, parents, or therapists.

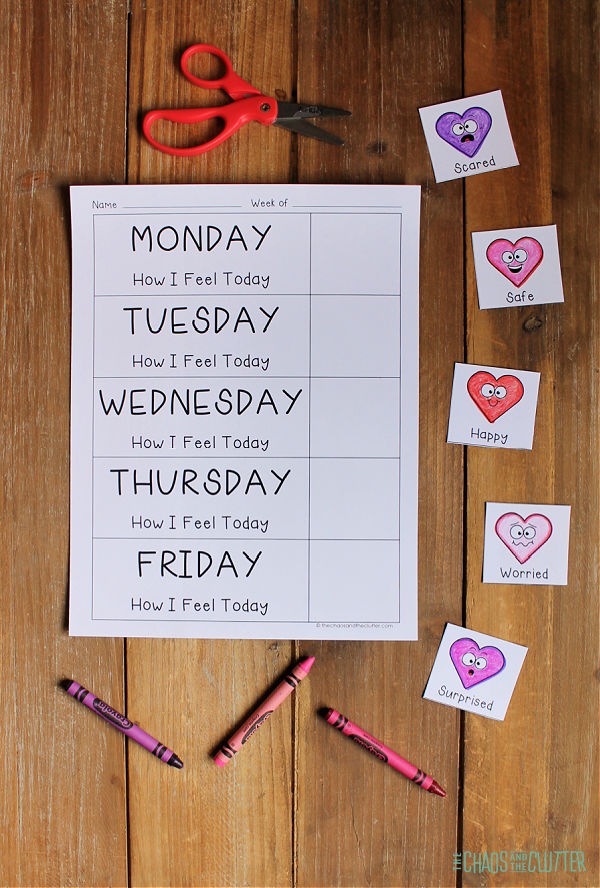
February Feelings Log:

Keeping a daily log of feelings helps kids to look at their emotions. It can also allow them and their teacher or parents to recognize any patterns they see emerging when looking back through the log. This can provide a lot of insight. 

Doing this quick daily exercise is an easy way to help kids to talk about their emotions and get to the root of why they are feeling the way they are. Doing this at the same time each day can develop a positive habit. 

It may be most helpful to do this in the morning to then be able to adjust activities or expectations based on how the student is feeling or it may be best to do after supper or before bed to reflect on and analyze the day. printed pages with hearts that have faces with feeling expressions

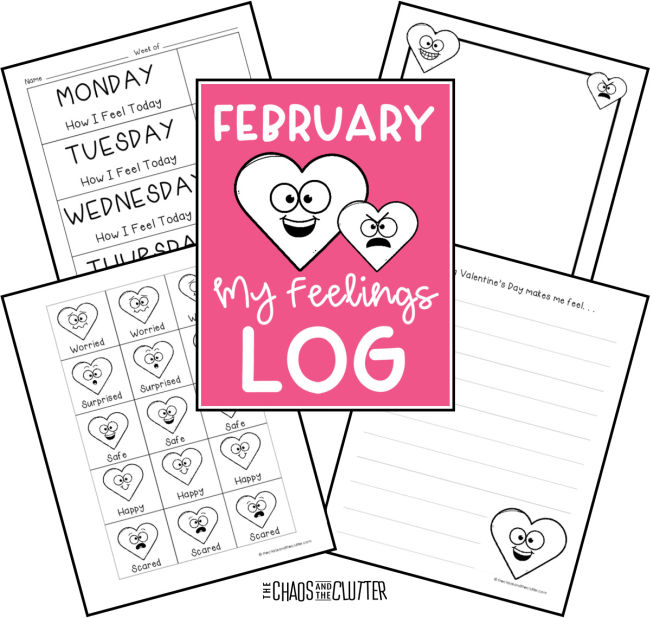
Teaching emotions is such a powerful tool. It arms children with a skill they can use their whole life.

I’ve created a special Feelings Log for February. It includes a writing prompt and drawing prompt about Valentine’s Day, and weekly tracking sheet of “Today I feel” along with cute heart faces to use to help them better express their emotions.

Supplies needed:

  • printed Feelings Log pages (download here)
  • scissors
  • markers, pencil crayons, or crayons
  • pencil or pen

scissors, crayons, square pieces of paper with coloured hearts on themEnter your email below to download the free February Emotions Printables. You can use this with your child at home or print it off to use with your students in the classroom. 

Our other monthly emotions printables:

  • April Emotions Printables
  • May Emotions Printables
  • June Emotions Printables
  • July Emotions Printables
  • August Emotions Printables
  • September Emotions Printables
  • October Emotions Printables
  • November Emotions Printables
  • December Emotions Printables

Filed Under: Homeschooling, Printables

Colourful Celery Experiment

a boy looks at celery stalks in coloured water

By Sharla Kostelyk


A few years ago, one of our daughters decided to do the celery experiment for her science fair project. This is such an easy project for kids to do. a girl smiles as she looks at a blue celery stalk in blue water. Other colours of celery are visible. Text reads "Colourful Celery Science Experiment"
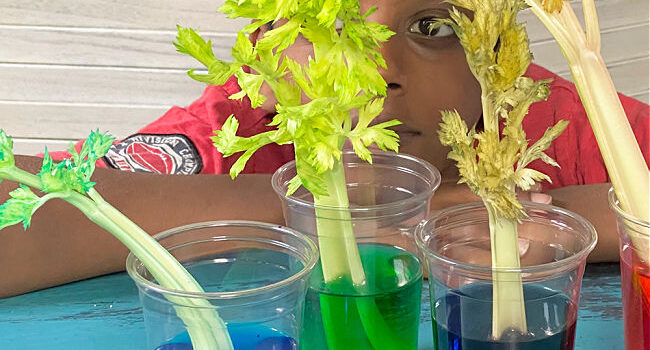
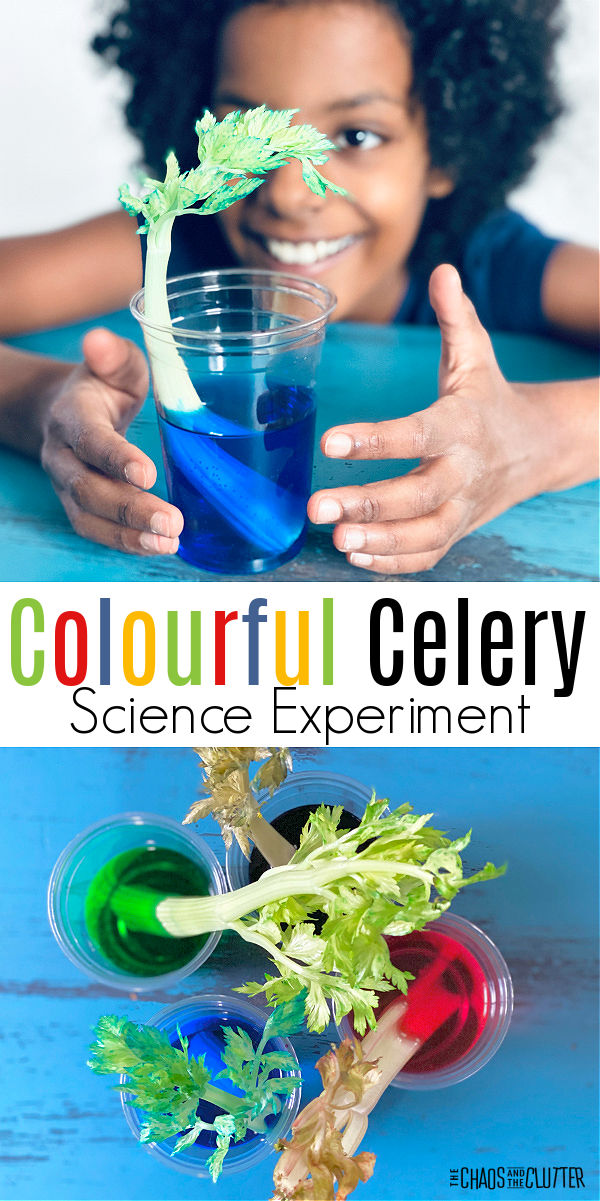
Kitchen science experiments are a great way for kids to learn. They are using materials that are familiar to them. This experiment uses celery, food colouring, and water which are all things that are familiar to most kids.

Hands on learning is so much more effective for retention. This particular experiment uses simple items that are cost effective and easy to find rather than expensive, hard-to-find materials. 

Kids are able to observe the changes happening and delight in the process.a boy looks at celery stalks in coloured water

Colourful Celery Experiment:

Supplies needed:

  • celery stalks
  • clear cups
  • food colouring
  • water

Instructions:

  1. Fill the plastic cups a little more than half full with water. 
  2. Add some drops of food colouring to each cup (one colour per cup) and stir.
  3. Cut the bottom ends off celery stalks.
  4. Place one freshly cut celery stalk in each cup. 
  5. Invite kids to make a hypothesis. What do they think will happen? Depending on their age, they can colour a picture or write out what they think will happen.
  6. Each child can watch what happens and write or colour their observations.

celery stalks in cups of coloured water and changing colour themselves
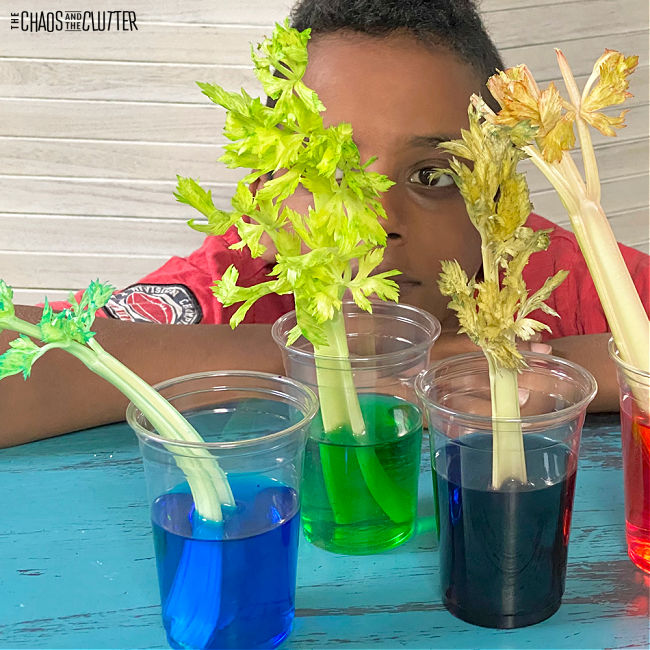
The colour will climb up the celery stalk through the capillaries which shows how plants pull up the water and nutrients. This is a great visual explanation. The results are more noticeable if you leave the leafy part on the celery. a stalk of celery sits in a glass of blue water and its leaves have a blue tinge to them
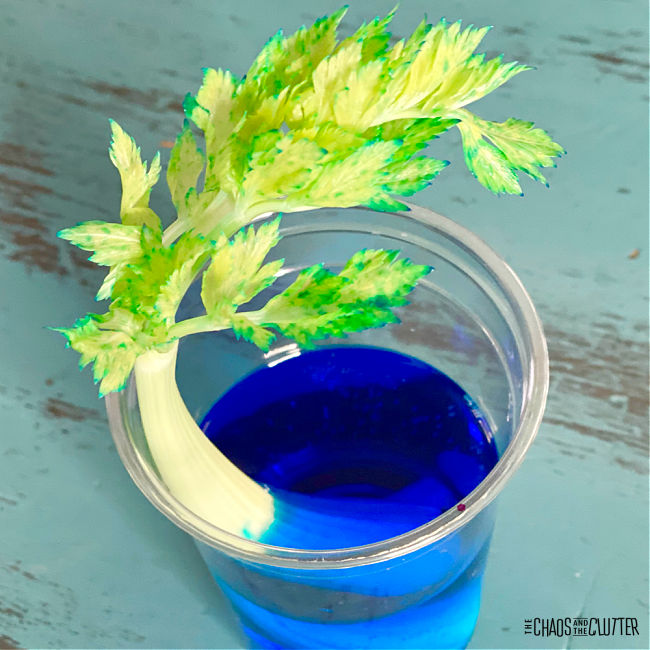
This is such an easy science experiment to do and a great visual aid for kids learning about plants and osmosis!

For older kids:

If you’re doing this experiment with kids who are older or are capable of a deeper understanding,  you can expand the learning into how water moves from the roots in the soil to other parts of the plant or tree such as the leaves and stem. This takes place in the xylem which are vein-like tubes similar to the capillaries in the celery. 

Here are some links for further research on this:

  • Thirsty Plants: How Plants Get Water from the Soil to their Leaves
  • Evapotranspiration and the Water Cycle
  • Osmosis and Osmotic Pressure

For younger kids:

If you’re doing this with littles, you can get out a magnifying glass and take a closer look at the capillaries at the bottom of the celery. Note that they are hollow, kind of like little straws. Once the coloured water has risen in them, you’ll be able to see the colour at the entrance of the capillary. 

For her science fair presentation, our daughter showed pictures of the process, wrote out the process, and drew what happened. We put all of it on a tri-fold presentation board and she was able to answer the judges questions about what she had learned through this. 

4 cups with a different colour of water in each and one celery stalk in each
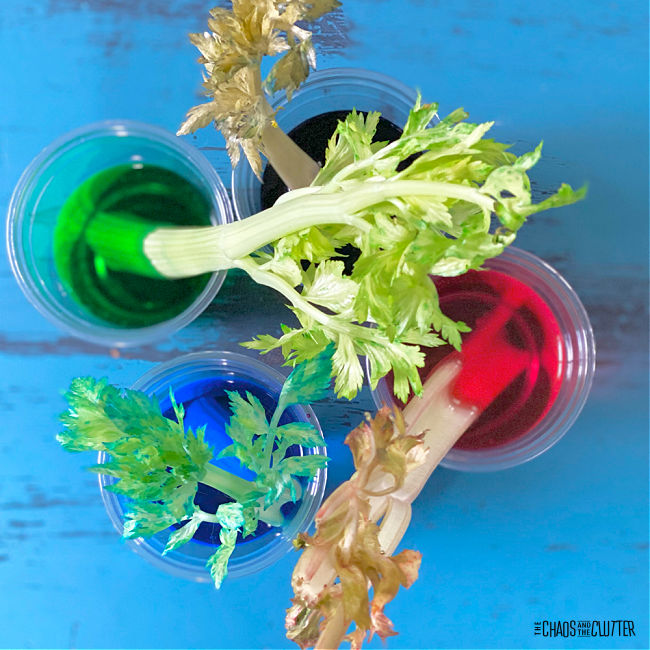
When I started homeschooling and began to incorporate hands-on science fun into our days, it made me wish that I had had the opportunity to do more of that kind of learning when I was in school. I know that many schools now recognize the importance of this and are doing experiments in the classrooms. Learning by doing is learning that lasts. 

Check out some of our other awesome science activities:

Melting Ice Experiment

Easy Earthquake Experiment

How Fold Mountains FormThis is a great hands-on science experiment to explain how fold mountains are formed.

Layers of the Earthhand holding half a ball with layers of colour and a book open to a page about the layers of the Earth

Filed Under: Homeschooling, Simple Science

Chocolate Oobleck or Fake Mud for Sensory Play

a child's hands pull a brown sensory material over a bowl

By Sharla Kostelyk

In case you’re not familiar with it, oobleck is a non-Newtonian fluid. That means its viscosity can change from liquid to solid depending on the pressure it’s under. So this chocolate oobleck is both a sensory play material and a science experiment!hands in a bowl with a brown messy sensory material. Text reads "Chocolate Oobleck"
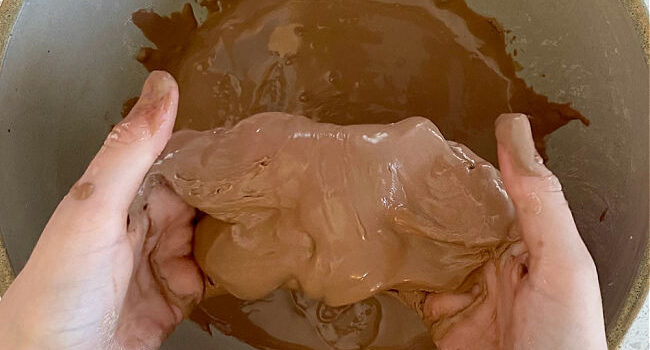
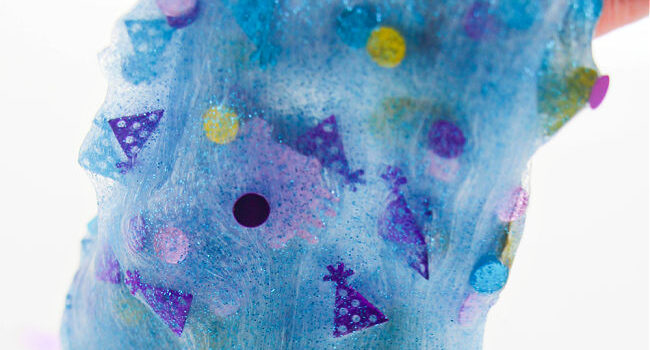
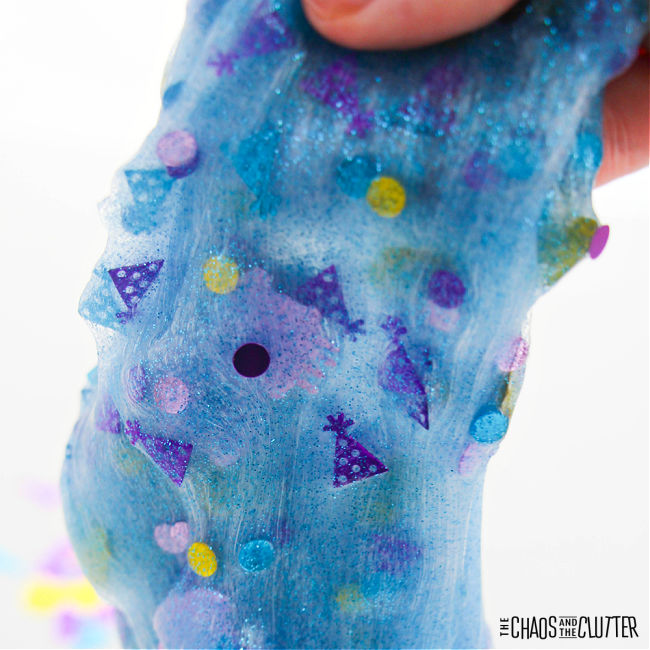
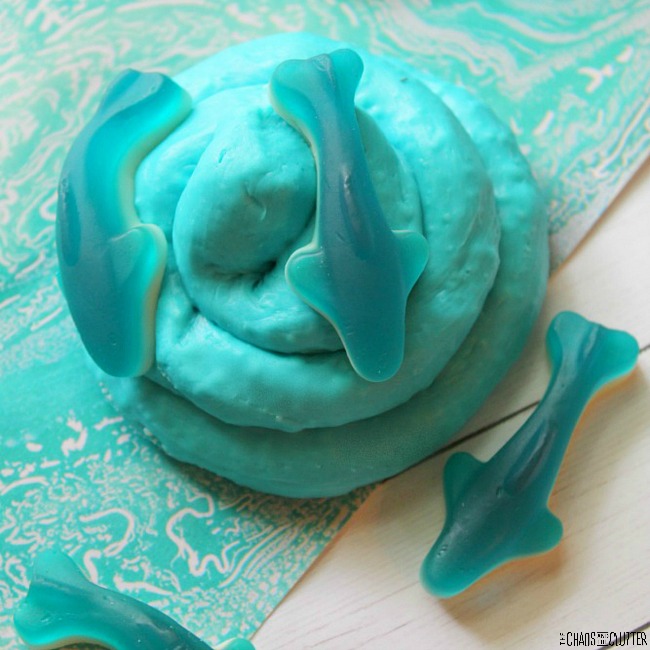
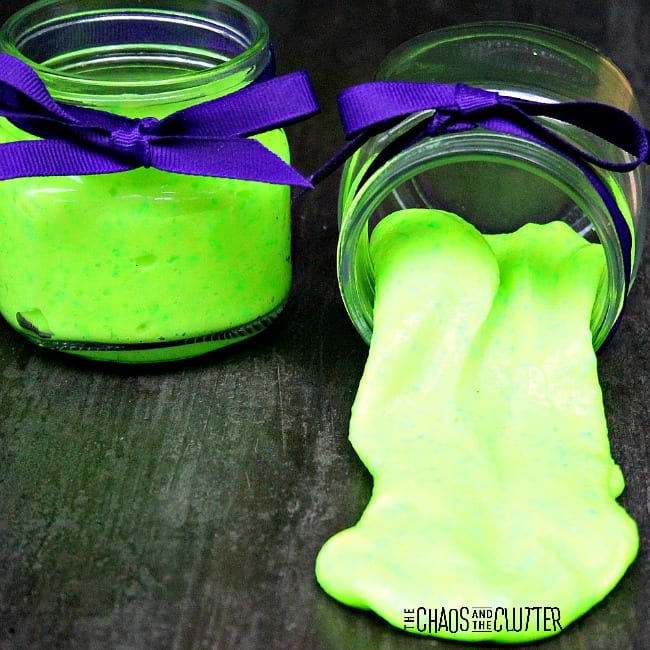
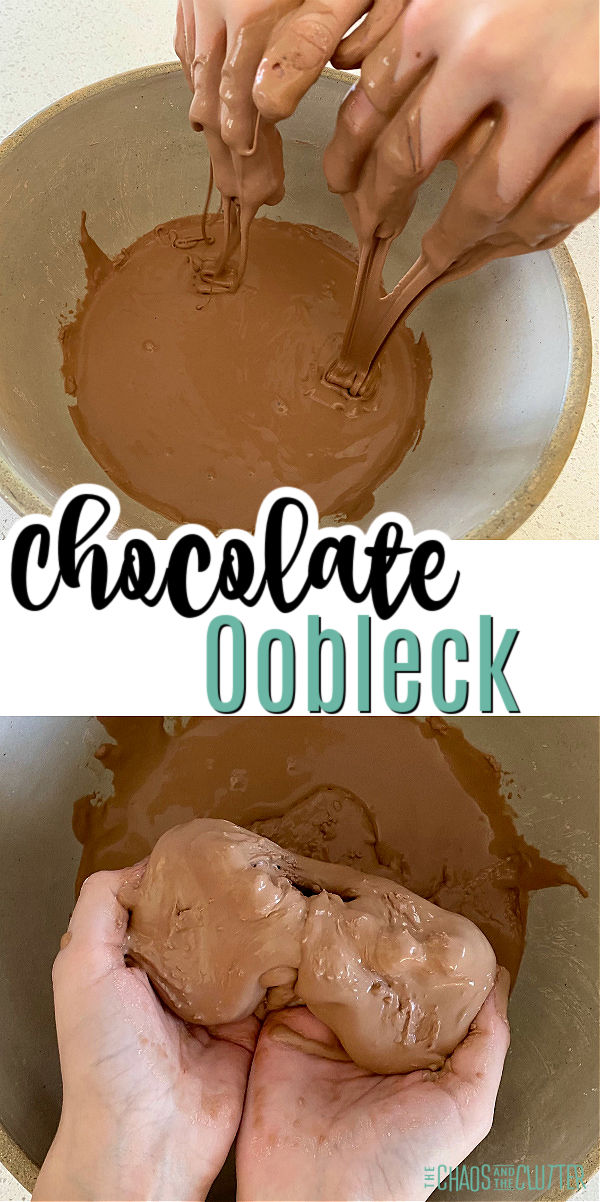
This recipe makes great messy fun for kids. It can be used at home or in the classroom for a fun sensory activity. Because it’s taste safe, it can even be used with toddlers or preschoolers.

We’ve made regular oobleck, candy cane (scented) oobleck, and lemonade oobleck. I had the idea of doing a chocolate version because I thought it would be fun with Valentine’s Day coming up. The chocolate smell really brings in the Valentine’s theme.

Once I saw it, I realized that it would make a really great fake mud for sensory play. When my boys were younger, they would have had so much fun driving toy trucks and construction vehicles through this stuff!

So regardless if you use this in a sensory bin with toy vehicles as a safe fake mud or in a Valentine’s theme bin with a heart mould to pretend to make chocolates with, this recipe is where you start!a child's hands pull a brown sensory material over a bowl

Chocolate Oobleck Recipe:

Supplies needed:

  • 1/4 cup cocoa
  • 2 cups cornstarch
  • 1 cup plus 2 Tbsp. water

Instructions:

  1. Mix all ingredients together.
  2. Get to playing.

collage of photos of making chocolate oobleck including the cocoa, cornstarch, and water needed
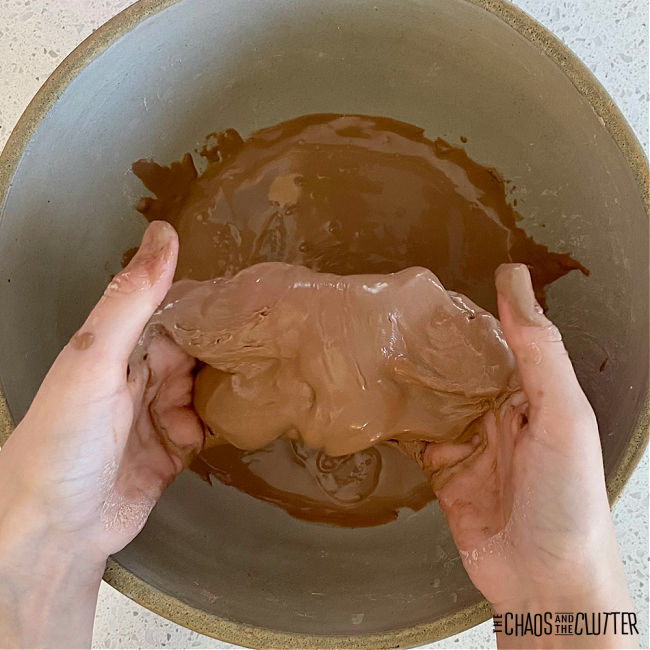
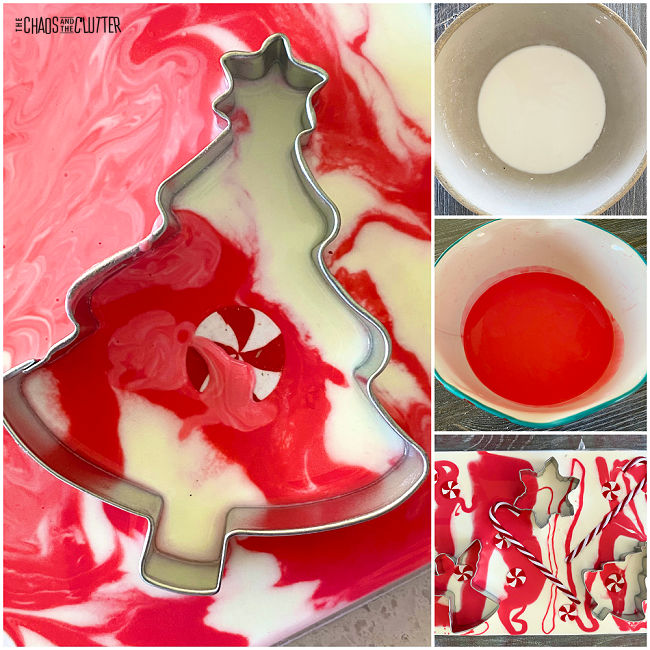
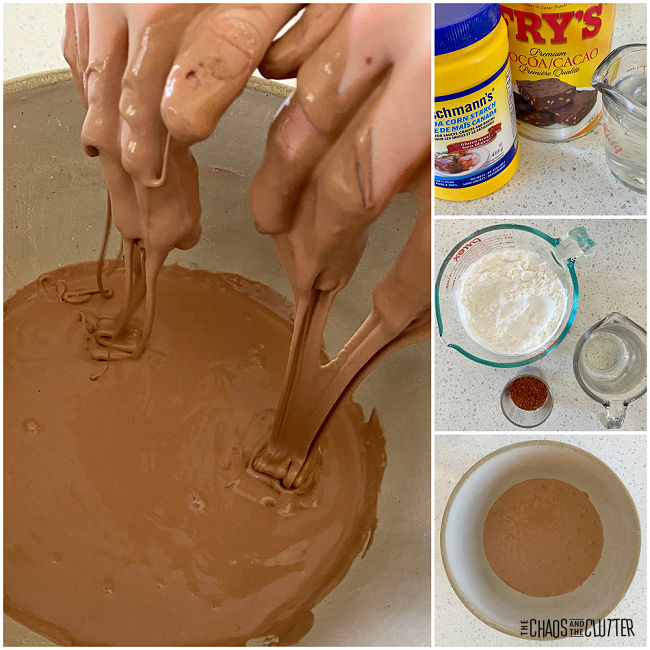
Important notes: Make your oobleck on the day you want to play with it as it doesn’t keep longer than a day or two. NEVER dispose of oobleck down the drain as it will clog your drain. Allow it to dry uncovered and then scoop it into the garbage.
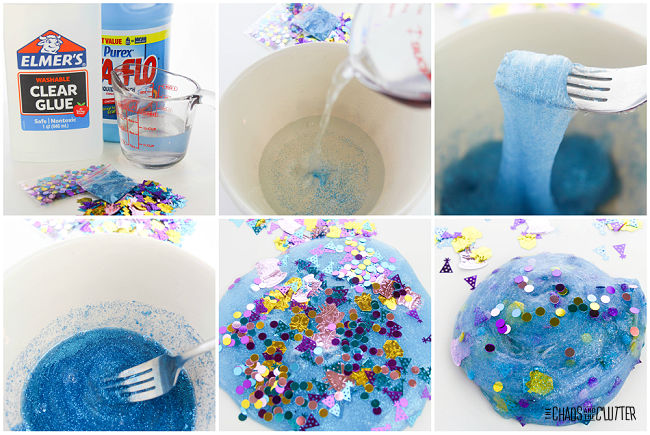
When kids squish or squeeze the oobleck, it will act like a solid but when they allow it to fall through their fingers, it acts like a liquid. hands hold clumps of a brown material over a bowl

Playing with this oobleck engages the tactile, visual, proprioceptive, and olfactory (smell) sensory systems. It is also taste safe, so technically, it could engage the gustatory system but I wouldn’t recommend eating it as with all that cornstarch, it won’t taste great.

Enjoy the messy, sensory, science fun!

Are you looking for other fun sensory play recipes to make at home? Join us for a five day email series on Sensory Activities and Solutions and get a free sample of our Sensory Play Recipes eBook.

Check out our other oobleck recipes:

Lemonade Oobleck

Candy Cane Ooblecktray of red and white oobleck and candy canes with a pair of hands squeezing the oobleck

Filed Under: Crafts and Activities Tagged With: sensory play

Fun Birthday Slime Recipe

thumb pulling blue slime filled with confetti

By Sharla Kostelyk

This stretchy birthday slime recipe is great for pretend play or for celebrating a birthday. It can even be given out as a party favour for guests. stretched out blue slime with confetti in it. Text reads "Birthday Stretchy Slime"

Slime is a wonderful tool for sensory input. It engages the visual, tactile, and proprioceptive sensory systems. thumb pulling blue slime filled with confetti

Birthday Slime Recipe:

Supplies needed:

  • 6 oz. bottle Elmer’s clear school glue
  • 1/4 to 1/2 cup warm water, as needed
  • 1/4 to 1/2 cup liquid starch, as needed
  • birthday themed glitter 
  • fine blue glitter (or whichever colour that matches the theme of your party)

collage of photos of making blue celebration slimeDirections:

  1. Pour the clear glue into a medium-sized bowl.
  2. Stir in 1/4 cup warm water with a fork.
  3. Add the fine blue glitter and stir well.
  4. Drop in 2-3 Tablespoons of liquid starch and stir well for 2 minutes.
  5. If the slime is too stiff, add more water. If it’s too stiff, add more of the liquid starch.
  6. Continue stirring until the slime forms into a ball.
  7. Knead for 2 minutes, adding more water or liquid starch as needed to get to the right consistency.
  8. When the slime is stretchy and no longer sticky, knead in the birthday themed confetti and glitter.
  9. The slime is ready for play.

collage of photos of blue slime with birthday confetti in it
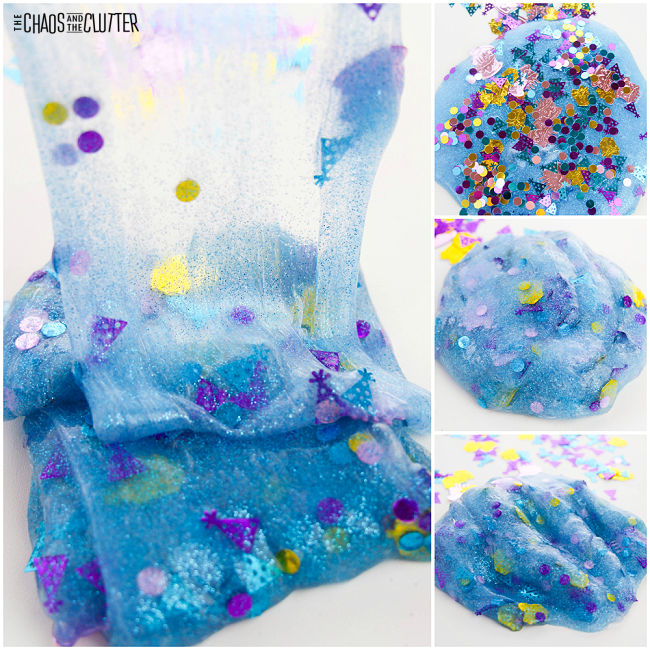
When not in use, store in an airtight container or resealable bag. Adult supervision should be used for this and all sensory play. Be sure to wash hands well after handling slime. 

stretched out blue slime with birthday confetti

Ideas for Making this Slime into a Party Favour:

  • Place the slime in a plastic container and use a hot glue gun to attach a bow, small figurine, decoration or to the top of the lid.
  • Or for a less expensive option, place the slime in sandwich bags, seal, and decorate with stickers. 
  • If you want to make this super interactive and fun, you can set up slime stations and have the kids all participate in making their own party favours. This idea is best when it’s a birthday for older kids or teens or when you have other adults to help.

Are you looking for more sensory play recipes you can easily make at home? Join us for a five day email series on Sensory Activities and Solutions and get a free sample of our Sensory Play Recipes eBook.

Check out these other fun slime recipes:

Shark Edible Fluffy Slime

Glittery Butterfly Slime

Glow in the Dark Slime

Filed Under: Crafts and Activities Tagged With: sensory play, slime

Candy Cane Oobleck

red and white swirls in a dish with candy canes and cookie cutters

By Sharla Kostelyk

Looking for an easy Christmas sensory activity? This Candy Cane Oobleck recipe requires only 3 ingredients and is ooey-gooey fun! It combines sensory play with science for lots of holiday fun.red and white swirls with candy canes, peppermints, and cookie cutters
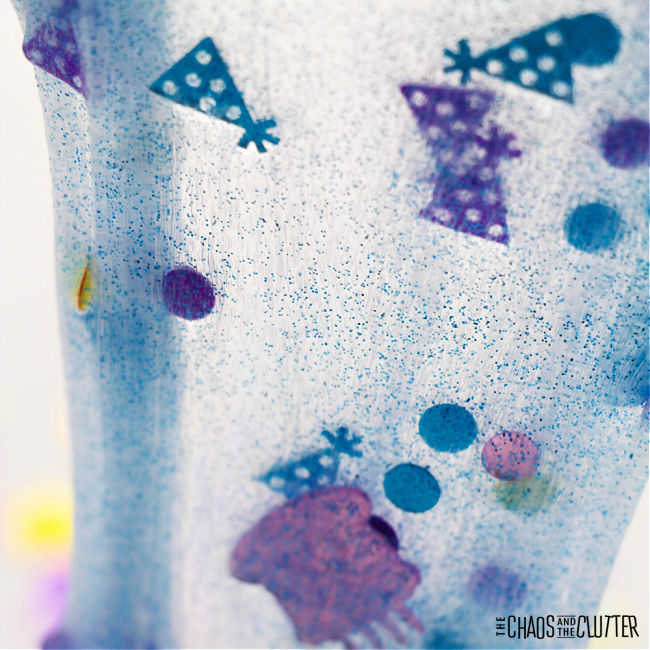
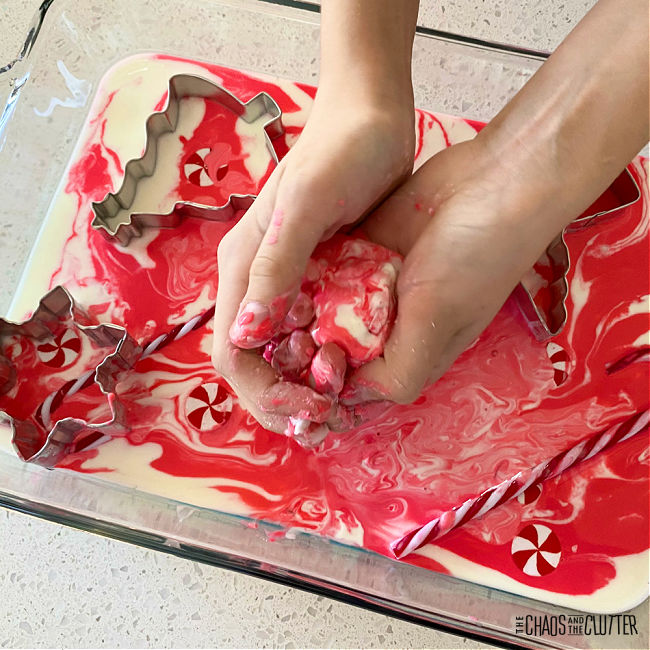
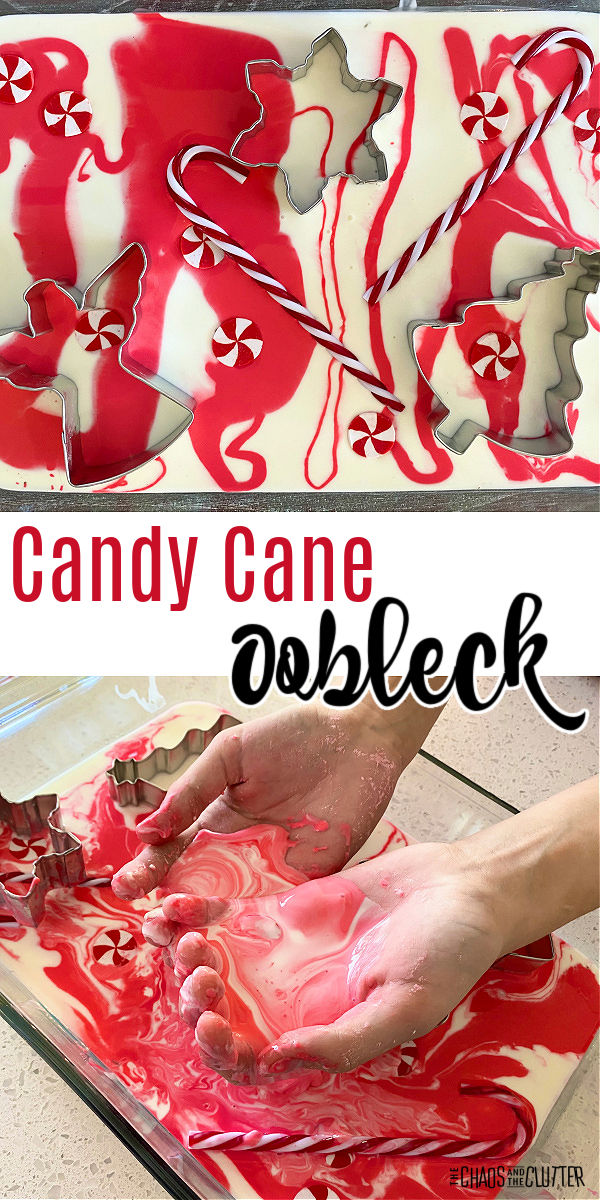
My kids love playing with oobleck and this candy cane themed one was especially fun. They enjoyed creating patterns and molding and squishing it into a ball and then watching as that ball turned to liquid and slid off their hands.

What is oobleck?

Oobleck is a sensory play material that acts like a solid when under pressure but is a liquid at rest. That’s where the science of it all comes in. Oobleck is a non-Newtonian fluid because it can mimic the properties of both a solid and a liquid.

This festive Christmas offers a way to combine science discovery with sensory play.red and white swirls in a dish with candy canes and cookie cutters

Candy Cane Oobleck Recipe:

Supplies needed:

  • 4 cups cornstarch
  • 2 cups water
  • red food dye
  • baking dish
  • optional: peppermint essential oil
  • optional: plastic candy canes, pretend peppermints, and holiday cookie cutters

Directions:

  1. Make one batch of white oobleck by mixing together 2 cups of cornstarch and 1 cup of water in a bowl.
  2. Pour it into a glass baking dish to form a single layer.
  3. Stir some red food dye into 1 cup of water.
  4. Mix the red water with 2 cups of cornstarch to make red oobleck.
  5. If you want, you can stir in a few drops of peppermint essential oil to make the oobleck smell like candy canes too. 
  6. Drizzle the red oobleck over the white.
  7. Drop some mini candy canes in there if you want or some Christmas cookie cutters or plastic candy canes and pretend peppermints.
  8. Invite kids to play.

collage of photos of red and white oobleck and a Christmas tree shaped cookie cutter
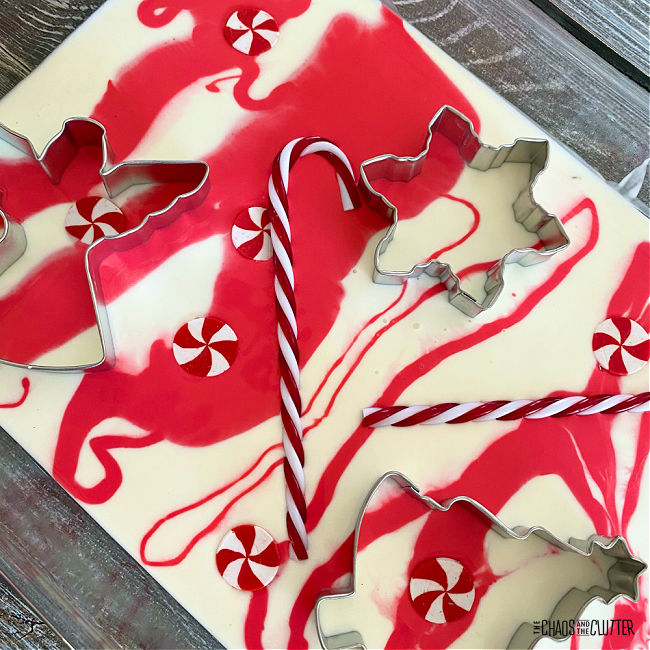
There is so much great sensory input in this activity. It provides wonderful tactile input, visual input, proprioceptive input, and if you use scent, olfactory input. Kids can squish it, squeeze it, tap it, drizzle it, smush it around, and pour it.

tray of red and white oobleck and candy canes with a pair of hands squeezing the oobleckThe science of it all:

I always find that kids learn best when they don’t even realize they’re learning. Invite your child or students to explore the oobleck and talk about their observations. 

When does the oobleck behave like a solid? When does it behave like a liquid?

Discuss states of matter. 

Read about Newtonian and non-Newtonian fluids.hands holding red and white swirls of liquid

Important notes:

  • Oobleck doesn’t keep as well as slime or playdough so it’s best to make it the same day you want to play with it.
  • Never dispose of oobleck down the sink or it will clog your drain. Just allow it to dry a bit and scrape it directly into the garbage.
  • Adult supervision should be used at all times with this or any sensory play activity.
  • Although this recipe is technically taste-safe, I wouldn’t recommend eating it!

Sign up for your free Christmas Fun Jar activity ideas. 

Check out these other Christmas sensory activities:

Nativity Slime

I Spy Christmas Sensory Bag

Peppermint Playdough Station

Filed Under: Christmas, Crafts and Activities Tagged With: sensory play

Minute to Win It Build Edition

mother and daughter's hands play with building blocks

By Sharla Kostelyk

Almost everyone of all ages loves playing with building blocks. This fun Minute to Win It Build Edition combines Lego or other building blocks with the challenge of trying to beat the clock. hands assembling building blocks. Text reads "Minute to Win It Build Edition"

The way Minute to Win It style games work is that each game is designed to be done in under a minute. These ones all involve building challenges. And as an added bonus, there are some fun Christmas themed ones too which makes this the perfect family activity for during the holidays.

Our family loves Minute to Win It games. In the video below, you can see our Minute to Win It Christmas Edition games. We pretty much use any reason to play these kinds of games though. Camping, Thanksgiving, or just for fun!

This Minute to Win It Build Edition also makes a great birthday party idea. Just add some decorations and food and you’re all set. 

Decorations:

The great thing about these particular Minute to Win It games is that the decorations are kind of already done for you. Just sprinkle some Legos here and there. If you want to take it up a notch, you can add brightly coloured balloons, napkins, and tablecloth.

Food:

While you can of course just set out some popcorn or chips, if you want to go with the theme, you can use some of these fun ideas:

  • building block candy
  • Lego shaped yogurt snacks
  • Easy Lego cupcakes
  • Building Blocks Cake

Prizes:

Prizes are certainly not necessary as this is just fun to play, but if you want to offer prizes to the winners, some cute ideas that would go along with the theme are:

  • Lego minifigures 
  • bag of building blocks
  • small Lego set

Minute to Win It Build Edition:

One of the things I like the most about Minute to Win It games is that they use supplies you likely already have on hand or are very inexpensive to get. Another benefit is that they work for a wide range of ages. If you want to play as a family, grandparents and parents can join in with the kids.

These particular games do involve building blocks which can present a choking hazard to young children, so adult supervision is recommended. 

Supplies needed:

  • classic Legos or similar building blocks
  • Minute to Win It Building Challenge Cards (download them here)
  • one minute sand timer or timer on a phone or watch
  • a glass
  • box or bucket

How to Play:

  1. Print out the challenge cards on card stock. 
  2. Set out the building blocks.
  3. Each person or team draws a card and has to complete the challenge on the card within a minute. The directions for each game is written on the card.

mother and daughter's hands play with building blocks
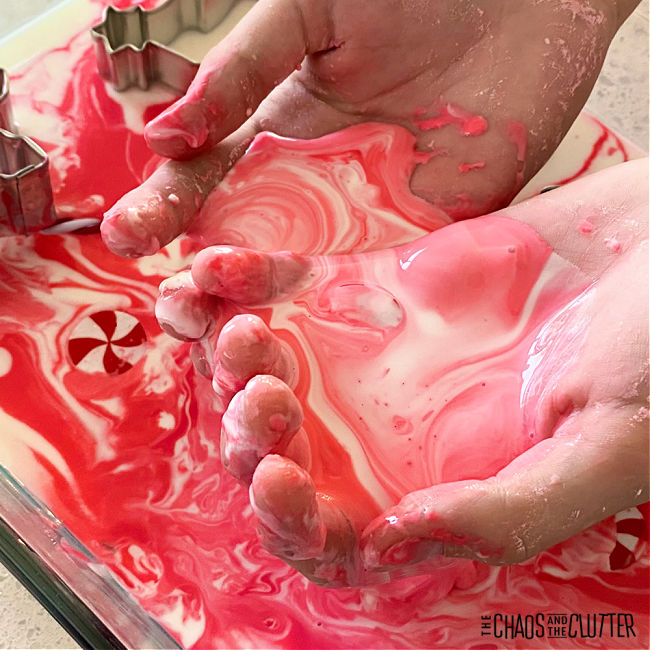
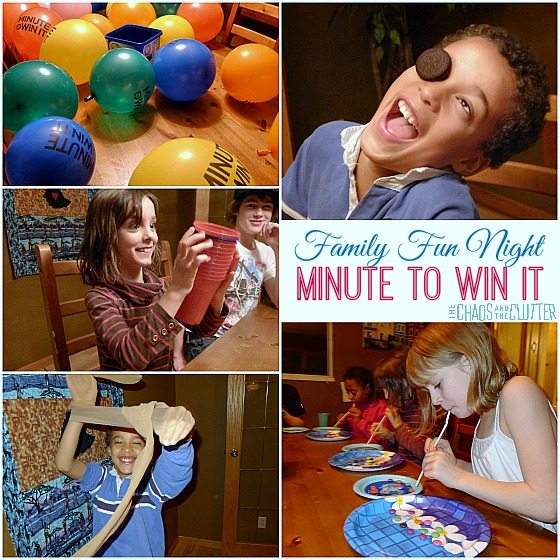
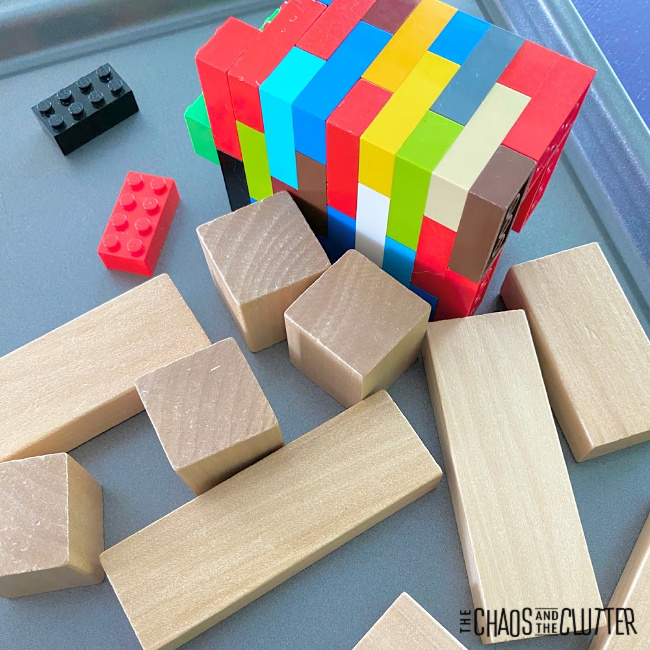
Players or teams can go one at a time or you can do a head-to-head style of play where two players or one person from each team attempt to complete the challenge at the same time and the first to complete it correctly is the winner of that round. That adds some competition.

The Christmas themed cards (there are 12 holiday challenges) can be used along with the regular game cards or on their own. four printed cards each with an alarm clock image and instructions for game play
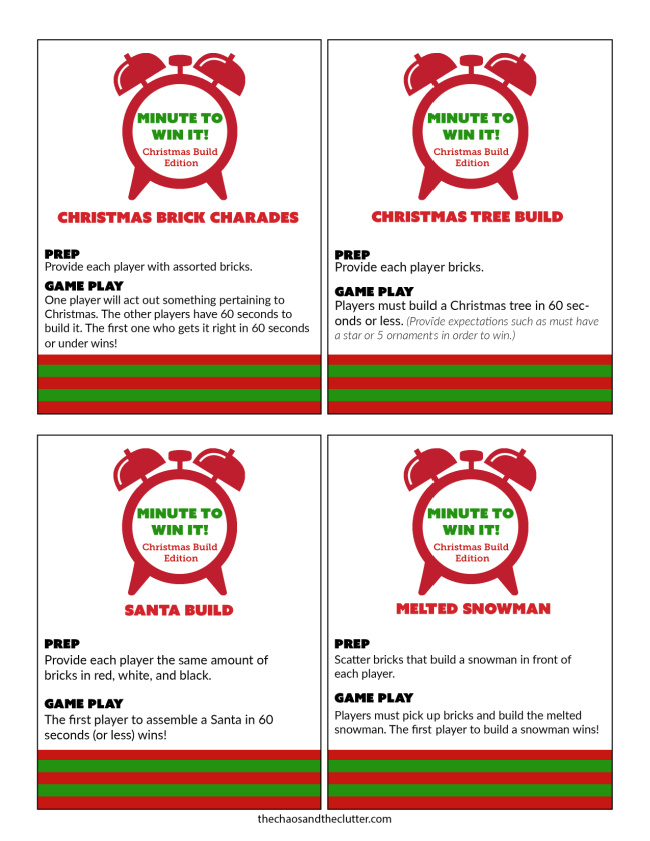
Get your free printable Minute to Win It Build challenge cards by entering your email below. You will also be entered into our email series 5 Secrets to Powerful Family Connection. 

Check out some of our other Minute to Win It Games:

Minute to Win It Family Night

Christmas Minute to Win It

Minute to Win It Dollar Store EditionDollar Store Minute to Win It party

Filed Under: Crafts and Activities, Family Games

  • « Go to Previous Page
  • Page 1
  • Interim pages omitted …
  • Page 11
  • Page 12
  • Page 13
  • Page 14
  • Page 15
  • Interim pages omitted …
  • Page 128
  • Go to Next Page »

Primary Sidebar

Categories

We are a participant in the Amazon Services LLC Associates Program, an affiliate advertising program designed to provide a means for us to earn fees by linking to Amazon.com and affiliated sites.

Copyright © 2026 • The Chaos and the Clutter • Site Design by Jeni @ The Blog Maven

Return to top of page

Copyright © 2026 · Chaos and the Clutter 2.0 on Genesis Framework · WordPress · Log in